If you use an iPhone, you can book a doctor’s appointment in just a couple of minutes — right through the Gosuslugi app. No calls to the reception desk and no waiting in line at the window. I’ll explain how it works, what you need for it, and what nuances to keep in mind. I recently booked an appointment for my child with a doctor this exact way — through the app on my iPhone. The whole process took about three minutes. Let me walk you through it step by step.

You can now book a doctor’s appointment right from your iPhone without calling anyone
Documents You Need to Book a Doctor’s Appointment via Gosuslugi
Before opening the app, make sure you have everything you need. Without these, the booking simply won’t go through.
- A verified Gosuslugi account. A basic account won’t work — you need a fully verified one. If you haven’t verified it yet, you can do so through your bank, a government services center (MFC), or Russian Post.
- A valid OMS (mandatory health insurance) policy. Its details will be pulled into the app automatically from your personal account. You can check your policy number and insurance company in the “Documents and Data” — “Health” section.
- Registration at a clinic. Without it, you won’t be able to book. If you don’t know which clinic you’re registered at, this information is also displayed in the app — in the “My Clinic” section.
- The Gosuslugi app on your iPhone. You can download it for free from the App Store. If you changed your Apple ID region to a foreign one, the app may not appear — in that case, you’ll need to temporarily switch back to a Russian account.
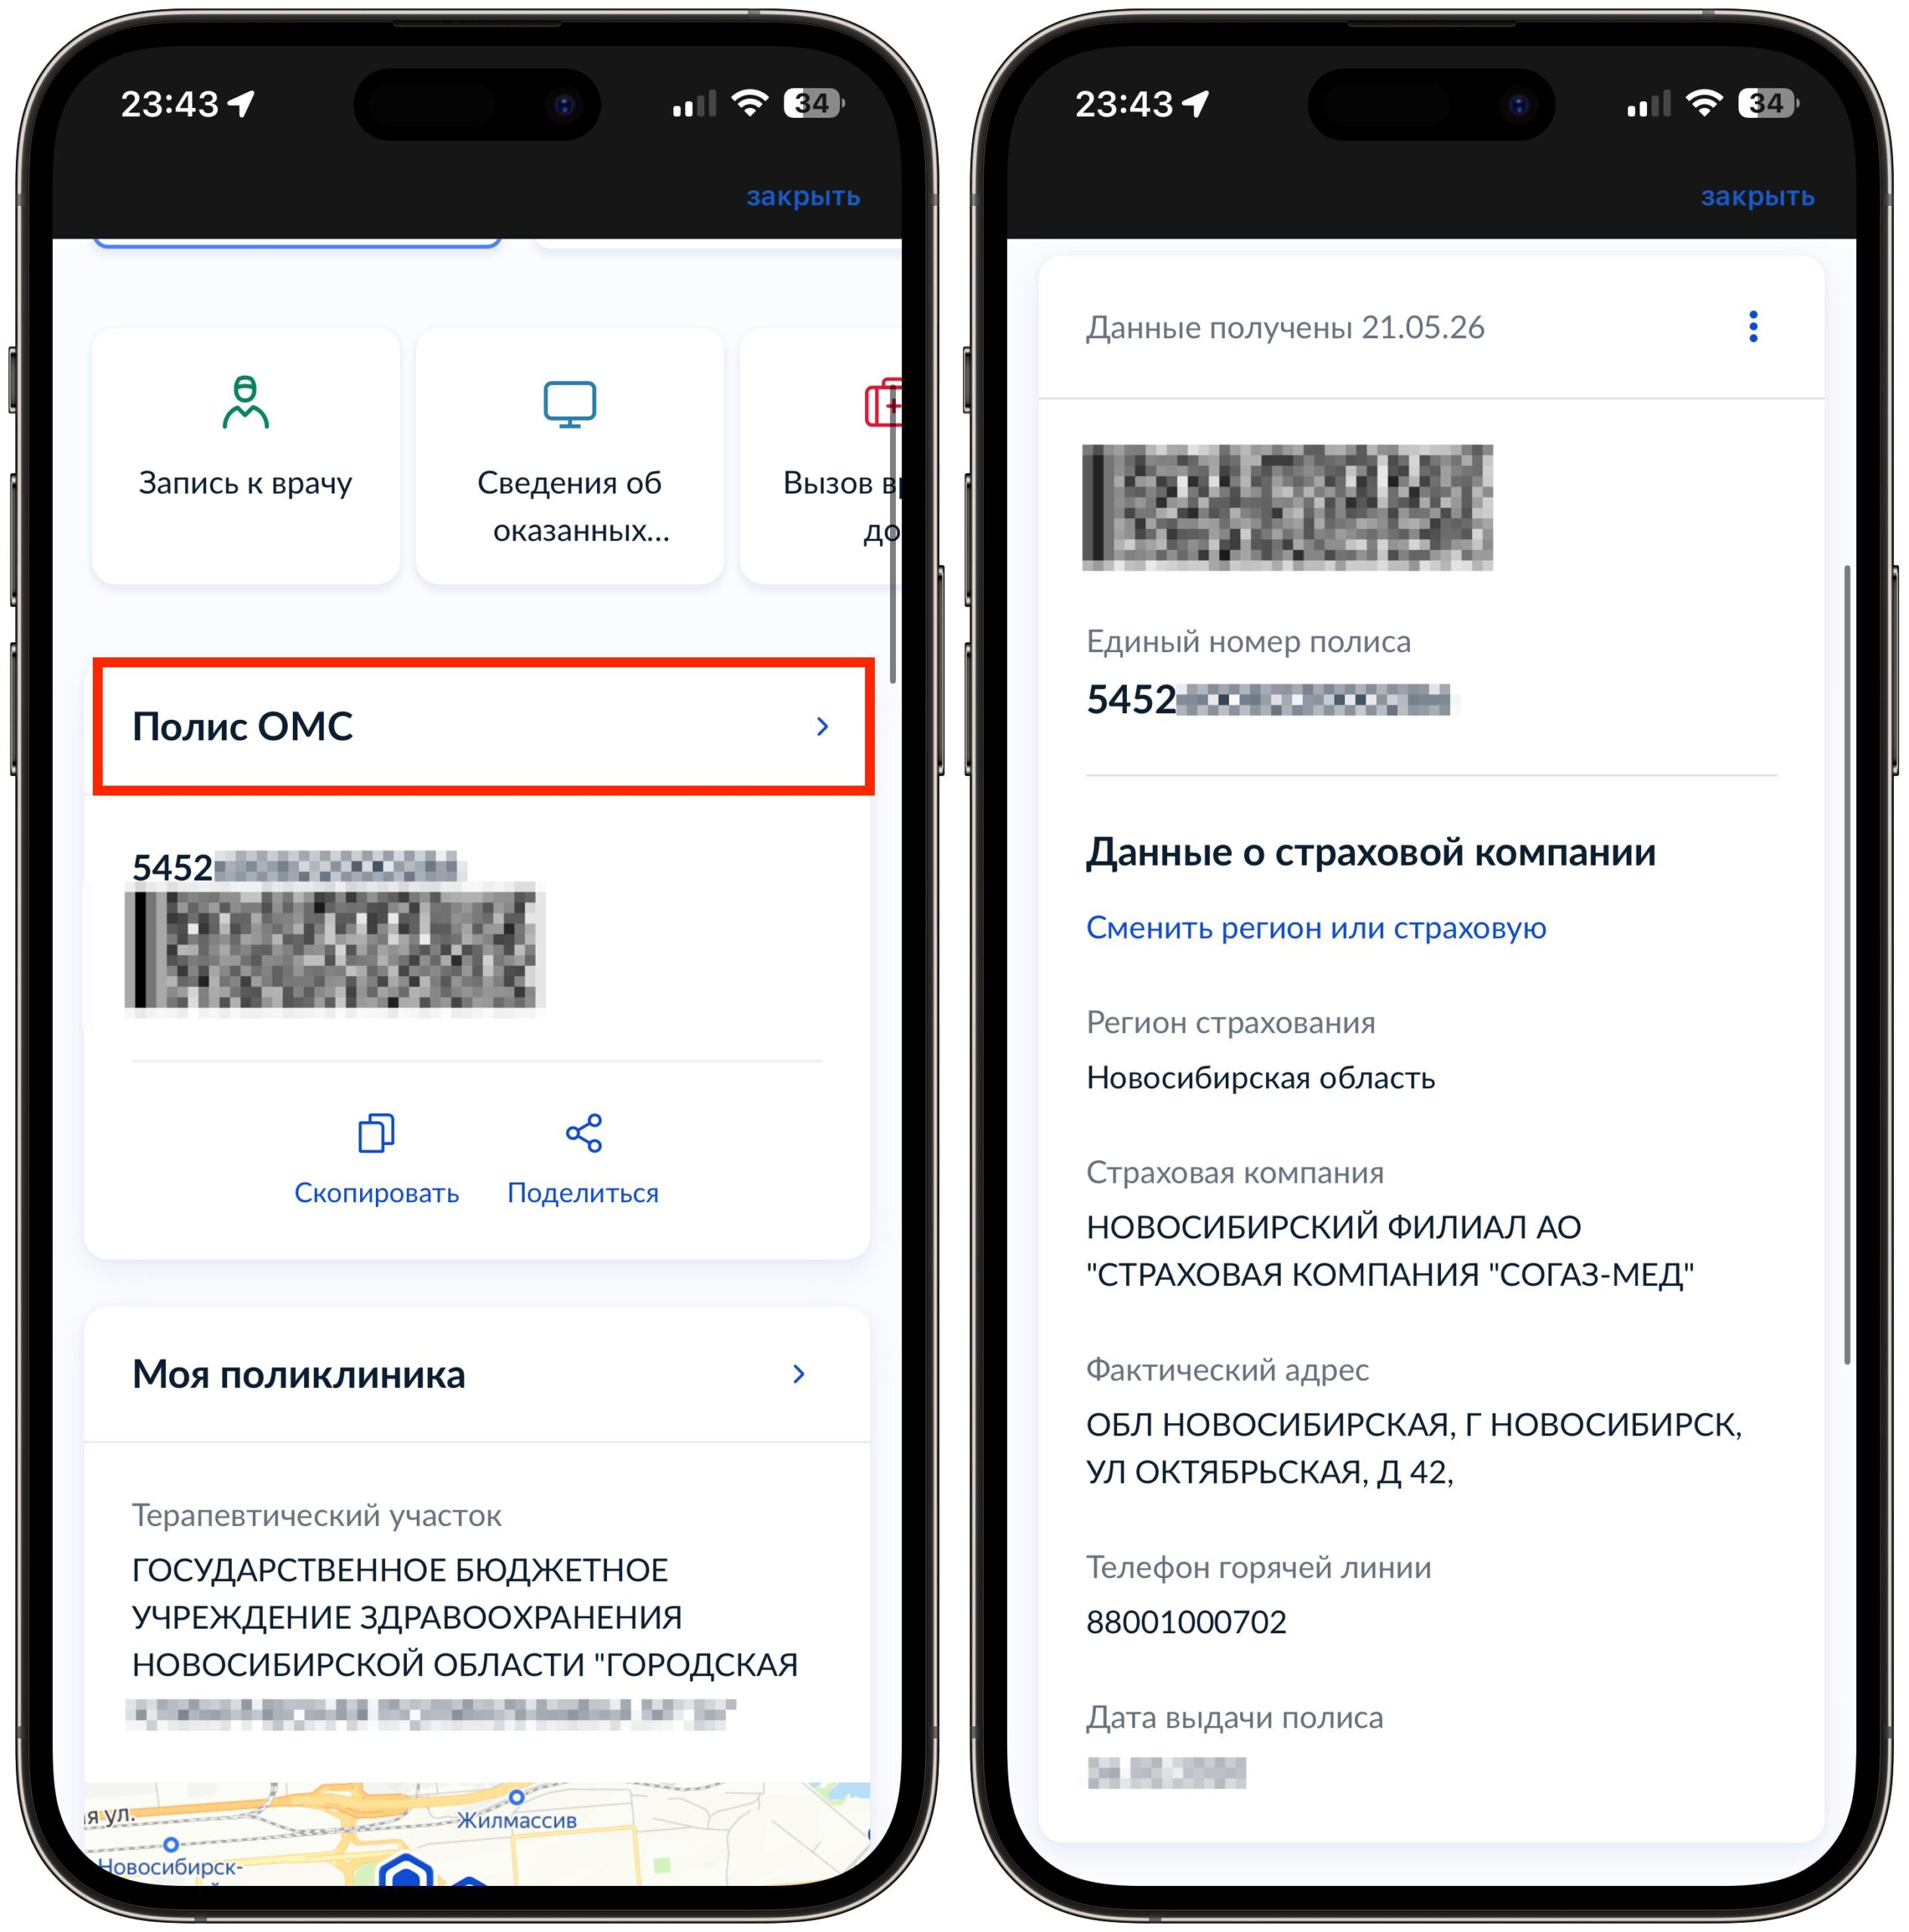
Make sure to check for your OMS policy. You can’t book without it
Once everything is ready, you can proceed to the booking itself.
Booking an Appointment via Gosuslugi: Step-by-Step Guide
The process itself is intuitive, but there are a couple of moments where you might get confused. Let’s go through everything in order.
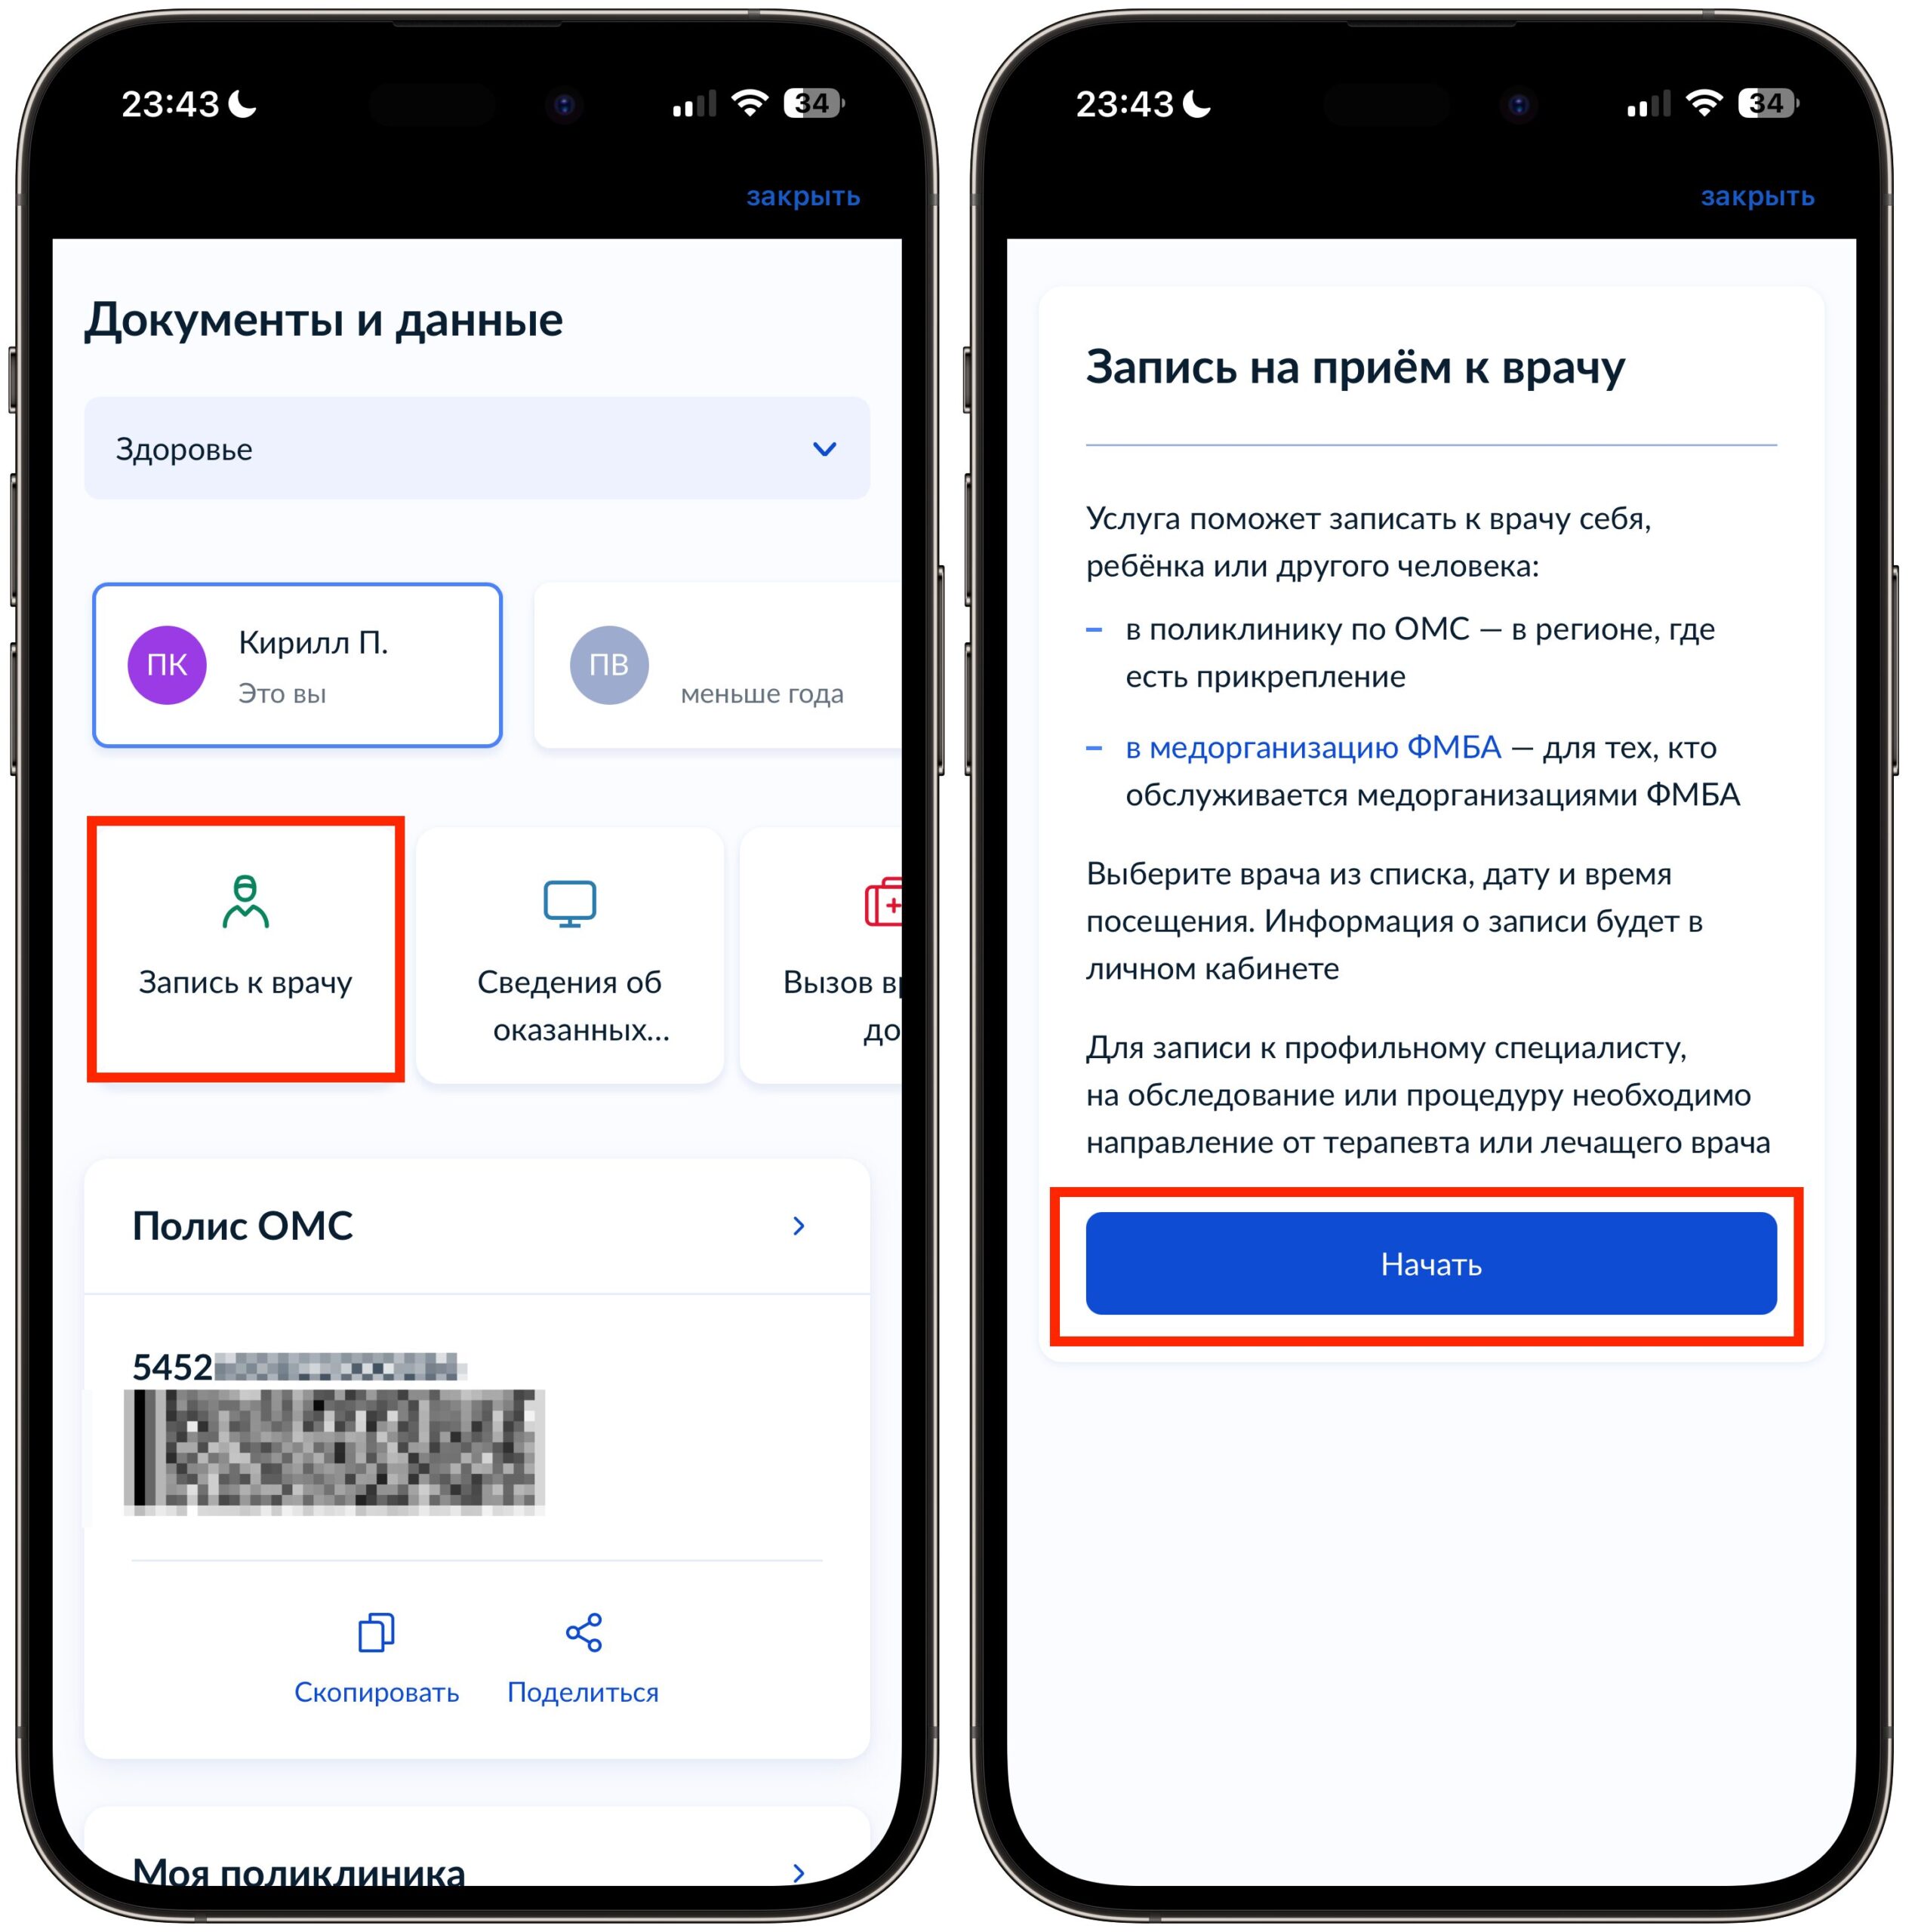
- Open the Gosuslugi app and log in. Tap the “Documents” tab.
- Select “Health” and tap the “Book a Doctor’s Appointment” field.
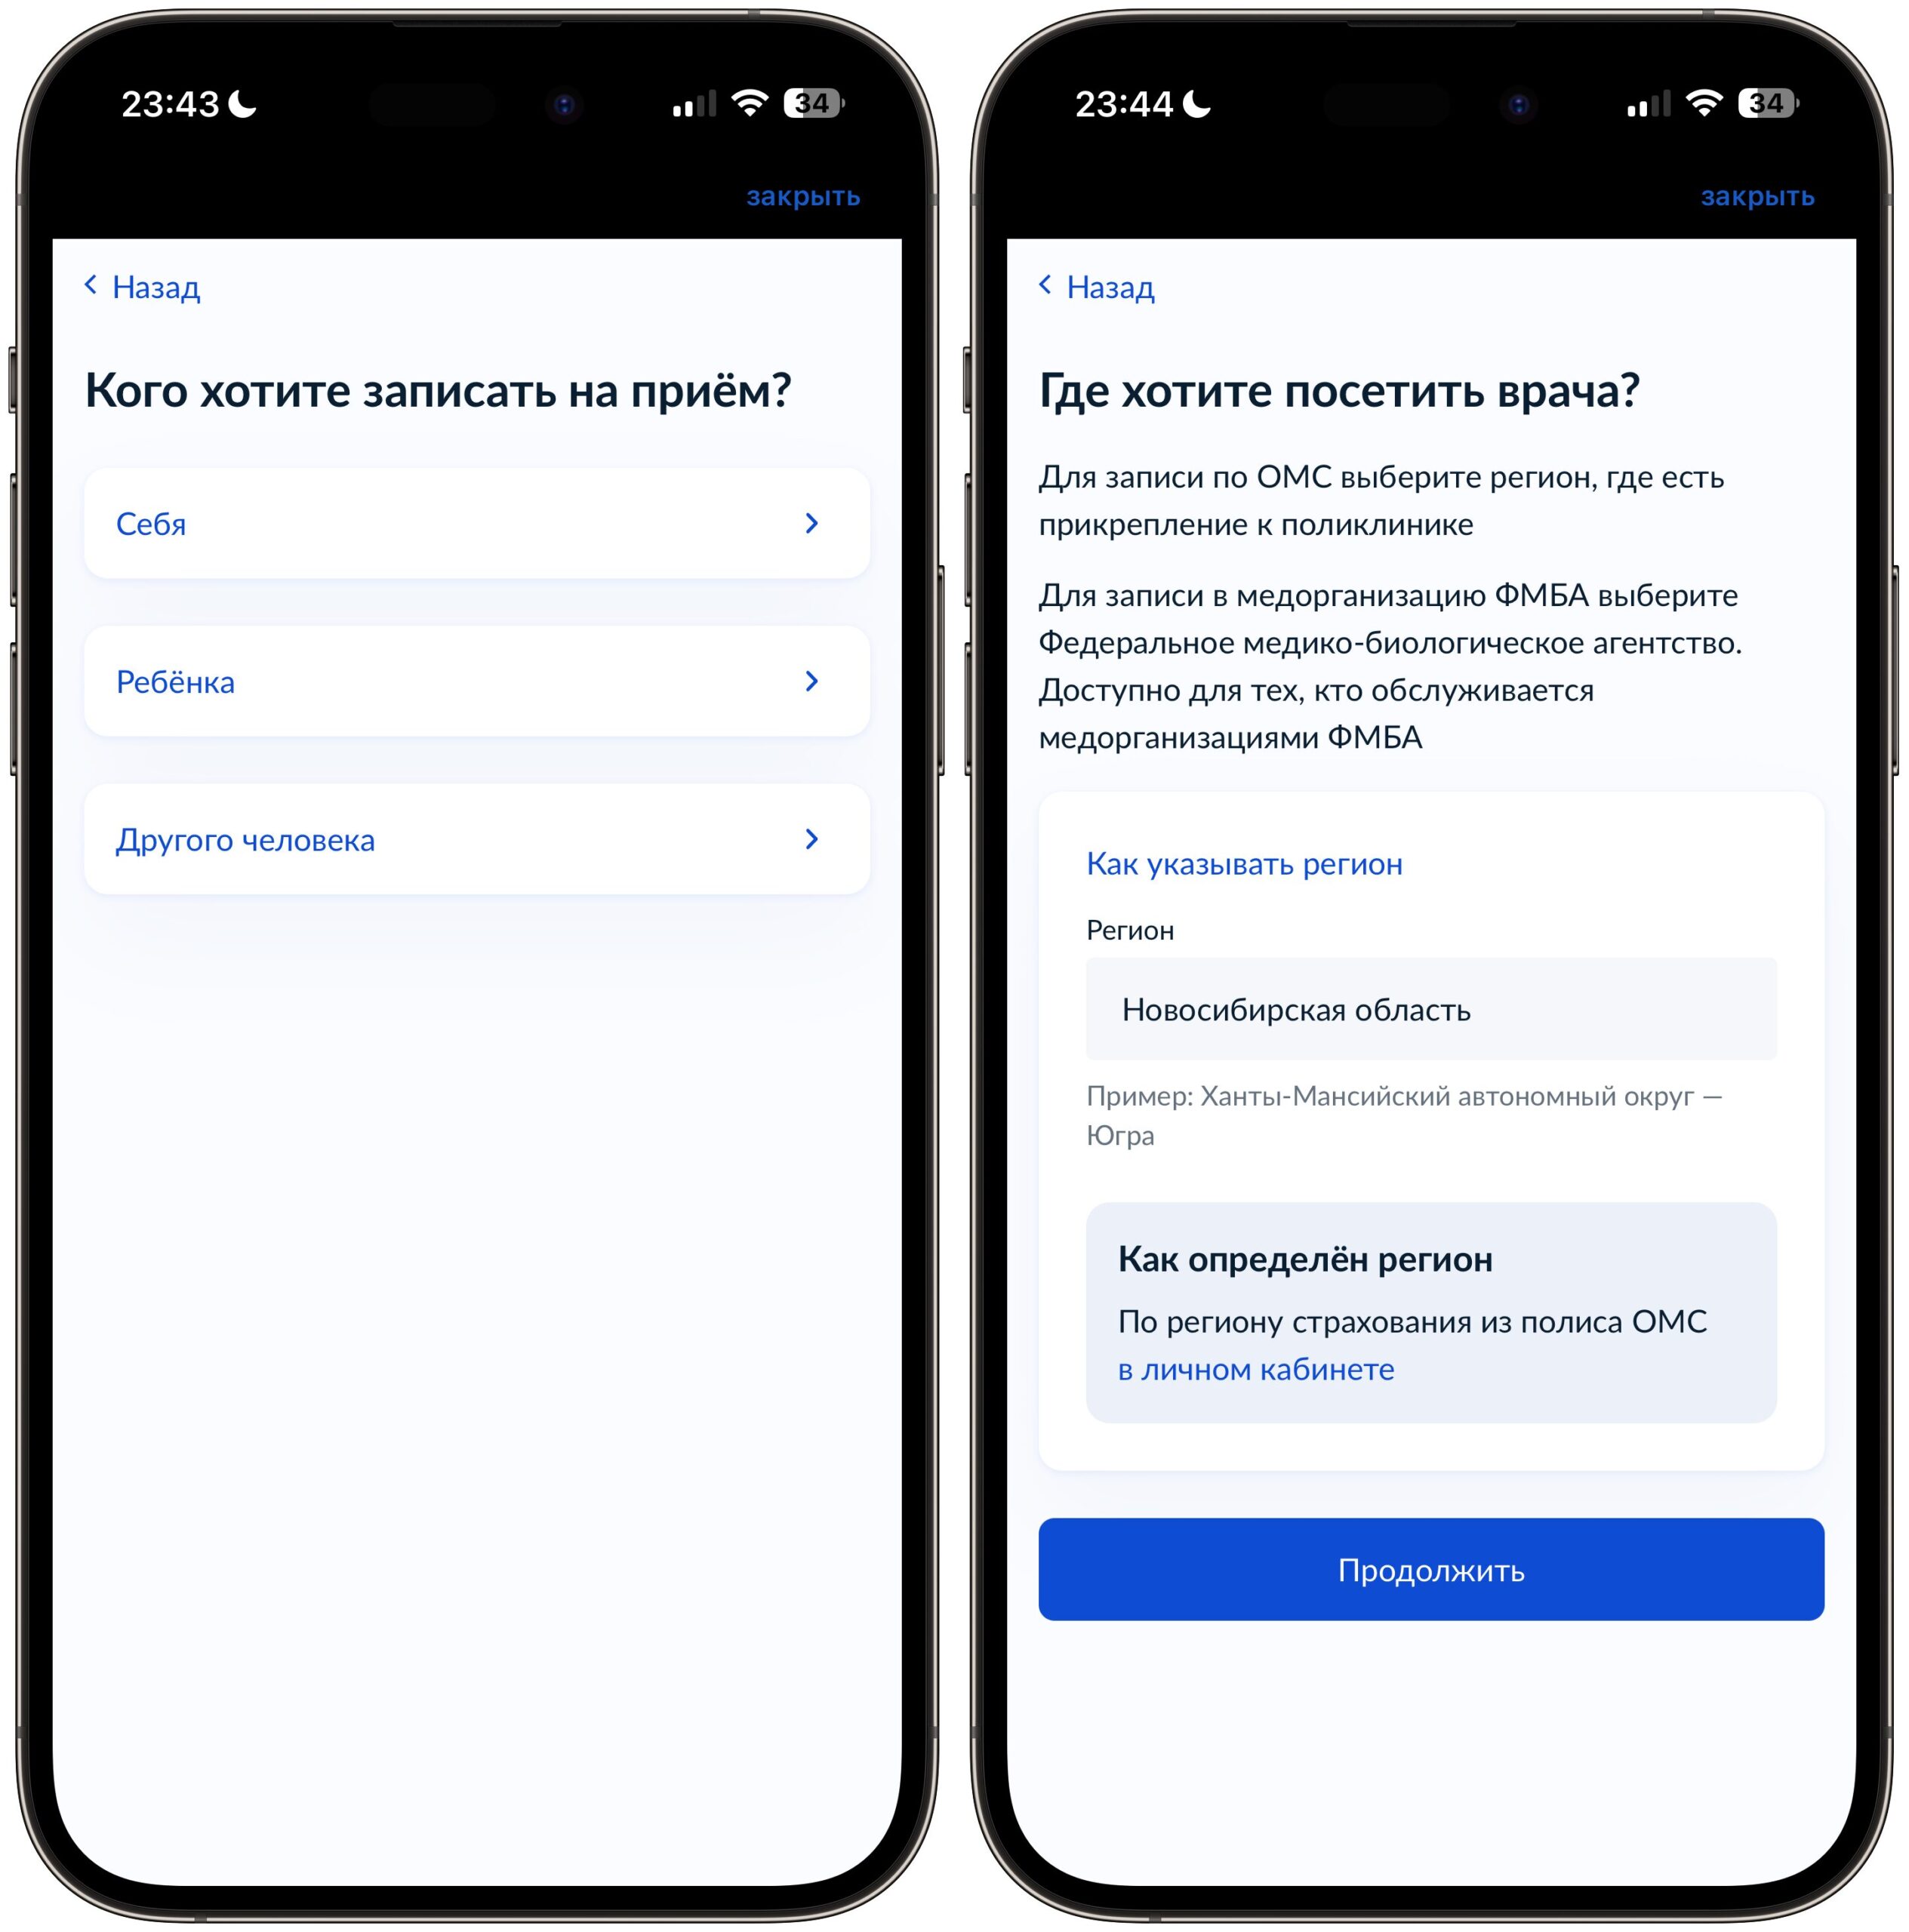
- On the next screen, you’ll see a description of the service: you can book for yourself, a child, or another person. Tap “Start.”
- Choose who you want to book the appointment for: yourself, a child, or another person. If you’re booking for a child, their details must be linked to your account.
- Specify the region where you want to visit the doctor. The app will detect it automatically based on your OMS policy data from your personal account. If everything is correct, tap “Continue.”
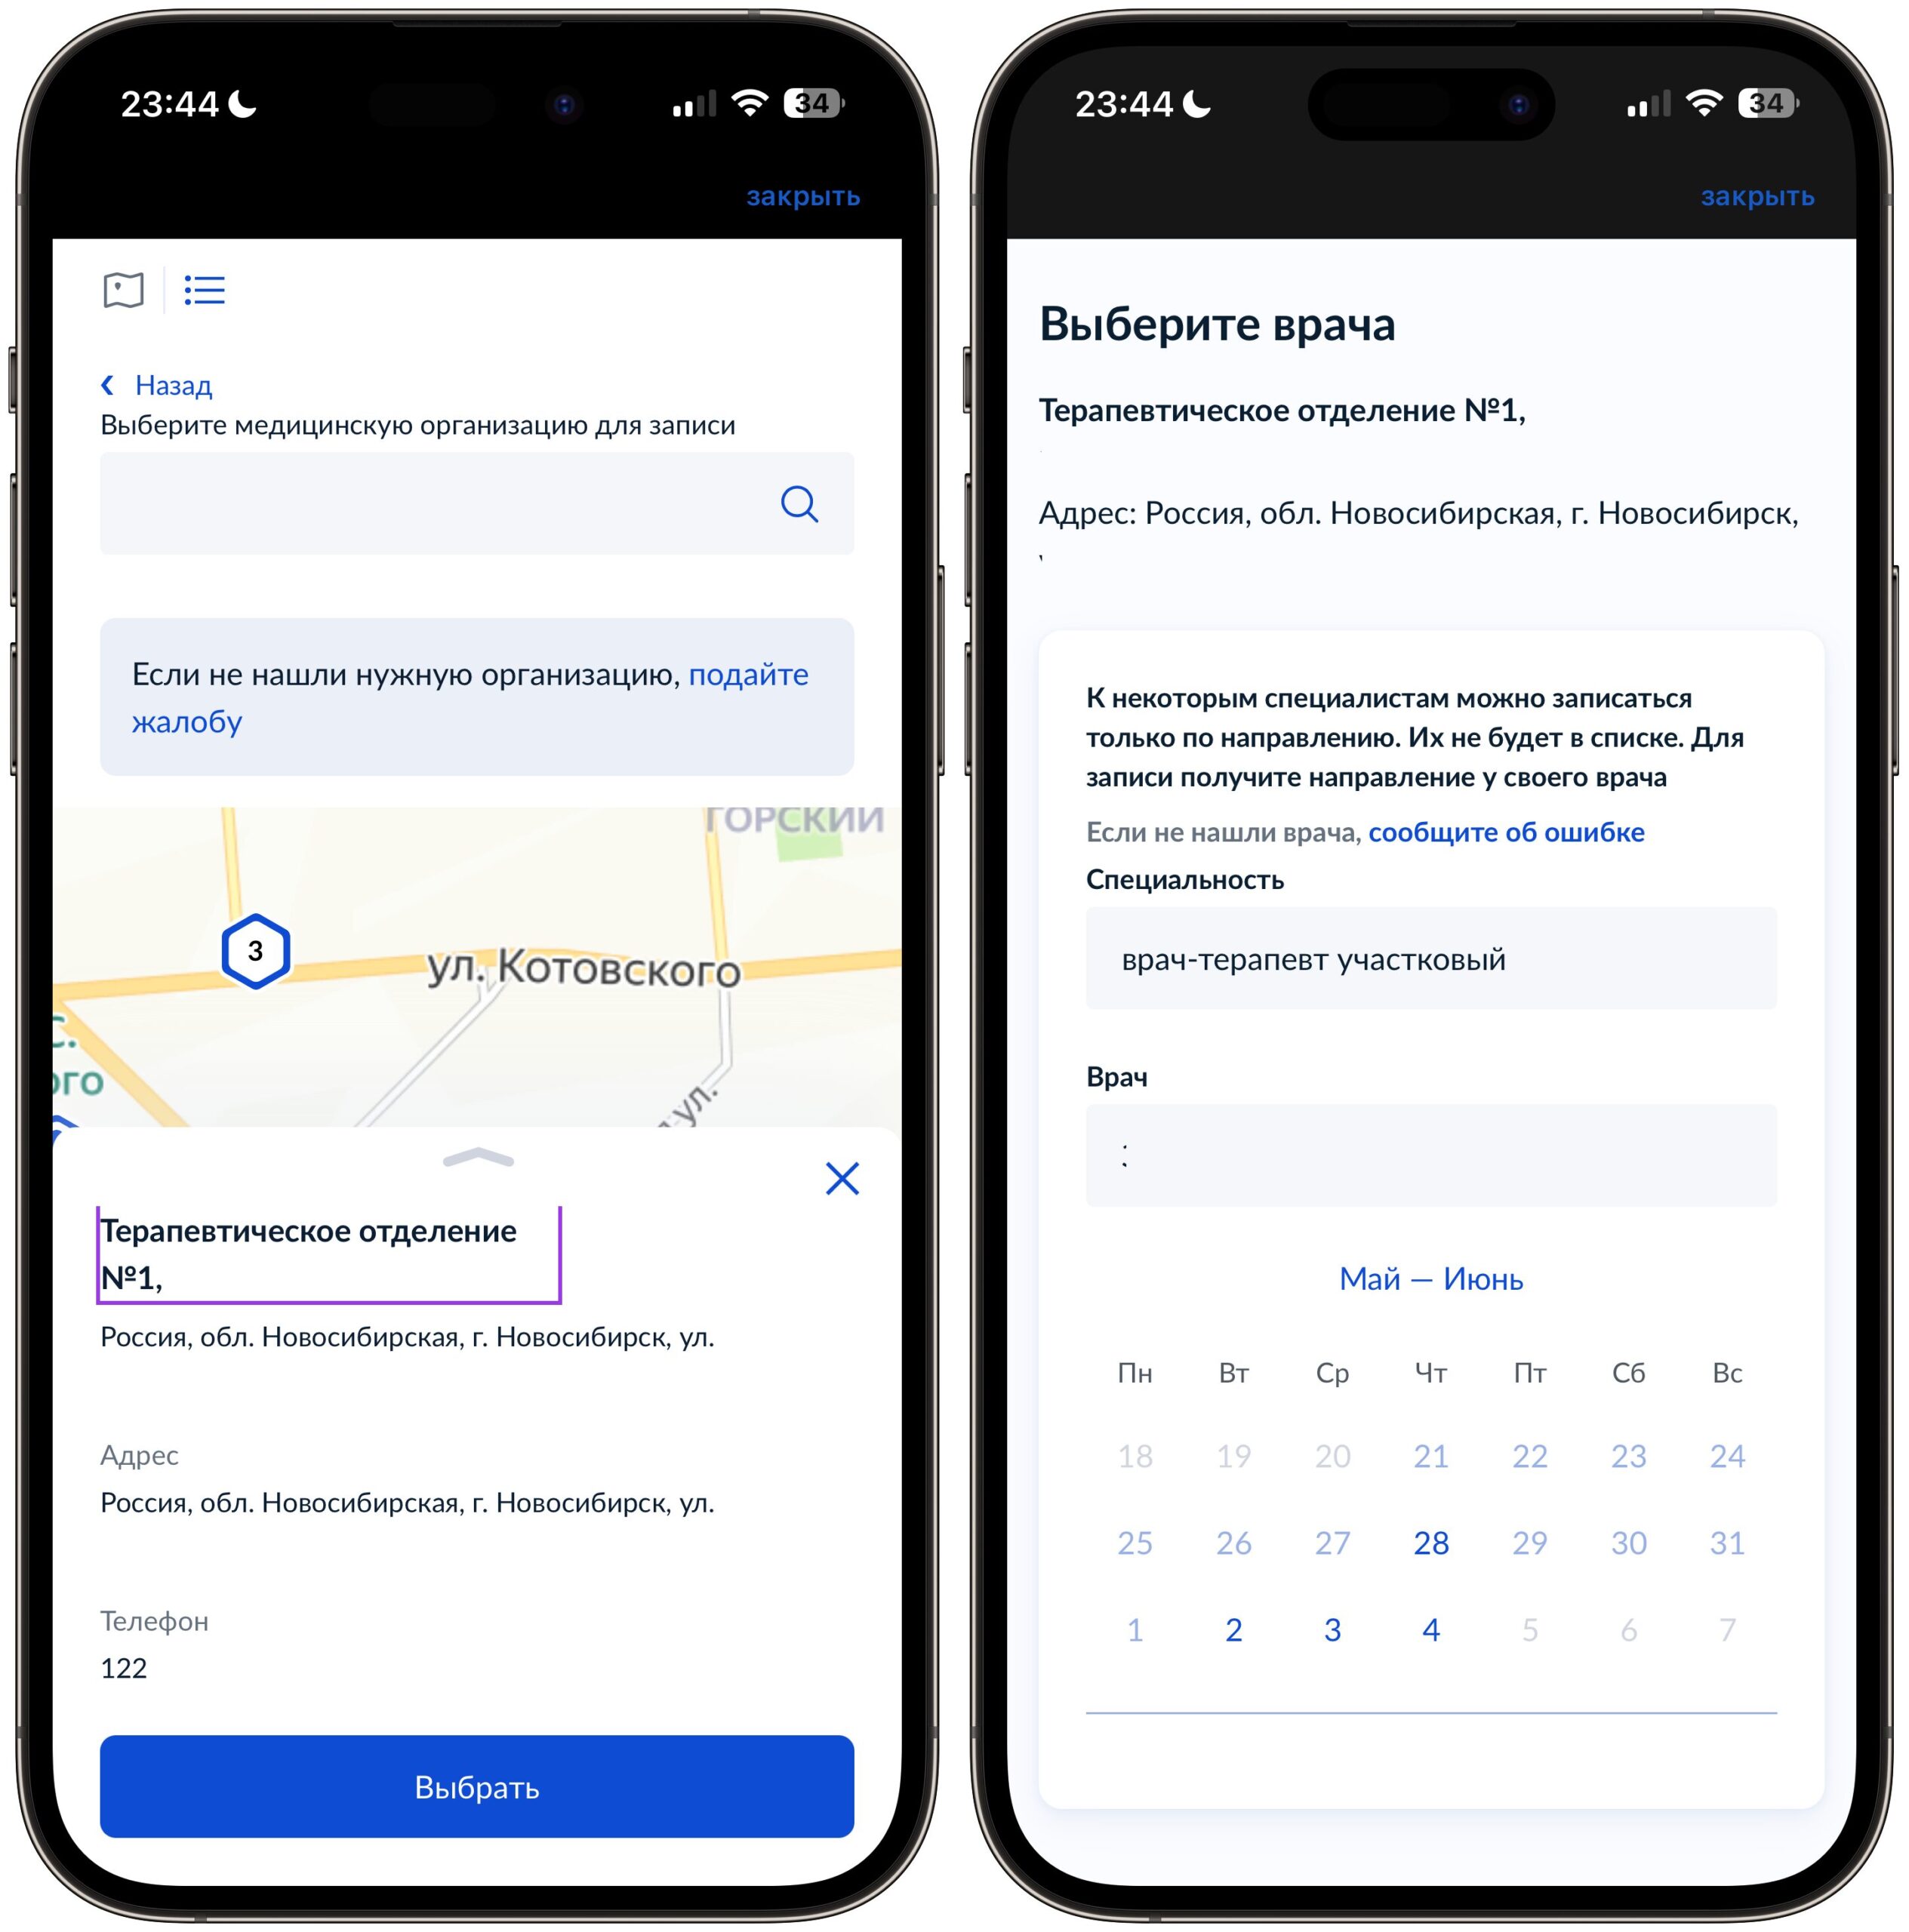
- Choose a medical facility from the list. The screen will display a map with marked clinics, and below — the name, address, and phone number. Tap “Select” next to the one you need.
- Specify the doctor’s specialty. The dropdown list will only show specialists you can book without a referral: general practitioner, pediatrician, surgeon, ophthalmologist, ENT, dentist, and others — 14 specialties in total.
- Choose a specific doctor from the list. If there are multiple doctors, all available ones will be shown. For example, in my case, there were three general practitioners to choose from.
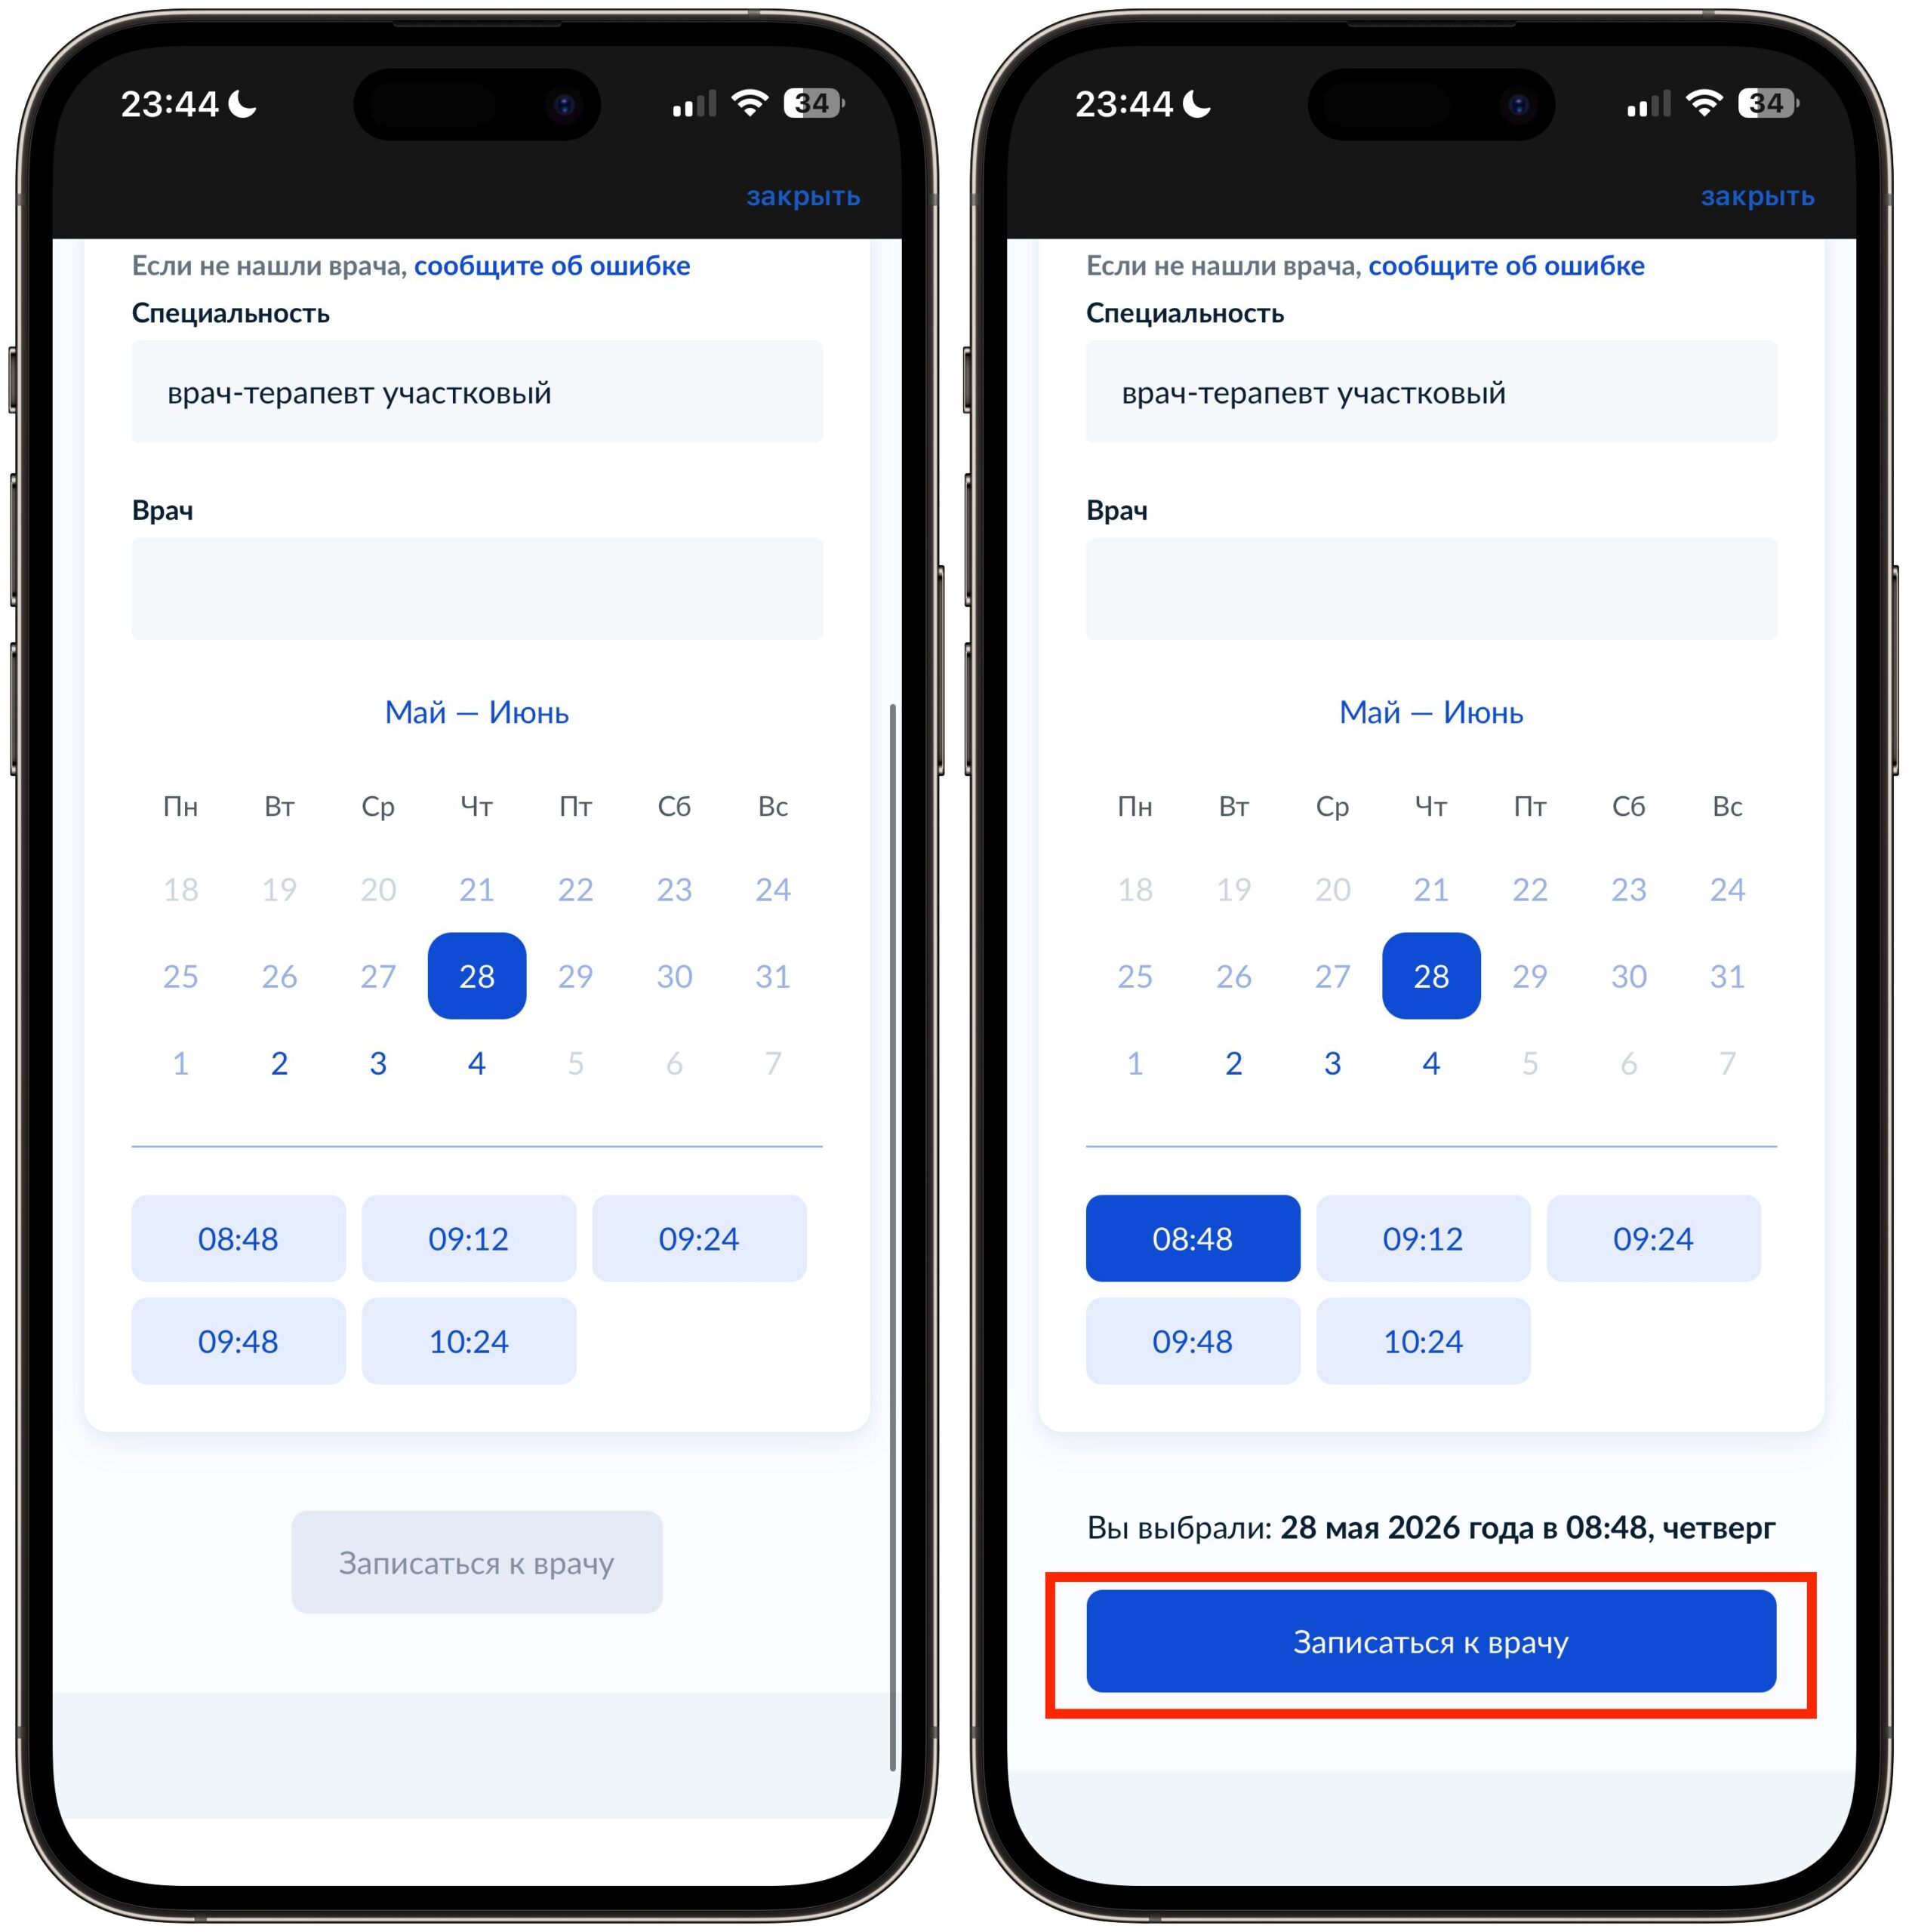
- Select a convenient date on the calendar. Available days are highlighted — the rest are inactive. After selecting a date, available time slots will appear at the bottom: for example, 08:48, 09:12, 09:24, and so on.
- Tap on a suitable time. Below the calendar, summary information will appear: date, day of the week, and appointment time.
- Tap “Book a Doctor’s Appointment.” Done — the booking is confirmed.
The booking process starts from this screen
You can book not only for yourself
Choose a medical facility on the map
Choose a doctor from the list and a date and time that works for you
After that, you’ll receive a notification in the app, and you can view the booking details — including the address, time, and booking status.
Booking a Pediatrician Appointment for Your Child Online
It’s worth mentioning booking appointments for children separately. The process is almost the same, but with a couple of differences. At the patient selection stage, tap “Child” — the app will pull the data from your profile. If the child hasn’t been linked yet, you’ll need to add them in advance in the “Documents and Data” — “Health” section, where all family members are displayed.
An important note: for children, the booking goes to the pediatric department, not the general practice department. So at the medical facility selection stage, you’ll see specifically children’s departments. In my case, it was Pediatric Department No. 1 of the city children’s hospital — the address and appointment time were displayed correctly.
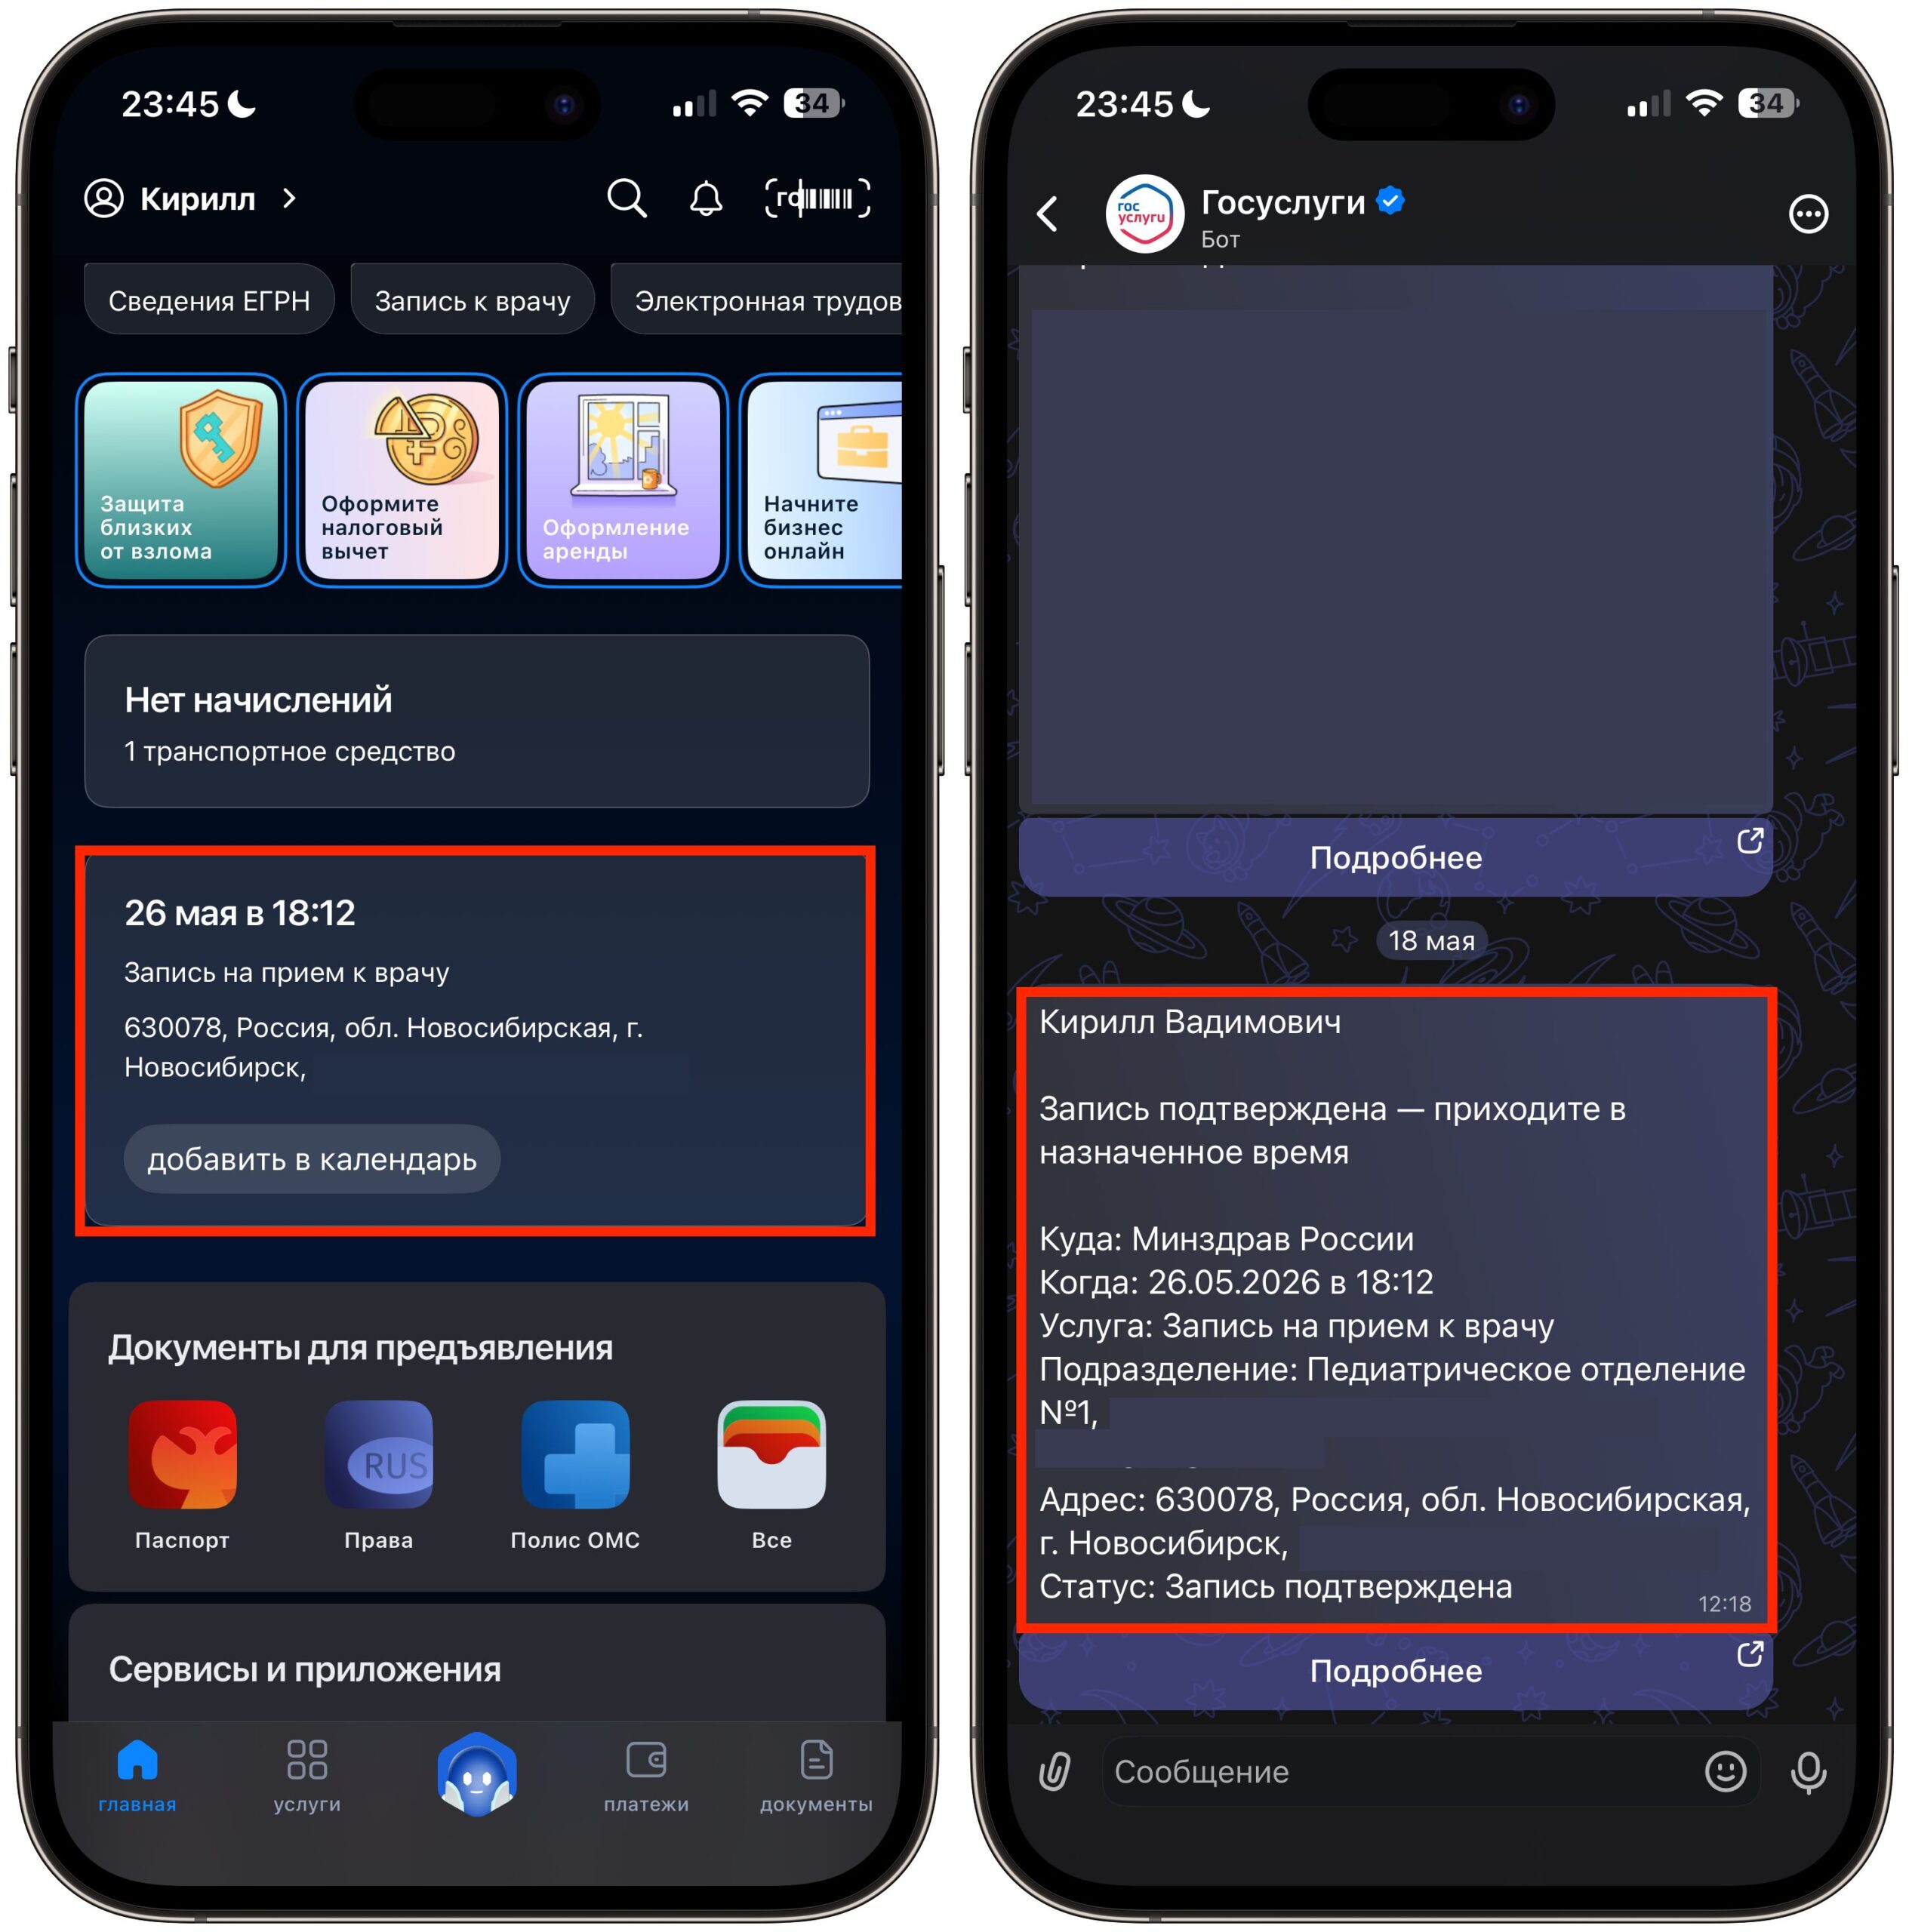
Booking confirmation can be seen on the Gosuslugi main page