Owners of multiple Apple devices often encounter a non-obvious problem: making a FaceTime call from an iPhone to your own iPad or Mac doesn’t work if they share the same Apple ID. Not only that, but things get even more confusing with accounts. The call simply doesn’t go through, and iMessage conversations look like you’re talking to yourself. Below is a step-by-step guide on how to fix this in five minutes.

It turns out you can easily call from a smartphone to a tablet. A handy feature
Why FaceTime and iMessage Don’t Work Between Devices with the Same Apple ID
It’s simple: when both devices have the same phone number and the same email address registered, the system considers the sender and receiver to be the same person. FaceTime can’t call “itself,” and iMessage doesn’t understand which specific device the message is intended for.
The solution is to assign a unique email address for FaceTime and iMessage to each device. Then you can call not the shared number, but specifically the address assigned to the iPad or Mac.
A Separate iCloud Address for Calls and Messages Between Your Devices
The most convenient method is not to create a new email, but to create an alias of your current iCloud address. An alias is an additional address, and all emails sent to it automatically arrive in your main mailbox. There’s no need to set up a separate mailbox and remember yet another password. Apple allows you to create up to three iCloud aliases. Here’s how to do it:
- Open iCloud.com/mail in your browser and sign in with your Apple ID.
- Click the settings icon (gear) and select Settings.
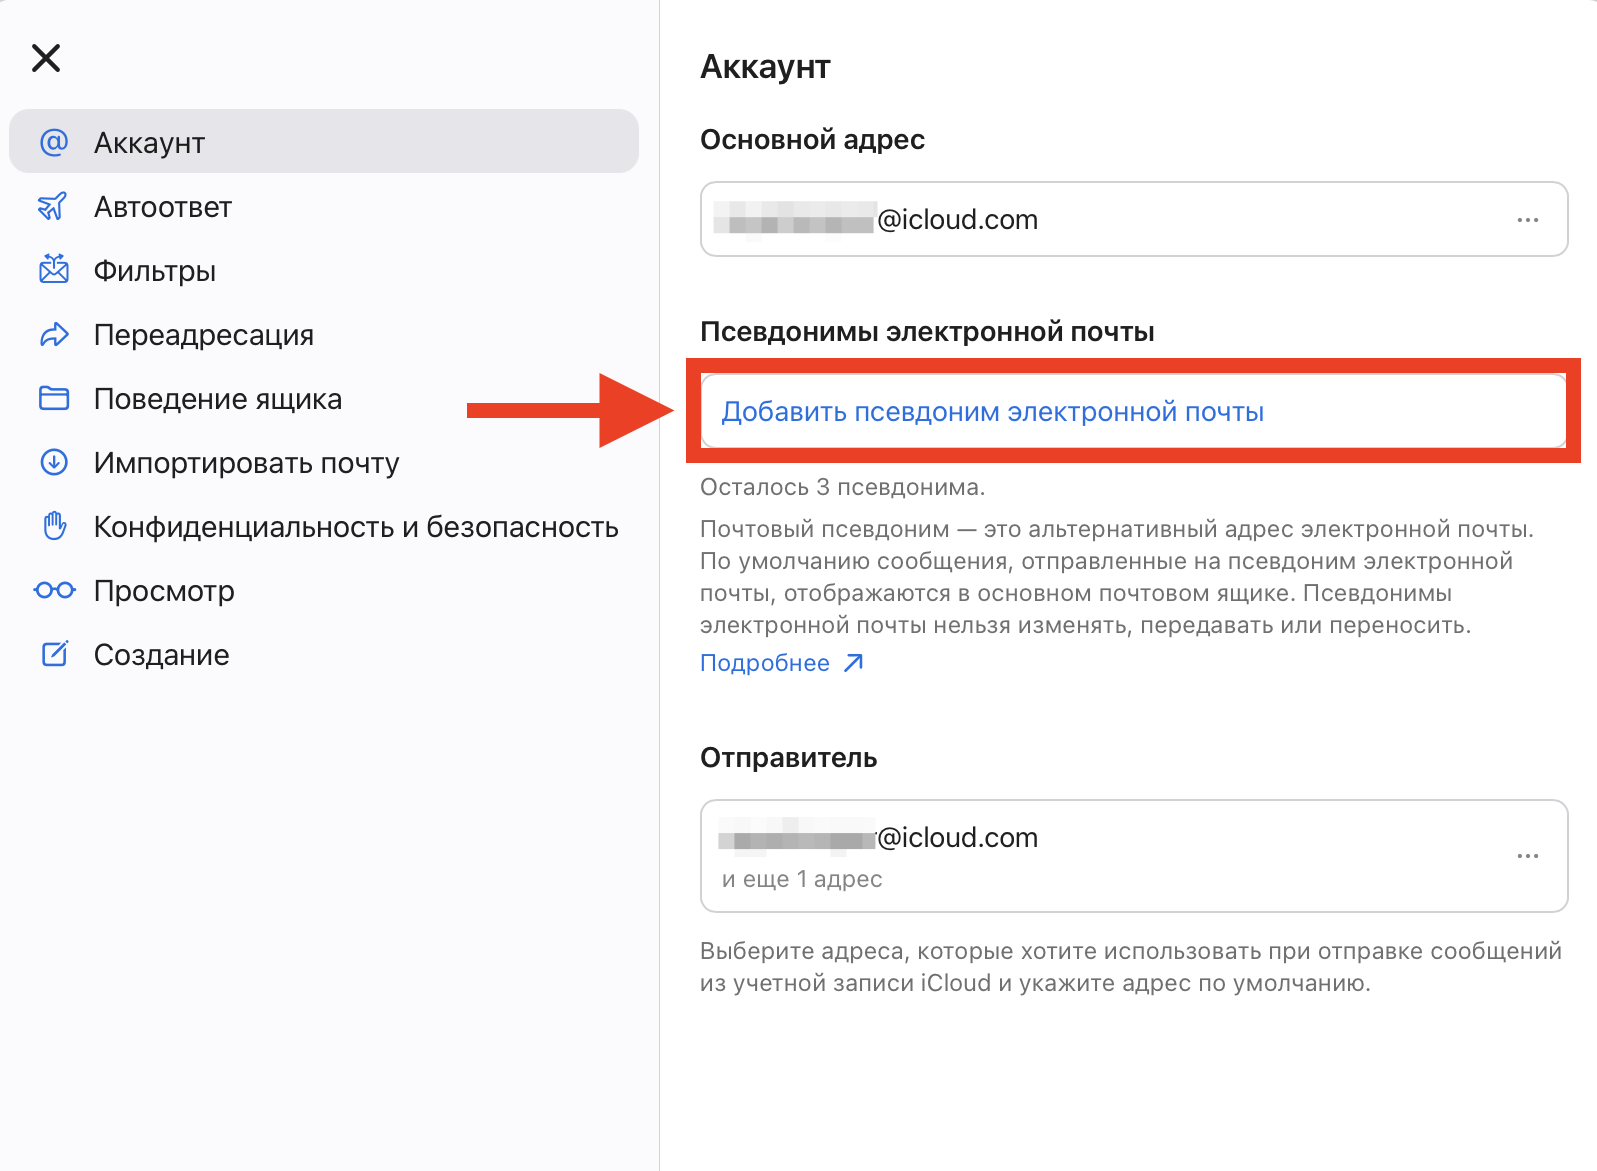
- Go to the Account section on the left and click Add email alias.
- Come up with an alias address, specify the sender name, and optionally choose a label. Click Create.
The alias is created in literally a minute
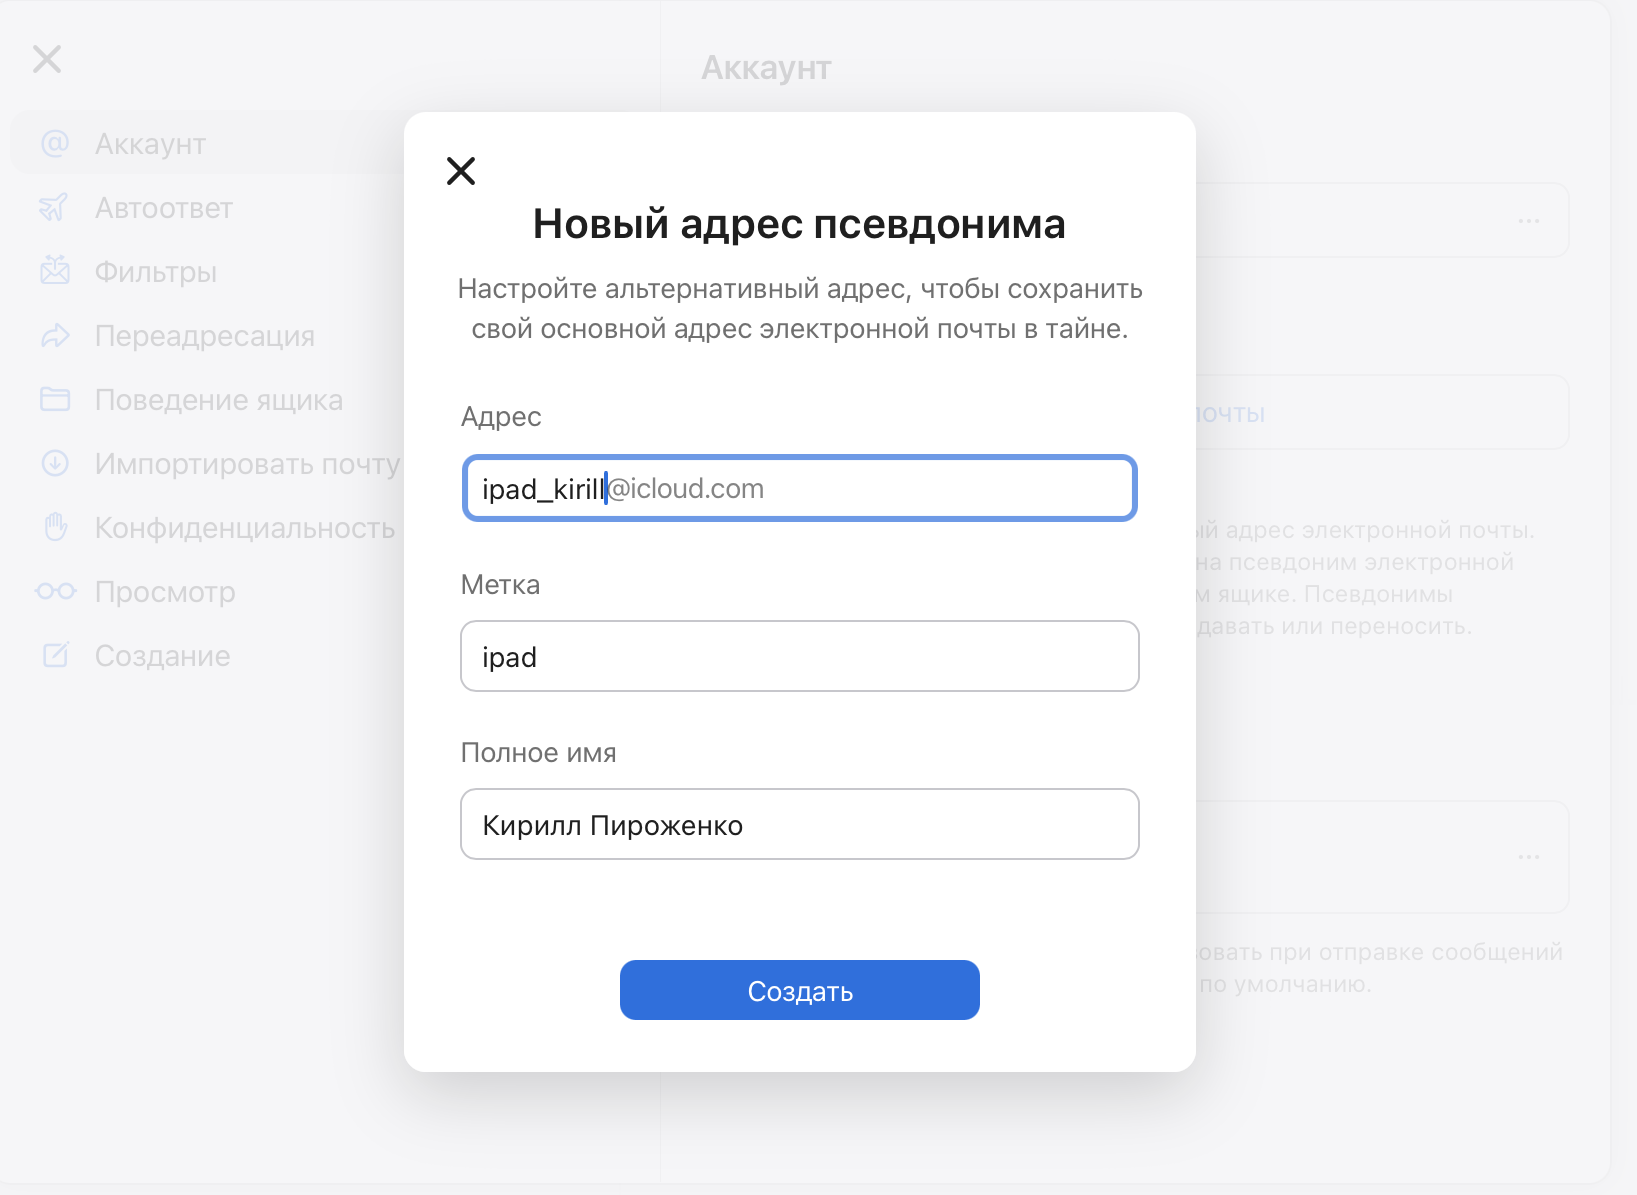
Create the alias you need. Be prepared to try a few options, some may be taken
All emails that arrive at the alias will automatically appear in your main iCloud mailbox. And when sending an email — whether from the iCloud website or from the Mail app on Mac, iPad, or iPhone — you can select the alias in the sender field. It’s convenient to name aliases after devices to avoid confusion:
- lastname.ipad@icloud.com
- lastname.macmini@icloud.com
- lastname.macbook@icloud.com
If you don’t have enough aliases or don’t want to use them, any existing email address will work — Gmail, Outlook, Yahoo, or any other.
Add a New Email to Apple ID for FaceTime and iMessage
Once the alias or second address is ready, you need to link it to your Apple ID. This is done once and automatically applies to all devices.
Add the alias to your account
- Open Settings on iPhone or iPad (on Mac — System Settings).
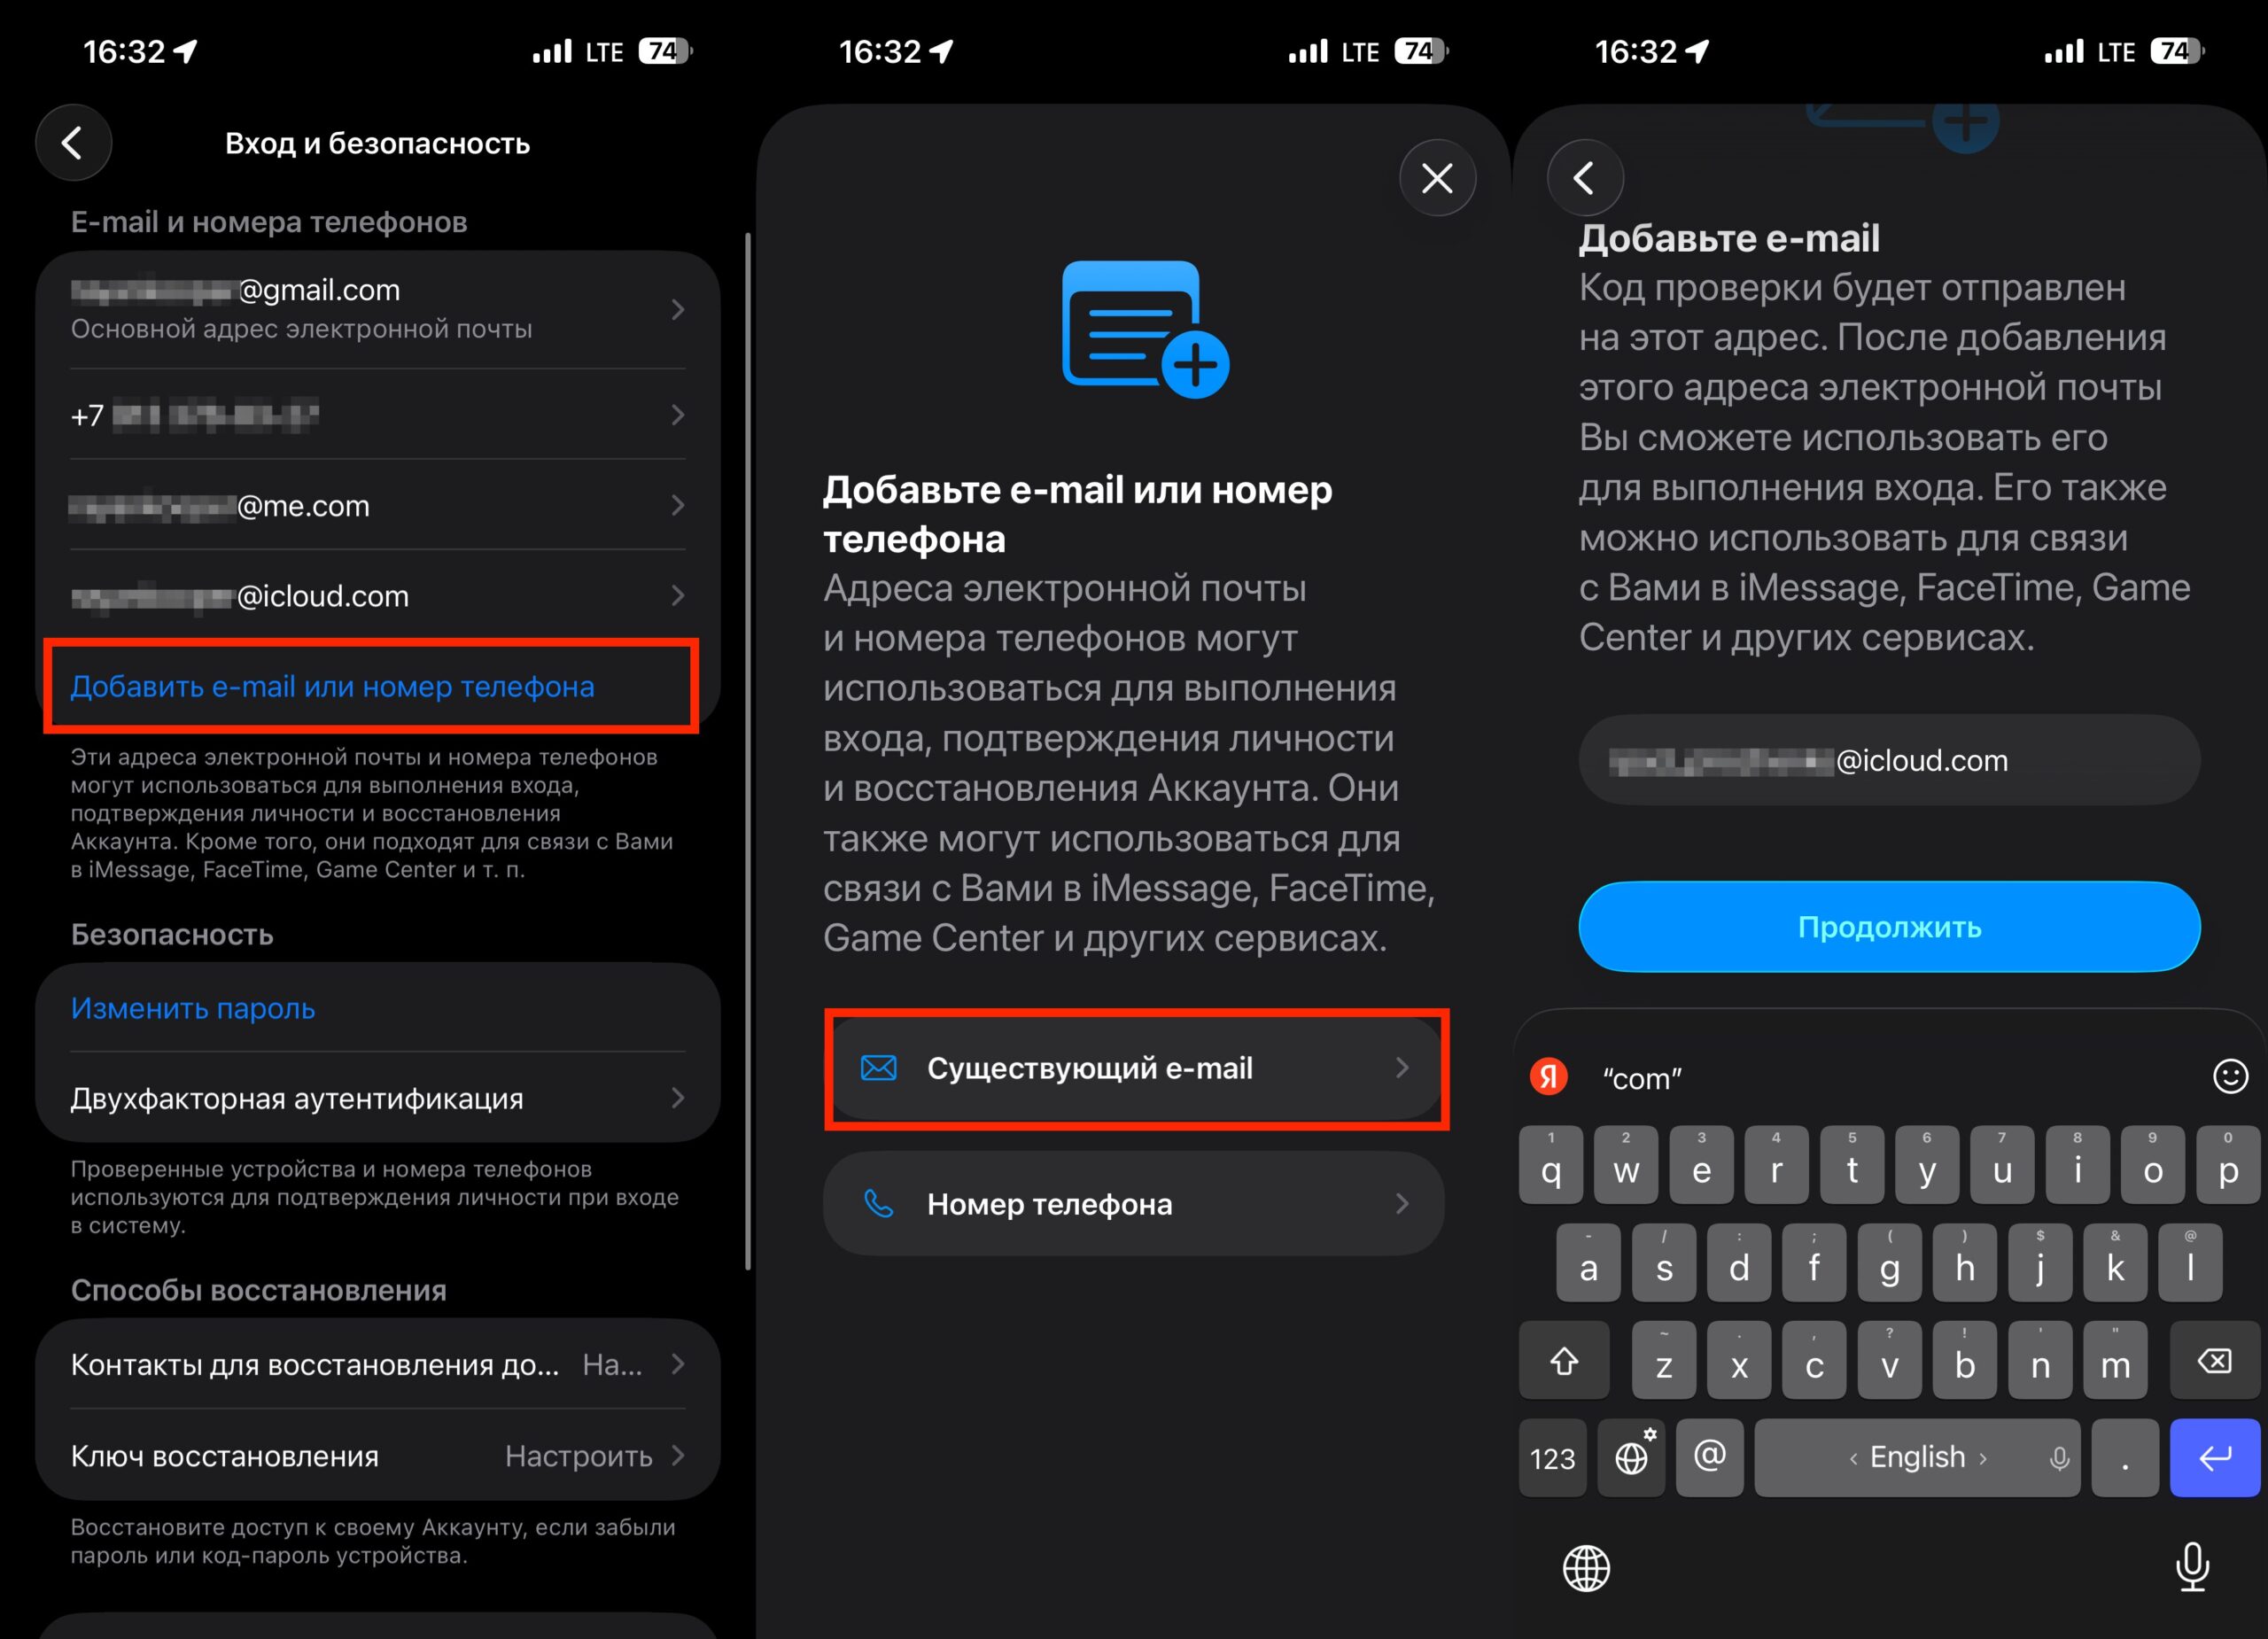
- Tap your name (Apple ID) — Sign-In & Security — Add Email or phone number.
- Select Existing email address, enter the alias or second address, and confirm it with a code.
- Repeat if you have multiple devices and need multiple addresses.
Set Up a Separate FaceTime and iMessage Address on iPad
Now you need to tell your iPad that it should use the new address specifically for calls and messages, rather than the shared phone number.
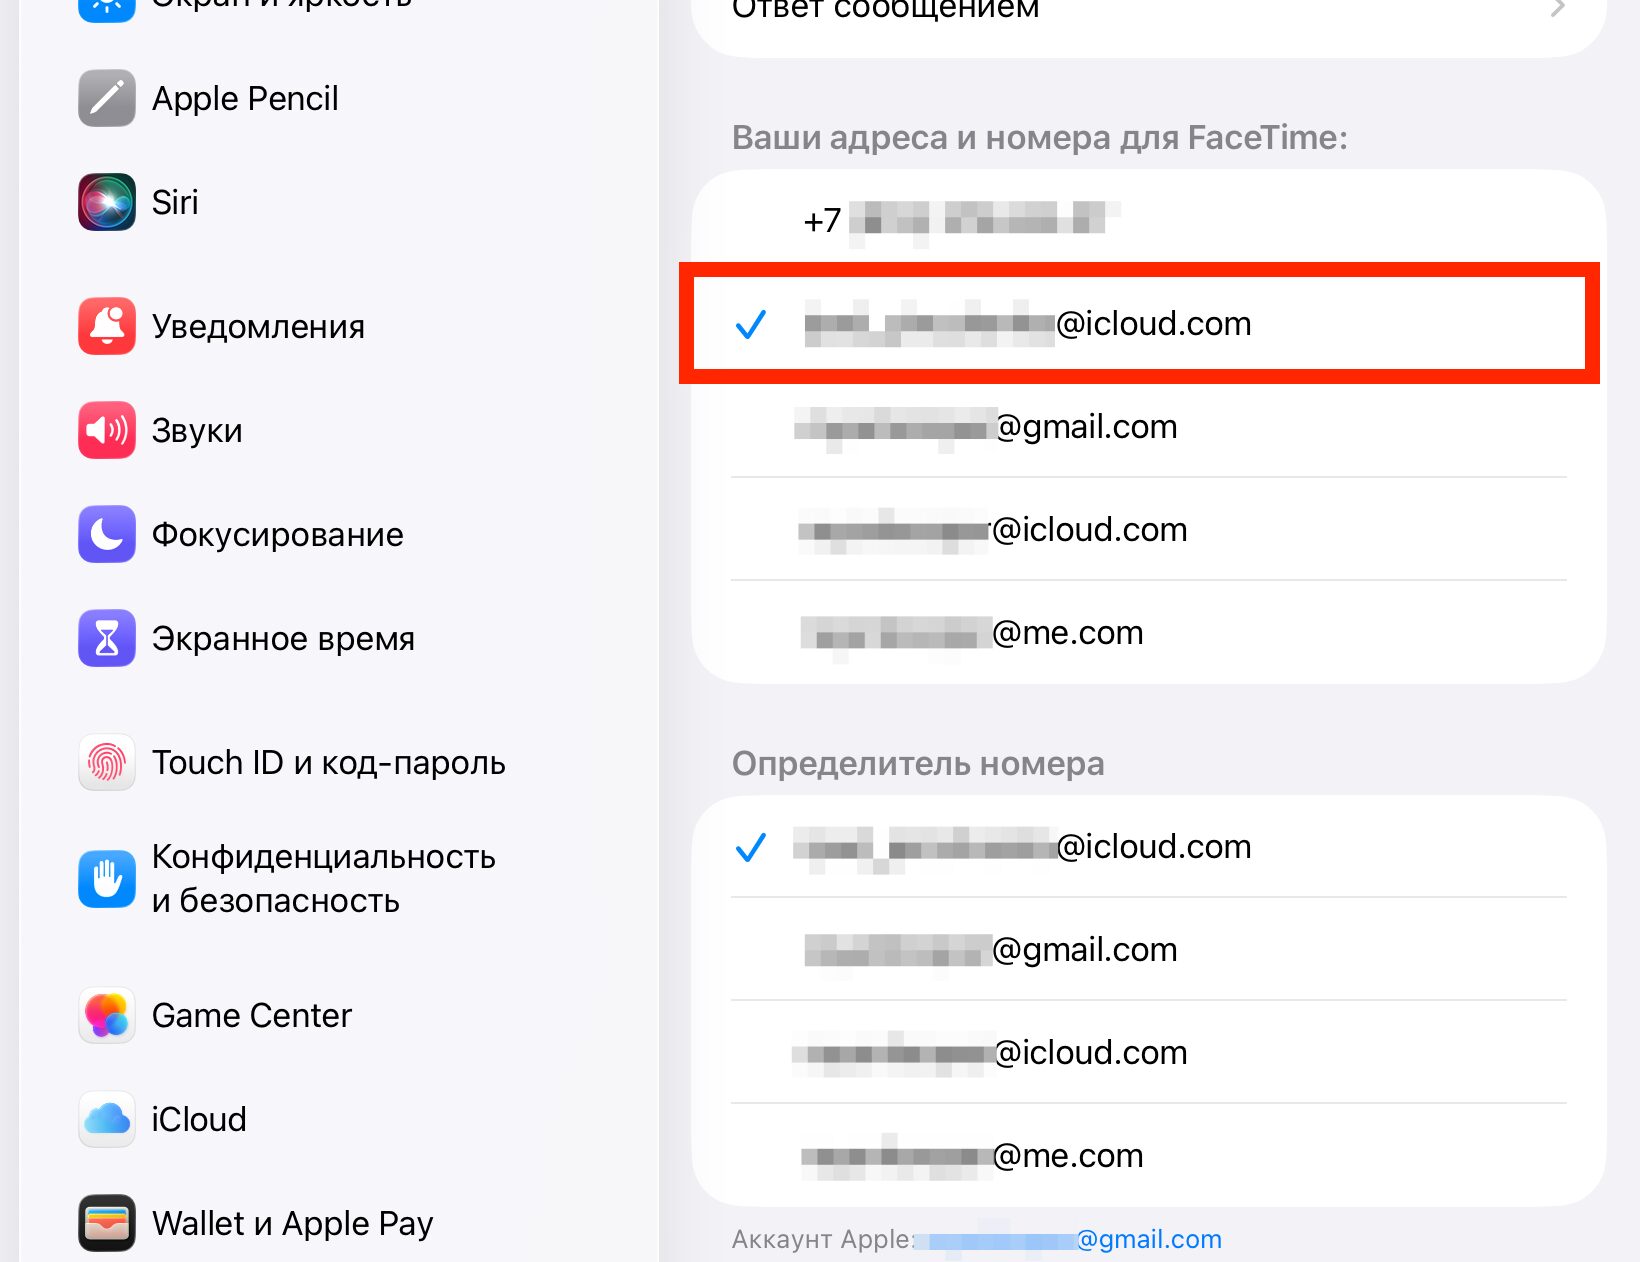
On iPad, leave the checkmark only on the email you just created
- Open Settings — Apps — FaceTime.
- In the “You Can Be Reached By FaceTime At” section, check the new address. Optionally, uncheck the shared number and primary email so that calls don’t get duplicated.
- Go back to the app list, select Messages — Send & Receive and check the new address in the same way.
After this, FaceTime calls to this address will come only to the iPad, not to all devices at once.
Set Up a Separate FaceTime and iMessage Address on Mac
On Mac, the process is similar, but it’s done through the apps themselves rather than through system settings.
- Open FaceTime, then in the menu bar: FaceTime — Settings.
- In the “You Can Be Reached By FaceTime At” section, check the desired address.
- Open Messages, in the menu: Messages — Settings — iMessage tab.
- Check the new address in the “You can be reached for messages at” section.
If you have multiple Macs — for example, a work one and a home one — each can be assigned its own alias from the three available.
How to Make a FaceTime Call to Your Own Device
The final step — save the new address as a separate contact. For example, “My iPad” or “Kitchen Mac.” This will allow you to quickly find the right device in your contacts list and call without confusion.
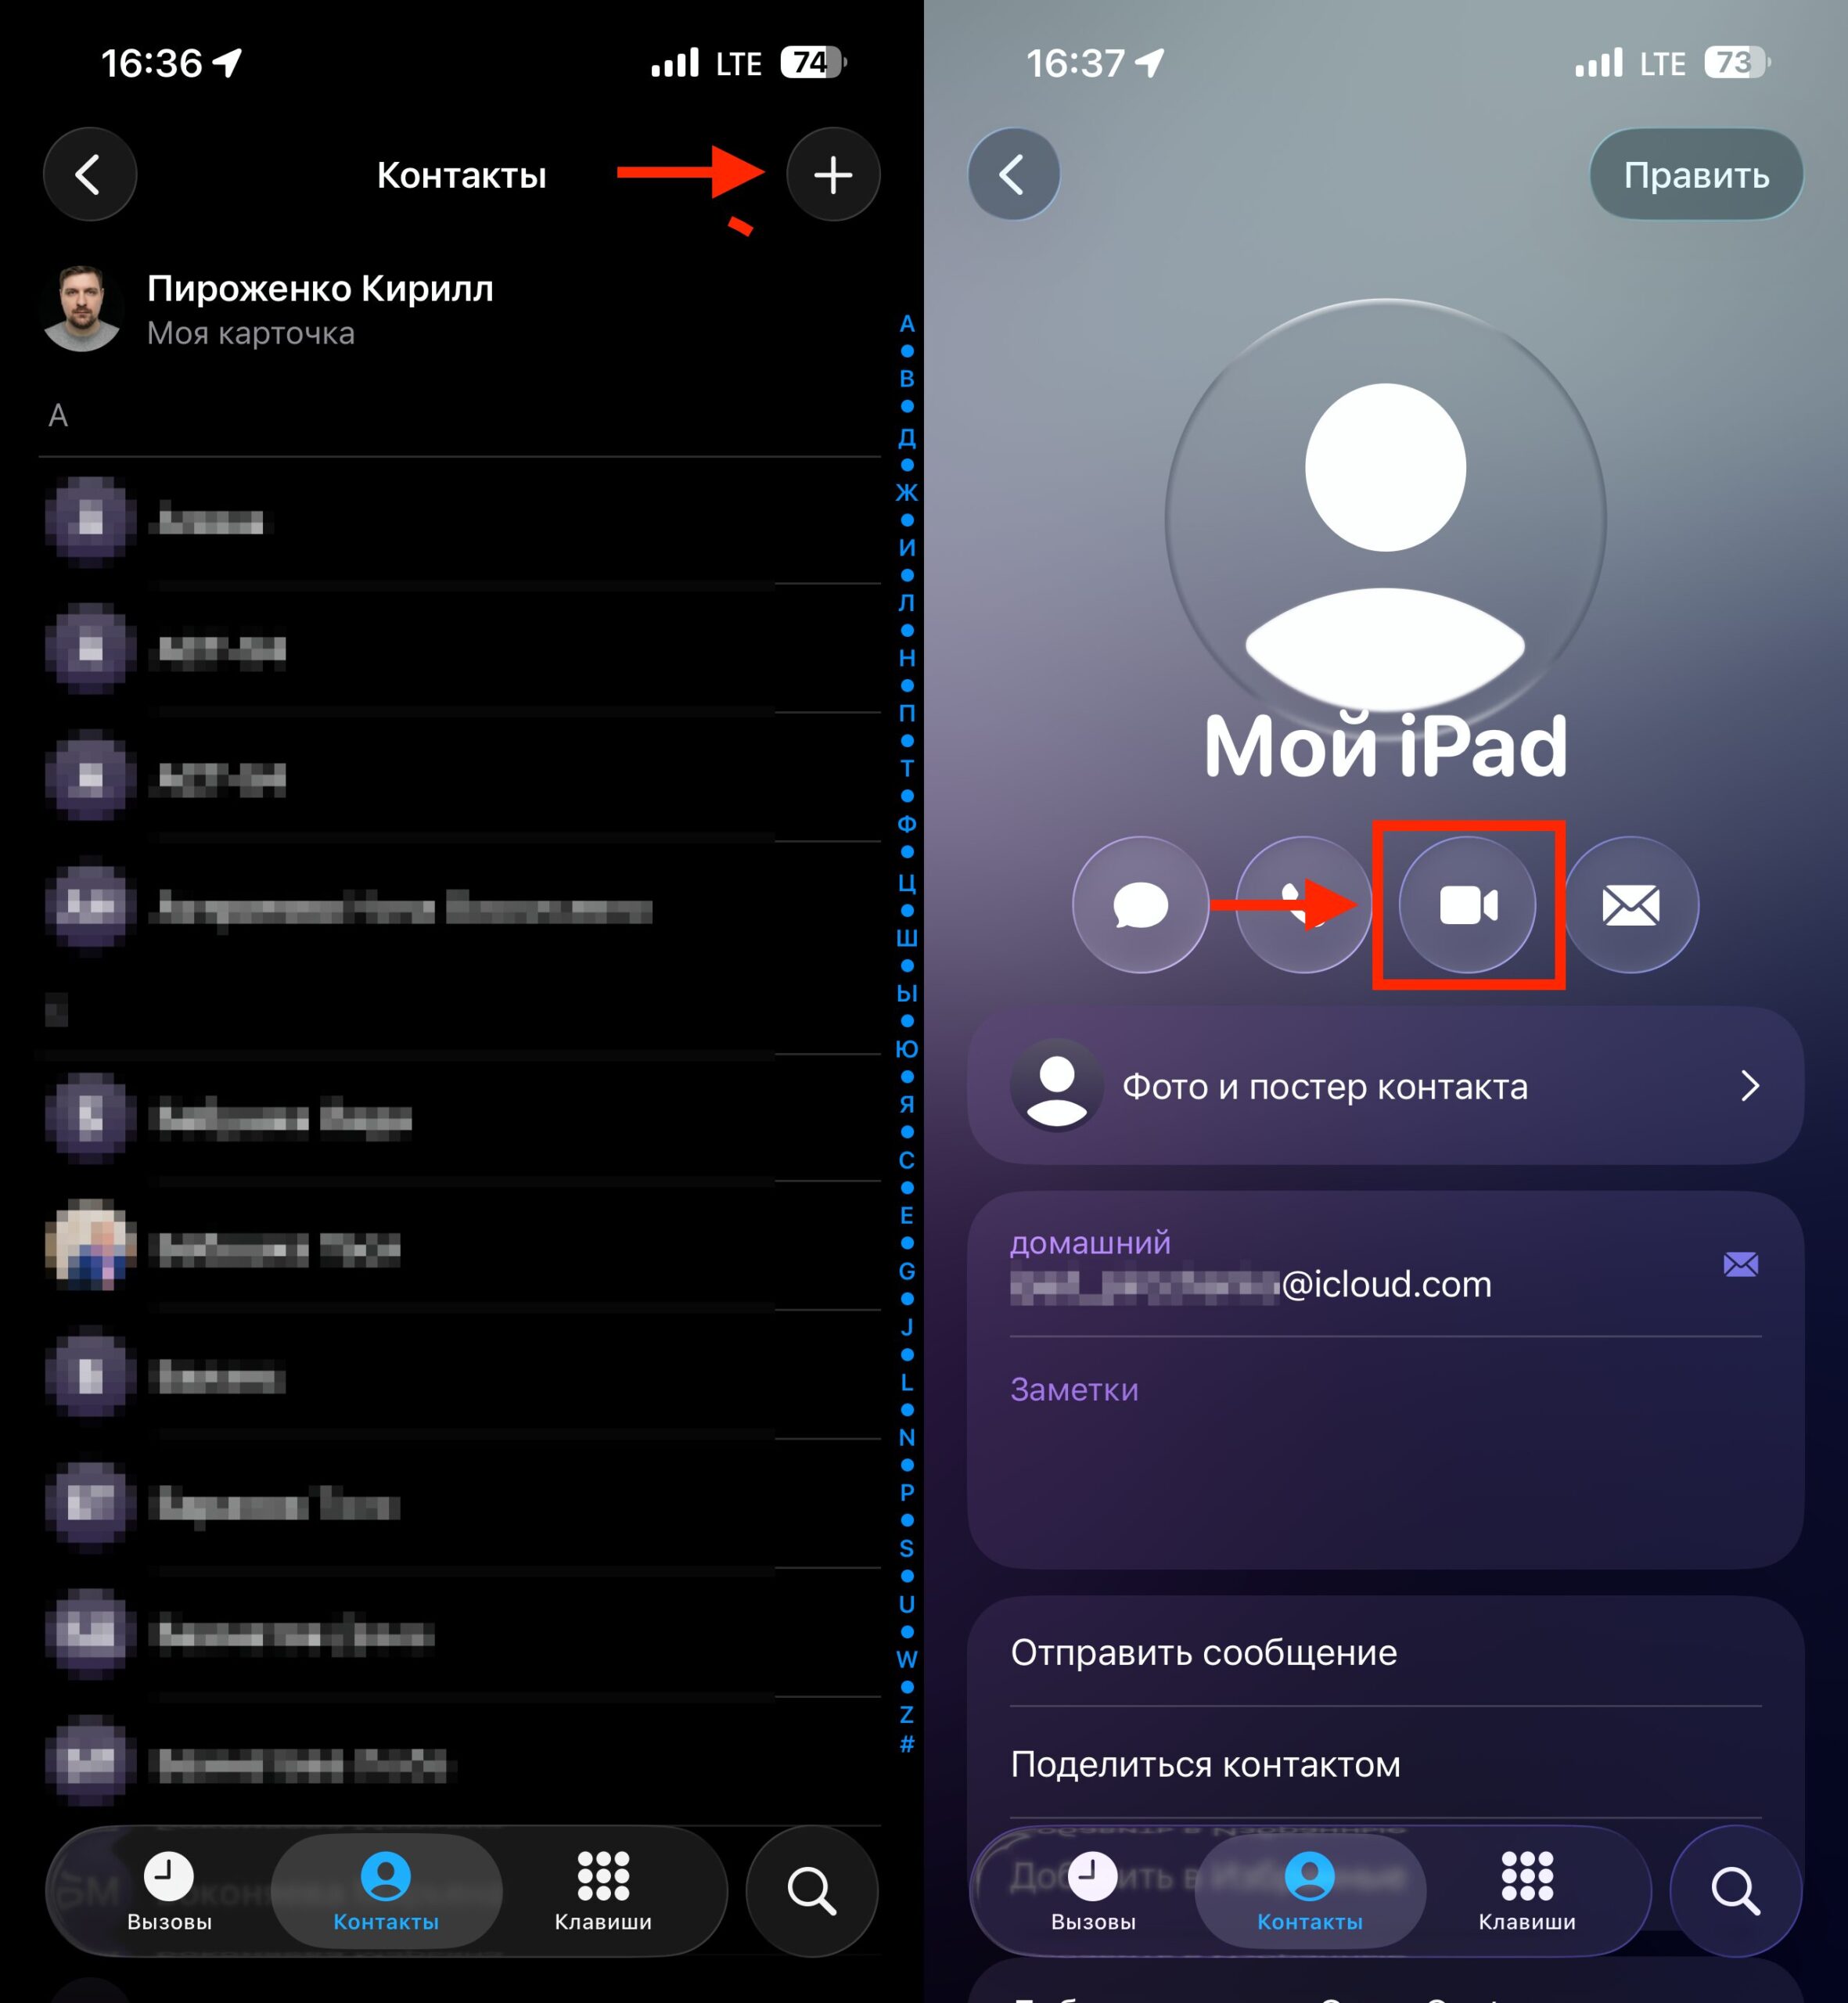
Create a contact for the call and tap the camera icon