Next to my MacBook, there’s always a small army of wireless gadgets. Headphones, a second pair of headphones, sometimes someone else’s iPhone charging, and from time to time a watch and a tablet. And every time I need to check the battery level of even one of them, the familiar ritual begins: open settings, find the Bluetooth section, hover over the right device. I’m constantly looking for ways to make macOS even more convenient, and recently I stumbled upon a free app that gathered this entire zoo in one window. Now the standard macOS widgets seem almost decorative to me.
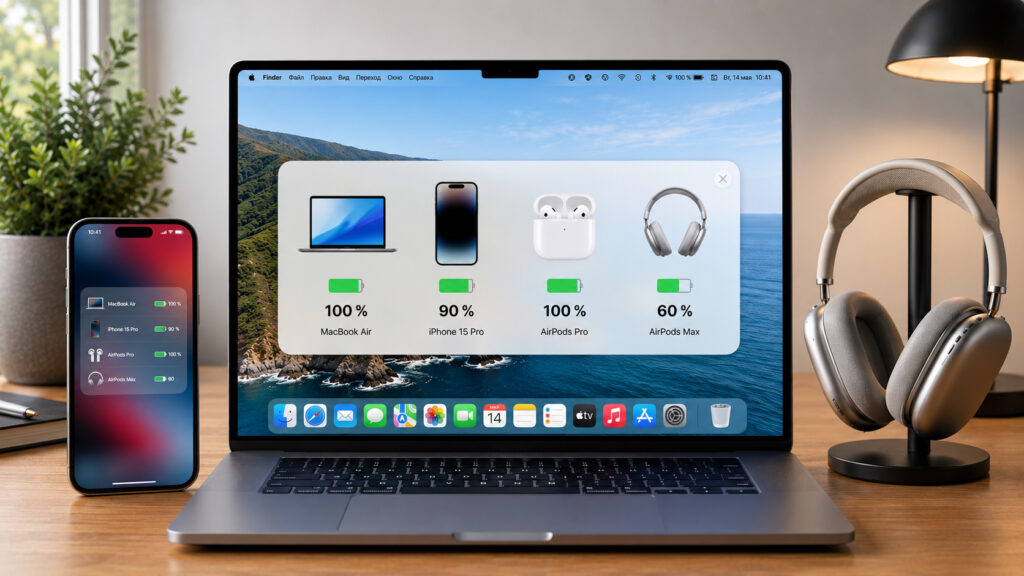
A small utility that makes working on Mac more convenient
I’m talking about AirBattery. It’s a tiny utility that displays the battery level of all your devices in the menu bar, in the Dock, and in desktop widgets. No subscriptions, ads, or accounts. Open it, grant a couple of permissions, and you immediately see the full picture.
How to Check Battery Levels of All Bluetooth Devices on Mac
Apple does have standard widgets, but they’re inconvenient to use. The compact battery widget shows a maximum of four devices, and to get to the details, you still have to open menus and settings. When you have two accessories, it’s tolerable. When you have six or seven, things get confusing.
That’s exactly my situation. On my desk, I simultaneously have a MacBook, AirPods Pro headphones, their case, plus third-party HUAWEI FreeClip, an iPhone charging nearby, and sometimes my wife’s second iPhone connects too. Keeping track of all this through system settings is exhausting, and it’s easy to miss the moment when headphones die at the worst possible time. This is exactly the kind of scenario that narrow utilities like AirBattery were designed for — they do one thing, but they do it well.
Installing AirBattery on Mac: Step-by-Step Guide
The installation here is as simple as it gets, and that’s the first thing I liked. You download the latest version, open the downloaded disk image, and drag the app icon into the Applications folder. No installers with ten steps and checkboxes. The latest build is always available on the project’s releases page.
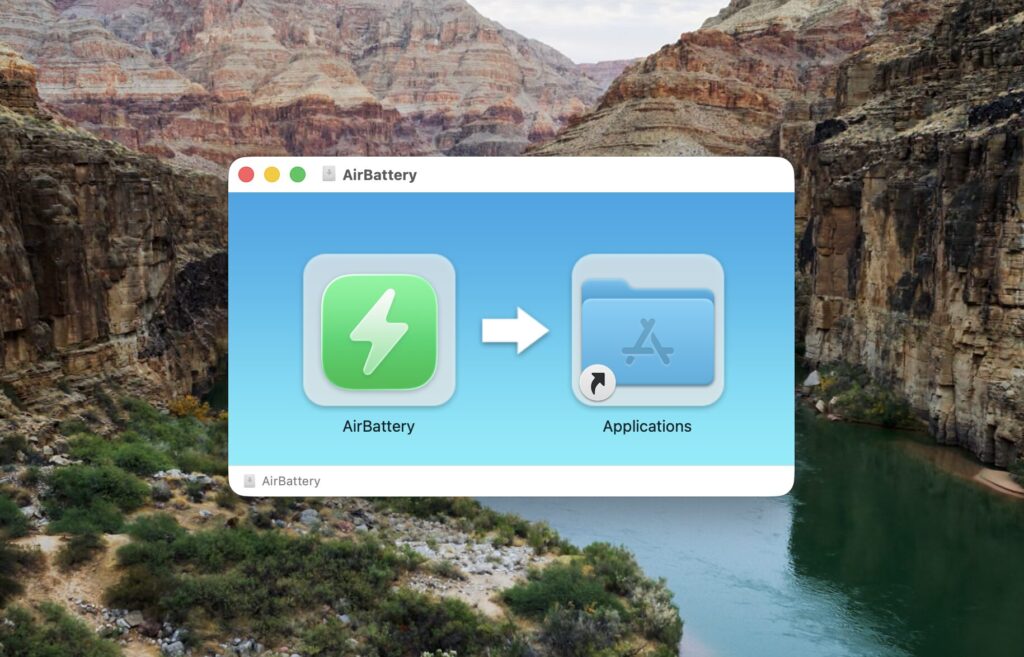
The installation is absolutely top-notch
After the first launch, AirBattery will request several permissions, including Bluetooth access. This isn’t a developer whim: without Bluetooth, the app can’t read packets from devices and parse the battery data within them. Sometimes on the first launch, macOS complains that it can’t verify the developer, and Gatekeeper will block the app — you can enable it through the privacy settings. After that, the icon appears in the menu bar and in the Dock right away — by default in both places, and in settings you can keep only one.
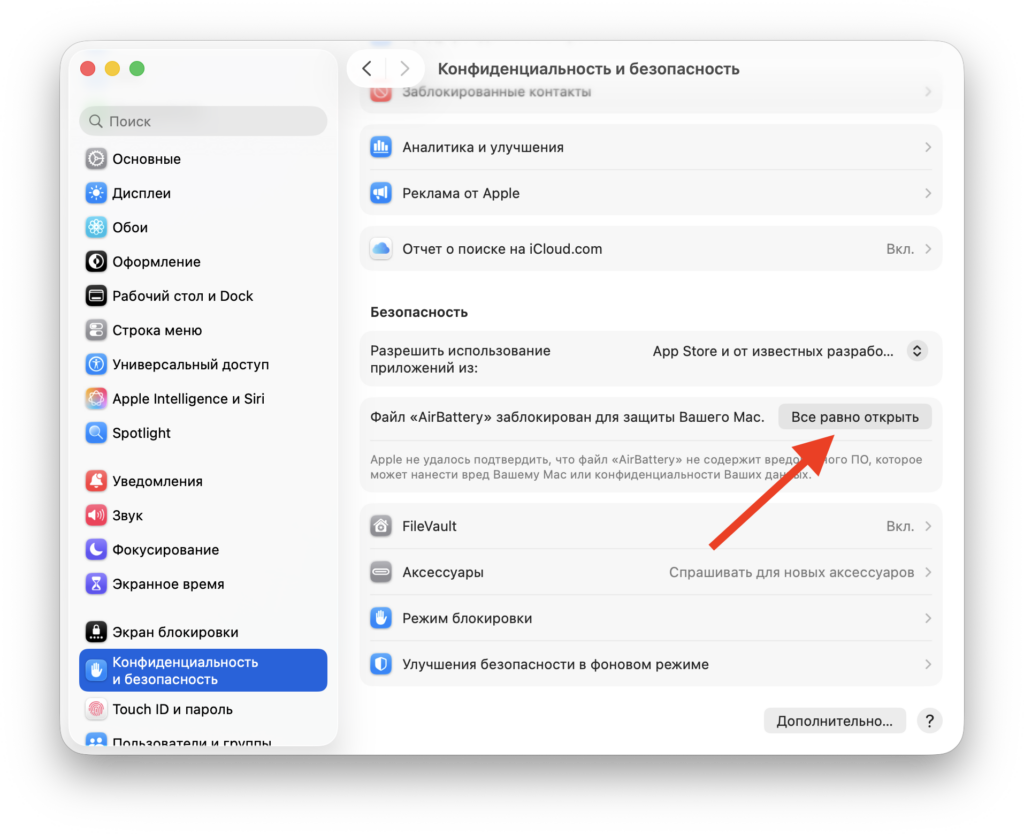
After the first launch, grant permission in settings
I want to specifically mention iPhone and iPad. For them to appear in the list, the phone needs to trust your Mac once. Just connect it with a cable while AirBattery is running, confirm trust, and after that everything syncs over Wi-Fi on the same network.
How AirBattery Works on Mac After Installation
The most interesting part began when I clicked the icon in the menu bar. A neat list unfolded before me with all devices and their battery percentages. MacBook Air at 78 percent, HUAWEI FreeClip at 100, AirPods Pro case at 91, both earbuds at 100, my iPhone at 92, and even my wife’s iPhone at 88 percent. So the app honestly pulls battery levels not only from Apple devices but also from third-party Bluetooth devices, and that’s a pleasant surprise.
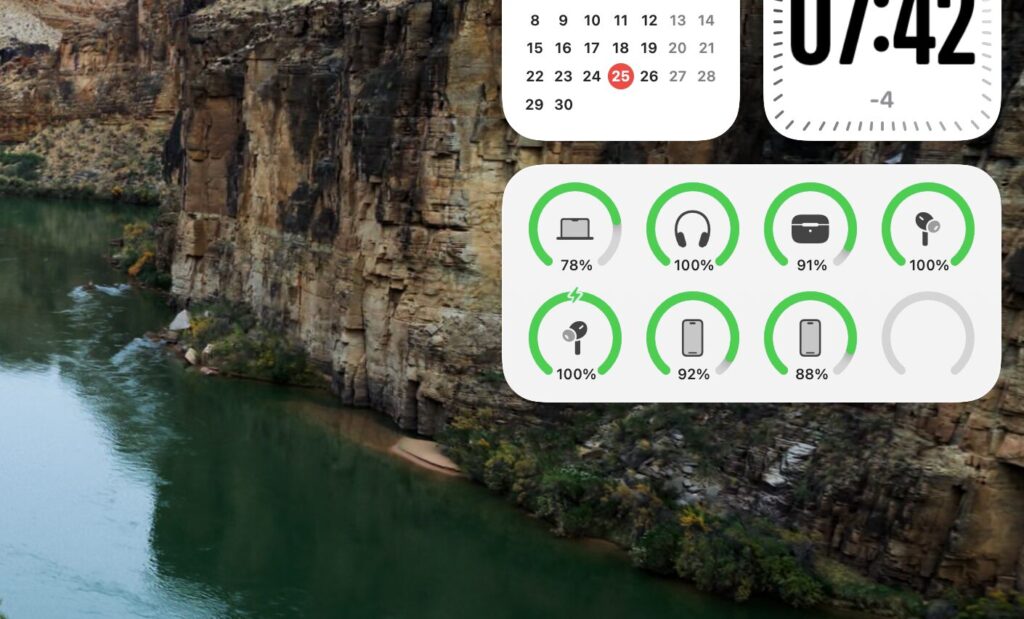
You can create a convenient widget
What especially caught my attention is that connected iPhones specifically appear in the list. Previously, to check my wife’s phone battery, I had to go and pick it up. Now I just open the menu on Mac and see the number. For a family where everyone has Apple devices and everything is on the same network, it’s a small thing, but a nice one.
Besides the menu bar, you can also display battery levels on your desktop. AirBattery has a set of ready-made widgets, including a large variant for up to eight devices and a two-row layout. I placed such a widget next to weather and calendar, and now all the information is right in front of me without a single click. Those who like order in the Dock will appreciate the dynamic icon that shows the battery level right on the app icon.
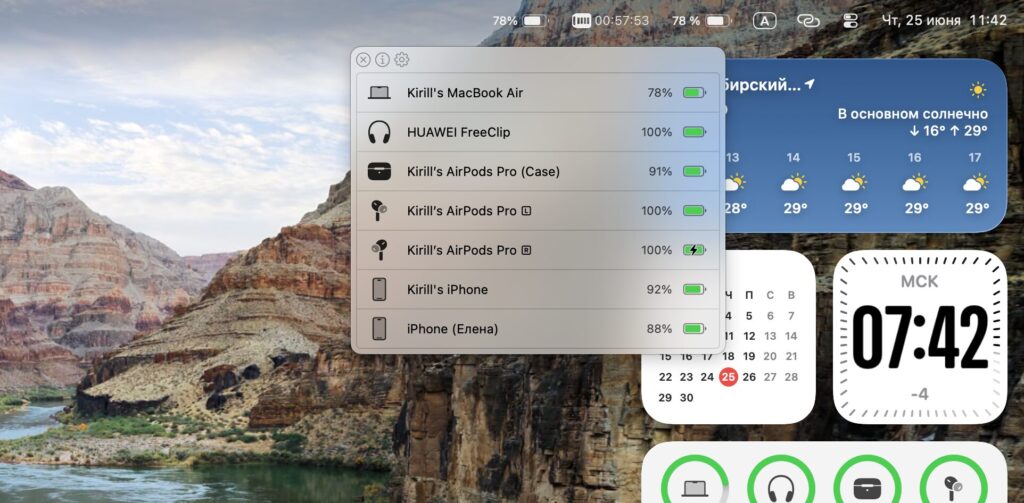
Or you can check the battery in the menu bar
Notifications weren’t forgotten either. For any device, you can set a threshold at which the app will warn you about low battery. Click the bell icon next to the desired gadget, choose a percentage, and AirBattery will remind you that it’s time to put the accessory on the charger. I set up notifications for my headphones and no longer find them dead before a call.
AirBattery for macOS: Is It Worth Installing?
If you have just one MacBook and a pair of AirPods, system tools might be enough. But as soon as you have more devices, AirBattery transforms from a toy into a genuinely useful tool. The app is free and works on macOS 11 and later, uses minimal resources, and doesn’t burden the system with unnecessary features. It solves one task: letting you quickly check the battery level of all your gadgets in one place.
Personally, it became a staple within a couple of days and permanently moved into my menu bar. This is one of those cases where a small utility addresses a tiny but daily pain point, and then you can’t understand how you ever managed without it.