The situation I found myself in a couple of days ago seemed like a dead end. In my hands was an old iPhone with 256 GB of storage, 140 of which were occupied. Ahead was buying a new iPhone 17 Pro Max for my wife, and with it the need to transfer absolutely everything to it: photos, chats, notes, banking apps, and a dozen programs that are no longer available in the App Store. And not a single obvious way to do it. Here’s how I got out of the situation for free without losing a single file.
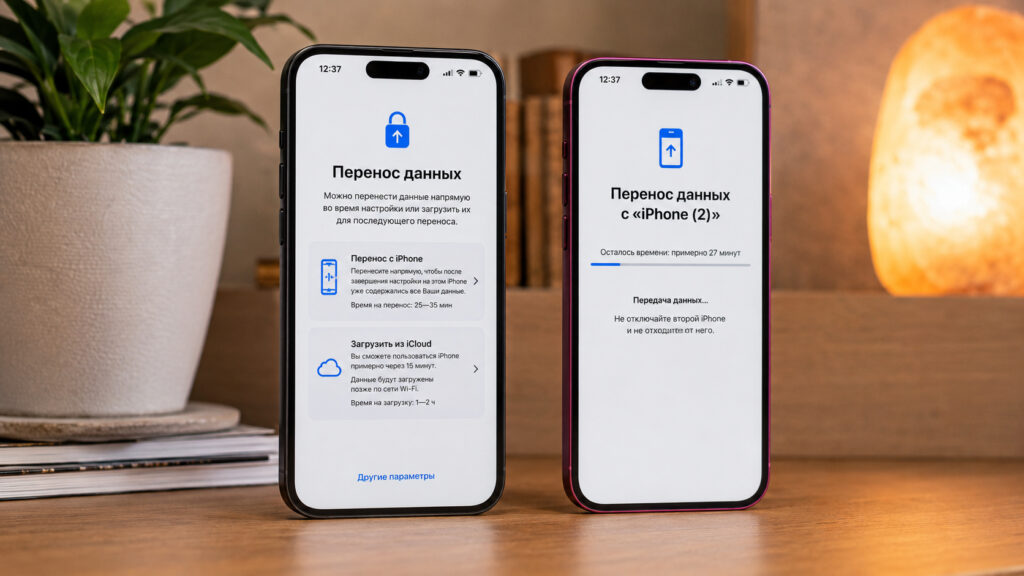
Transferring data from iPhone to iPhone in 2026 only seems complicated. In reality, it’s extremely simple
Free Data Transfer from iPhone via iCloud
First, I went through all the usual options, and each one hit a wall. A backup on the computer was out immediately: my MacBook Air also has 256 GB of storage, and only about 60 were free. There’s physically no way to squeeze a 140 GB backup in there, even if I deleted half my work files.
The second option was to buy more iCloud storage. Here everything came down to the Russian Apple ID: you can’t pay for a subscription with it, and creating a new account just for the migration is a separate quest with the loss of purchases and subscriptions. The method works, but it takes more time than the transfer itself.
That left an external hard drive with a terabyte of space. But it let me down too: for an iPhone backup, the drive needs to be formatted to a compatible file system, and it had 500 GB of data on it that I really didn’t want to lose. There was nowhere to move them — the circle was complete.
And then I remembered a feature that not everyone knows about. Starting with iOS 15, Apple gives unlimited iCloud space to those who are migrating to a new device. This works for everyone: both those who pay for cloud storage and those who only have the free 5 GB. The backup is stored for 21 days, and if needed, the period can be extended for another three weeks.
How to Create a Temporary iPhone Backup
The feature is enabled in literally four taps. Here’s what to do:
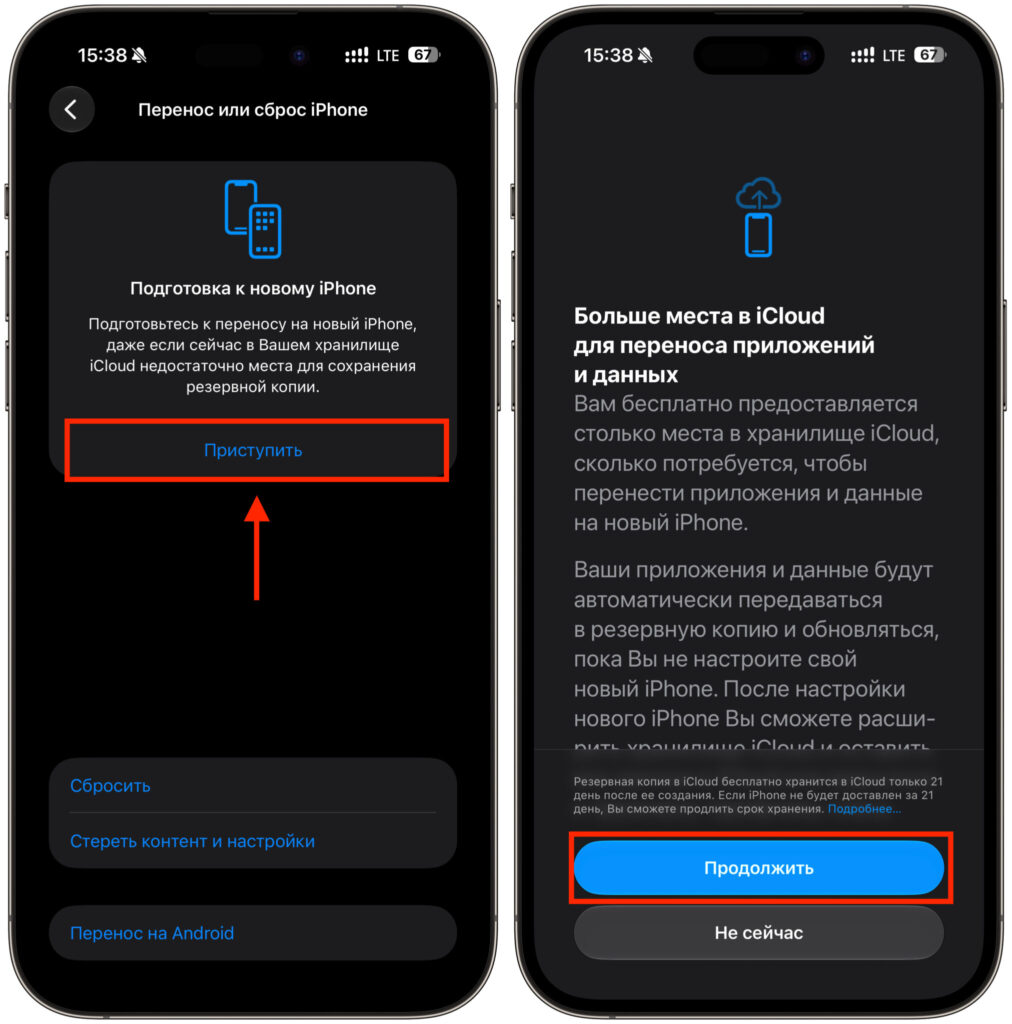
After this, you just need to wait for the full backup to be created
- Open Settings and go to the “General” section.
- Scroll down to “Transfer or Reset iPhone”.
- Select “Get Ready for New iPhone” and tap “Get Started.”
- Tap “Continue” and agree to create a backup.
After that, you can close Settings and go about your business. The copy progress is displayed on the main Settings page, right below your Apple ID — a separate banner with the status appears there. For me, the entire process took about an hour and a half to two hours on home Wi-Fi, and the iPhone was on the charger the whole time.
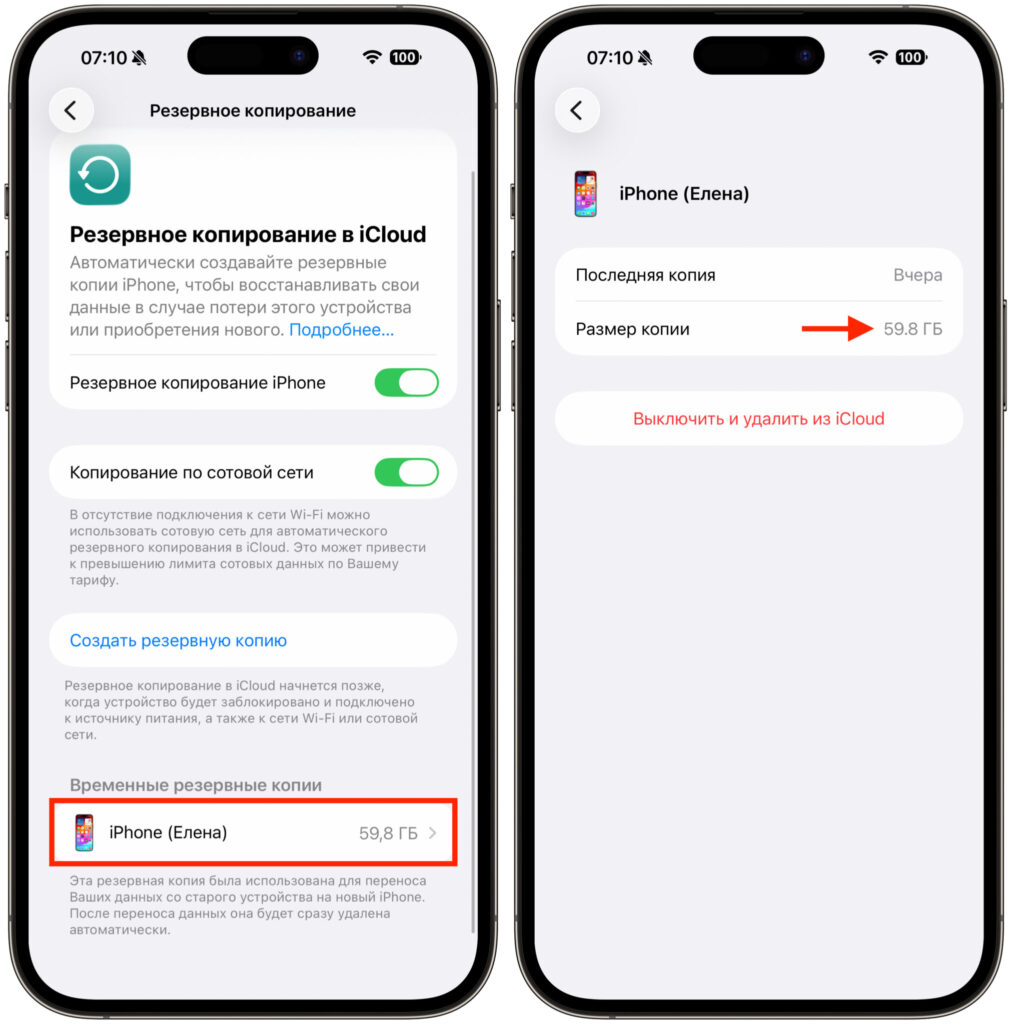
The temporary iCloud backup took just under 60 gigabytes
The most interesting part came at the end. The final backup weighed 59.8 GB instead of the expected 140. You can check the exact size in Settings, in the iCloud backup section. I double-checked this in Apple’s documentation: only app data and purchase history go into the backup, not the apps themselves. After restoration, programs are re-downloaded from the App Store and don’t take up space in the backup — hence the nearly two-and-a-half-times difference.
I also recommend saving a list of what’s installed on the old device in advance. Especially if you have apps that might soon be removed from the App Store — you’ll have to deal with those separately.
How to Update a New iPhone Before Transferring Data
Next, a surprise awaited me. You can only restore from a backup during the activation of the new device, but the iOS version on it turned out to be older than the one on the old iPhone. And data from a newer backup won’t deploy onto an older system.
I went the proven route and connected the new iPhone to my Mac to update it through Finder. That was a mistake. The 11.5 GB firmware took almost an hour to download, and at the end turned out to be corrupted and simply wouldn’t install. I didn’t bother with a second attempt.
The solution turned out to be much simpler: I activated the iPhone as new, connected it to Wi-Fi, and updated the system over the air in ten minutes. The difference from the wired method was enormous. The moral is simple: don’t overcomplicate things — wireless updates today work faster and more reliably.
After the update, the iPhone needs to be reset to get back to the initial setup screen. Follow the familiar path:
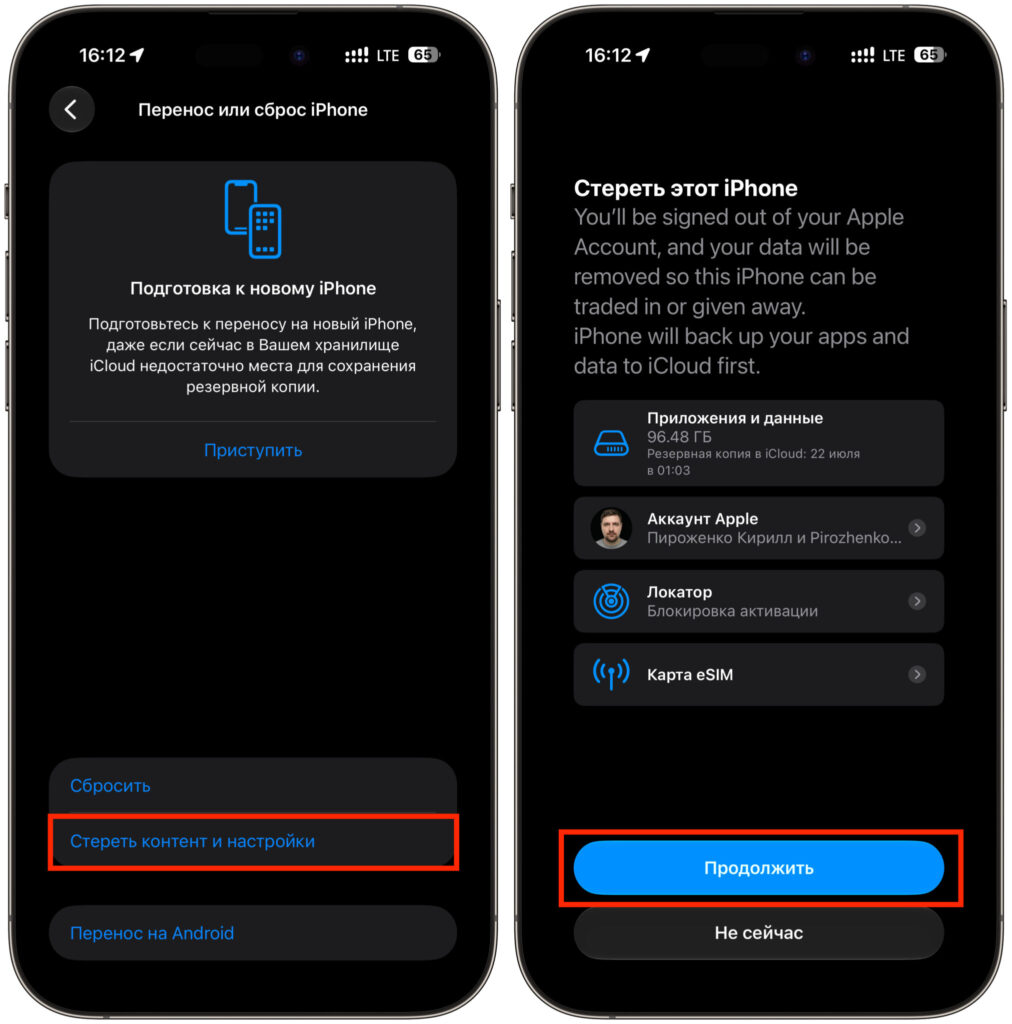
After a successful update, the iPhone will need to be reset
- Go to Settings — General.
- Open “Transfer or Reset iPhone”.
- Tap “Erase All Content and Settings” and confirm the action.
- Wait for the reboot — the device will greet you with a welcome screen, just like out of the box.
Restoring iPhone from iCloud
The restoration itself also fits into a few steps:
- On the welcome screen, proceed to “Transfer Your Apps & Data”.
- Choose the option “From iCloud Backup” and sign in with your Apple ID.
- Select that very temporary backup — it will be marked as the most recent by date.
- Leave the iPhone on the charger and connected to Wi-Fi until the download is fully complete.
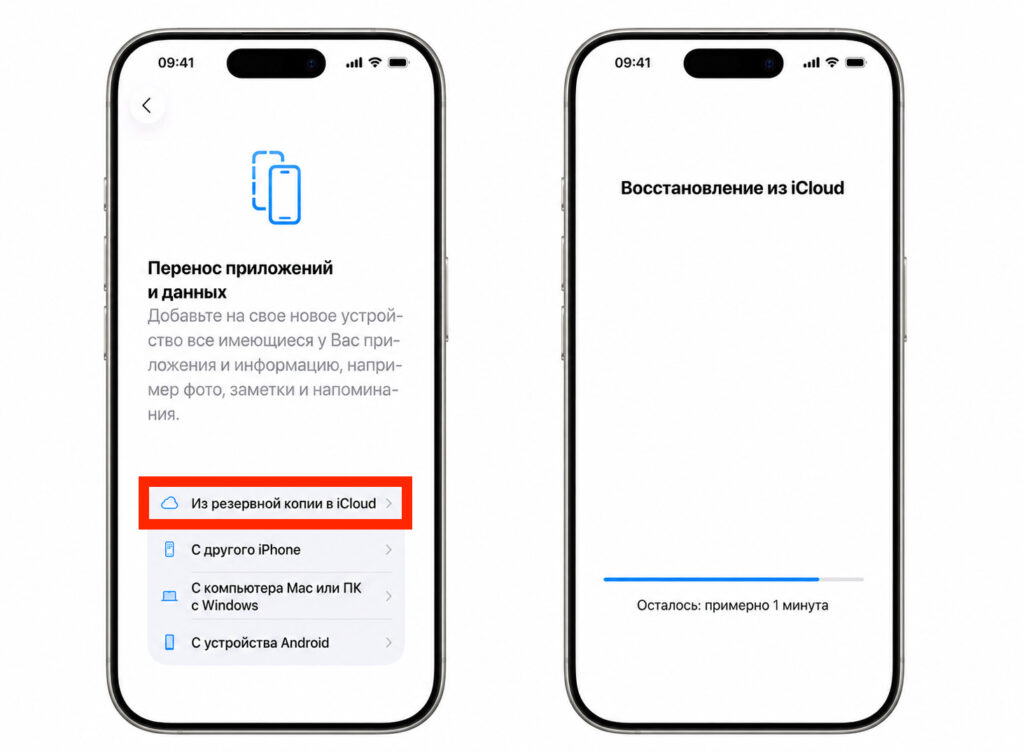
After this, you just need to wait for the full data restoration
The iPhone reached the home screen in about 40 minutes. Technically, the device was already usable: contacts, messages, mail, and settings were all in place.
But the process fully completed much later. Photos, videos, and apps continued downloading for several more hours in the background. App icons appear on the screen immediately but are grayed out with a loading indicator — there’s no point touching them until the progress bar reaches the end. My advice: start the restoration in the evening so that by morning the device is one hundred percent ready.
The only thing that didn’t restore automatically was apps that had been removed from the App Store. Their data was preserved in the backup, icons appeared on the home screen, but the system couldn’t pull the apps themselves because they no longer exist in the store. This was the only moment when I had to use a computer and act manually: I installed them separately, after which all the data was picked up automatically.
The result: 140 GB migrated to the new iPhone for free, without a computer, without purchasing cloud storage, and without formatting an external drive. It took about a day with breaks, but not a single file was lost. If you have a similar task — start with “Get Ready for New iPhone,” it’s the most underrated tool in iOS.