Your Android phone’s camera works out of the box, but the default settings are not always optimal. There are five camera settings worth changing on any new Android device right away — adjustments that genuinely affect how your photos turn out. Below is a practical walkthrough of each setting, why it matters, and how to find it on popular Android brands.
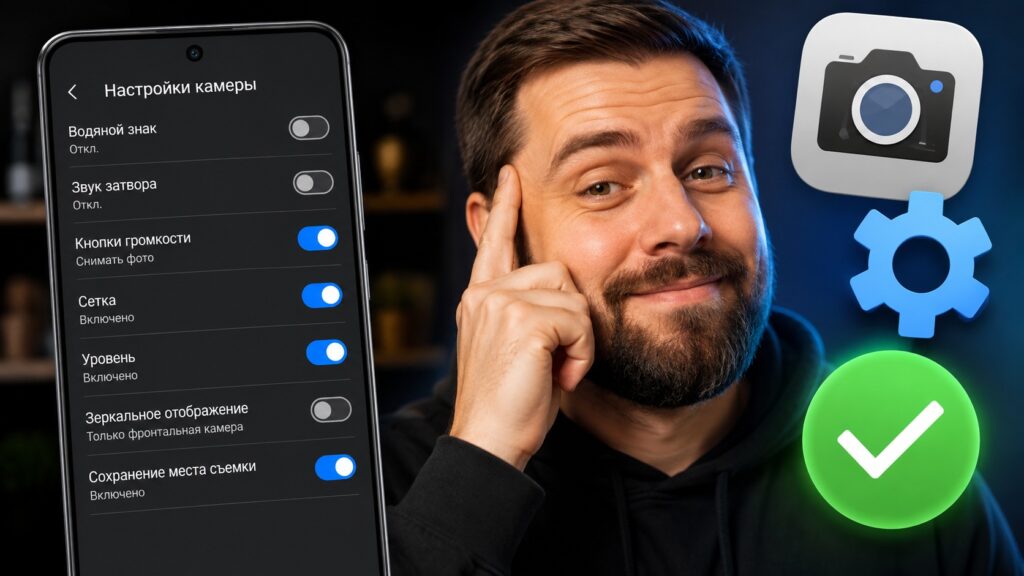
The right camera settings for your smartphone
What you need to know
- Many Android manufacturers enable a branded watermark on photos by default — it becomes part of the image and is very difficult to remove after the fact.
- The volume button can be remapped to act as a physical shutter key, which is especially useful for one-handed, landscape, or gloved shooting.
- Enabling the 3×3 grid overlay and electronic level in the camera app helps avoid tilted horizons and improves composition before you shoot.
- Many phones save selfies in a mirrored orientation by default, which reverses any text visible in the frame.
Turn off the manufacturer watermark
Some manufacturers stamp every photo with a brand logo, model name, or tagline such as “Shot on POCO X8 Pro” or “Shot on Xiaomi 17.” The watermark does not improve the image — it distracts from the composition and effectively turns personal photos into advertising. It looks especially out of place on family snapshots, vacation shots, and images intended for social media.
Crucially, the watermark should be disabled before you start shooting. Once saved, the text becomes part of the image file and is nearly impossible to remove cleanly.
- Open the camera app.
- Tap the settings gear or menu icon.
- Look for “Watermark,” “Camera watermark,” or “Camera signature.”
- Toggle it off.
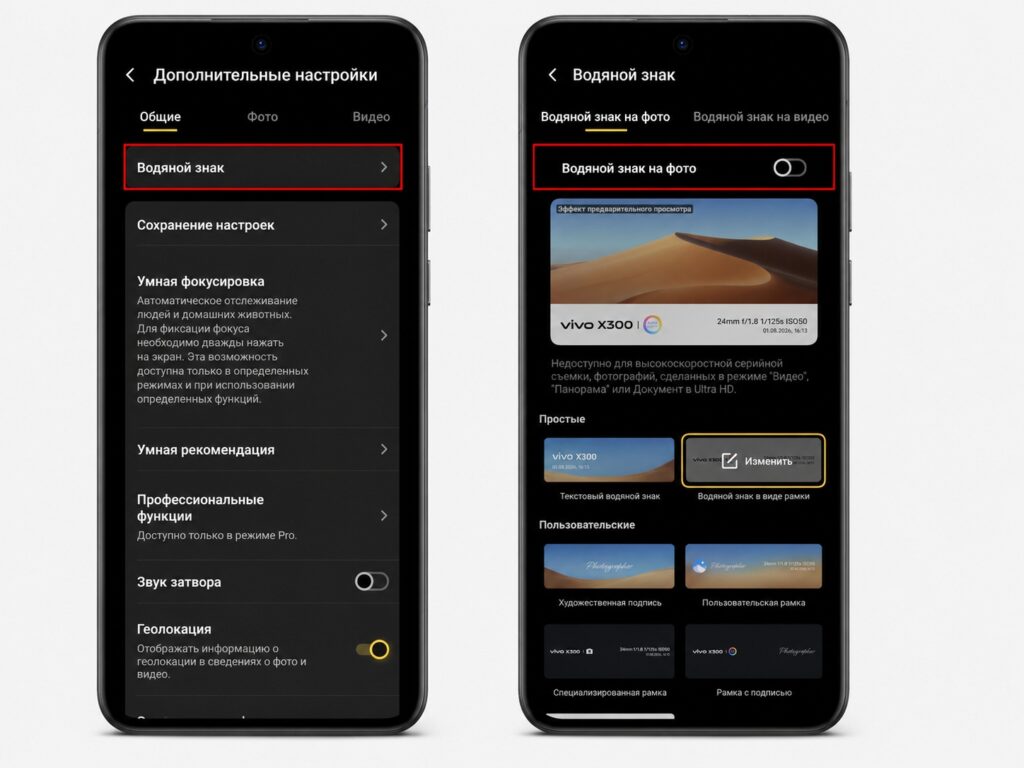
It is best to disable the watermark right away

On Xiaomi and Redmi devices the setting is labeled “Watermark” inside camera settings. On Samsung, look for “Photo tags” or “Add signature.” On Realme it is called “Watermark.” Some phones ship without a watermark at all — meaning the manufacturer already made the right call for you.
Disable the shutter sound
The artificial shutter click was originally designed to signal bystanders that a photo is being taken. In most everyday situations, however, it is simply disruptive:
- Quiet spaces such as libraries, museums, theaters, or cinemas.
- Events where you do not want to draw attention to the fact you are shooting.
- A sleeping child or pet — one click and the moment is lost.
- Restaurants or cafés — fellow diners do not need to hear every frame.
The goal is not covert photography but simply preventing the phone from announcing every tap of the shutter button.
- Quickest method: switch the phone to silent mode. On most Android devices the shutter sound disappears along with other system sounds.
- Camera-only method: open camera settings and look for “Shutter sound” — toggle it off.
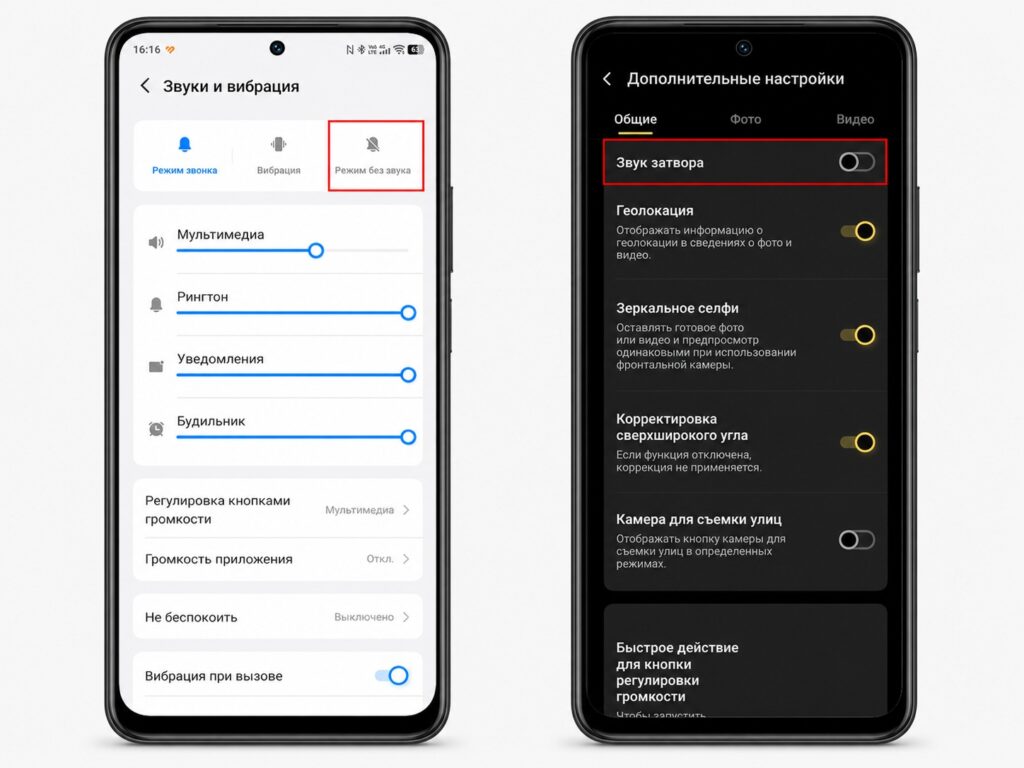
Switch to silent mode or disable the shutter sound in camera settings

Important caveat: on some phones and regional firmware variants, the shutter sound cannot be disabled through settings — this is a legal requirement in certain countries. In those cases, silent mode is the only workaround.
Use the volume button as a shutter key
The on-screen shutter button works well when holding the phone upright with both hands. In many other scenarios, the physical volume button is more practical:
- Landscape shooting — the phone can be held almost like a traditional camera without changing your grip.
- One-handed shooting — no need to stretch a thumb across the screen and risk dropping the device.
- Selfies with the rear camera — hold the phone at arm’s length and press the side button.
- Shooting in gloves — the touchscreen may not respond, but a physical button always does.
- Open camera settings.
- Find “Volume key function” or “Volume button.”
- Select “Shutter” or “Take photo” instead of “Zoom” or “Volume.”
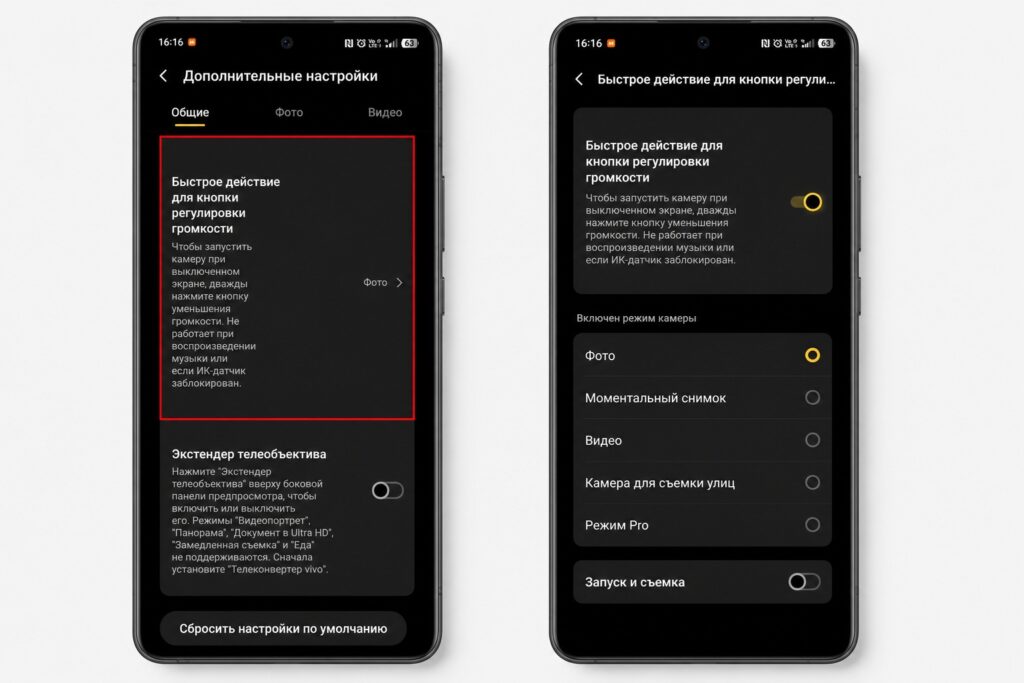
Now you can take a photo by pressing the physical volume button
Tip: press the button gently. A forceful press can jolt the phone and blur the shot, especially in low light.
Enable the grid overlay and electronic level
The grid and level serve the same purpose: they help you compose the frame before pressing the shutter, so you do not have to crop and rotate afterward.

Why the grid helps:
- Keeps the horizon straight in landscapes and architectural shots.
- Prevents the main subject from being pushed awkwardly to the edge of the frame — placing it at an intersection of grid lines rather than dead center generally produces a more interesting composition.
- Discourages placing everything in the exact center, which can make shots look static.
The electronic level is especially useful when shooting buildings, flat-lay food photos, or documents from above — it shows when the phone is tilted even by a few degrees.
- Open camera settings.
- Find “Grid lines,” “Assistive lines,” or “Grid” — enable it. Start with the 3×3 grid.
- In the same section, look for “Level” or “Horizon” — enable it.
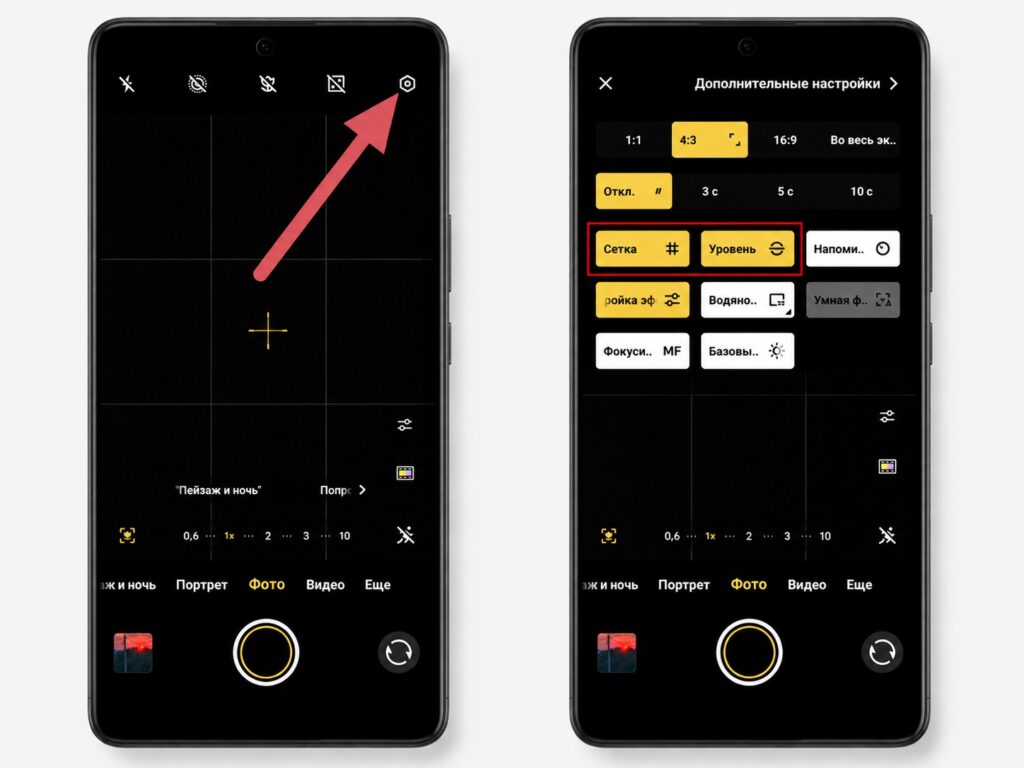
The grid and level help you take straight, well-composed shots without a tilted horizon
These are not professional tools — they are simple visual guides that reduce the number of ruined shots.

Turn off mirrored selfie saving
When using the front camera, the live preview is shown as a mirror image — the way you see yourself every day. However, many phones also save the final photo in that mirrored orientation by default. The problem becomes obvious whenever text appears in the frame: a shirt logo, a sign behind you, or a door number will all be reversed.
A non-mirrored selfie may look unfamiliar at first, but that is only because we are used to seeing ourselves in mirrors. In reality, the un-mirrored version is how other people see you and how the camera faithfully records the scene.
- Open camera settings.
- Go to the front camera or “Selfie” section.
- Find “Save as mirrored,” “Mirror front camera,” or “Mirror selfie.”
- Toggle it off.
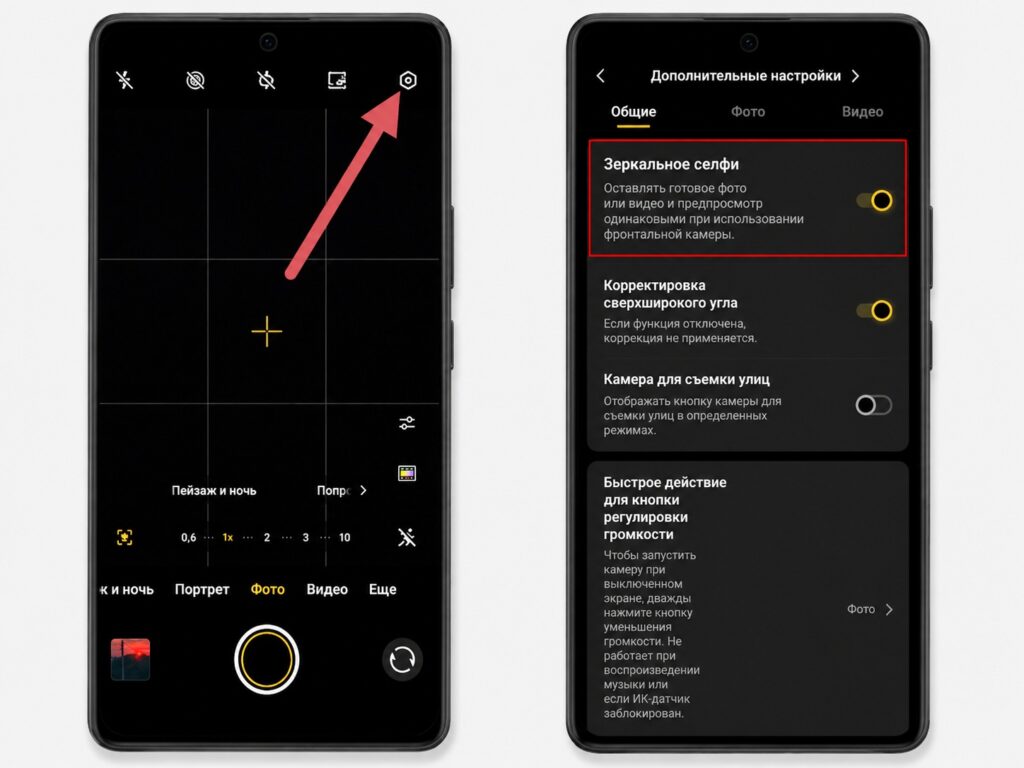
Disable mirrored selfie saving for more natural-looking photos
On Xiaomi the setting is labeled “Mirror photo” in the front camera settings. On Samsung, look for “Save selfies as previewed.” On Realme it is simply called “Mirror.”
Note: The exact wording and location of these settings vary by manufacturer, Android version, and camera app. If you cannot find a particular option, check both the in-app camera settings and the phone’s main Settings menu under the camera section.