If you scan documents on an iPhone using Notes, two other built-in apps can save you steps: Preview and Files. According to the source author, both use the same iOS document scanner as Notes but save the result directly as a standalone PDF. Notes, by contrast, keeps the scan as an attachment inside a note. Preview places the scan button on its main screen and suits documents you need to send right away. Files saves the scan into whichever folder you have open, which makes it better for building an organized archive.
What you need to know
- The scanner is the same in Notes, Preview and Files. It detects page edges, corrects perspective and removes shadows.
- Preview, which arrived on iPhone with iOS 26, has a Scan Documents button on its main screen. Scans open immediately as PDF files, and a copy is saved to iCloud Drive.
- Files has offered a scanner since iOS 13. It is hidden behind the three-dot menu and saves the PDF into the currently open folder.
- The scanner offers color, grayscale, black-and-white and photo filters. The source recommends black-and-white for printed text.
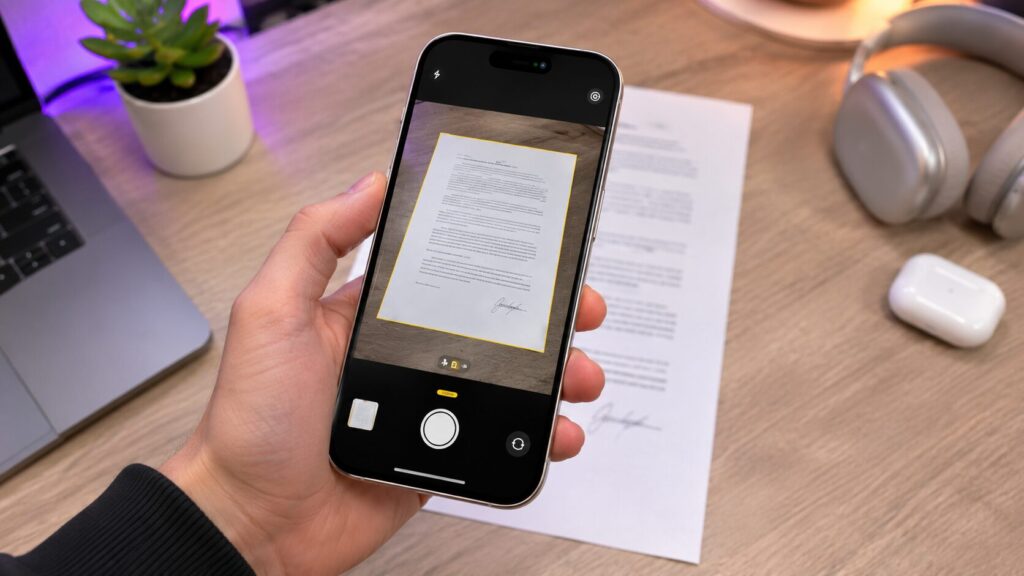
A person holds an iPhone over a sheet of paper while the scanner outlines the document edges with a yellow frame
Why Notes is not the most convenient option
The scanning engine in iOS is the same wherever you open it. It finds the edges of the page, straightens the perspective and removes shadows, so the source finds no fault with the image quality. The problem with Notes, the source argues, is what happens after the scan.
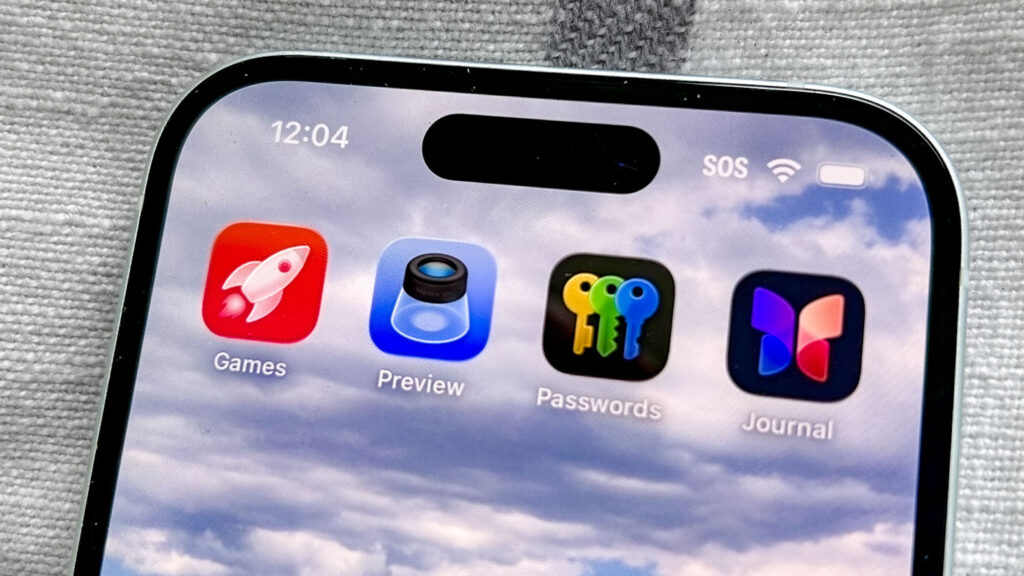
The Preview app icon on an iPhone home screen next to the Games, Passwords and Journal apps
In Notes, the process takes several steps:
- Create a new note.
- Find the scanner in the attachments menu.
- Capture the pages and save them.
The finished scan is not a separate file. It stays as an attachment inside the note. To send it by email or through a messaging app, you have to open the note, tap the scan and then tap Share.
Each scan also leaves an otherwise empty note containing a single image. The source notes that after a handful of documents, the notes list becomes cluttered and hard to search. This becomes a real annoyance for anyone who scans documents often.
Method 1: Scan from the main screen of Preview
Preview came to the iPhone with iOS 26. The source says many users still think of it as just a PDF reader. Its scan button sits on the app’s main screen, directly below New Document. In the source’s view, that placement alone makes the app worth keeping on your first home screen.
- Open the Preview app. If you cannot find it, swipe down on the home screen and type its name into Search.
- Tap Scan Documents.
- Point the camera at the page. Wait for the scanner to capture it automatically, or tap the white shutter button.
- Move on to the next page. All pages are combined into one file.
- Tap Save in the lower-right corner.
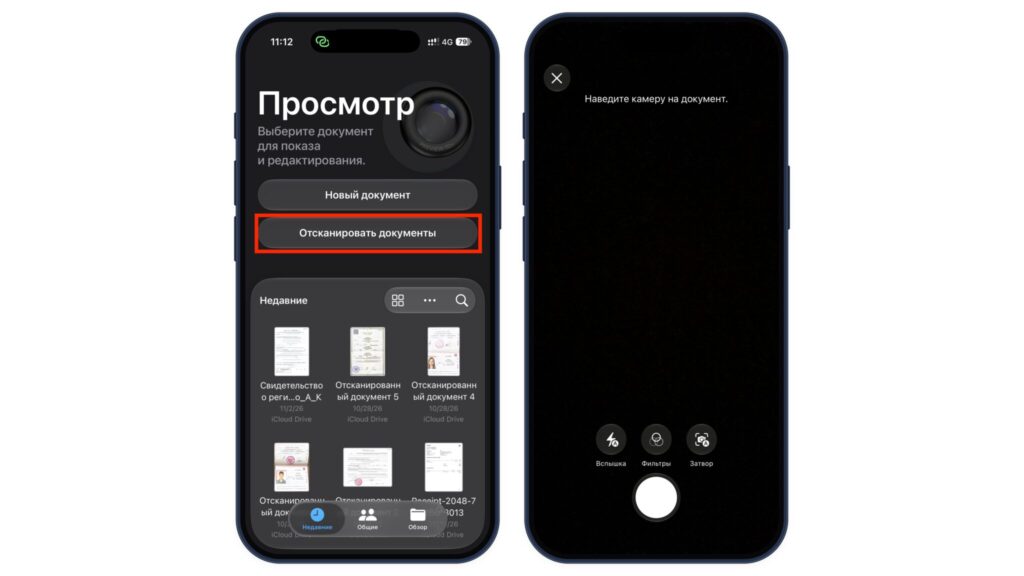
The Preview app main screen with the Scan Documents button, and the open scanner with Flash, Filters and Shutter buttons
After you save, the scan opens immediately as a finished PDF file. A copy is stored in iCloud Drive and appears under Recents on Preview’s main screen. From there, you can mark up the document, sign it or send it via Share. No intermediate note or attachment is involved.
Flash, shutter and filter settings
Three buttons sit above the shutter.
- Flash and shutter: Both are set to automatic by default. If the scanner will not capture a page on its own, switch the shutter to manual.
- Filters: The options are color, grayscale, black-and-white and a regular photo. The source author suggests keeping color for a passport or a document with a stamp. For printed text, the author recommends black-and-white, which produces the cleanest and smallest file.
Rename scans right away
By default, scans receive generic numbered names along the lines of “Scanned Document 4” and “Scanned Document 5.” The source recommends renaming each file immediately by pressing and holding it in Recents. That makes a specific document much easier to find later.
Method 2: Scan straight into a folder with Files
The second method works in almost the same way. It is more convenient when a document needs to go into a specific location. According to the source, the Files app has had a scanner since iOS 13, but few people think to look for it there. The scan is saved to whichever folder is currently open, so choose the folder first and then start the camera.
- Open Files and go to the Browse tab.
- Navigate to the folder you want, either in iCloud Drive or On My iPhone.
- Tap the three dots in the upper-right corner.
- Select Scan Documents.
- Capture the pages and tap Save.
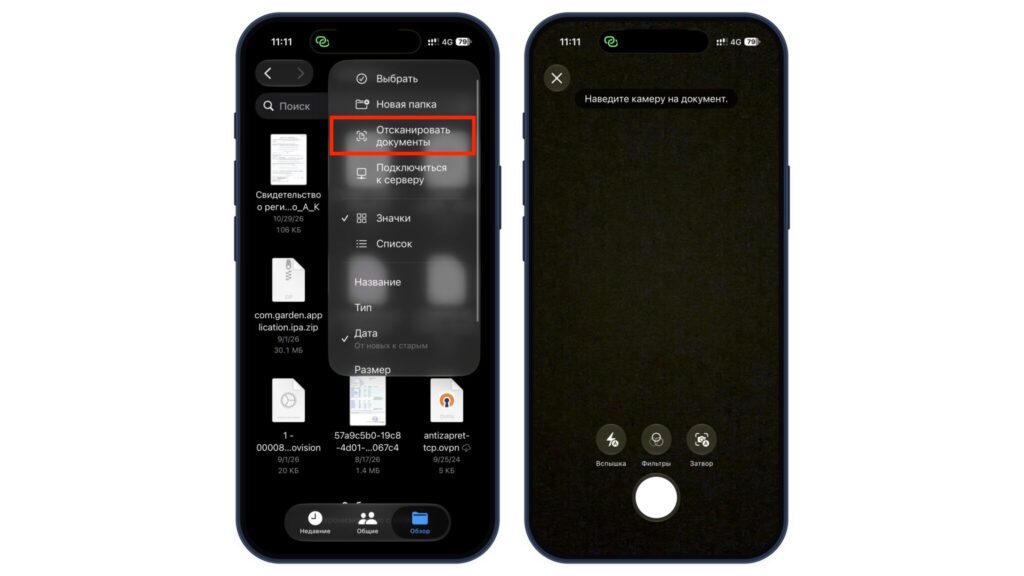
The three-dot menu in the Files app with the Scan Documents option, and the scanner prompting the user to point the camera at the document
The scanner is the same one, with the same filters, flash and automatic shutter. The finished PDF lands in the folder alongside your other documents. To send it, press and hold the file and choose Share. According to the source, if the folder is in iCloud Drive, the same scan will also appear on your Mac and iPad within about a minute.
The source suggests creating a dedicated folder in Files for family documents, such as certificates, insurance policies and contracts. Scanning directly into that folder is faster than moving files around afterward.
Which method to use
Both apps do essentially the same job. According to the source, the right choice depends on what you plan to do with the scan.
- Preview, for documents you need right now: for example, a passport copy for a bank or a signed form for HR. The button is on the first screen, the file is ready to send immediately, and you can add a signature on the spot.
- Files, for building an archive: this works best when you scan a batch of documents on one topic. You decide which folder each scan goes into, so you spend no time sorting later.
- Notes, for scans that need text: the source author would keep Notes for cases where a scan needs a written comment, such as a record of who it was sent to and when.
Tips for better scans
The source offers two practical tips:
- Place the page on a dark surface. This helps the scanner detect the edges more accurately.
- Avoid scanning under a lamp that creates glare on glossy paper.
The source also notes that a phone holder mounted above the desk can make frequent scanning easier.