You’ve probably caught someone glancing at your screen at least once on the subway or bus while scrolling through messages or entering a password. Unpleasant feeling, right? Many people buy special anti-spy screen protectors that darken the screen at an angle. But few people know that the iPhone itself already has a built-in feature that works on a similar principle. It can be activated with literally a triple press of one button.
You can protect your screen from prying eyes without any screen protectors
Reduce White Point on iPhone: What Is It
The “Reduce White Point” feature appeared in iOS back in version 7.1 and is hidden in the Accessibility section. Apple originally created it for people with increased sensitivity to bright light. The idea is simple: it reduces the intensity of the brightest colors on the screen, making the image noticeably darker.
This is not the same as simply reducing brightness through the Control Center. The brightness slider adjusts the display backlight, while Reduce White Point works differently — it reduces the brightness of specifically white and light shades. If you combine both settings, the screen becomes so dark that reading anything at an angle becomes impossible. This is exactly what creates the anti-spy screen protector effect.
How to Reduce iPhone Screen Brightness Below Minimum
Before assigning the feature to a shortcut, you need to configure it properly. This can be done in a couple of minutes.
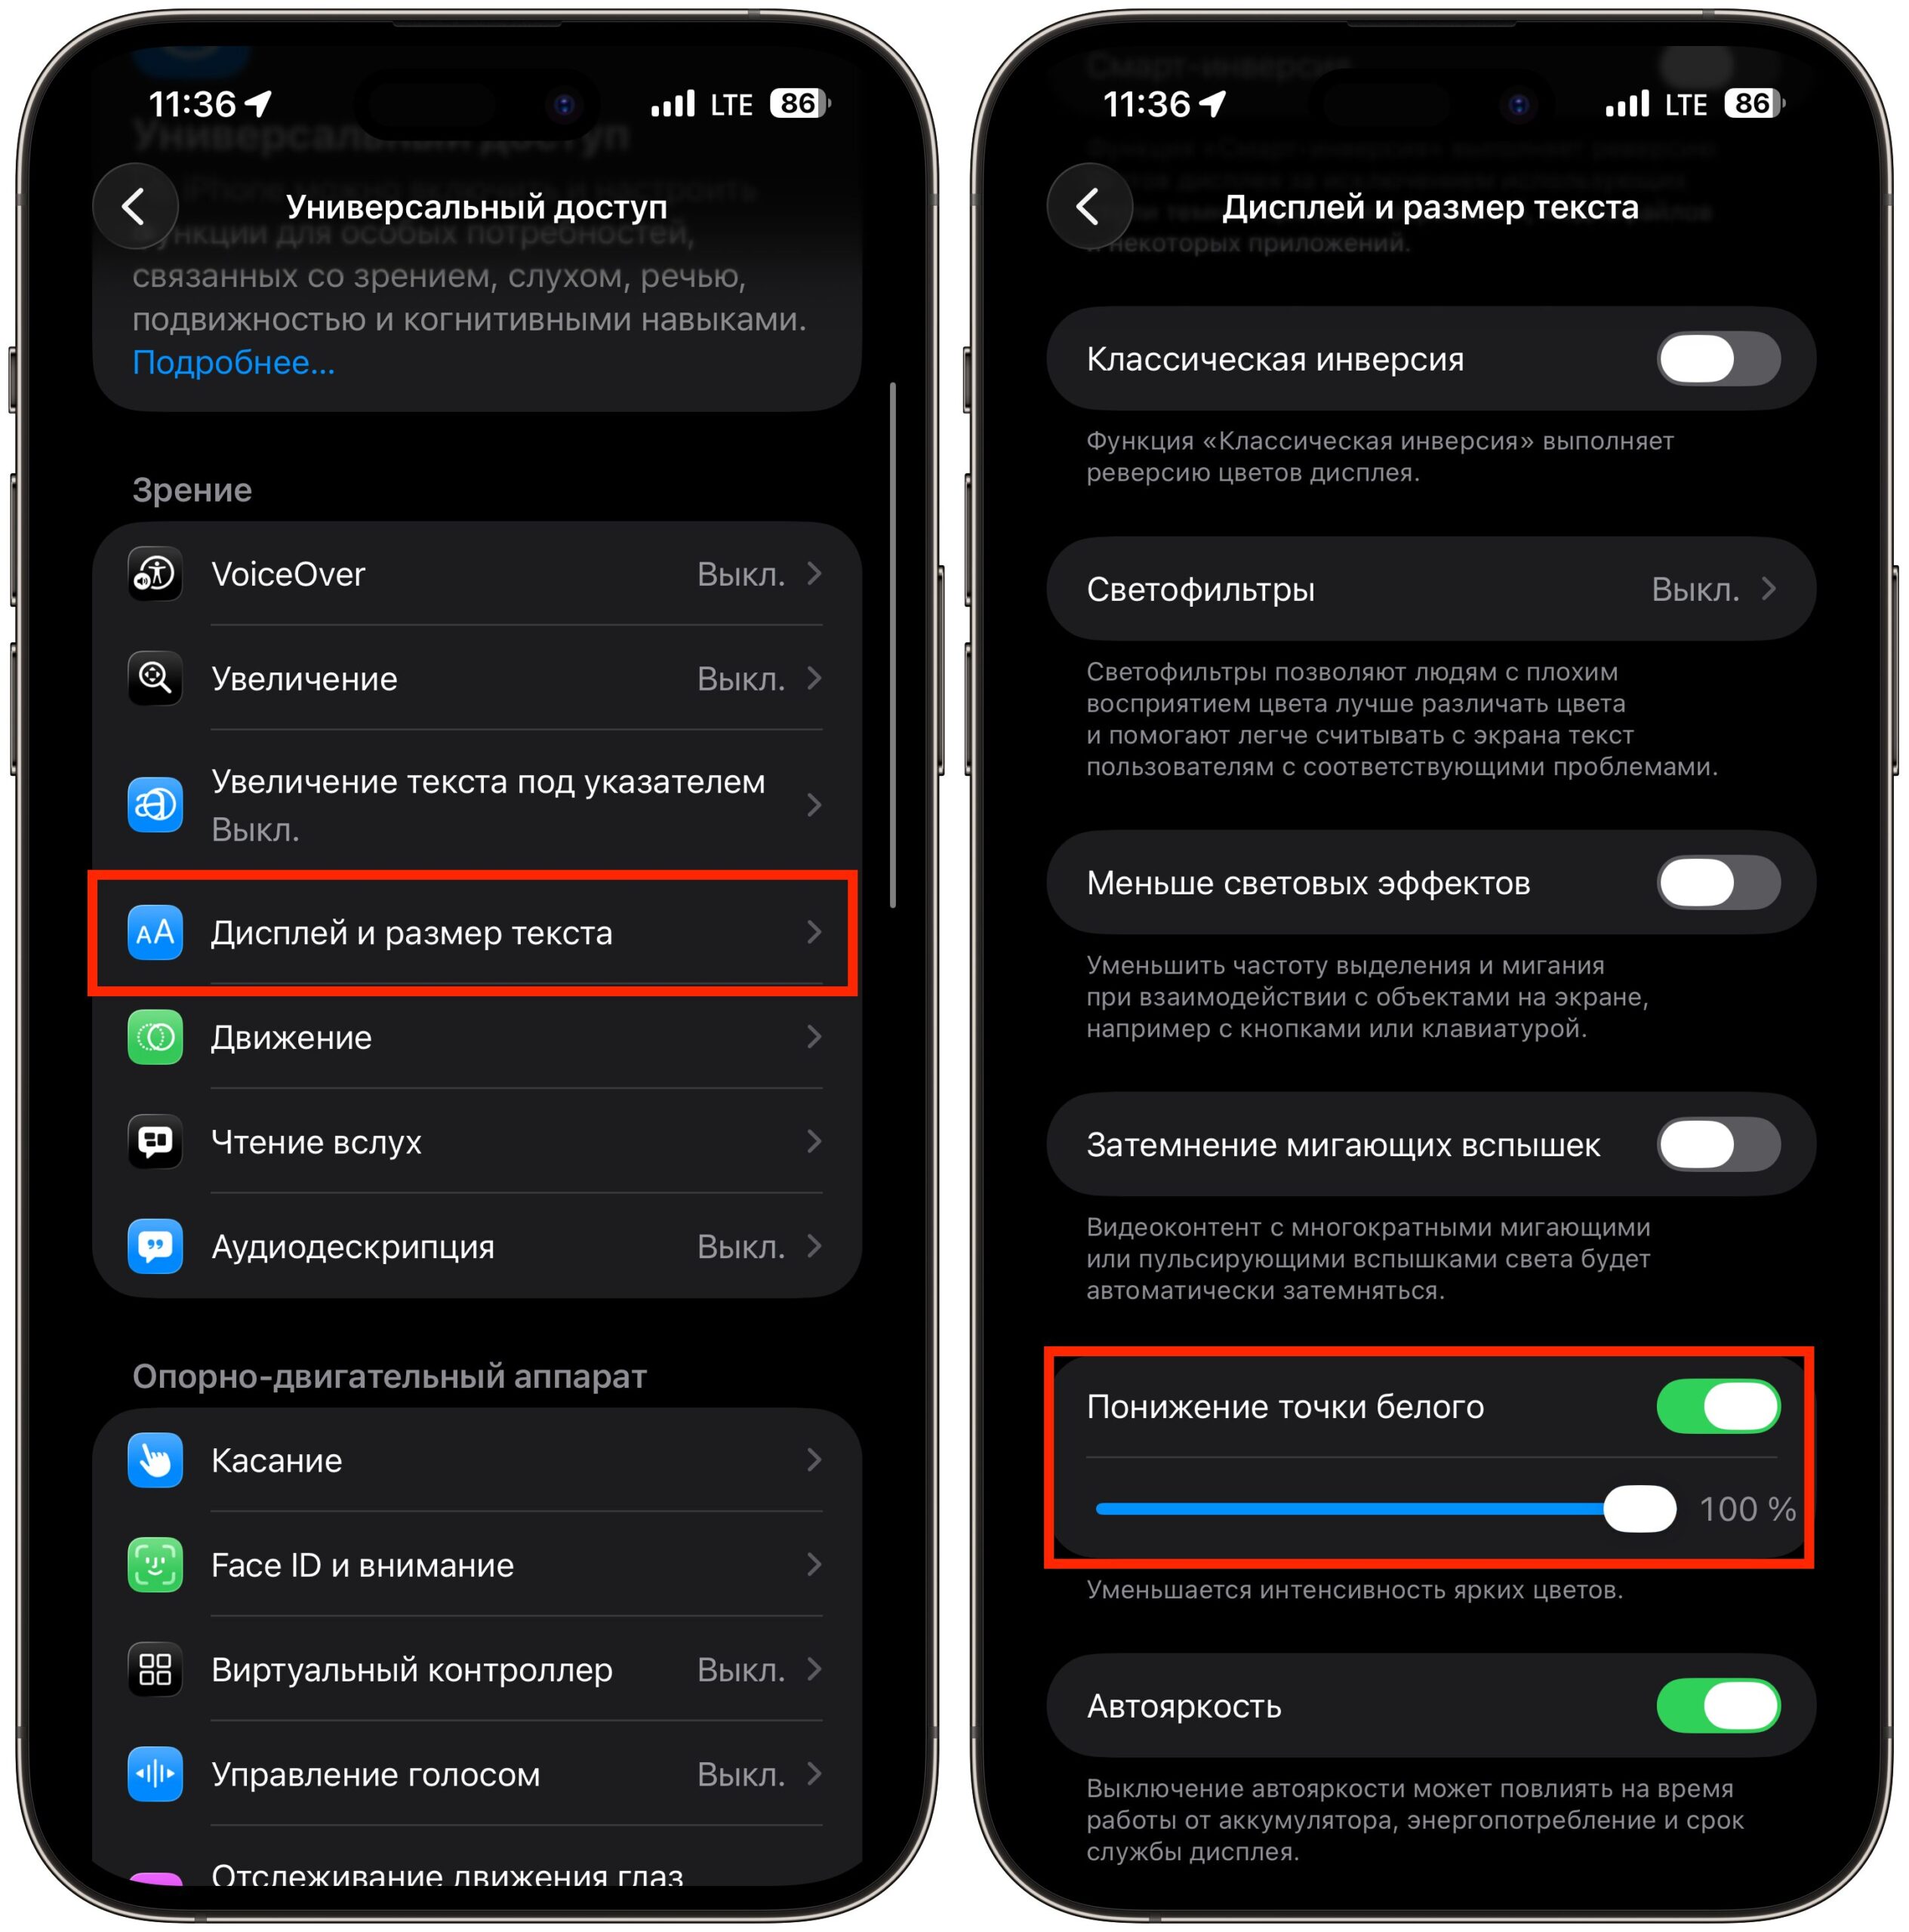
First set the slider to 100%
- Open “Settings” on your iPhone.
- Go to the “Accessibility” section.
- Select “Display & Text Size”.
- Scroll down and find the “Reduce White Point” toggle.
- Turn it on and drag the slider to 100% — this is the maximum dimming.
- Make sure the screen has become noticeably darker, then turn the toggle back off.
Why turn it on and immediately off? It’s simple: you need to make sure the slider is set to maximum. The feature itself will be launched not through settings, but via a shortcut — this is much more convenient.
How to Activate Reduce White Point with the Lock Button
Now for the most interesting part. iPhone allows you to assign any Accessibility feature to a triple press of the side button (or the Home button on older models). This is exactly how we’ll turn Reduce White Point into an instant anti-spy mode.
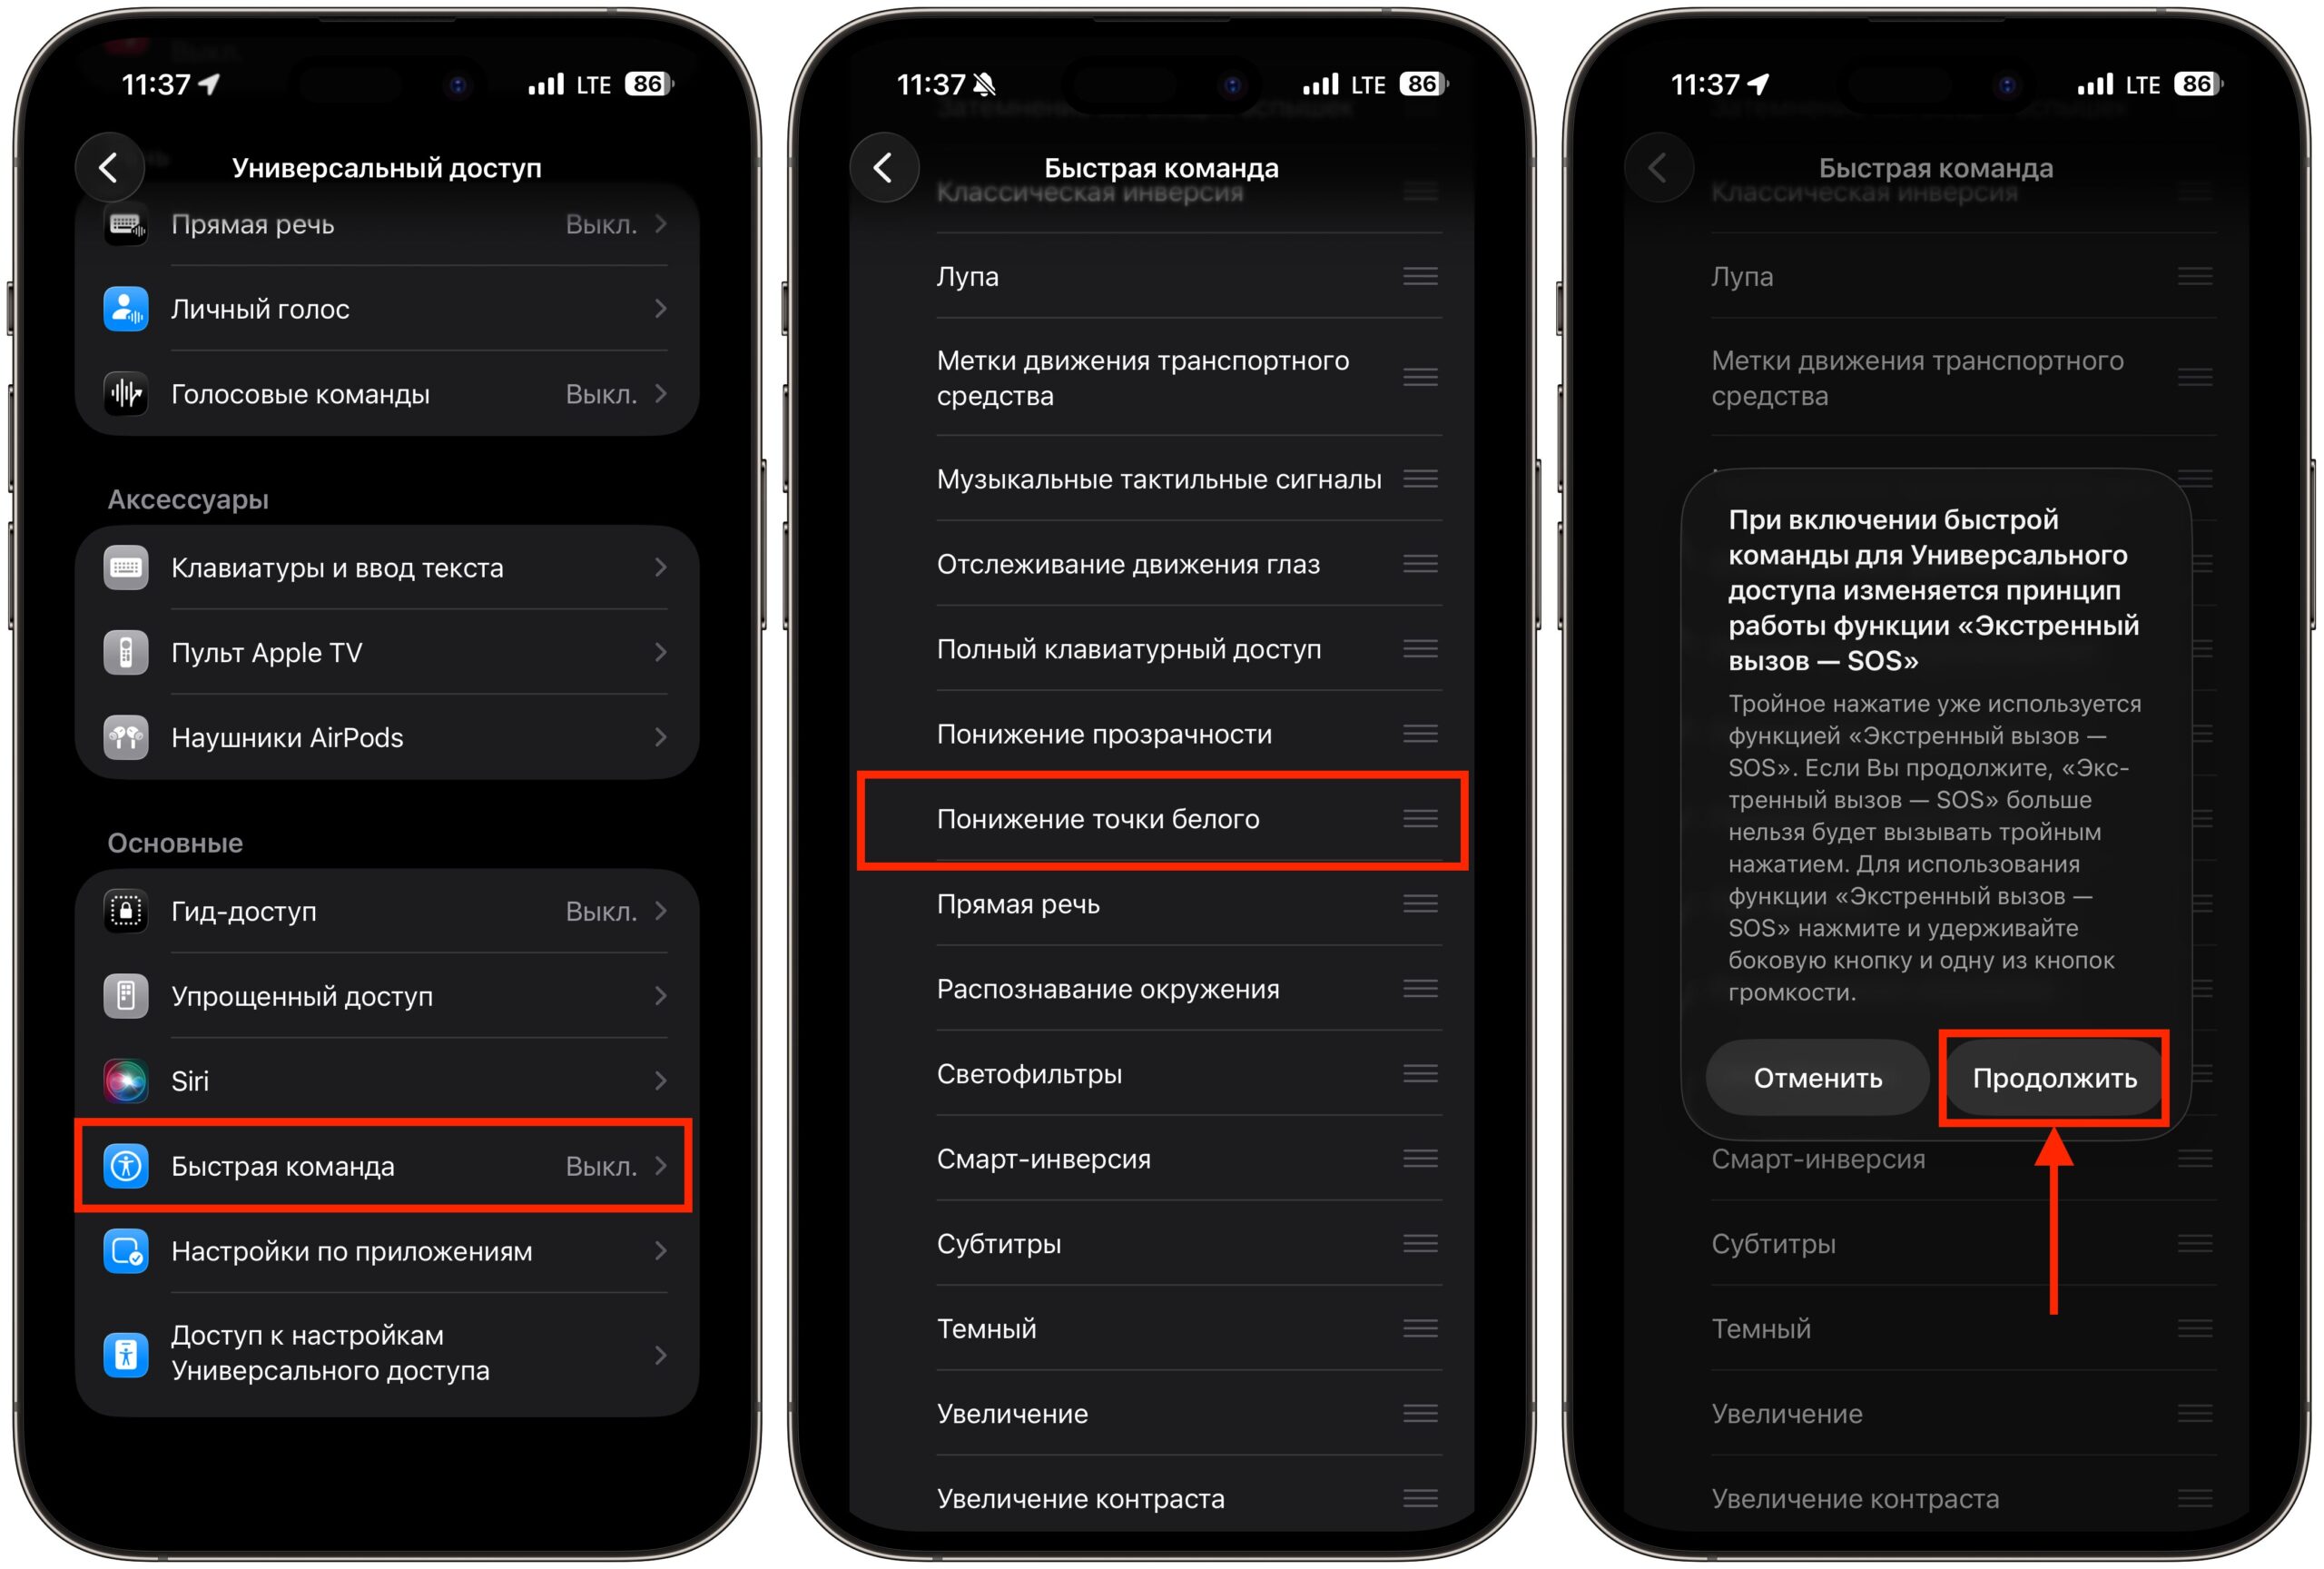
Binding to the lock button allows you to quickly launch the feature
- Go back to the “Accessibility” section in Settings.
- Scroll all the way down to the “General” block.
- Tap on “Accessibility Shortcut”.
- Check only “Reduce White Point”.
Important note: if you leave checkmarks next to multiple features, a selection menu will appear on triple press. This slows down the process. It’s better to leave only one checkmark so the dimming activates instantly.
Done. Now a triple press of the side button instantly dims the screen. Another triple press returns brightness to its normal state. Quick, simple, and without any extra steps.
After activation, the iPhone screen becomes so dark that it’s virtually impossible to see anything on it at an angle. Your neighbor on the subway will only see a dark rectangle, while you can comfortably read messages right in front of you.
Of course, this is not a full replacement for an anti-spy screen protector. A special film physically blocks light at an angle and works at any brightness level. The software dimming simply reduces the overall brightness of white tones. But in most everyday situations — on public transport, in a queue, at work — the effect is quite impressive. Especially if you don’t want to compromise image quality with a permanently applied privacy screen protector.
When iPhone Screen Dimming Comes in Handy
Beyond protecting from curious eyes, Reduce White Point is useful in other situations as well. Here are a few examples when you’ll thank yourself for setting up the shortcut.
- Reading before bed. Even the minimum screen brightness in complete darkness can strain your eyes. Reduce White Point lowers brightness even below the minimum, making the screen as comfortable as possible for reading in bed.
- Using your phone in a movie theater. If you absolutely need to check a notification during a screening, a dimmed screen won’t blind the people around you. Yes, it’s better not to take it out of your pocket at all, but life is life.
- Working in a dark environment. Photographers, videographers, and anyone who works in low-light conditions will appreciate the ability to quickly dim the screen so it doesn’t interfere with their workflow.
- Entering passwords and banking details. When you’re entering a PIN or password in a crowded place, a dimmed screen adds an extra layer of privacy.
Additional Ways to Protect Your iPhone Screen from Prying Eyes
If you need maximum privacy, Reduce White Point alone may not be enough. Here’s what else you can do.
- Enable Dark Mode. Go to “Settings” — “Display & Brightness” and select the dark appearance. Combined with Reduce White Point, this produces an amazing effect — the screen becomes practically unreadable at an angle.
- Reduce brightness manually. Lower the brightness slider in the Control Center to minimum before activating the dimming. Two levels of brightness reduction work better than one.
- Use the “Attention” feature. In Face ID settings, there’s a “Require Attention for Face ID” option. It ensures that the iPhone can only be unlocked when looking directly at the screen.
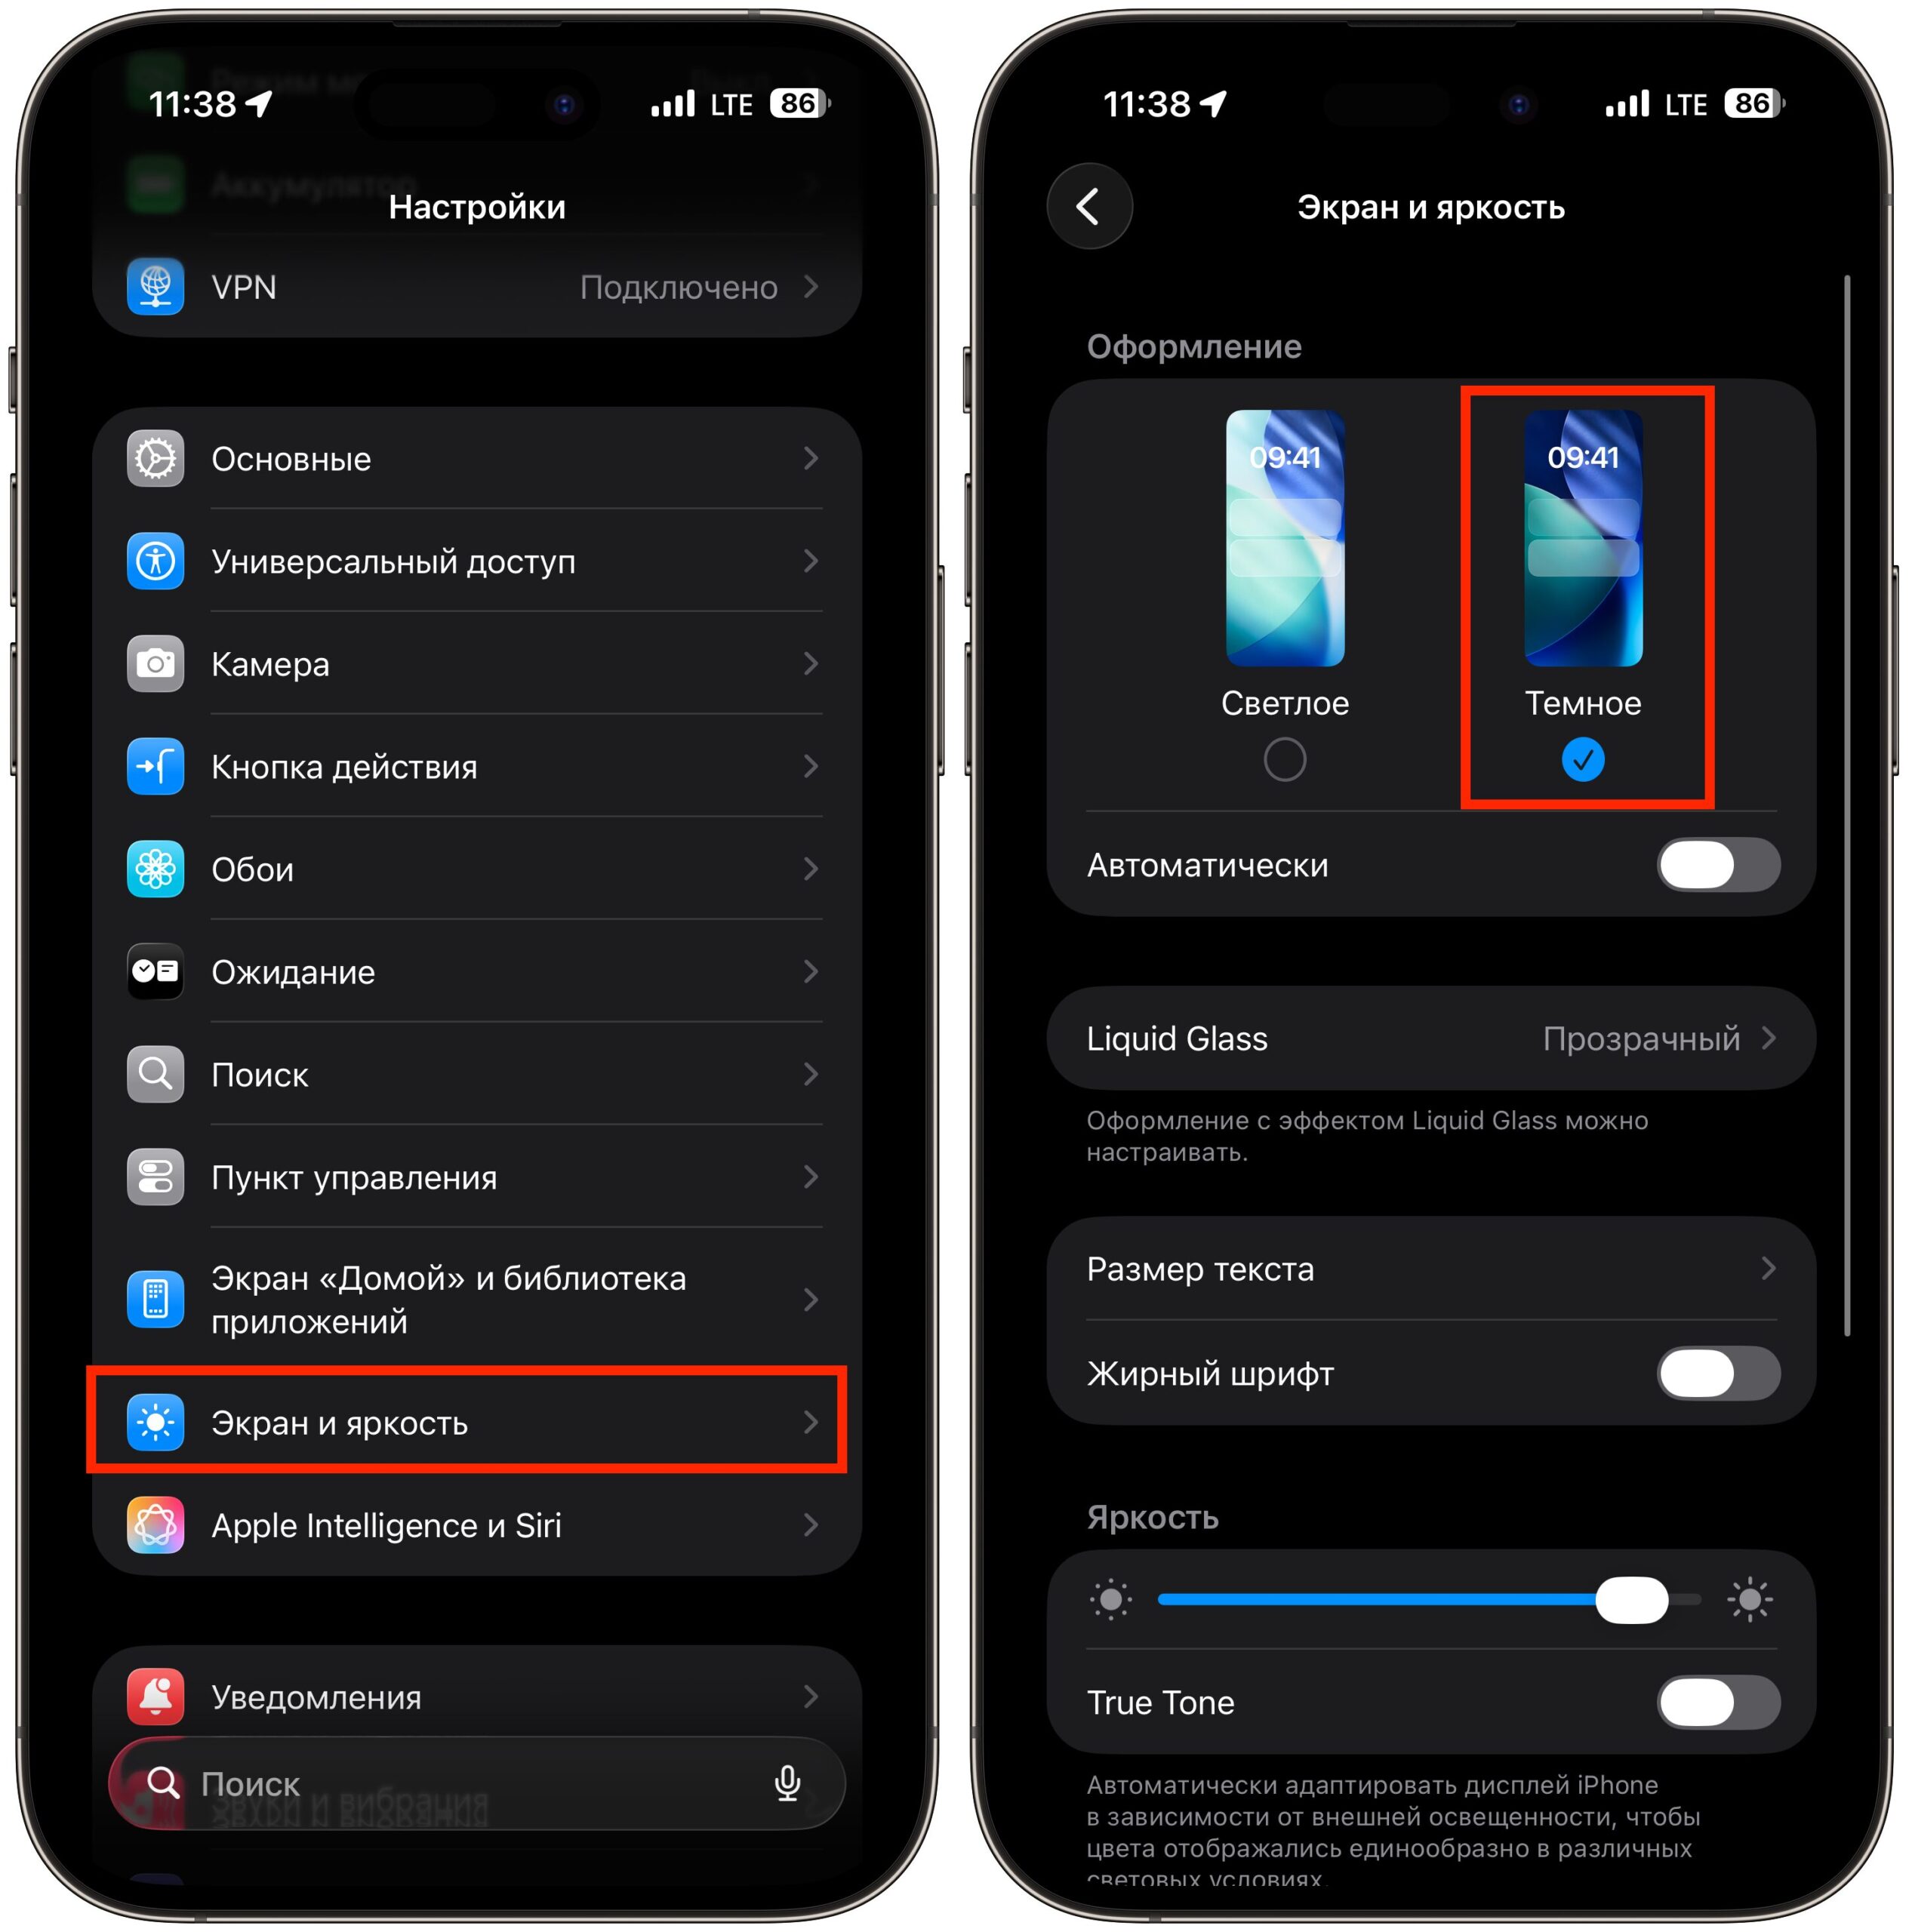
Dark mode will make Reduce White Point even more effective

Make sure to disable notification previews without unlocking the iPhone