A checklist of nine iOS security settings recently circulated on social media, promising to make a stolen iPhone far harder to resell, reflash, or break into. The claims are bold, but the underlying features are standard iOS options — no magic involved. According to the source, spending just a couple of minutes enabling all nine can meaningfully harden your device against common theft scenarios. Here is what each setting does, why it matters, and how to turn it on.
What you need to know
- Stolen Device Protection (available since iOS 17.3) is described as the single most important setting — it blocks Apple ID changes, Find My deactivation, and factory resets without Face ID, even if the thief has the unlocked screen.
- Disabling Control Center access from the lock screen prevents a thief from instantly enabling Airplane Mode and cutting the phone off from Find My.
- iOS can block USB data accessories after one hour of being locked, countering passcode-brute-force hardware tools while still allowing charging.
- Setting a SIM PIN stops someone from moving your physical SIM to another phone to intercept SMS verification codes.
Protecting your iPhone against theft with built-in iOS settings
1. Stolen Device Protection blocks Apple ID changes
This is the most critical item on the list and has been available since iOS 17.3. When the iPhone detects it is away from familiar locations, the system blocks the most dangerous actions: changing the Apple ID password, disabling Find My, and performing a factory reset. To carry out any of these, the phone demands Face ID authentication, and some operations add an additional one-hour delay. A thief holding an unlocked phone still hits a wall at Face ID.
The source recommends setting this to “Always” rather than “Away from Familiar Locations,” so the protection applies even at home — where a thief could also potentially be present.
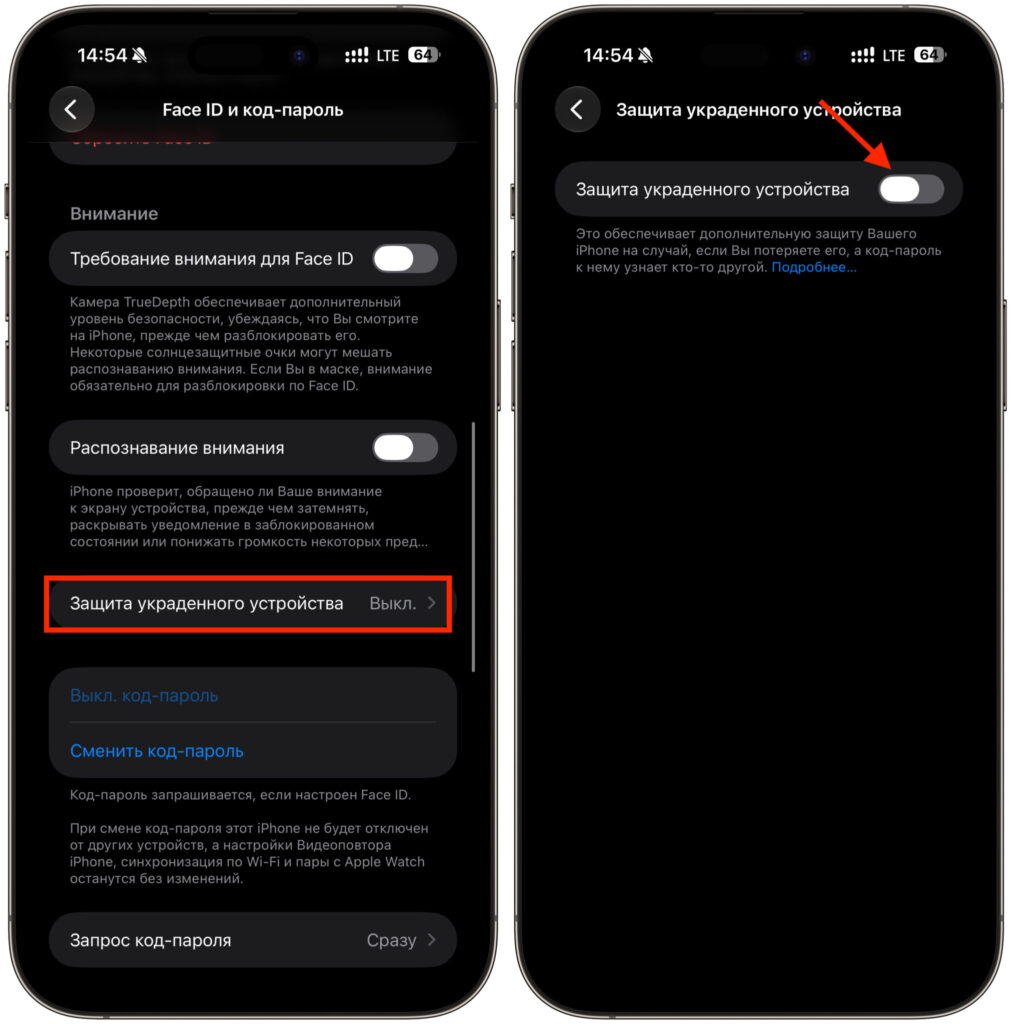
Activate this toggle and follow the on-screen instructions
- Open Settings → Face ID & Passcode.
- Scroll to Stolen Device Protection.
- Set it to Always.
Important caveat: if Face ID stops working — for example, because the screen is cracked — you will not be able to disable this protection until the hardware is repaired.
2. Disable Control Center on the lock screen
The first thing a knowledgeable thief does is cut the phone’s connection so it disappears from Find My. The easiest way is to swipe into Control Center from the lock screen and toggle Airplane Mode. Removing lock-screen access to Control Center eliminates that shortcut.
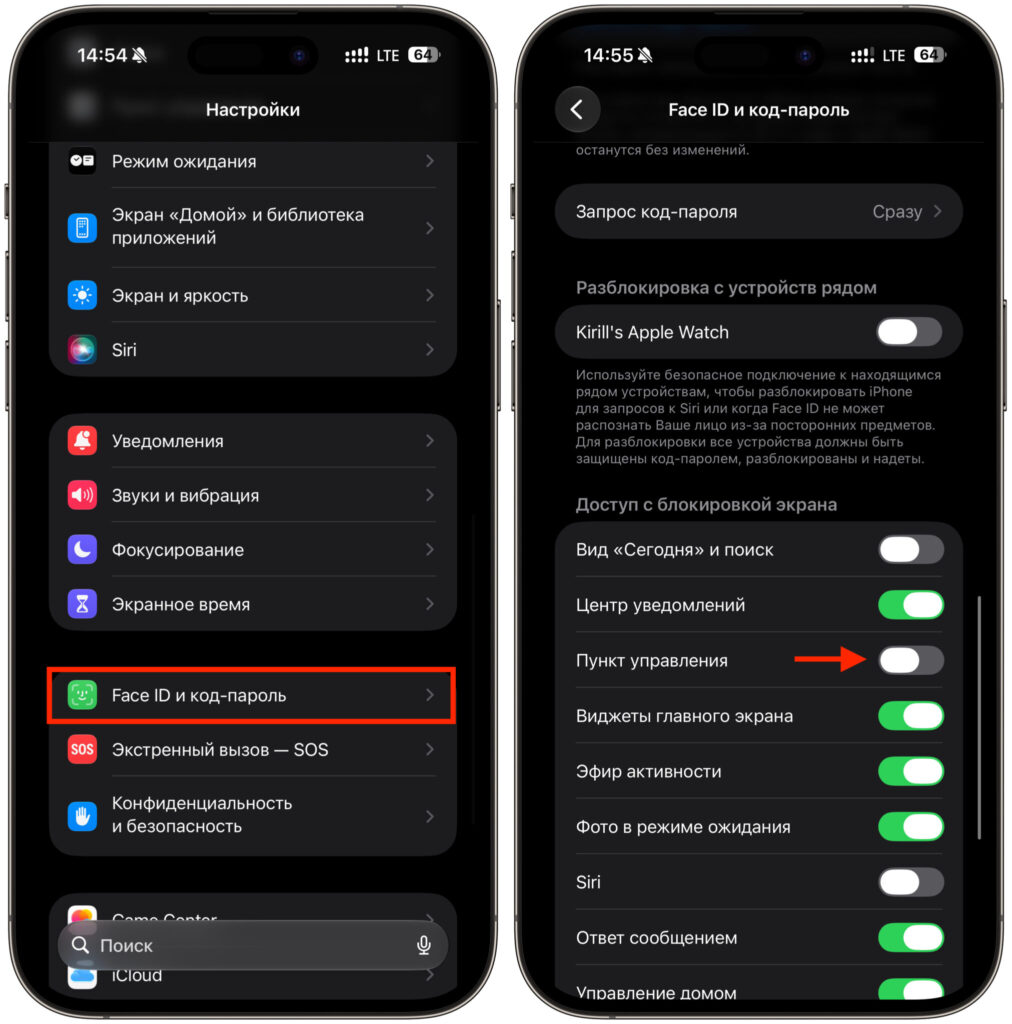
This should definitely be turned off
- Open Settings → Face ID & Passcode.
- Find the Allow Access When Locked section.
- Toggle off Control Center.
3. Block USB accessories on a locked iPhone
Specialized hardware tools exist that brute-force the passcode through the charging port. iOS counters this with a simple rule: if the phone has been locked for more than an hour, the port stops accepting data accessories. Charging still works normally; only data transfer is blocked.
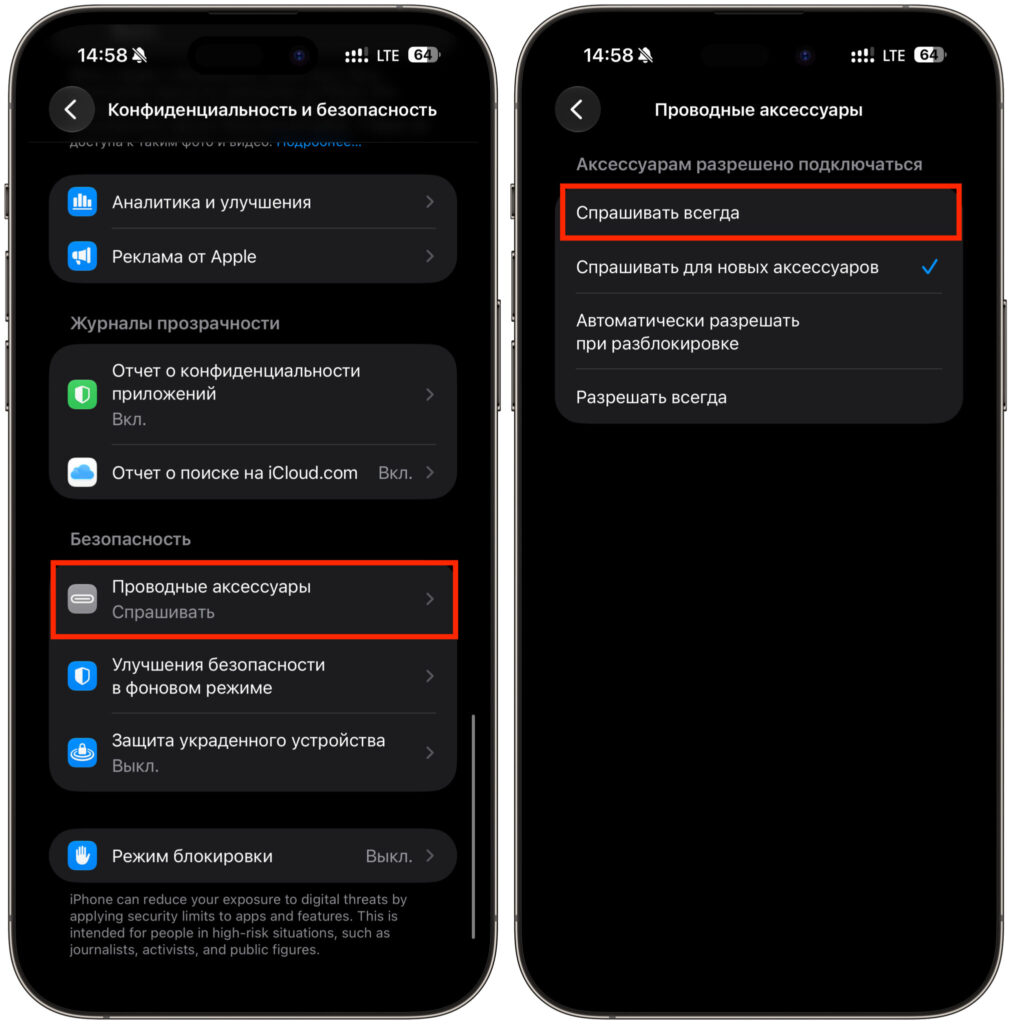
Block all new accessory connections
- Open Settings → Privacy & Security.
- Under Security, find Accessories (labeled “Wired Accessories” in some versions).
- Set it to Ask Always.
4. Use a longer passcode
A four-digit passcode can be brute-forced far faster than a six-digit one, and an alphanumeric password takes longer still. The difference in daily convenience is negligible, while the security improvement is substantial.
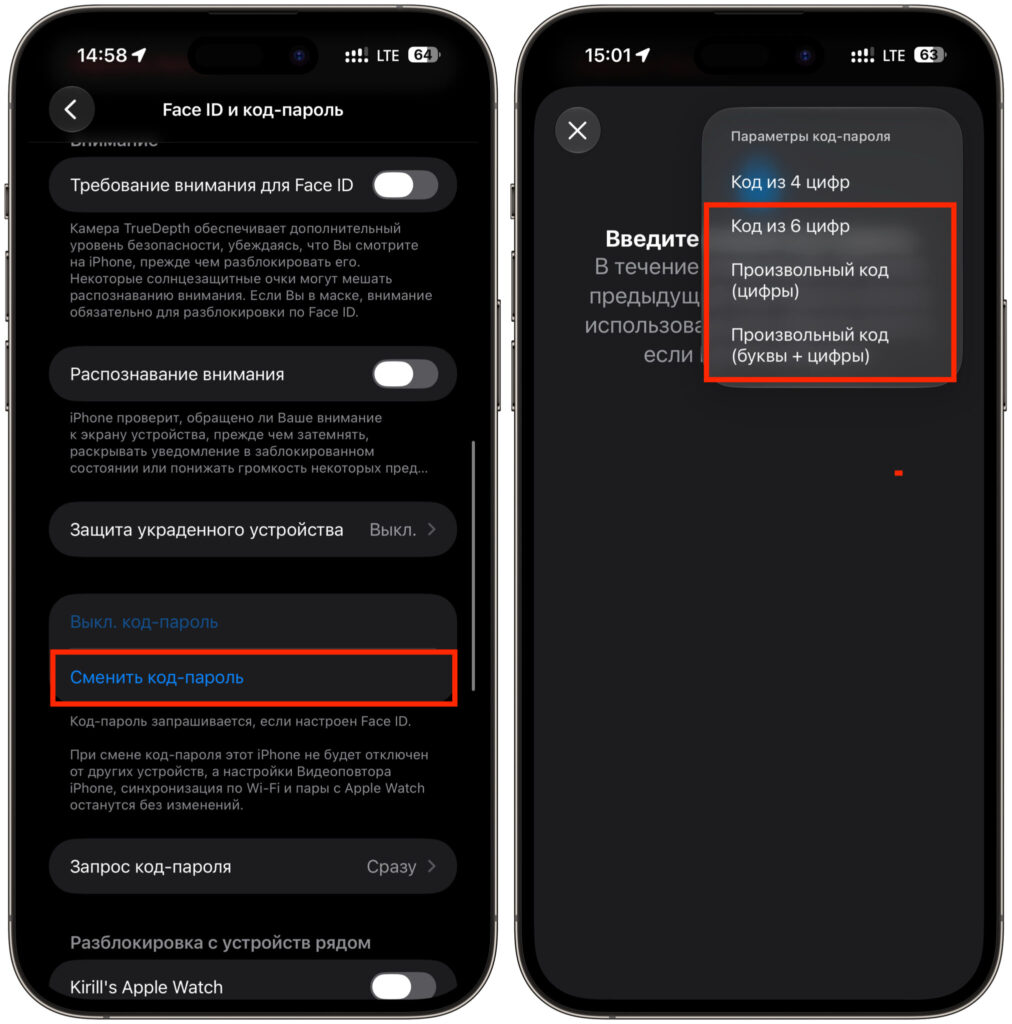
Set a complex passcode — it matters
- Open Settings → Face ID & Passcode.
- Tap Change Passcode and enter your current one.
- Tap Passcode Options and choose a six-digit numeric or custom alphanumeric code.
Avoid basing the passcode on your date of birth or other easily guessed combinations.
5. Enable Find My and Send Last Location
Without Find My enabled, tracking a stolen iPhone is nearly impossible. A separate toggle — Send Last Location — tells the phone to transmit its coordinates to Apple’s servers just before the battery dies. That final location ping can sometimes be the clue that leads to recovery.
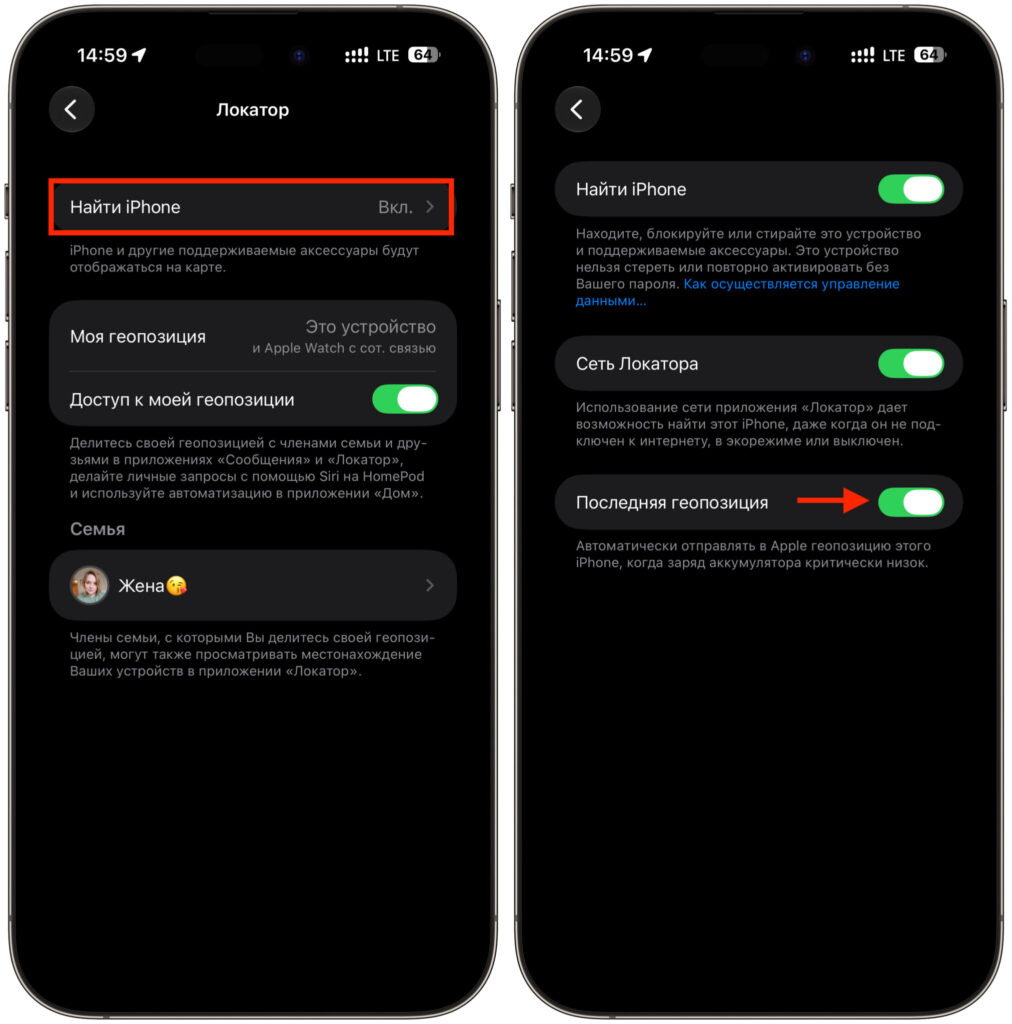
Before fully discharging, the iPhone will drop a pin on the map
- Open Settings and tap your name at the top.
- Go to Find My → Find My iPhone.
- Enable all three toggles, including Send Last Location.
6. Set a SIM PIN
A SIM card without a PIN is a gift to a thief. They can pop it into another phone and immediately receive SMS verification codes from banks and other services. A SIM PIN breaks that: the card demands a password as soon as it is inserted into a new device. This applies primarily to iPhones that still use a physical SIM.
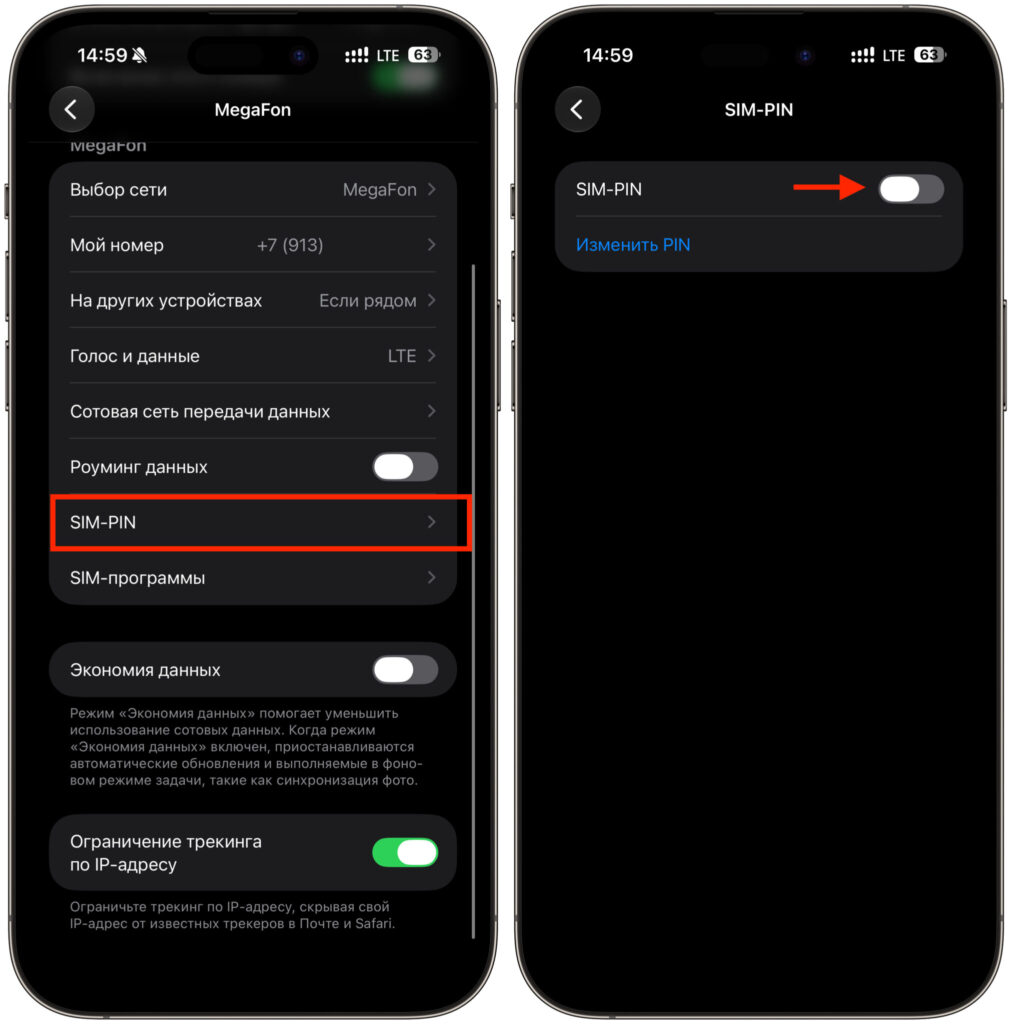
Relevant for iPhones with a physical SIM
- Go to Settings → Cellular.
- Open SIM PIN.
- Enable the feature and set your own PIN to replace the default one.
Remember your new PIN and keep the PUK code safe — three incorrect PIN attempts will lock the SIM card entirely.
7. Turn on automatic updates
iOS updates are not just about new features. A significant portion of each release patches security vulnerabilities — the same ones that cracking tools exploit. Enabling automatic updates means the system downloads and installs patches on its own, without you having to track release schedules.
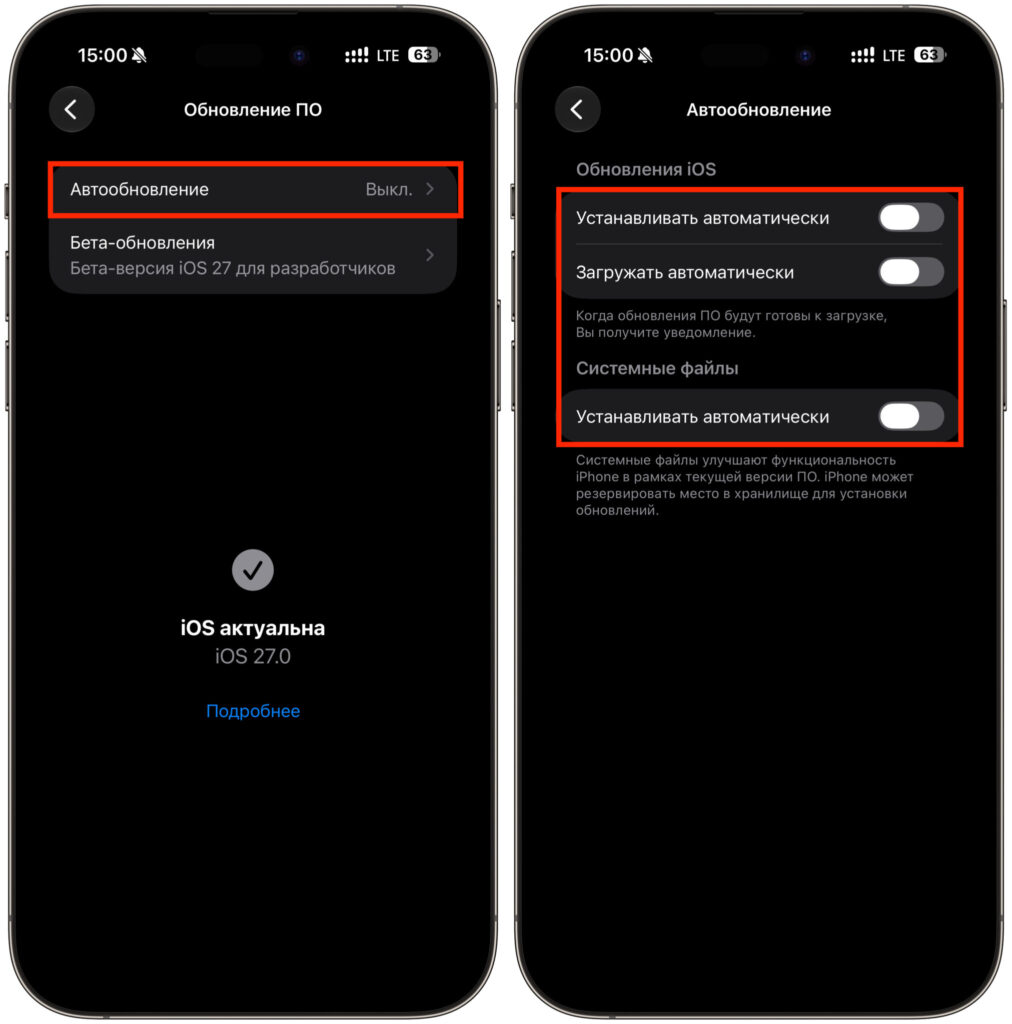
Automatic updates will patch security holes on their own
- Open Settings → General.
- Go to Software Update → Automatic Updates.
- Enable all toggles for downloading and installing updates.
8. Remove unused devices from your Apple ID
Your Apple ID may still be linked to an old iPad, a MacBook you sold, or someone else’s phone you once signed into. Each of those devices is a potential channel for receiving verification codes. The shorter the list, the fewer the loopholes.
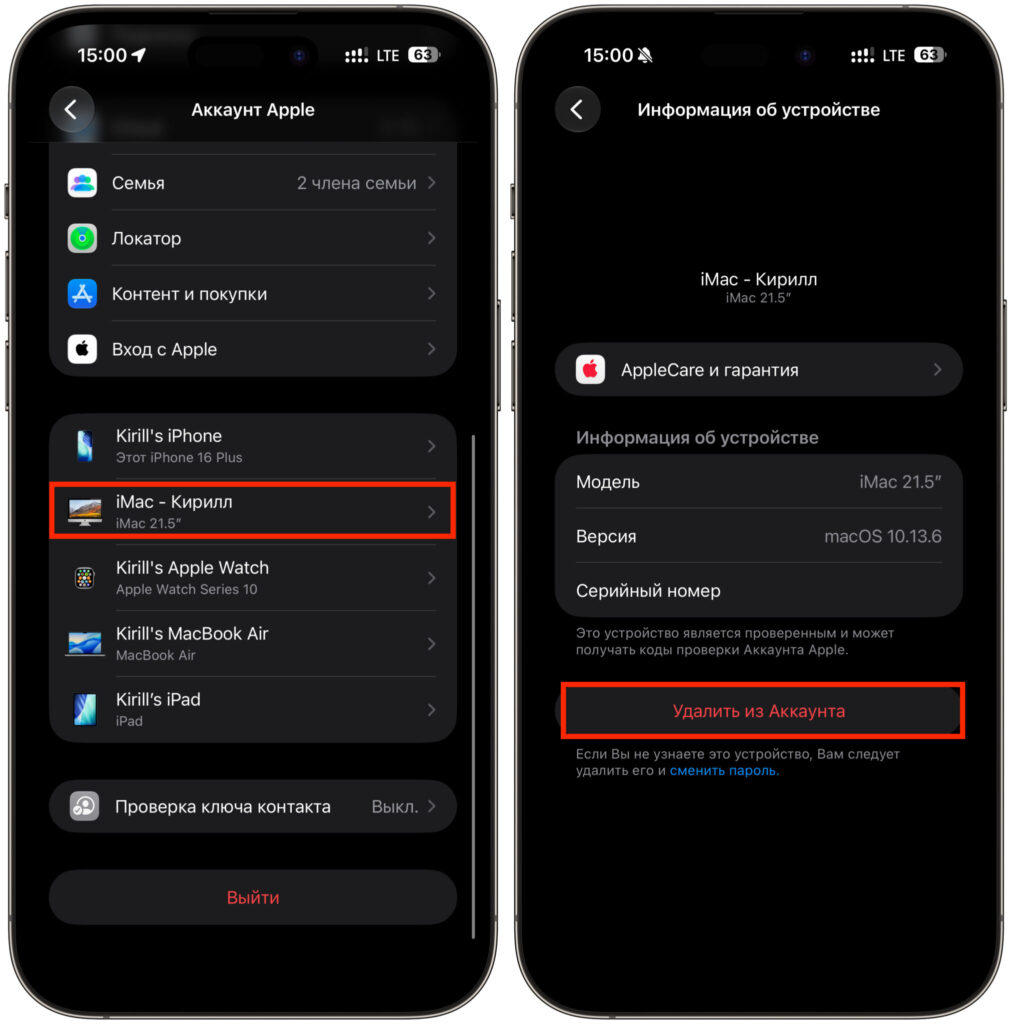
It makes sense to remove unnecessary devices
- Open Settings and tap your name.
- Scroll down to the list of devices.
- Open each one you no longer use and select Remove from Account.
9. Audit app location permissions
Many apps track your location in the background even when they have no functional need for it. Reviewing the list and revoking access from apps that do not need it reduces background tracking and can also save battery life.
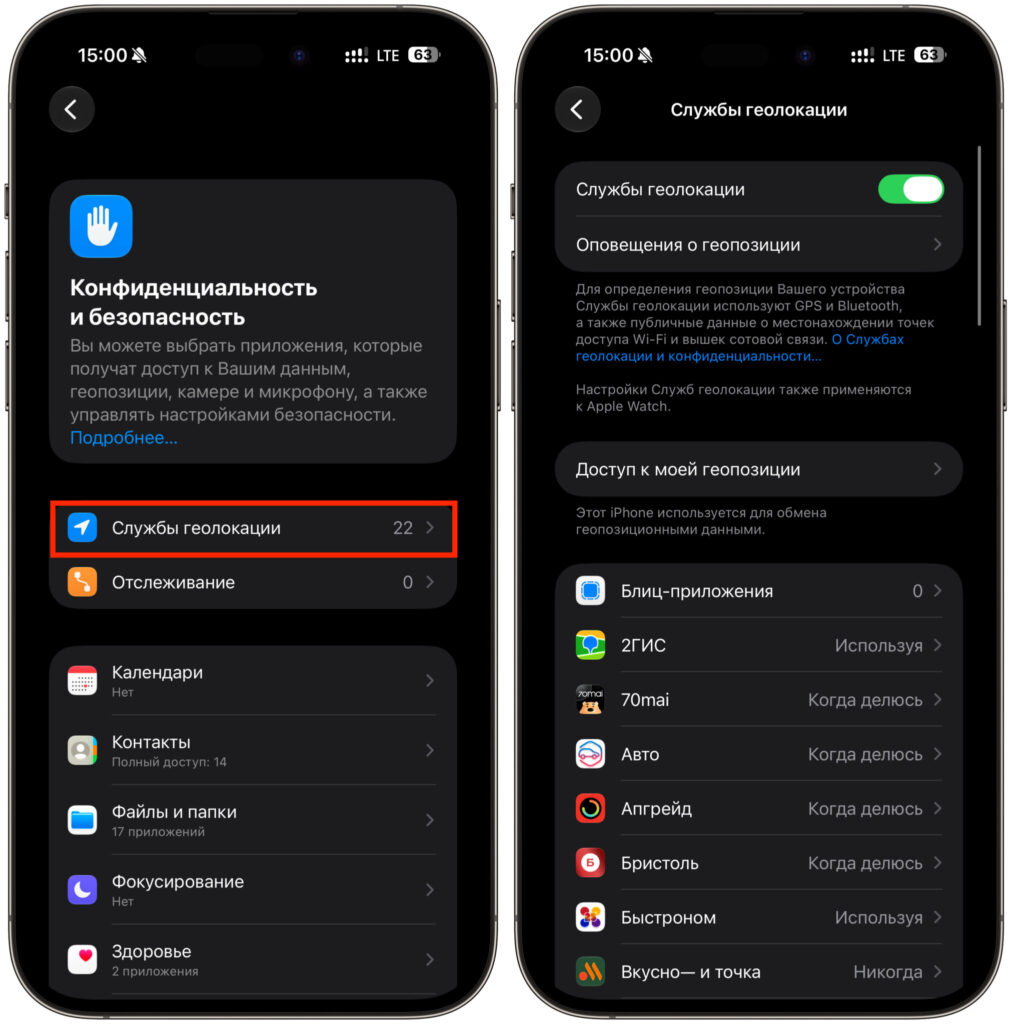
Grant location access only to apps that truly need it
- Open Settings → Privacy & Security.
- Go to Location Services.
- For apps that do not need location data, set access to Never.
Where to start
All nine settings can be configured in roughly two minutes. If you only have time for one, prioritize Stolen Device Protection above all else — it is the main lock, and the remaining eight settings close the gaps around it.