I couldn’t understand for a long time why people were so impressed with the MacBook trackpad, until I found one hidden setting. It completely changed my laptop experience, and now I barely use a mouse. If you’re also frustrated by selecting text on a trackpad — this article is for you.
You can actually make friends with the MacBook trackpad, but why Apple made everything so complicated is unclear
How to Select Text with the MacBook Trackpad
Everyone who has used the MacBook trackpad knows this problem. To select text, you need to press the trackpad until you feel the characteristic haptic feedback — and only then, while holding the press, drag your finger in the desired direction. It sounds simple, but in practice it’s much more difficult.
First, you need to constantly press your finger against the trackpad surface with force. Try selecting an entire paragraph of text — your finger gets tired quickly, and accuracy drops. Second, if you accidentally ease up the pressure for even a second, the selection immediately resets, and you have to start all over. This is especially annoying when working with large documents.
There’s another thing. The MacBook trackpad is one of the best on the market — that’s hard to argue with. But the standard method of selecting text through pressing makes it frankly inconvenient for many tasks. Dragging a file from one folder to another, selecting a row in a table, moving a window — all of this turns into a finger exercise.
It’s no surprise that many MacBook owners prefer to connect a mouse for working with text. Selecting with a mouse is elementary: hold the left button and drag. No effort, no haptic feedback. But the whole point of a laptop is mobility — carrying a mouse with you isn’t always convenient. Fortunately, Apple hid the solution right in the macOS settings. It’s just that not everyone knows about it.
Selecting Text with the MacBook Trackpad
This feature isn’t obvious — it’s hidden in the Accessibility section, not in the standard trackpad settings. That’s exactly why most users don’t even suspect it exists. To activate three-finger dragging, do the following:
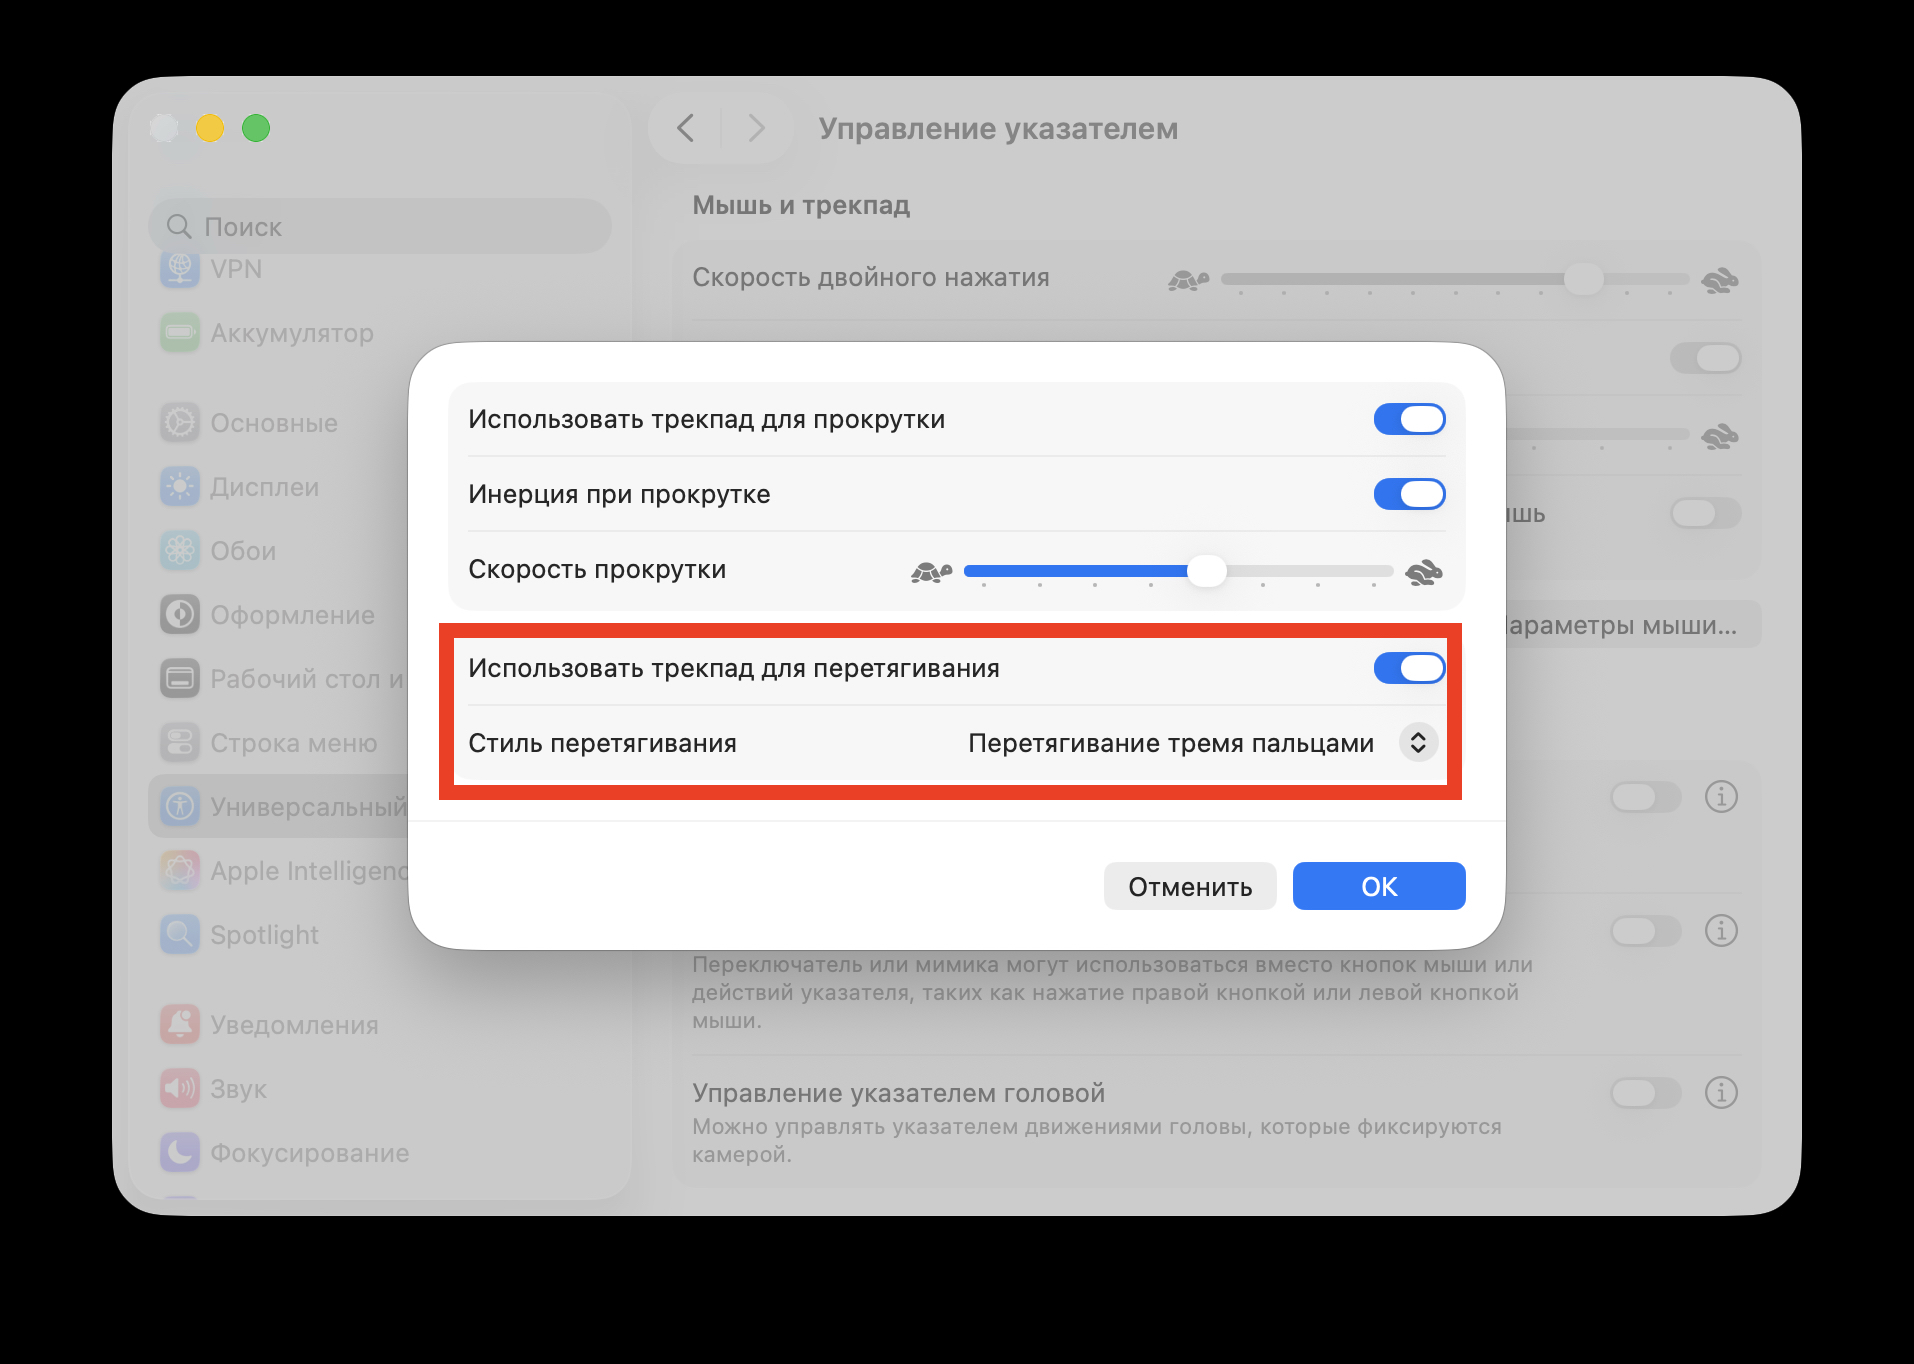
Turn on this option and enjoy
- Open System Settings on your Mac.
- Go to the Accessibility section in the sidebar.
- Find and click on Pointer Control.
- At the bottom of the window, click the Trackpad Options button.
- Turn on the Use trackpad for dragging toggle.
- In the Dragging style dropdown menu, select Three-Finger Drag.
- Click OK to save the setting.
Done. Now to select text or drag elements, you just need to touch the trackpad with three fingers and move them in the desired direction. You no longer need to press hard — a light touch with three fingers replaces the heavy click.
How the MacBook Trackpad Works After Setting Up Three-Finger Dragging
The first thing I noticed — selecting text became incredibly easy. You place three fingers on the trackpad and drag. No pressing, no effort, no risk of losing the selection. Your finger doesn’t get tired, the selection doesn’t reset. It’s like you got a completely new trackpad — that’s how dramatic the difference is.
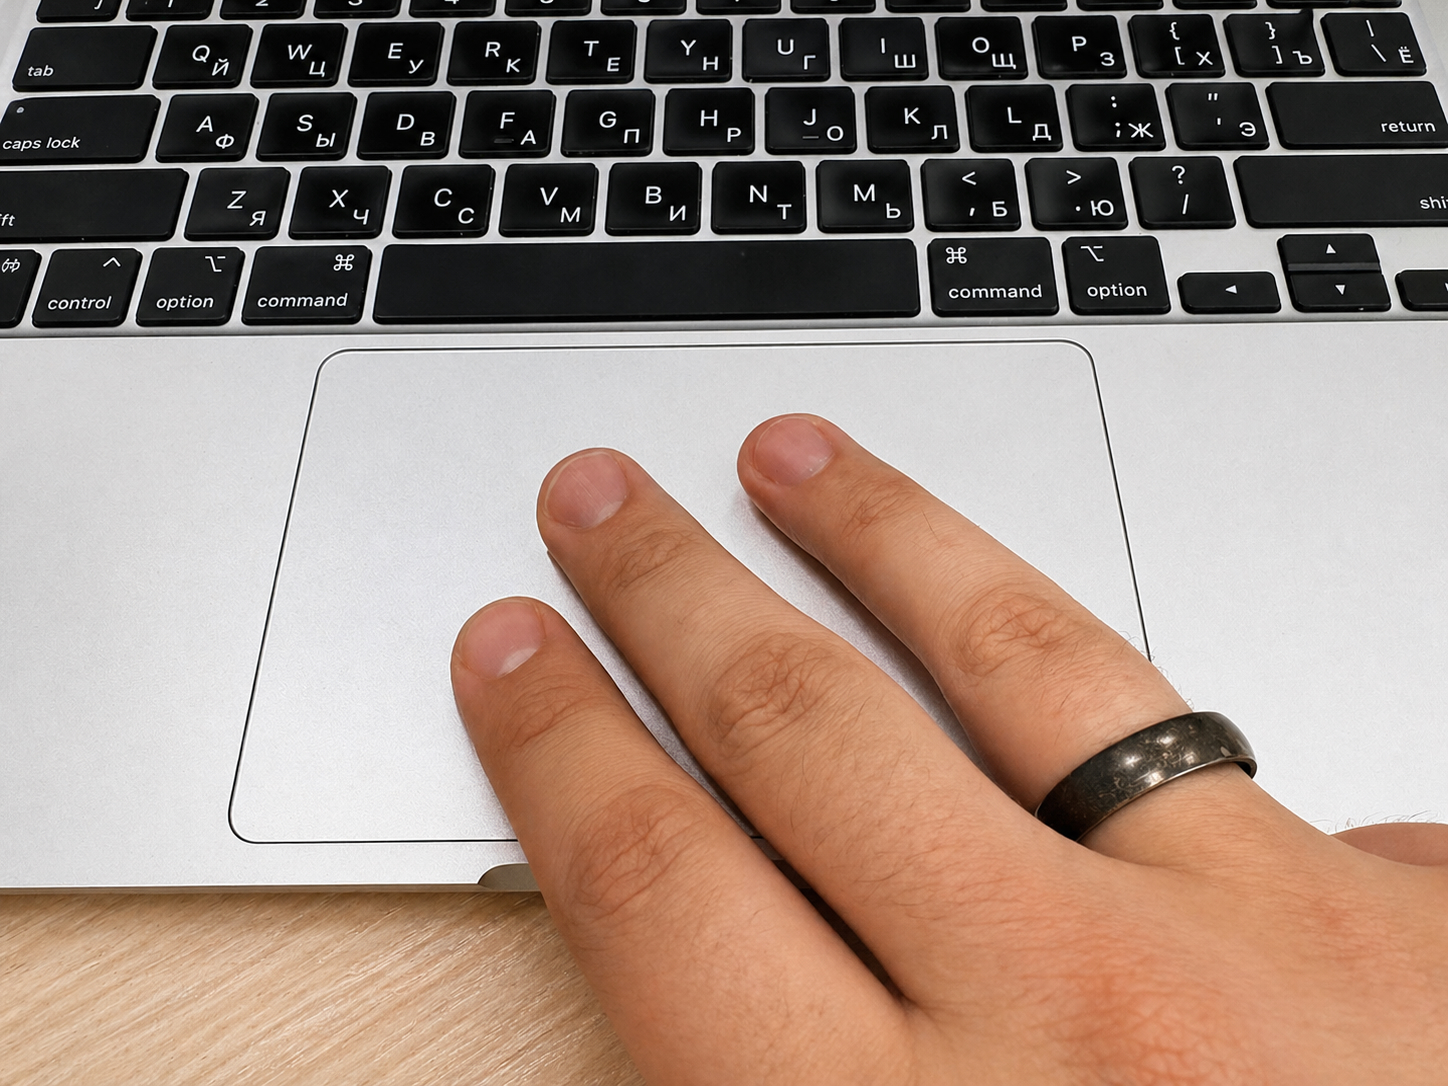
Now with three fingers, without clicking the trackpad, you can drag files and select text
Second — dragging files. Before, to move a file from one folder to another using the trackpad, you had to get creative. Now three fingers down on a file — and drag it wherever you want. It works perfectly.
Third — moving windows. Three fingers on the window title bar — and you drag it to any place on the screen. This is especially convenient when you’re working with multiple windows at the same time and need to quickly arrange them.
I got so used to this gesture within a day that I can’t imagine a MacBook without this setting now. It’s one of those small things that fundamentally change the user experience — and that you get used to instantly.
Differences Between Dragging Styles on the MacBook Trackpad
In the same menu, you’ll find other options as well. In total, Apple offers three dragging styles:
- Three-Finger Drag — the very one I’m talking about. Touch with three fingers and drag. The most intuitive option.
- With Drag Lock — you double-tap the trackpad with one finger, and on the second tap you hold. Dragging activates and stays active until you tap the trackpad again. Good if three fingers feel uncomfortable.
- Without Drag Lock — similar to the previous option, but dragging automatically deactivates when you lift your finger off the trackpad.
I tried all three options and settled on Three-Finger Drag. It works the most predictably and doesn’t require memorizing double-tap combinations. Put three fingers down — drag. Lift them — release. Everything makes sense.
The only nuance: if you previously used the three-finger gesture for switching between desktops or for other purposes, then after enabling dragging, those gestures will start working with four fingers. But you get used to that in literally a day.
Hidden MacBook Trackpad Setting in Accessibility
It’s interesting why Apple hid this setting specifically in Accessibility. Good question, and there’s no definitive answer. Perhaps Apple decided that three-finger dragging is a feature for advanced users and chose not to put it in the main trackpad settings. Or maybe they simply didn’t want to confuse beginners with additional options.
The MacBook trackpad is a great thing, but Apple, why do we have to fine-tune it ourselves
The fact is that this setting lives in the Accessibility section — alongside features for people with special needs. But in reality, it’s useful for absolutely every MacBook owner. It’s not a crutch or a compromise — it’s simply a more convenient way to work with the trackpad.
I honestly don’t understand why Apple doesn’t enable this option by default. There would be far fewer people who believe that for normal work with a MacBook you absolutely need a mouse.