iOS includes a built-in mode called Assistive Access that transforms an iPhone into something resembling a simple feature phone: large icons, a handful of chosen apps, and restricted functionality within each one. No third-party apps or configuration profiles are needed — everything is configured through the system’s own settings. It is a practical way to repurpose an older iPhone for a child or an elderly family member who finds the standard iOS interface overwhelming. The mode lets you decide exactly which apps remain available and even which features inside those apps are accessible.
What you need to know
- Assistive Access is a built-in iOS feature found under Settings → Accessibility; it strips the interface down to large icons and only the apps you select.
- You can restrict individual app features — for example, limiting Camera to selfie mode only, or allowing calls and messages exclusively to pre-approved Favorites contacts.
- Exiting the mode requires a triple-press of the side button (plus a Screen Time passcode if one is set); no data or apps are deleted when you switch back.
- All third-party apps should be installed and fully configured (accounts signed in, permissions granted) before enabling the mode, because many settings become inaccessible afterward.
Who benefits from Assistive Access
Standard iOS can be confusing for young children and elderly users: the home screen is crowded with icons, gestures are not intuitive, and there is no obvious “back” button. People unfamiliar with the interface may accidentally open the wrong app and struggle to return to the home screen.
Assistive Access solves this by trimming the entire interface down to a minimal set of large icons and straightforward actions. You choose exactly what stays: only selected apps, and even specific features within an app. For instance, you can limit the Camera app to selfie mode only, hiding every other shooting option.
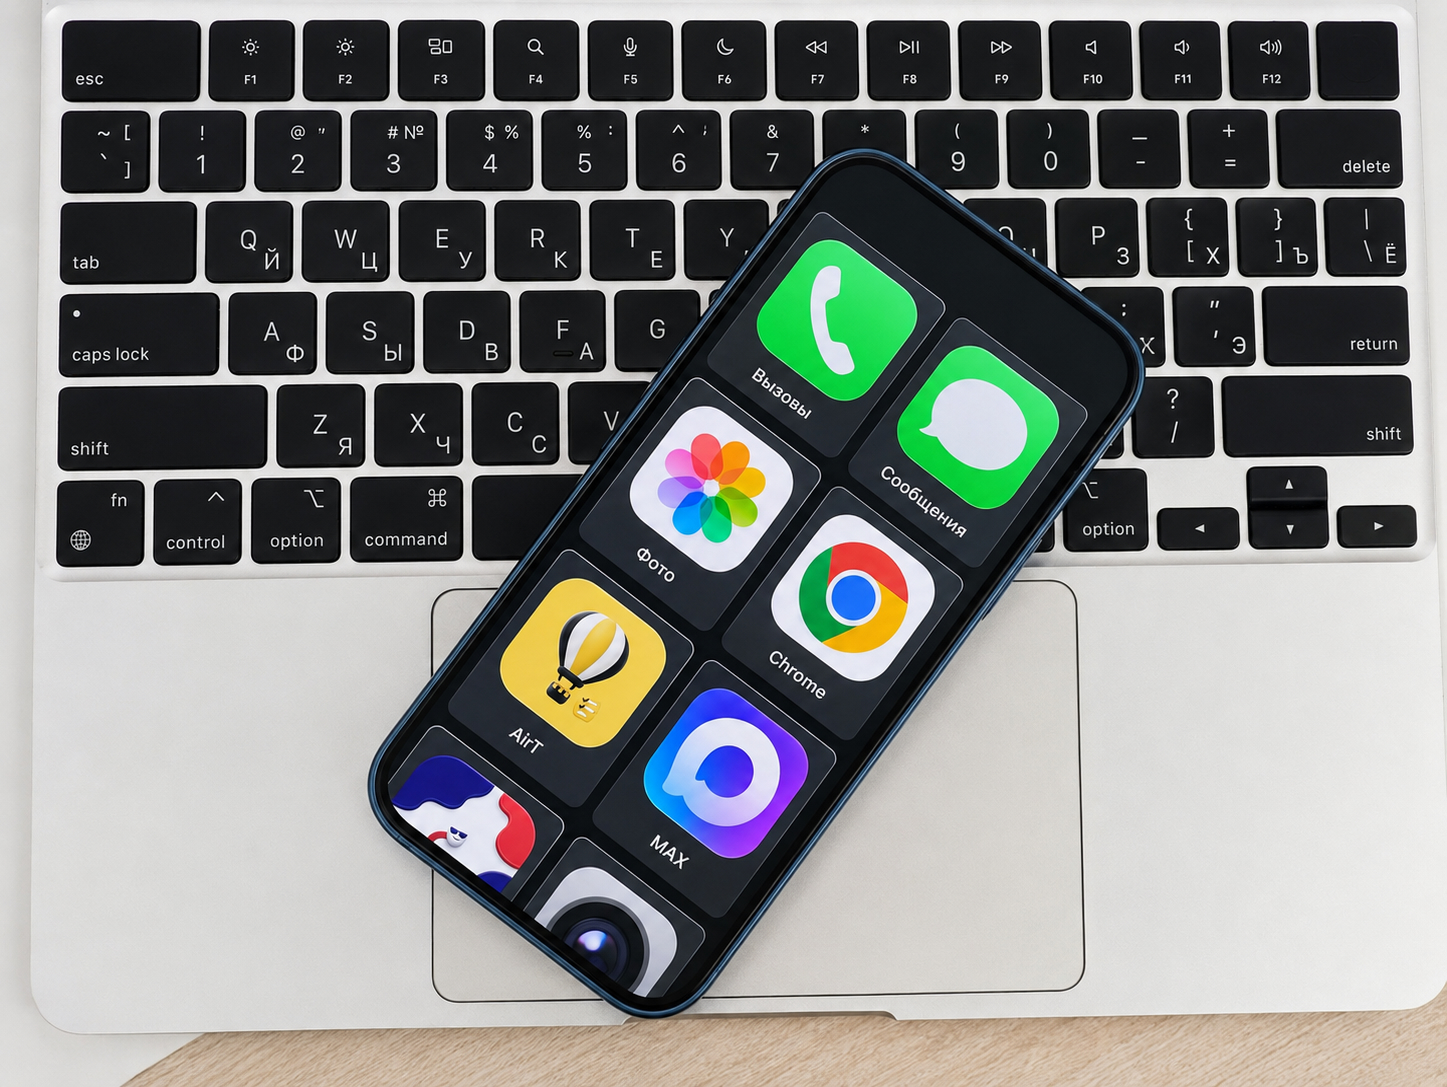
For elderly users the mode removes the fear of “breaking something” — the screen becomes predictable, and unnecessary gestures and menus no longer get in the way.
What to prepare on the iPhone beforehand
Before enabling Assistive Access, prepare the device. Once the mode is active, many settings become inaccessible and cannot be changed on the fly.
- Install all third-party apps you want to keep available in the simplified mode.
- Configure those apps before launch: sign into accounts (for example, YouTube), grant notification and camera permissions where needed.
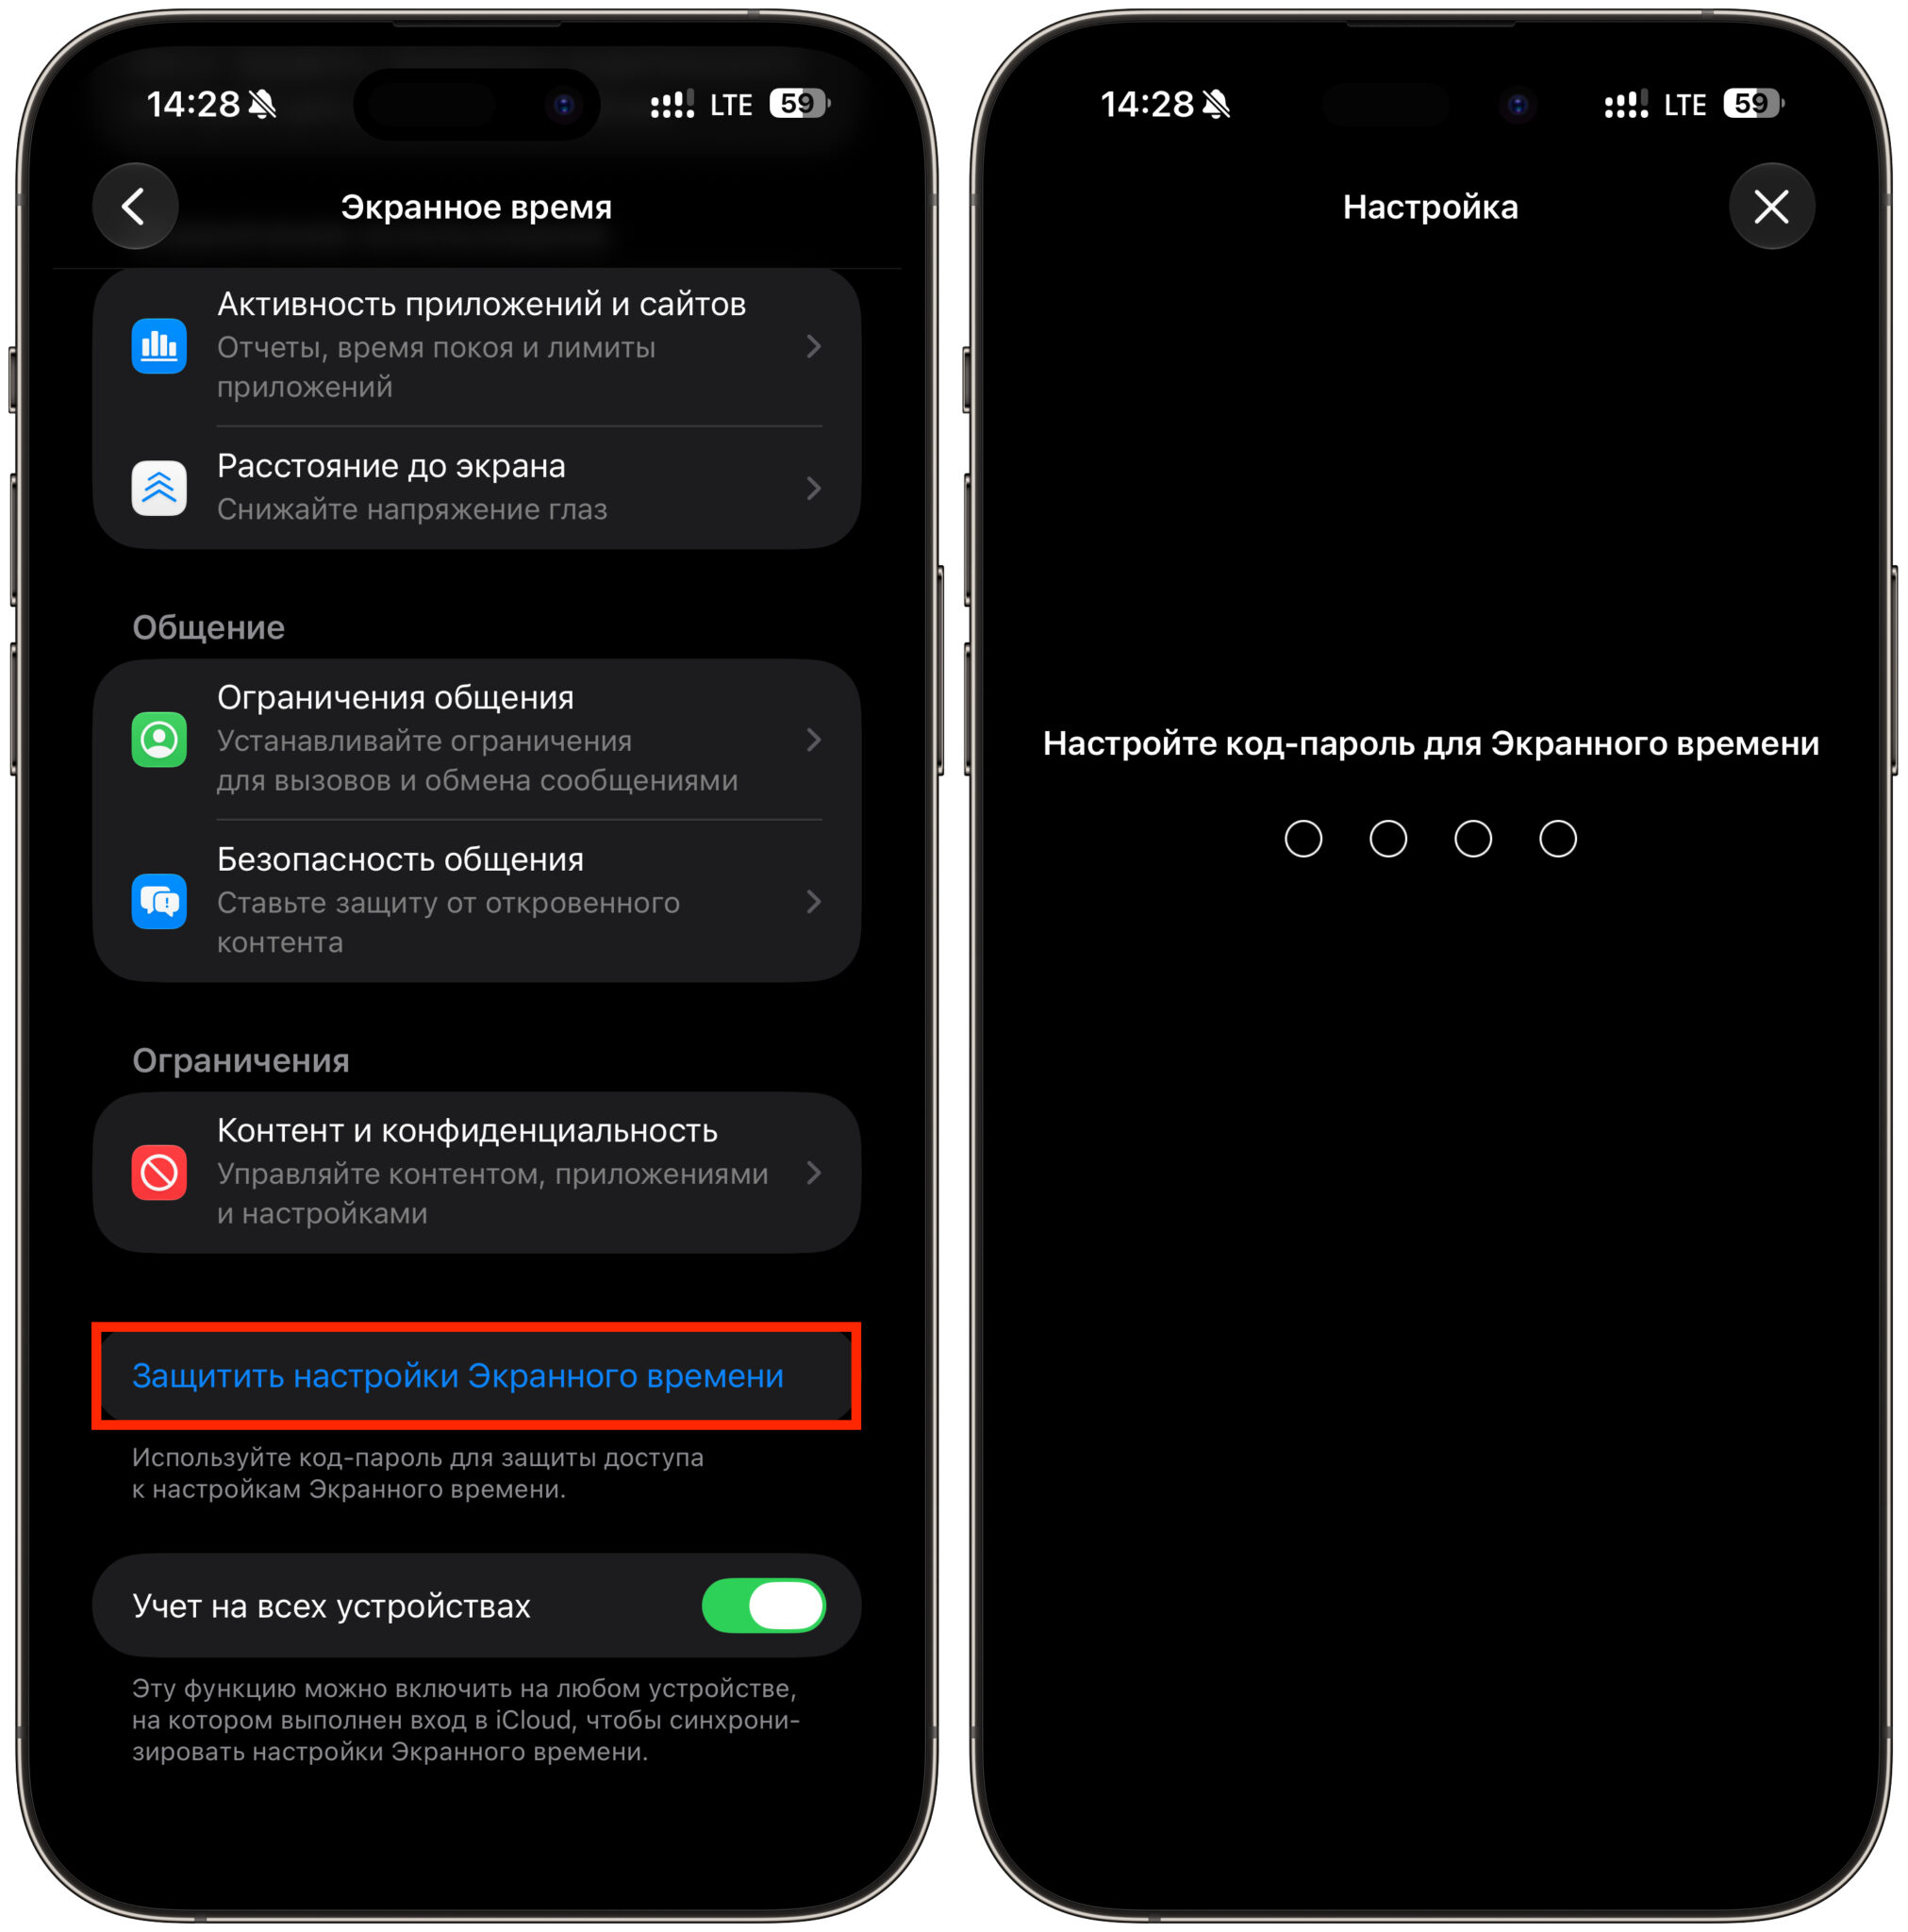
- Set a Screen Time passcode and do not share it with the child if you want to prevent them from exiting the mode on their own. For very young children this is less critical.
Enabling Assistive Access step by step
In the example below, only a handful of apps remain on the device — Phone, Messages, Camera, Photos, and a few third-party apps. You can assemble your own set in the same way, adding or removing apps as needed.
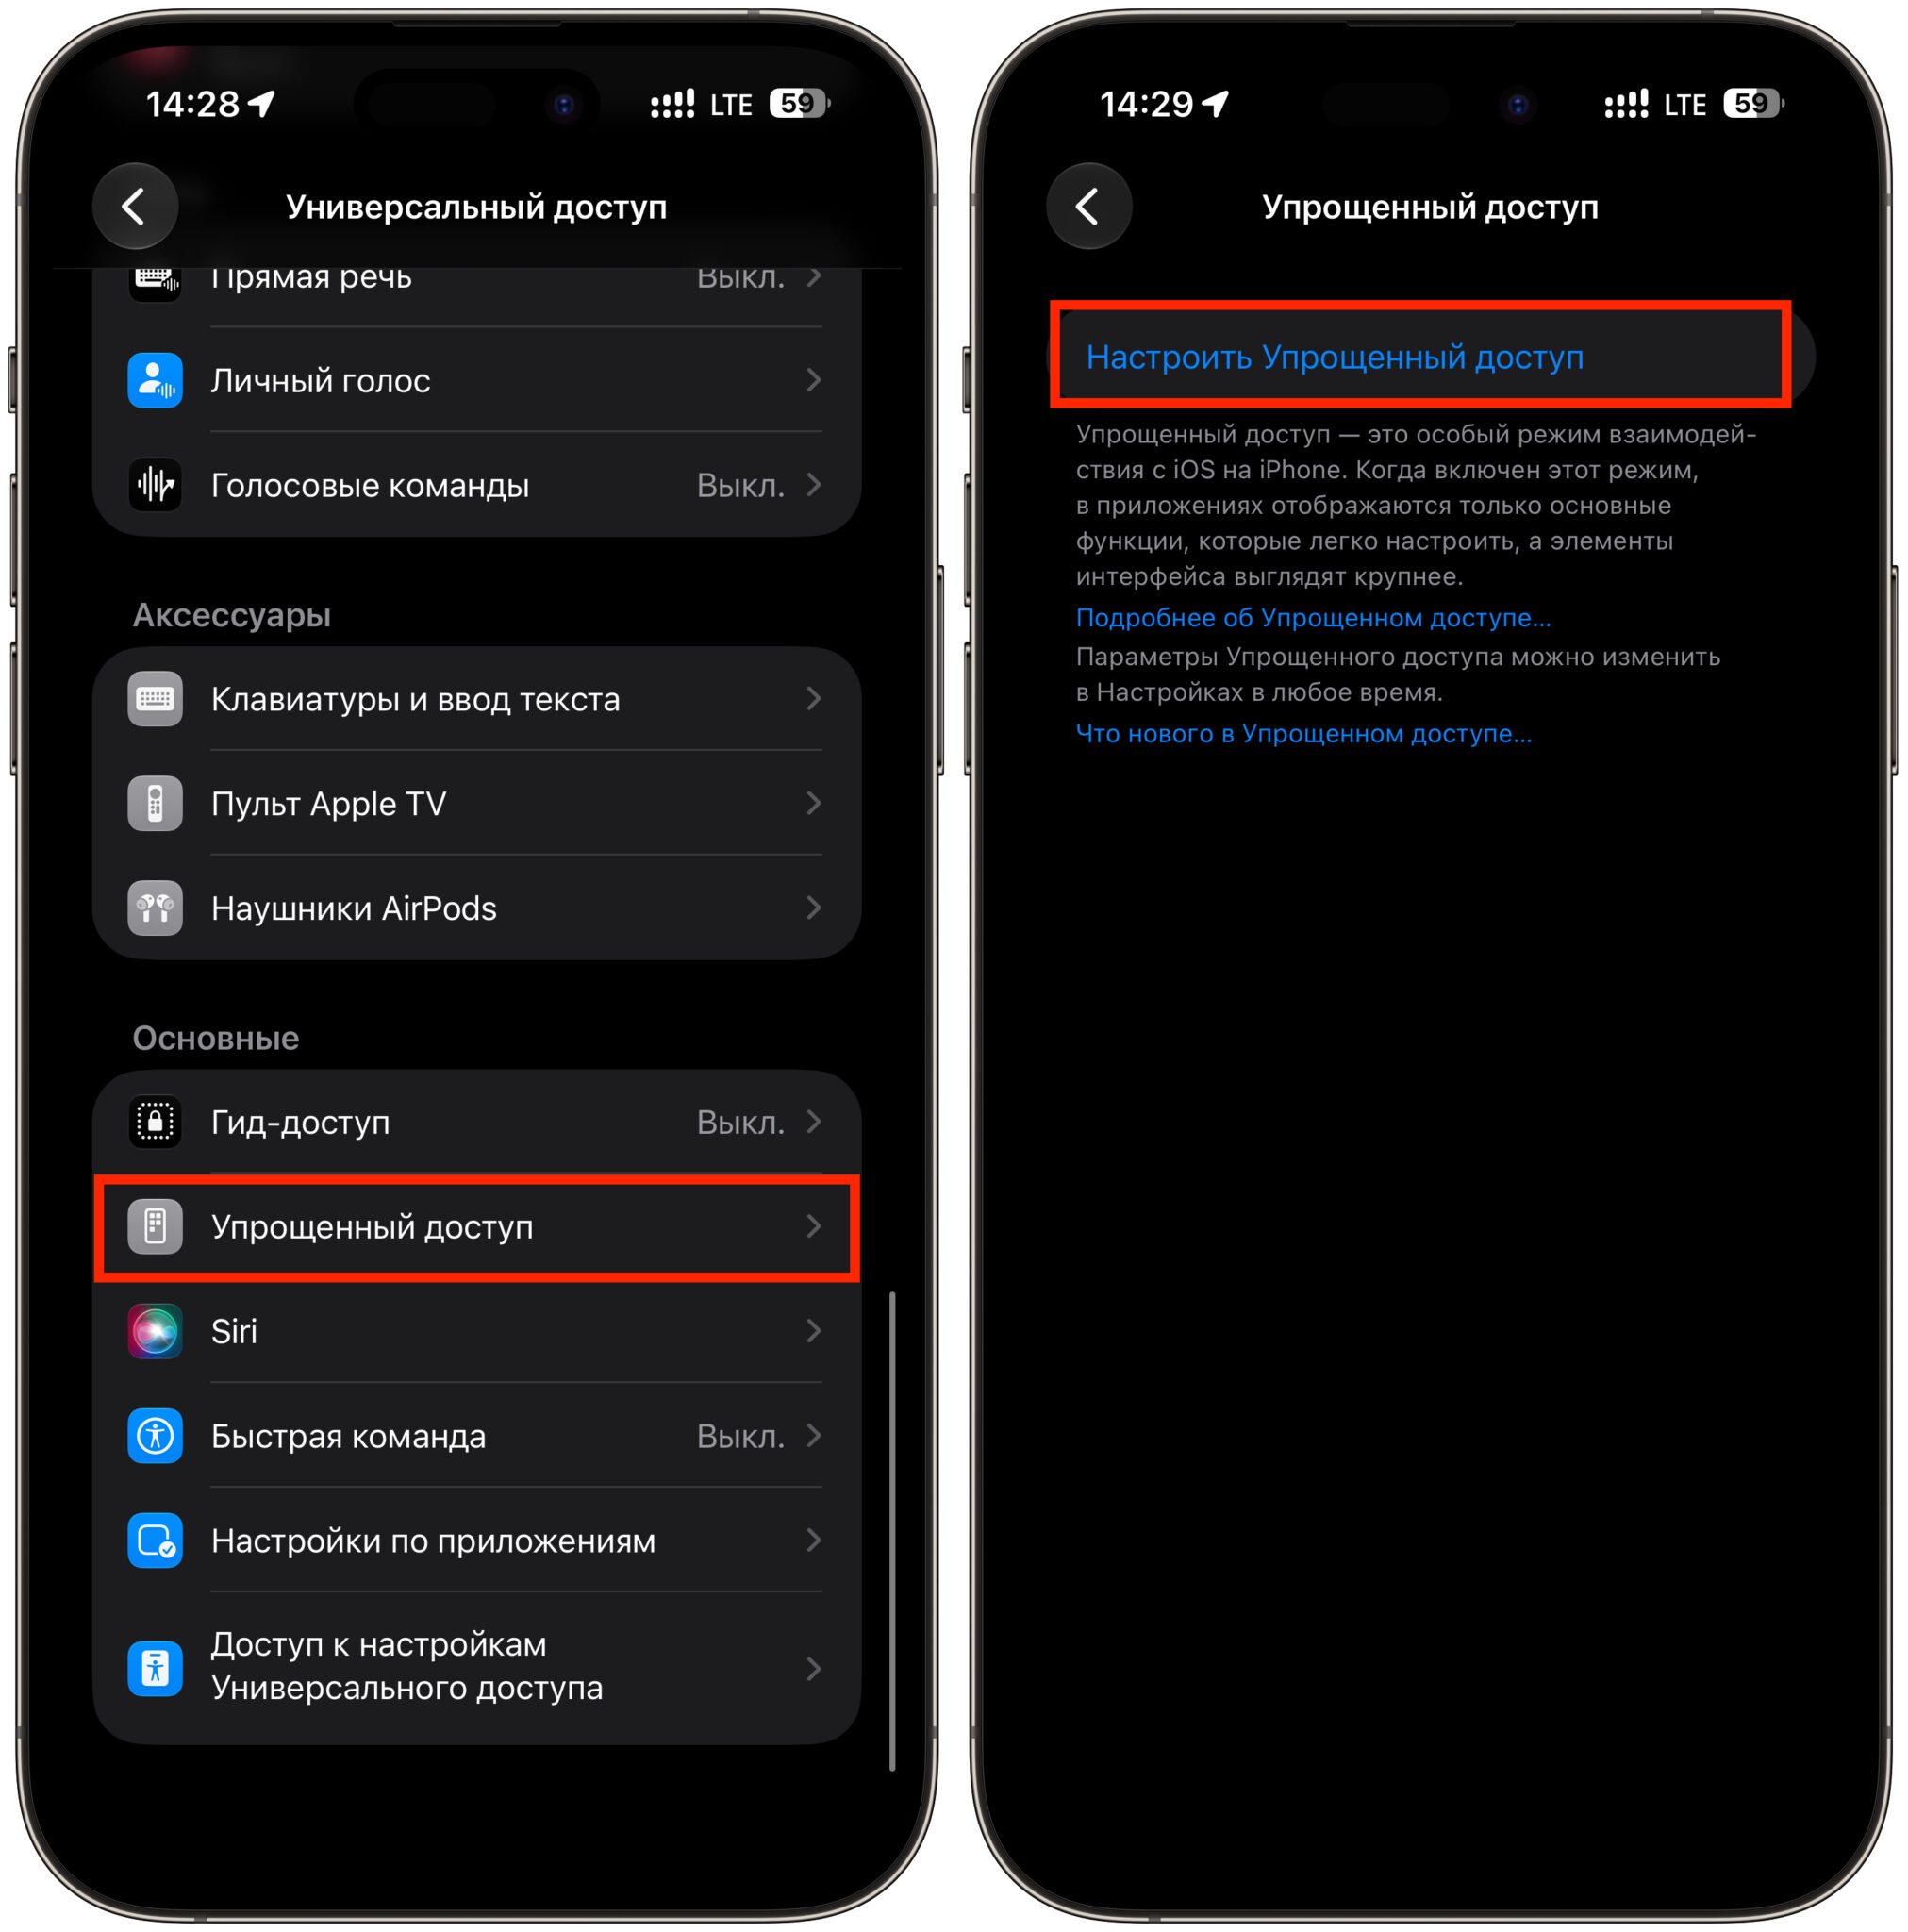
- Open Settings and go to Accessibility.
- Scroll down and tap Assistive Access.
- Tap Set Up Assistive Access, then Continue.
- Verify that the correct Apple account is shown and tap Continue. Change the account first if it is not the right one.
- Select the apps that will remain available in the simplified mode.
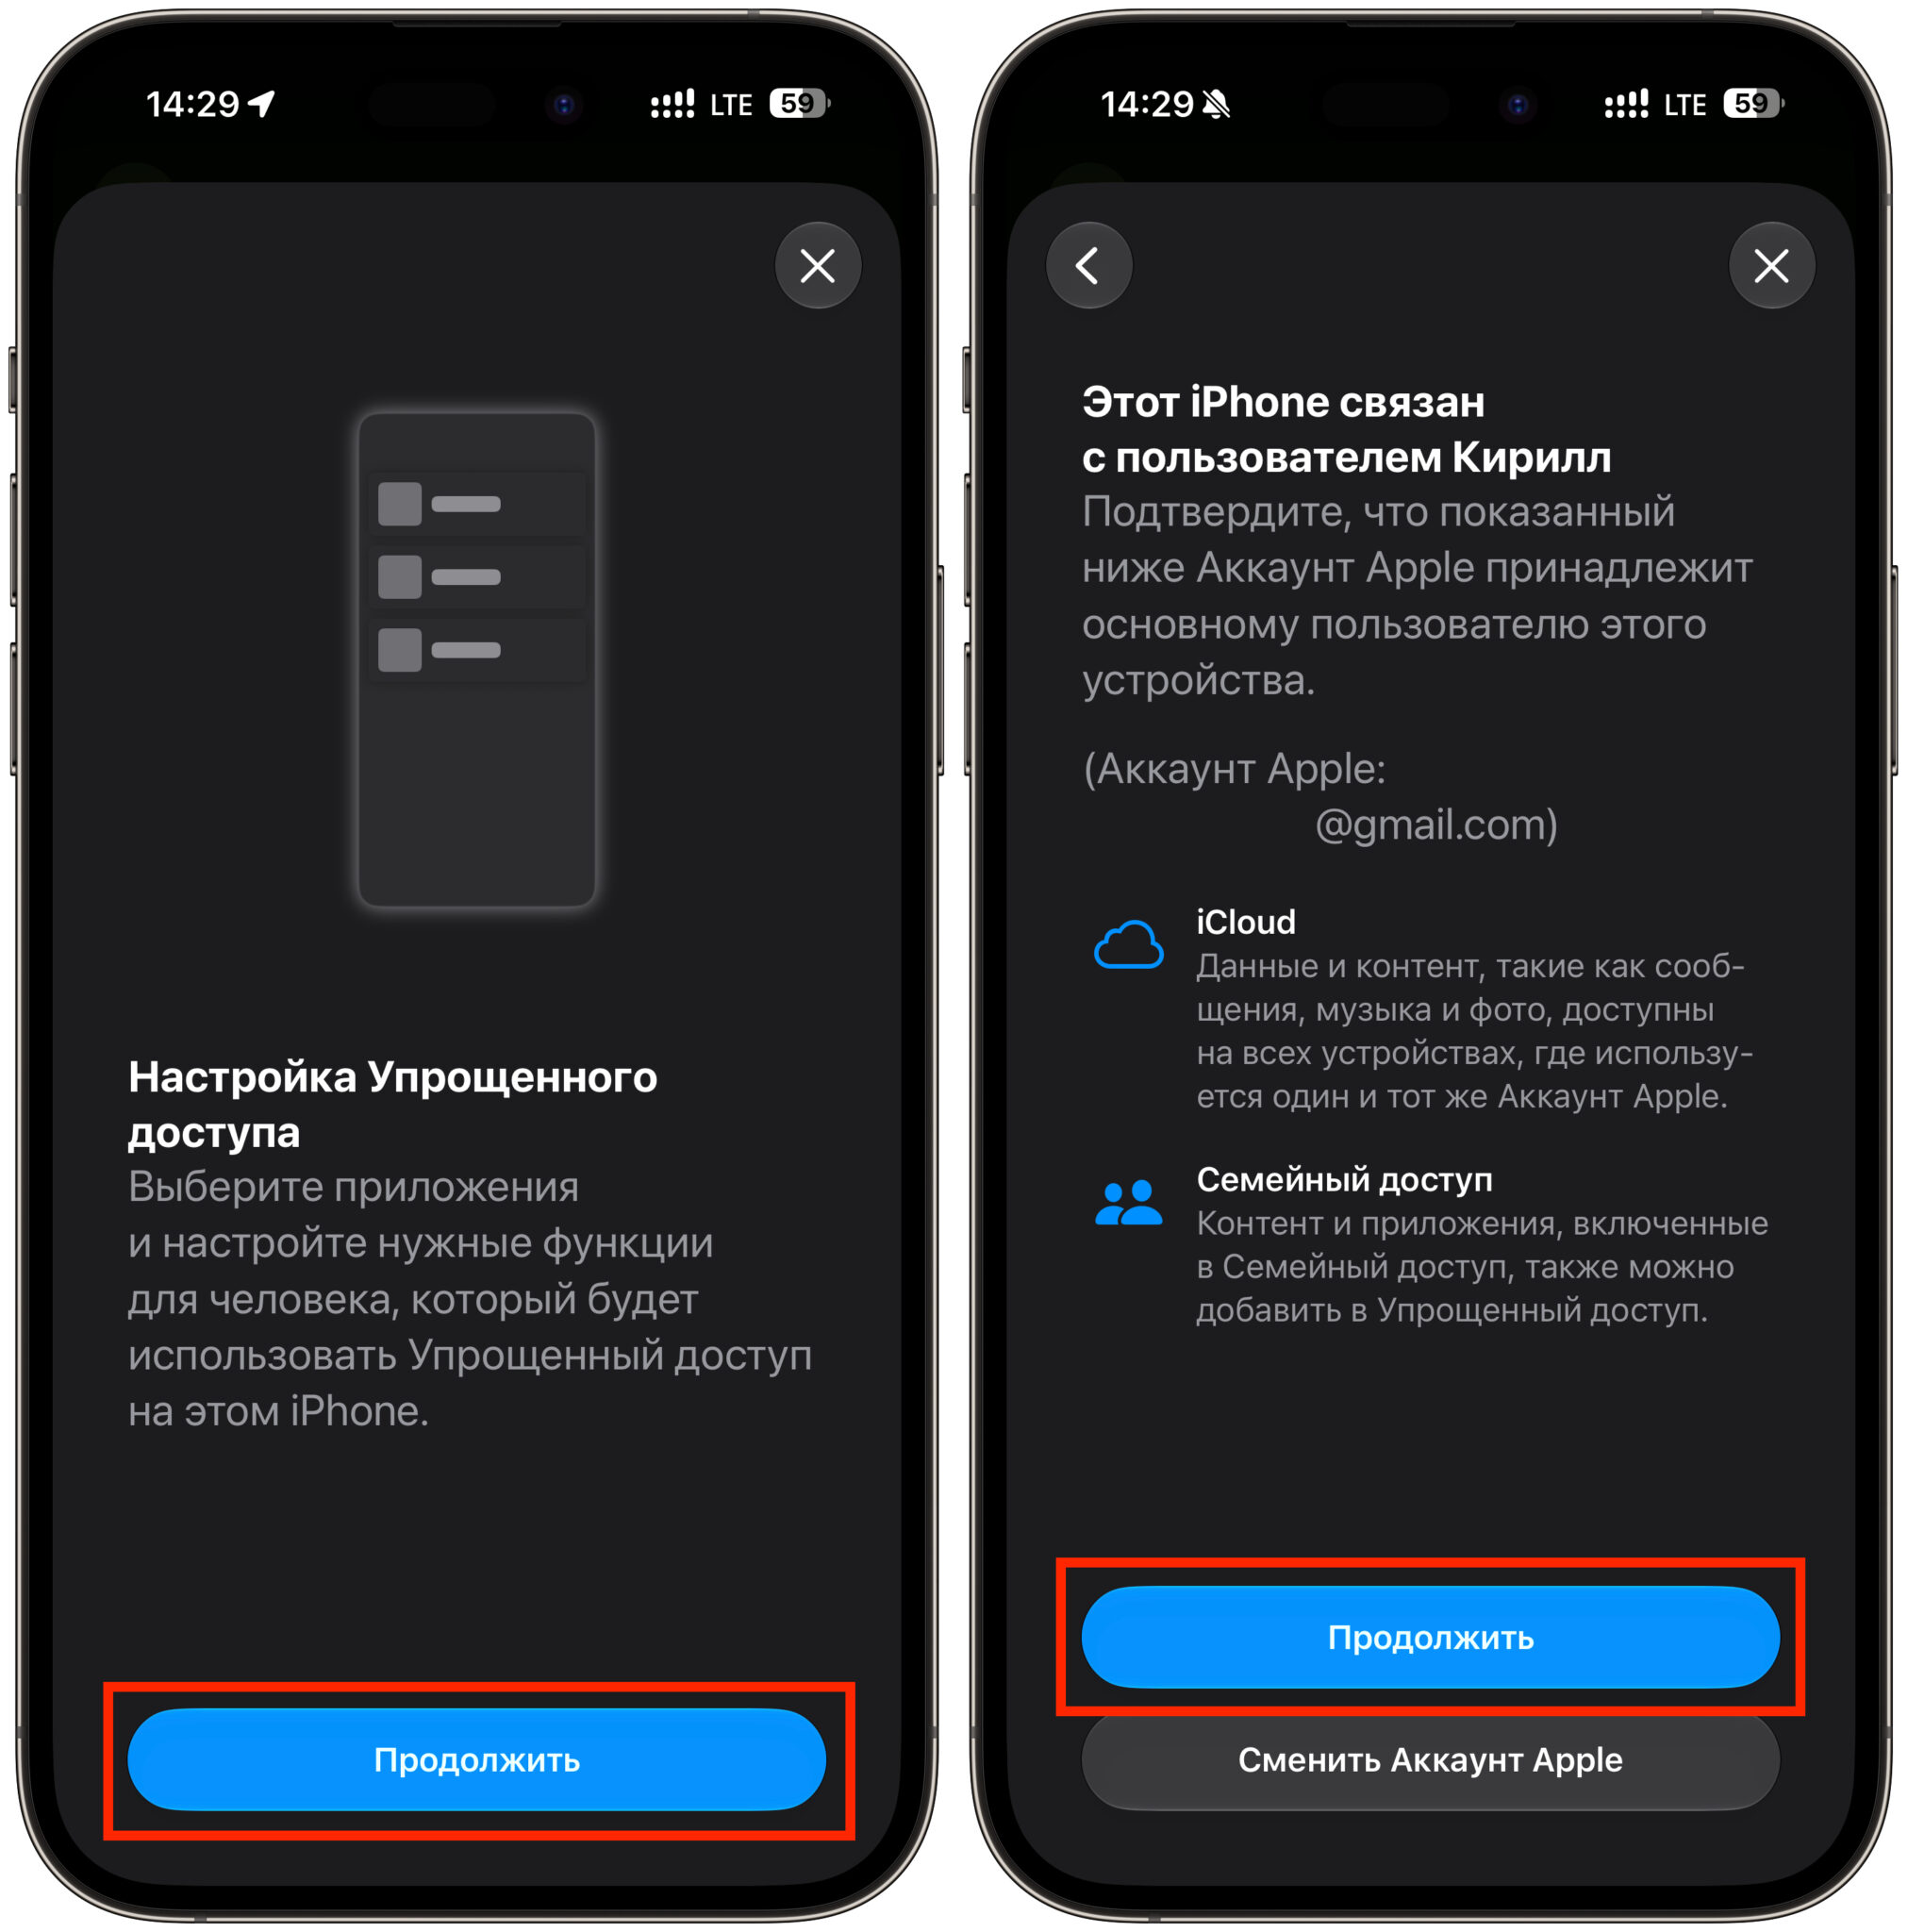
- After adding apps, tap Continue.
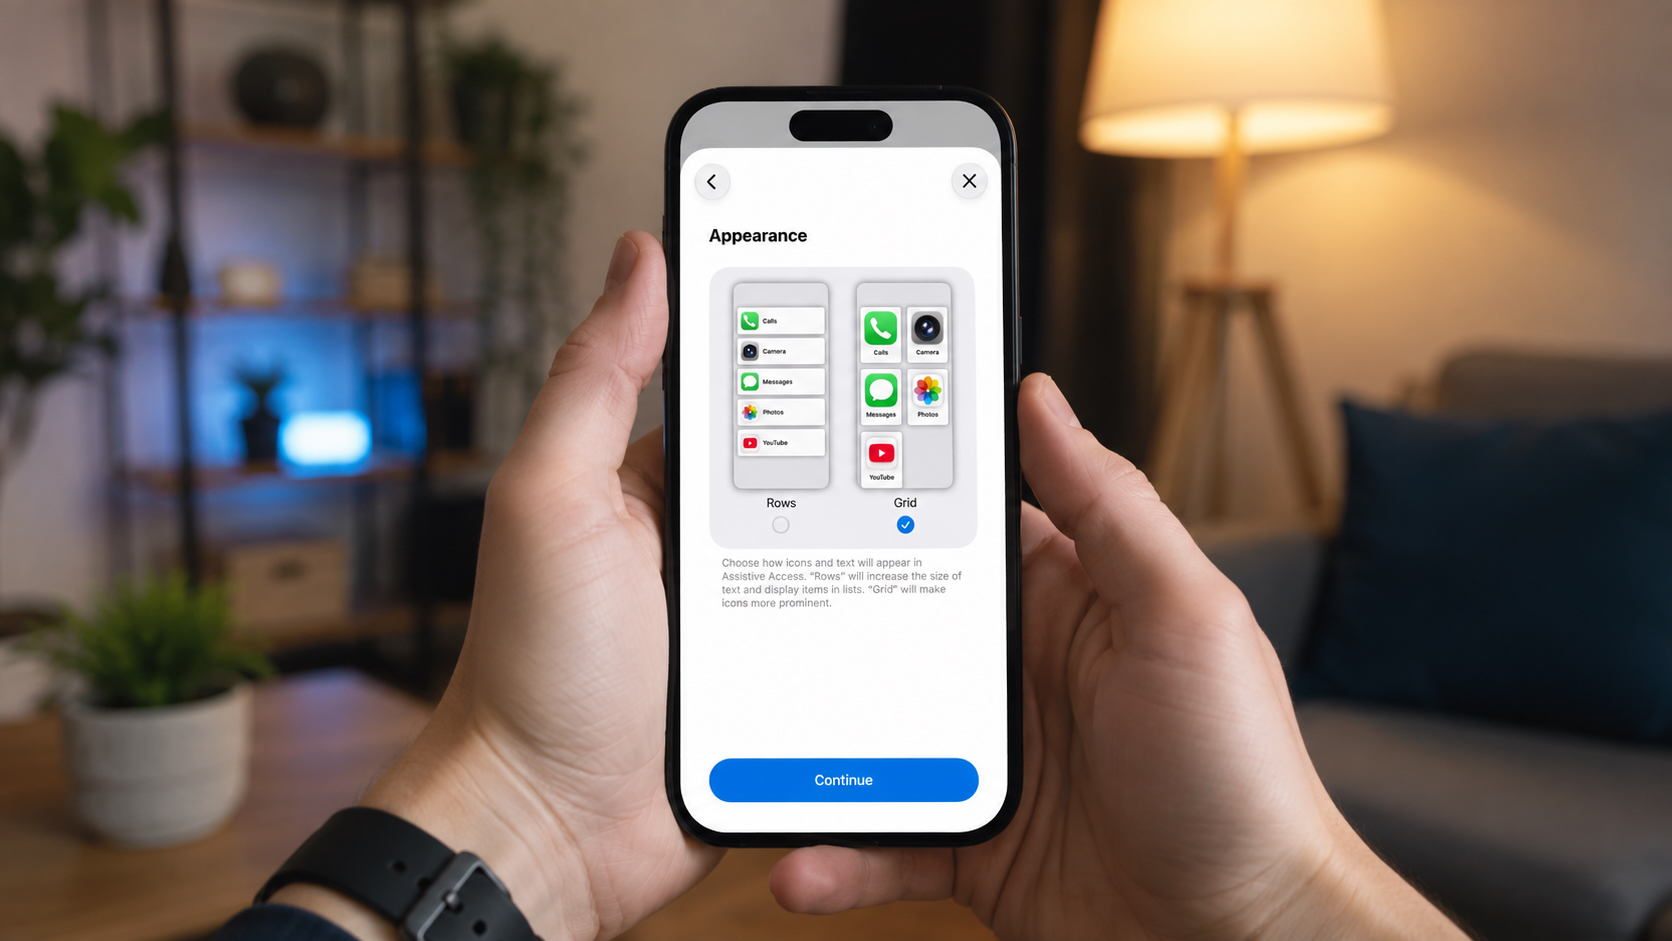
- Choose a layout — Grid or List — and tap Continue.
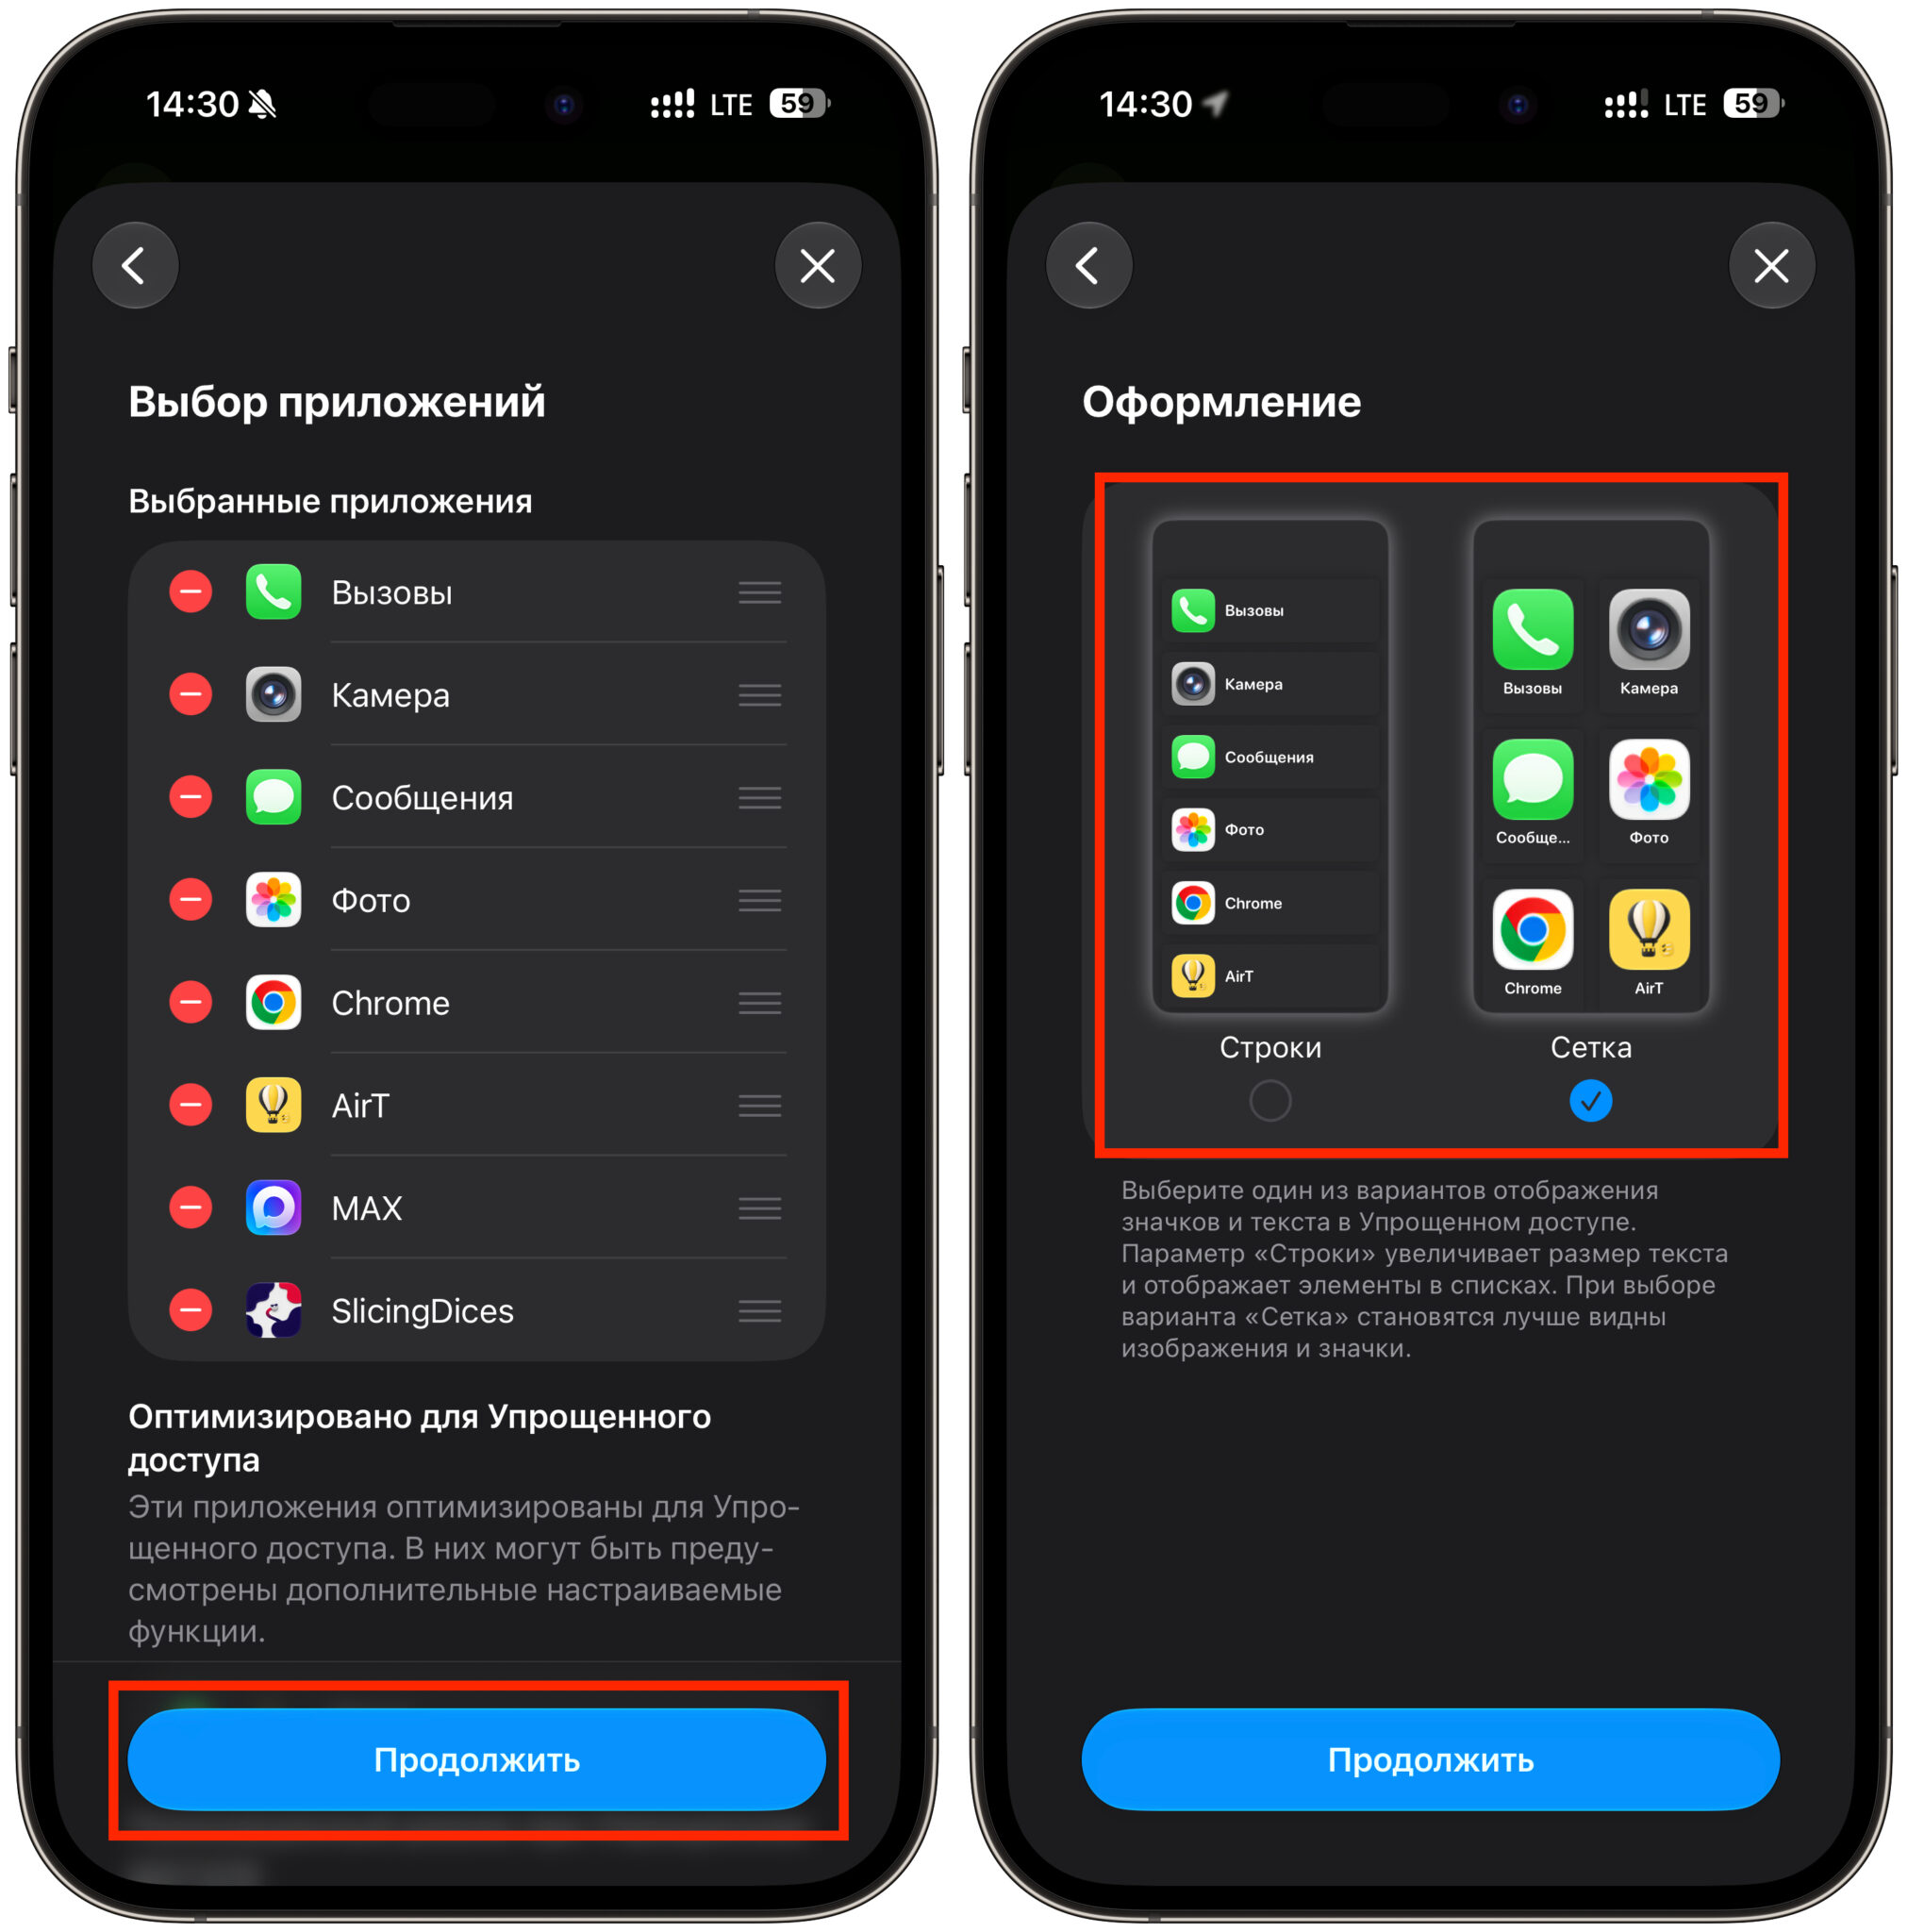
- Go through the tutorial screens, tapping Continue on each.
- Enter the Screen Time passcode if you set one earlier.
- Note the exit method: triple-press the side button.
- Tap Start Using Assistive Access and confirm with the passcode if prompted.
The Grid layout with large tiles suits users with poor eyesight, while the List layout works better for those who prefer reading app names in rows. After confirmation, a brief message appears on screen and the iPhone switches to the simplified mode, showing only the chosen apps.
How to restrict calls, messages, and the camera
The real power of Assistive Access is not just hiding icons — it is restricting what each app can do. You can limit functionality quite tightly:
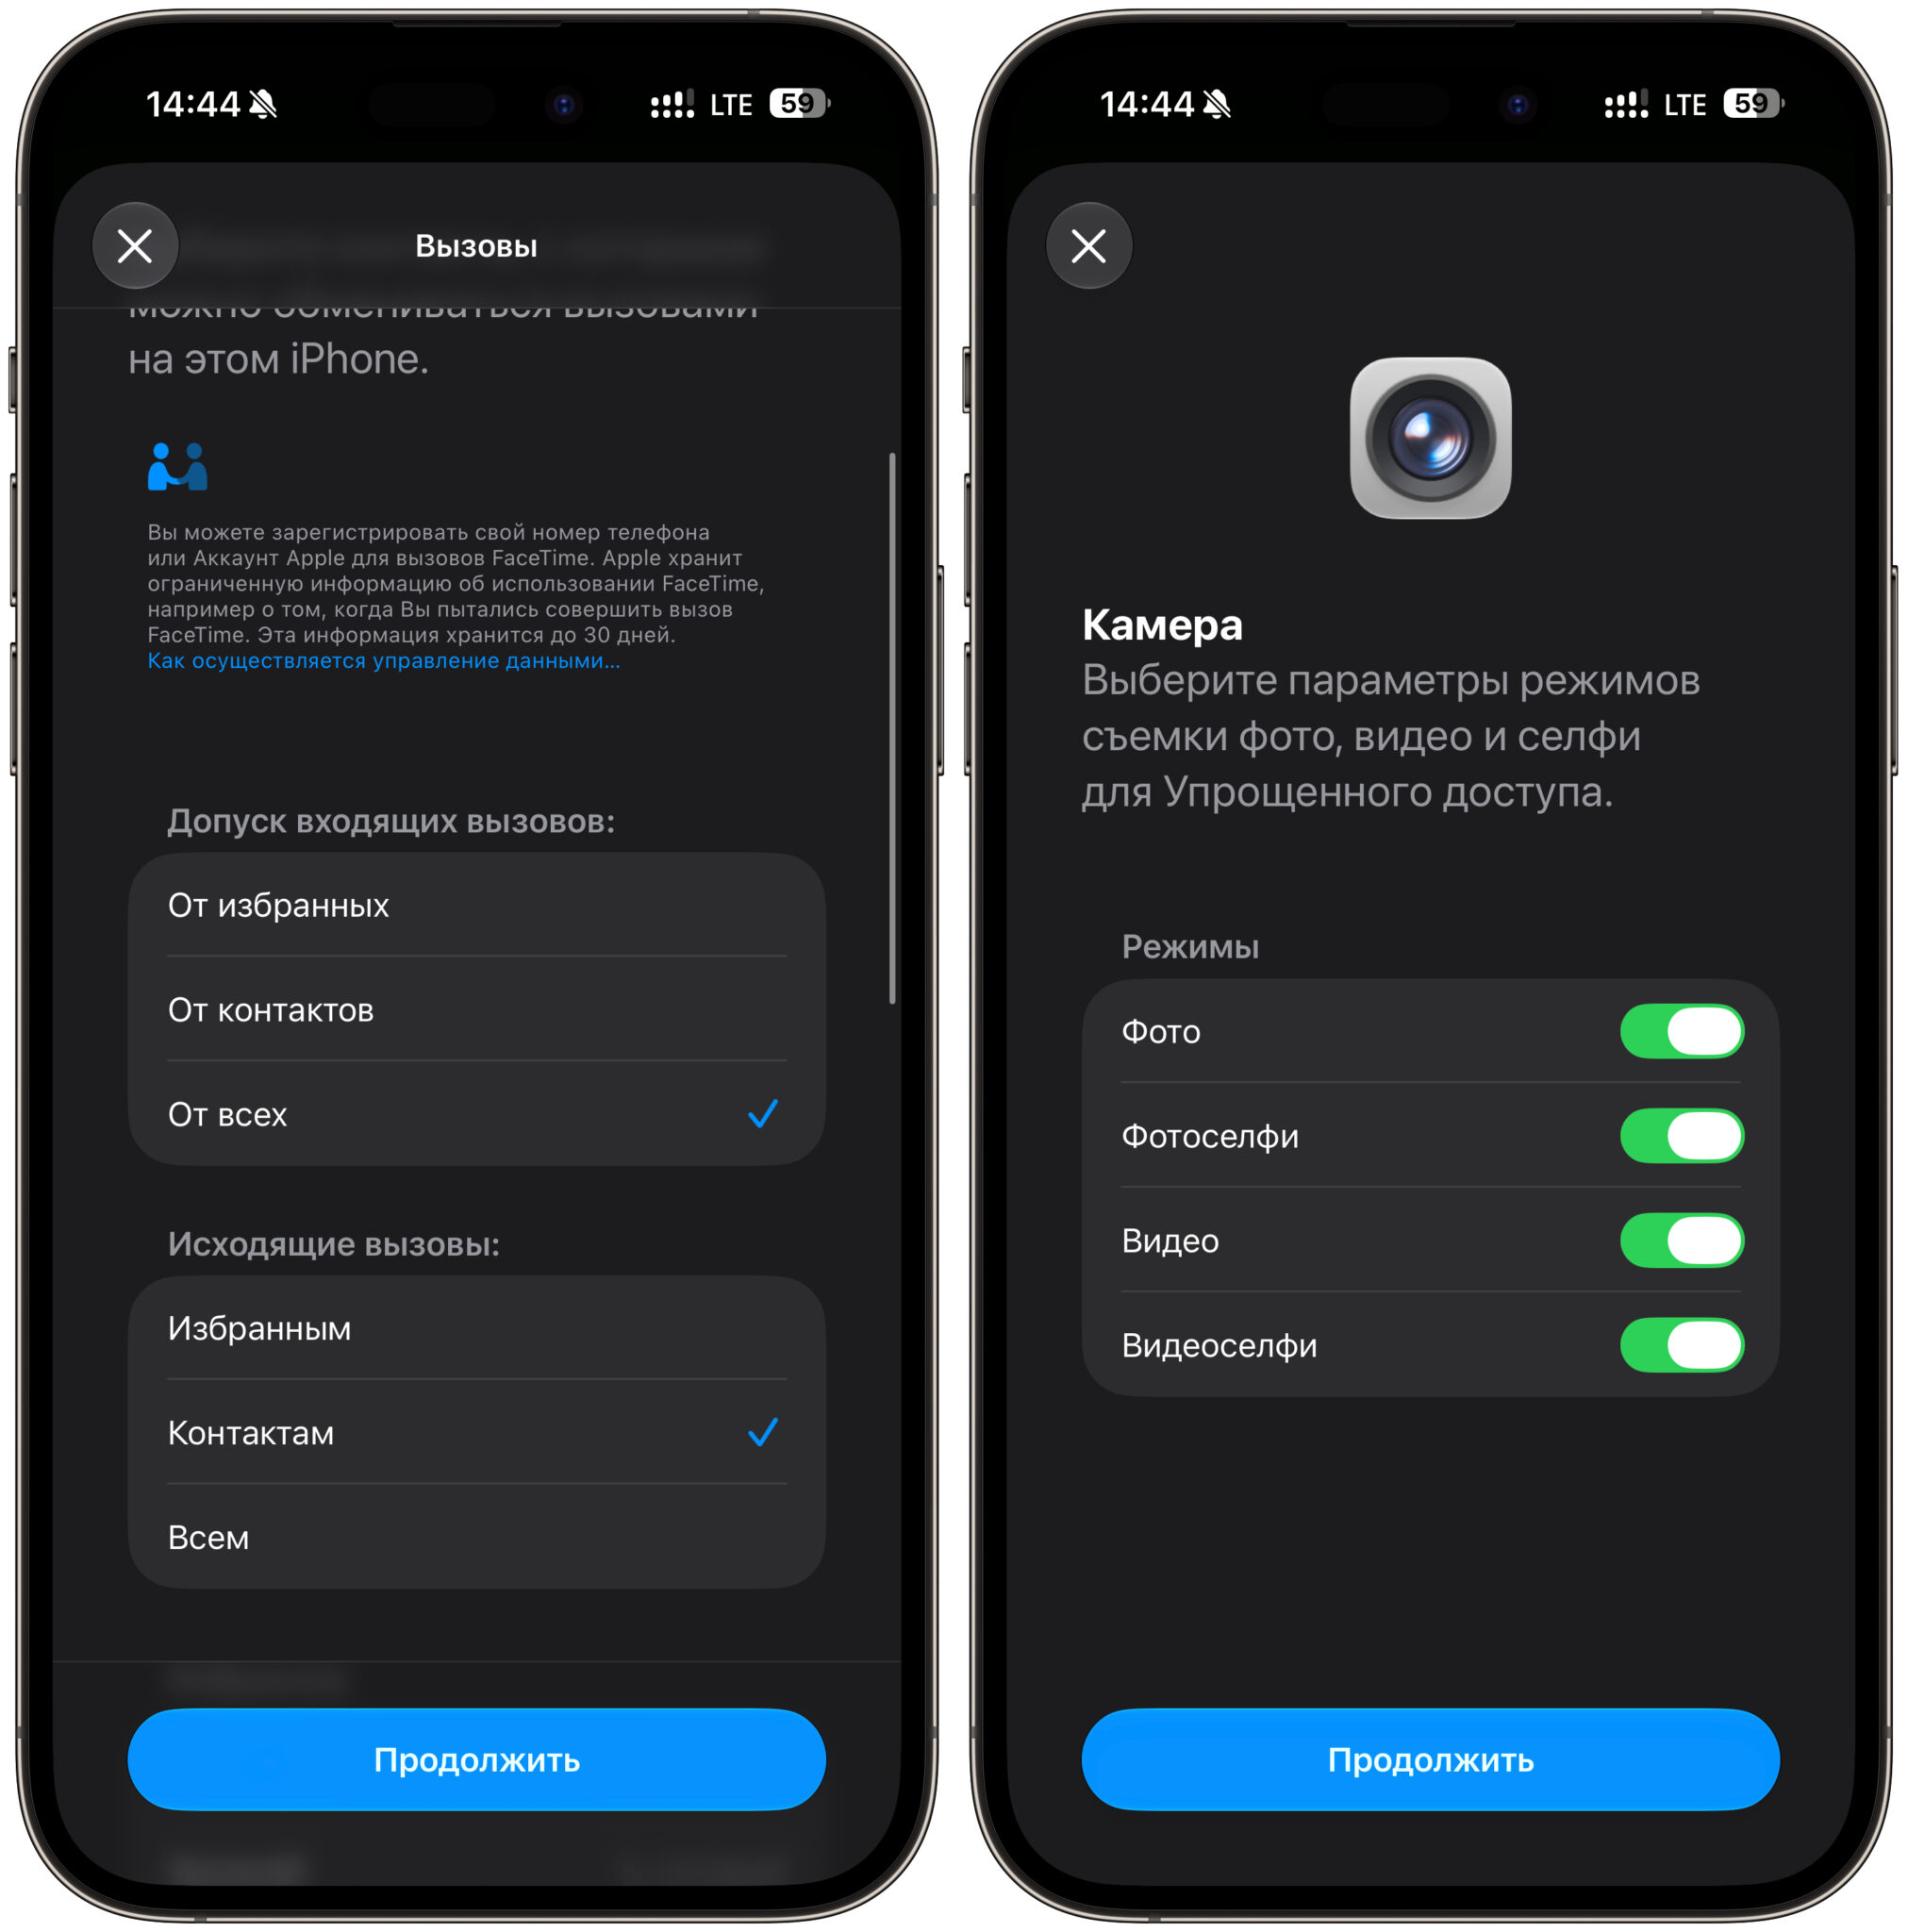
- Phone — calls can be limited to receiving and making calls only to contacts in a pre-built Favorites list.
- Messages — conversations restricted to Favorites contacts only.
- Camera — only Photo and Selfie modes available.
- Photos — access to shared albums.
- Third-party apps not adapted for Assistive Access (such as YouTube) — individual feature restrictions are not available; the app opens with its full functionality.
This means a child can only call or text people you have personally added to Favorites. That is the key difference from simply hiding icons in a folder on the home screen: with a folder, the child can still open Contacts or start a chat with anyone.
Returning the iPhone to normal mode
Exiting Assistive Access does not erase anything: all apps and files remain intact, and no data is deleted. To return to the standard iOS interface, triple-press the iPhone’s side button. If a Screen Time passcode was set, the system will ask for it before switching back.
Assistive Access is well suited for situations where an older iPhone is sitting unused and a child only needs it for calls and a couple of apps. For an adult with typical smartphone needs, the mode will be too restrictive — it blocks access to most system features.