Sometimes you record a video on your iPhone, and the audio comes out muffled or the volume keeps jumping, especially when you change the zoom. In most cases, this can be fixed with a couple of toggles in settings. Below — what exactly to turn off in the camera, how to check the microphones, and where to dig deeper if none of that helps. By the way, the audio issue is especially relevant for those who like to record video with the screen off — it’s even harder to monitor the recording there.

Not happy with the audio on iPhone video? Let’s fix the problem with what we have
Video Recording Audio Quality on iPhone: What Affects It
The main culprit behind “floating” audio is the Audio Zoom feature. As soon as you pinch to zoom in, the microphones are digitally narrowed to focus on the source in front of the camera, while everything on the sides gets muted. It sounds logical, but in practice every zoom change alters both the volume and the tone of the voice: sometimes muffled, sometimes as if someone covered the mic with their hand.
The second common cause is microphone openings clogged with dust or blocked by a case. The iPhone has several: at the bottom near the speaker, in the top earpiece, and near the rear camera module. If even one opening is blocked, the stereo recording loses balance and the sound becomes uneven.
The third cause is connected headphones. If AirPods or other wireless headphones are connected to the iPhone, the audio may be recorded through their microphone instead of the smartphone’s built-in ones. And a headphone microphone in the wind or in a noisy place performs noticeably worse than the built-in mics.
Audio Zoom on iPhone: When the Feature Ruins Your Sound
If the audio in your video changes in volume when you zoom in, turn off Audio Zoom. After that, the microphones will capture the scene evenly, regardless of the zoom level.

First, let’s disable Audio Zoom
- Open the Settings app on your iPhone with the latest version of iOS 26.
- Scroll down and select Camera.
- Tap Record Sound.
- Turn off the Audio Zoom toggle.
- Make sure that Stereo is selected in the same section.
Now launch the camera, shoot a test clip while zooming in, and play it back. The volume and tone should remain stable at any zoom level — without any digital volume “tweaking.”
iPhone Microphone Records Poor Audio: What to Check First
If after disabling Audio Zoom the sound still sounds dull, check the microphones and shooting conditions. Most often the problem is mechanical, not software-related.
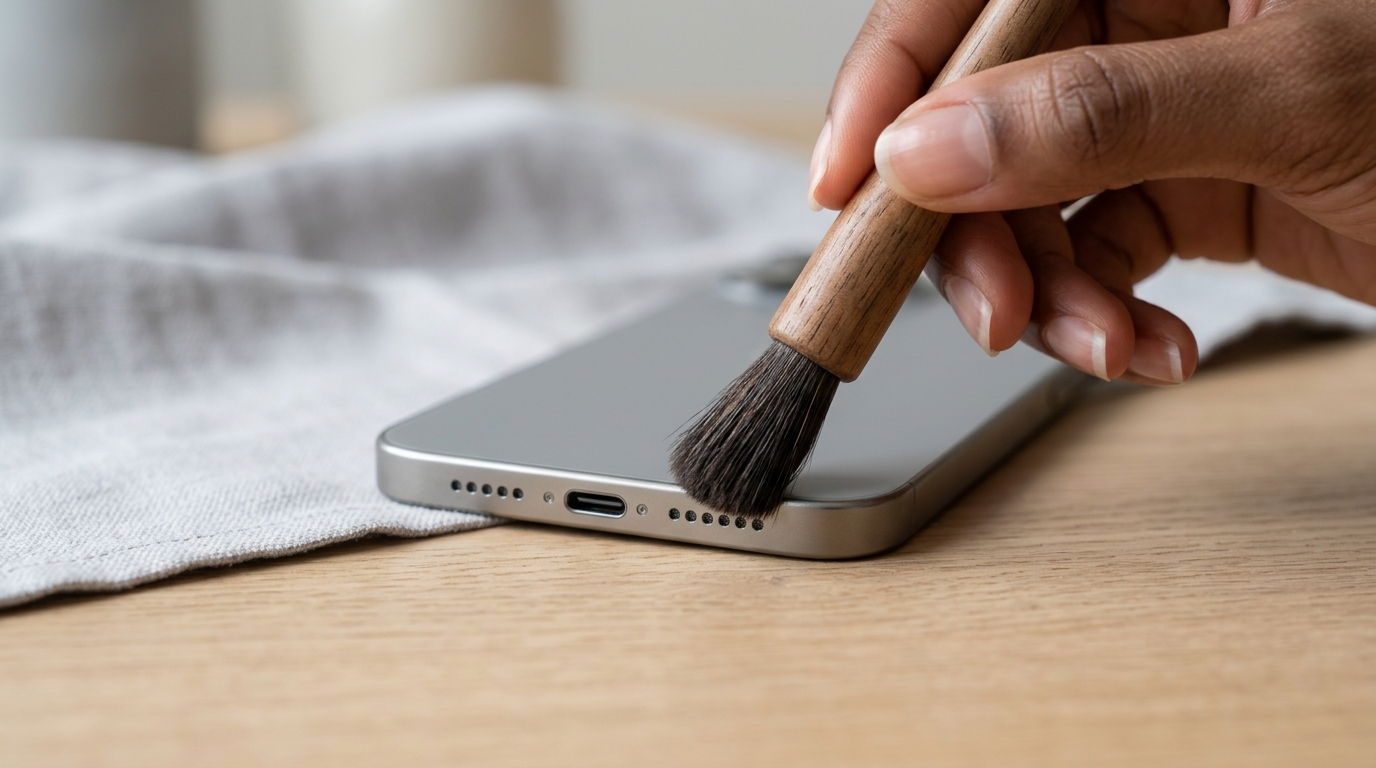
- Clean the microphone openings. Use a soft dry brush or a soft-bristle toothbrush. Gently go over the grilles at the bottom of the body, in the top earpiece, and near the camera module. Do not use needles, paper clips, or pressurized air — this can damage the mesh.
- Remove the case or screen protector. Thick cases and films, especially non-standard ones, sometimes partially block the microphones. Remove the accessory and make a test recording.
- Disconnect AirPods and other headphones. Before shooting, check the Control Center and make sure your Bluetooth headset is not active — otherwise your iPhone may happily record audio through its microphone.
- Restart your iPhone. It’s basic, but it works: a restart often resolves minor audio system and Camera app glitches.
- Check the recording mode. In the Camera > Record Sound section, Stereo should be selected. Mono sounds noticeably flatter.
Why audio in iPhone video comes out quiet and uneven
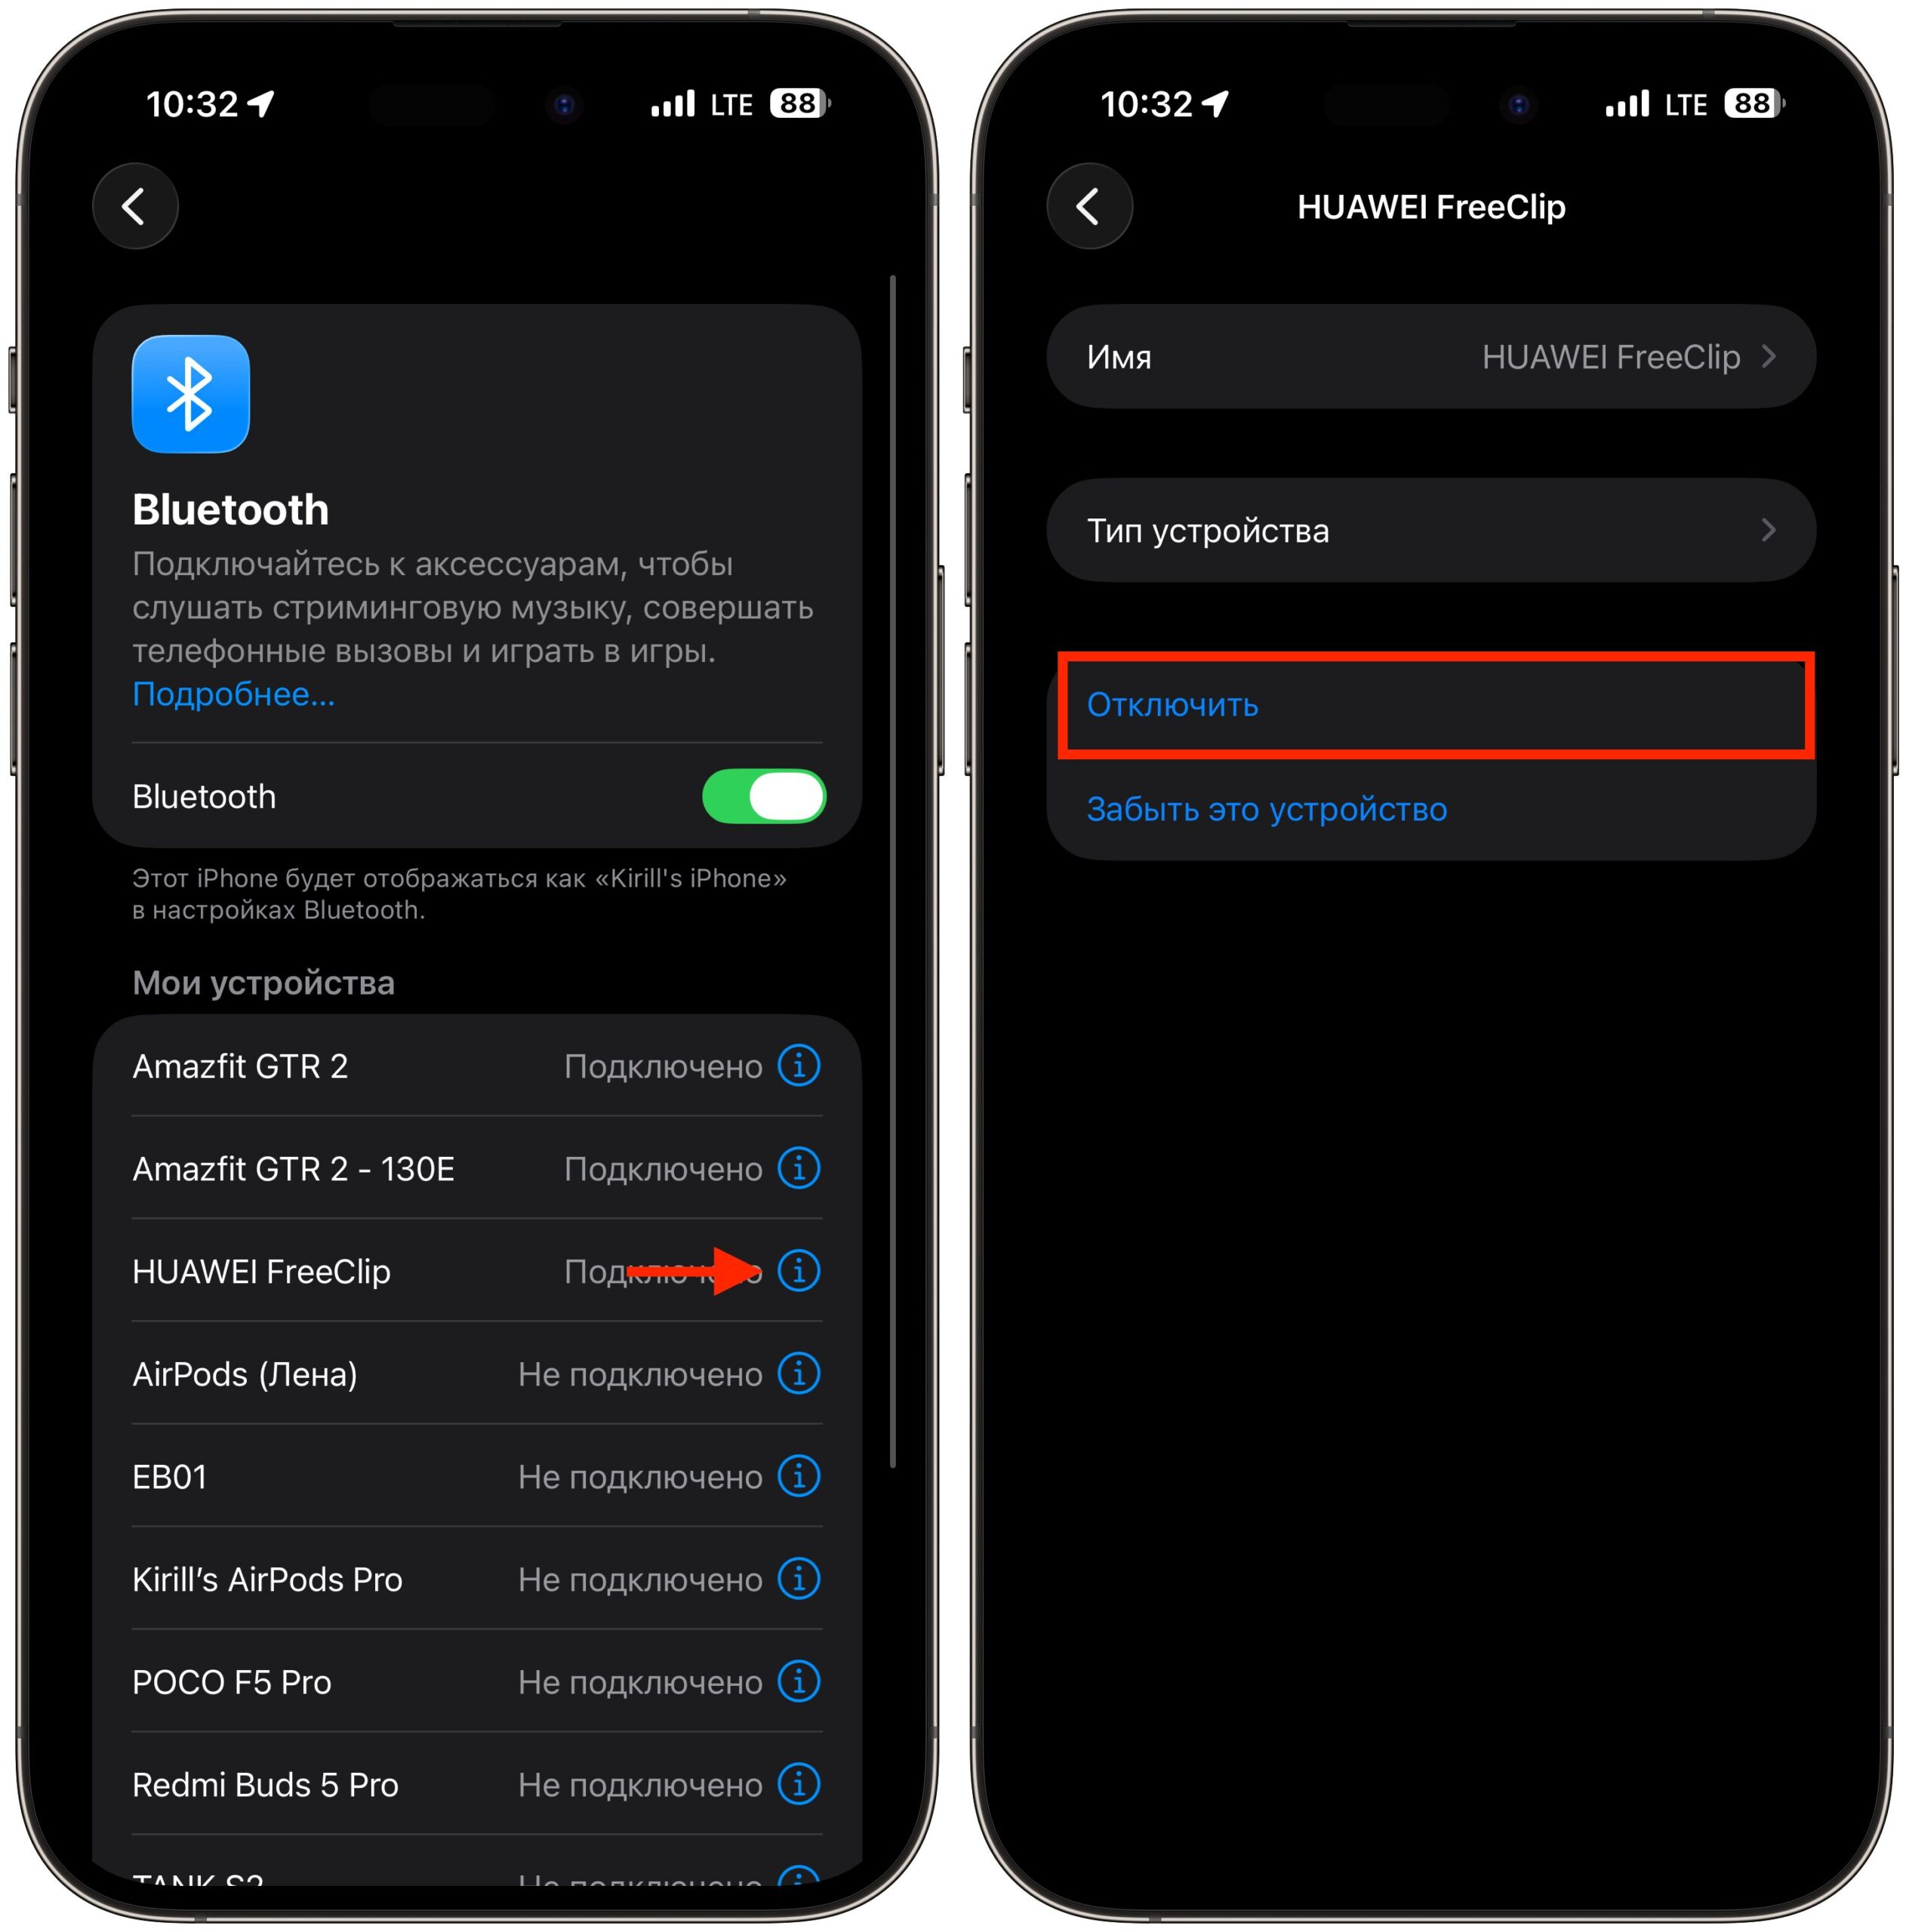
Disconnect AirPods or other headphones connected to your iPhone
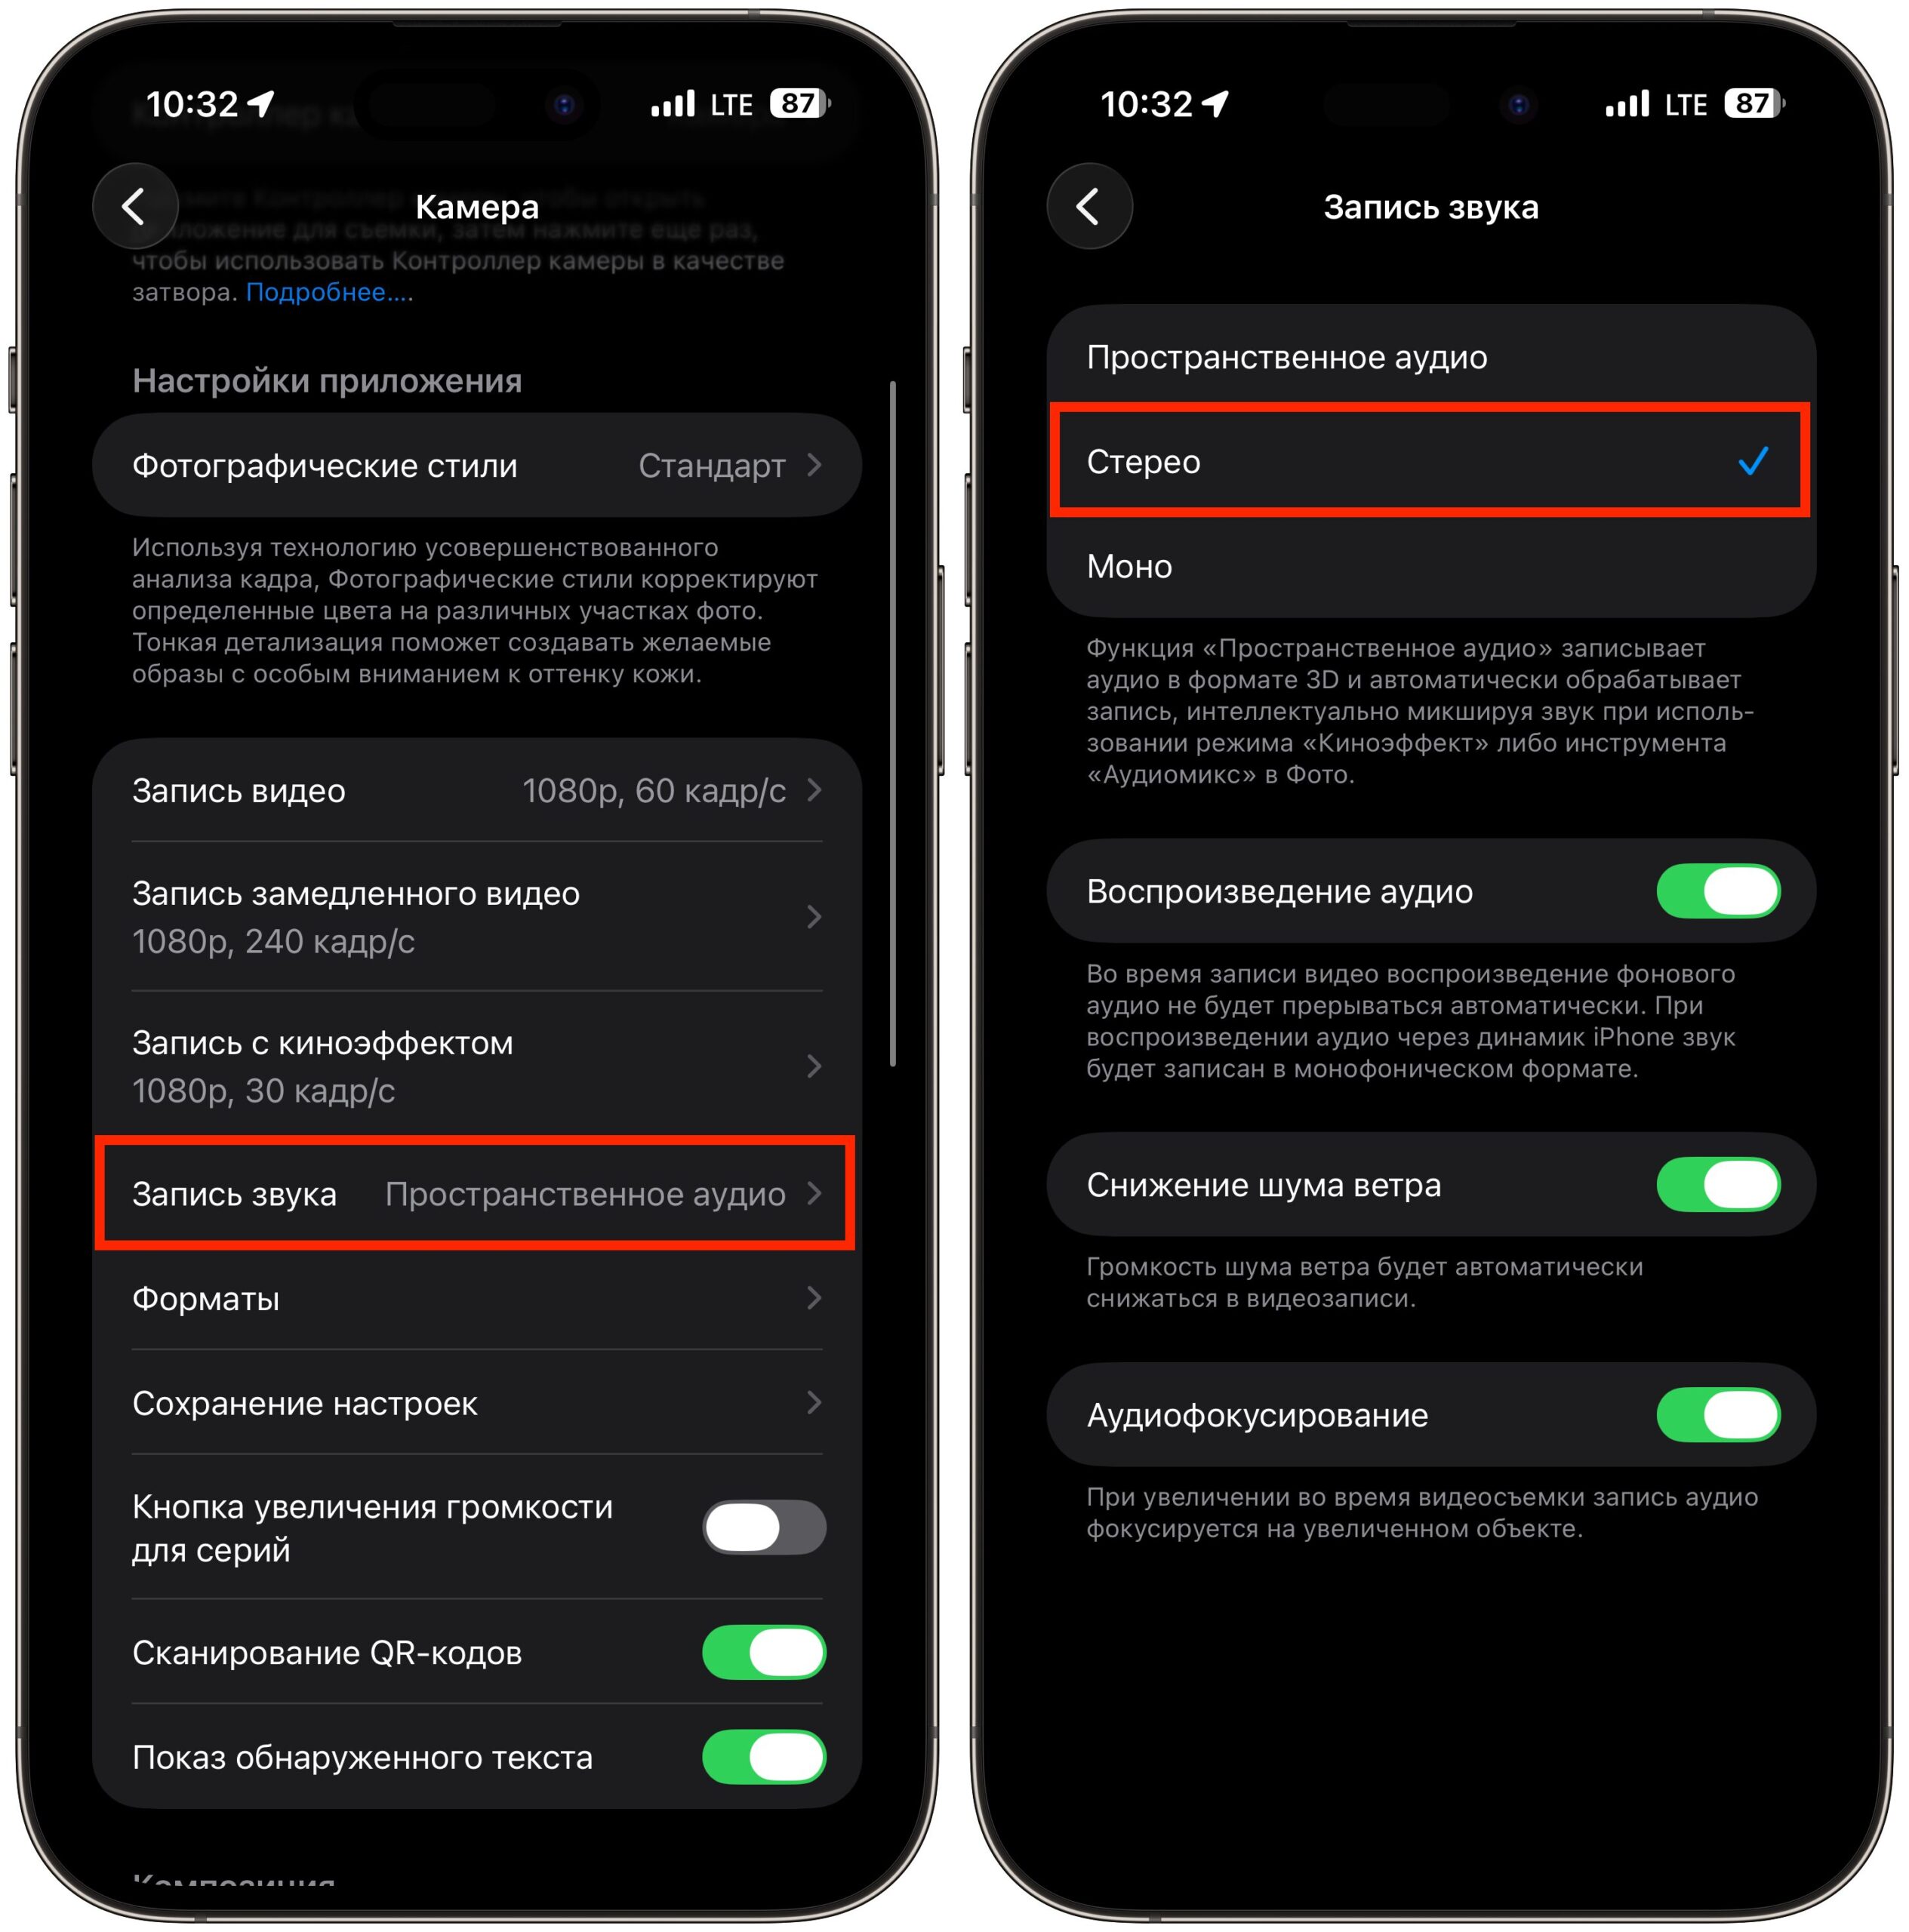
Set audio recording to stereo
If you often shoot interviews or vlogs, it makes sense to connect an external USB-C or Lightning microphone. A lavalier mic will cost you less than a thousand rubles and will almost always deliver cleaner sound than the built-in microphones, especially outdoors and in rooms with echo.
Audio Mix on iPhone: How to Improve Sound After Shooting
On iPhone 16 and newer, there’s a feature called Audio Mix — it works after shooting, in the Photos app. With it, you can choose one of the audio processing modes:
- Standard — the original recording without changes.
- In Frame — the system mutes sounds and voices that are outside the frame.
- Studio — simulates a studio recording with a close microphone, removes room echo.
- Cinematic — participants’ voices are brought forward, background noise is softened.
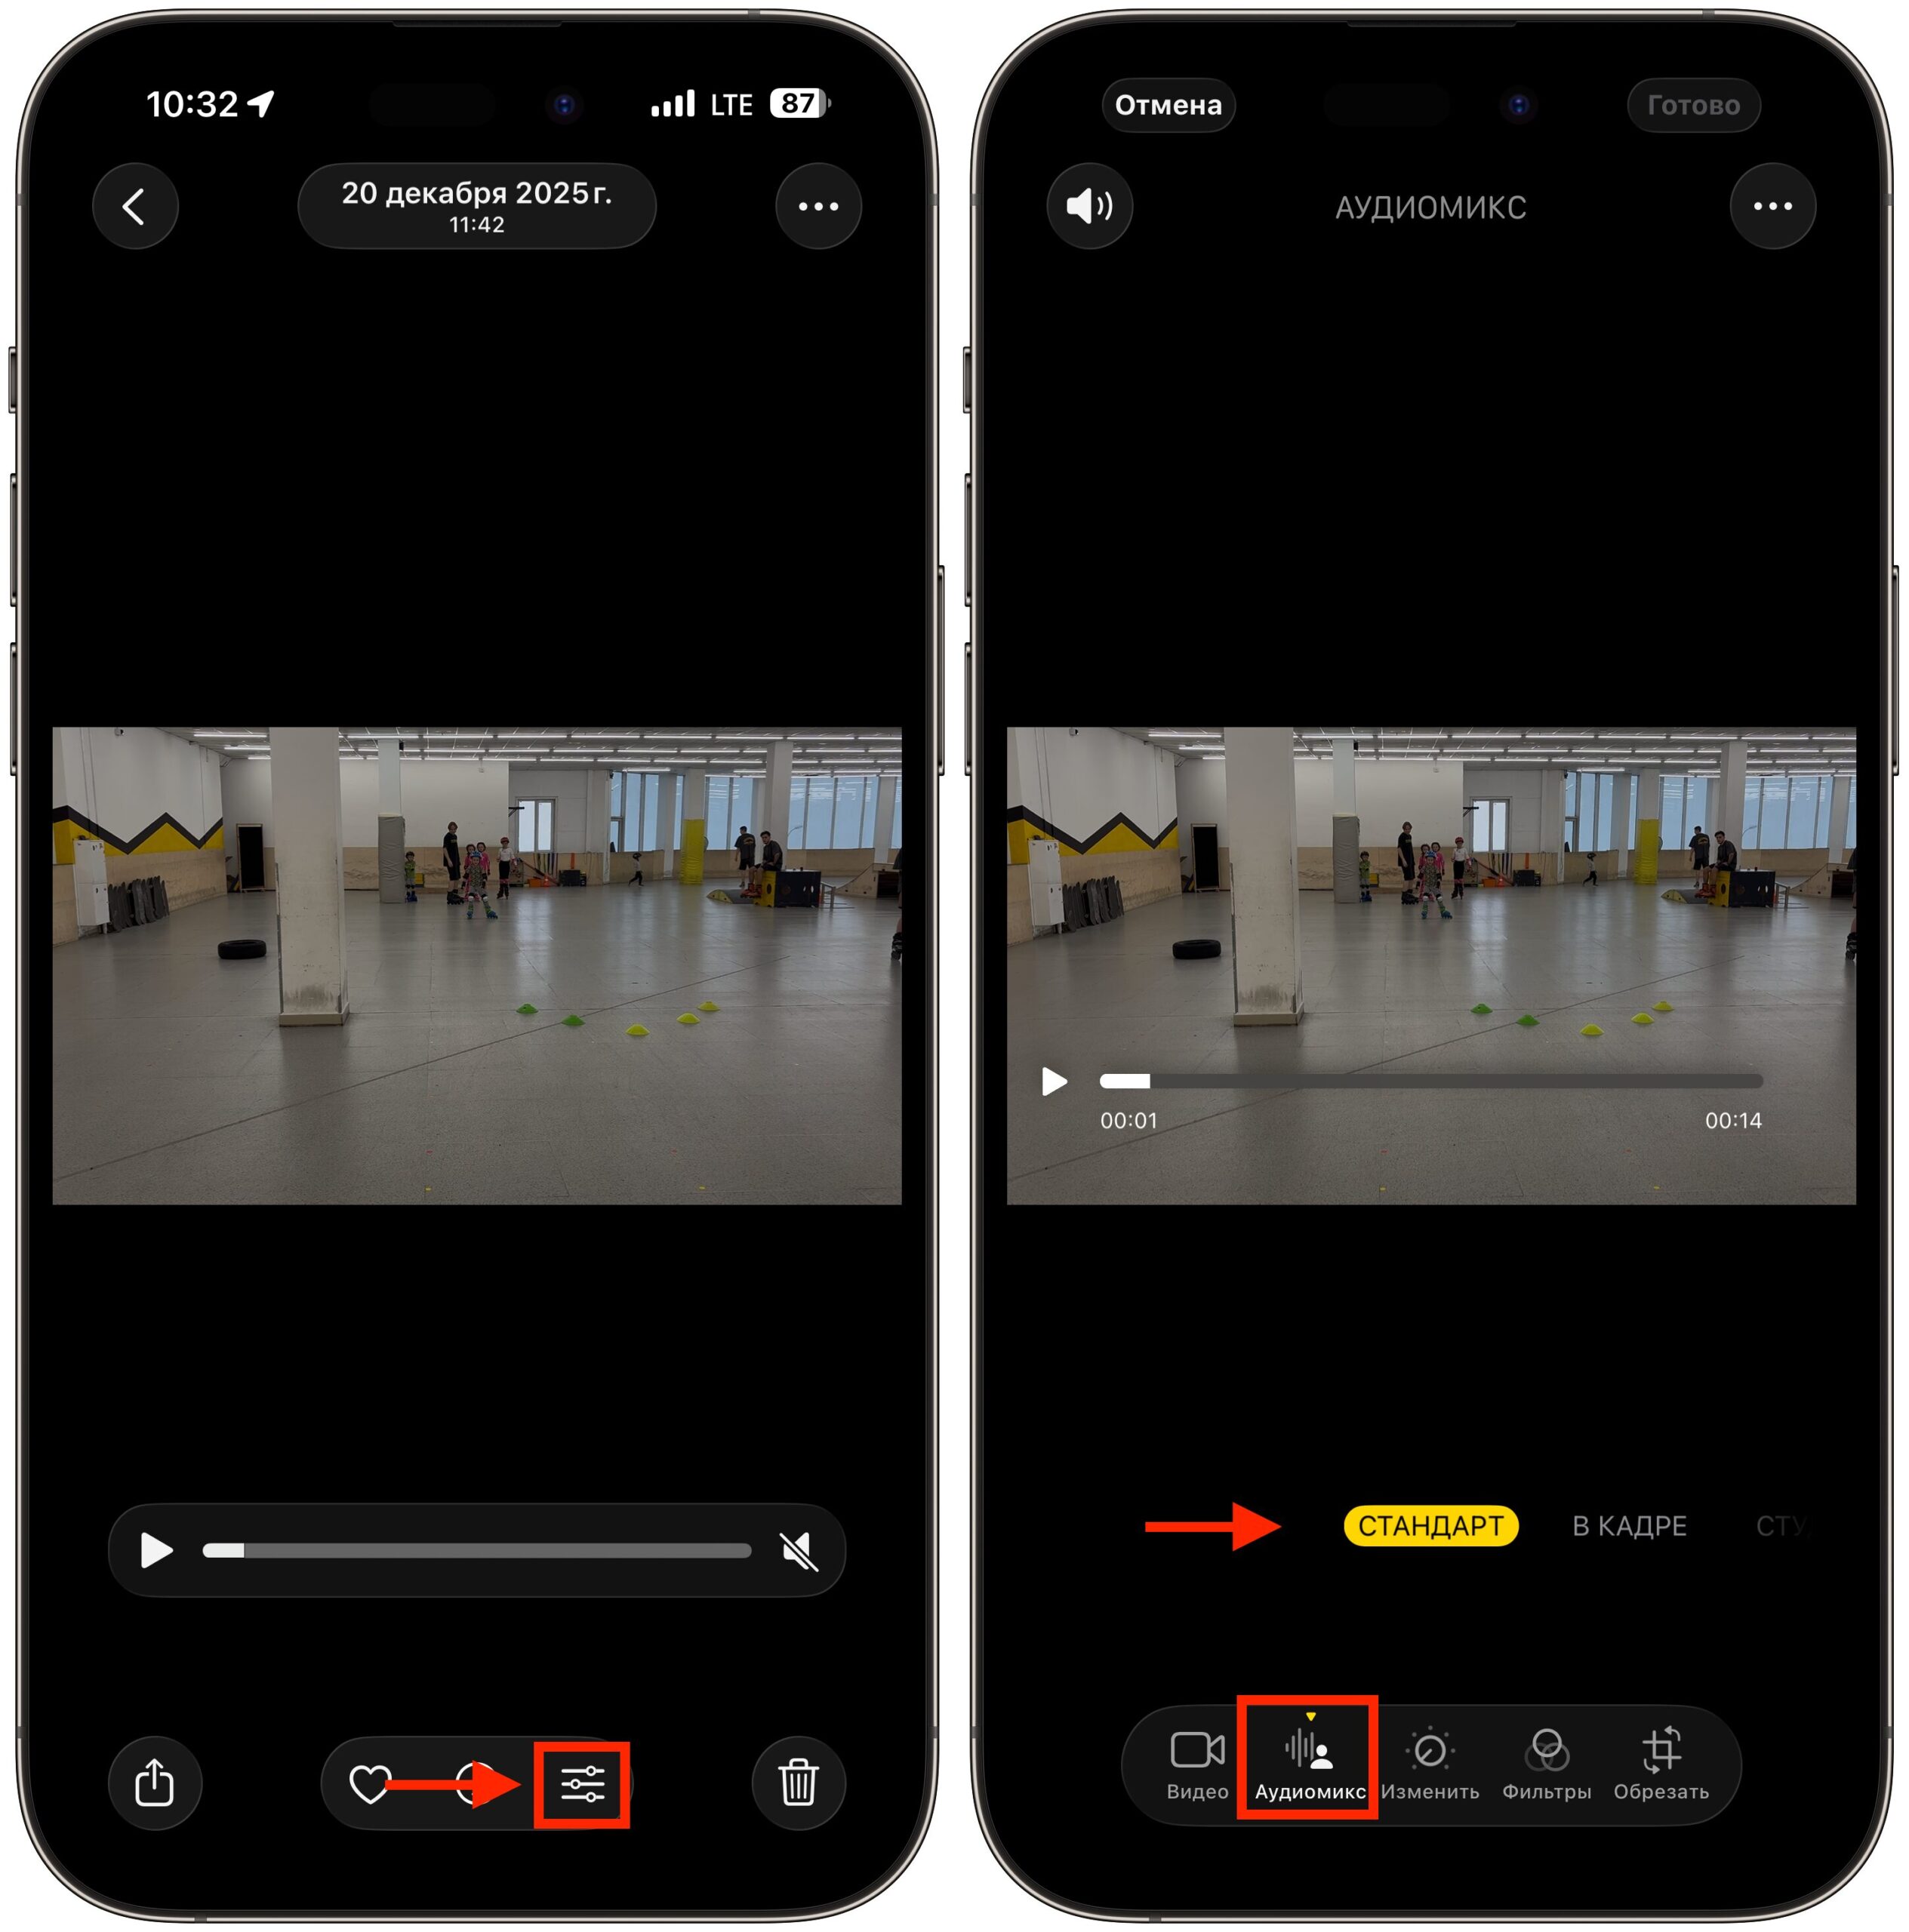
Audio Mix settings can be found here. By the way, they do a great job improving sound
To try it, open the clip in Photos, tap “Edit,” tap the audio icon, and switch between modes. When the original recording turned out uneven, “Studio” or “In Frame” often rescue the voice and smooth out the sound.