After Apple removed the MAKS messenger from the App Store, iPhone owners got an unpleasant side effect: notifications about new messages simply stopped arriving. Without valid push certificates from Apple, the app can no longer reach the phone, and you only find out about incoming messages by opening MAKS manually. This is especially frustrating if the messenger is used for work or family chats. A developer under the nickname ilcommm found an unconventional solution. He figured out how to redirect MAKS notifications directly to iMessage. It sounds strange, but the method works.
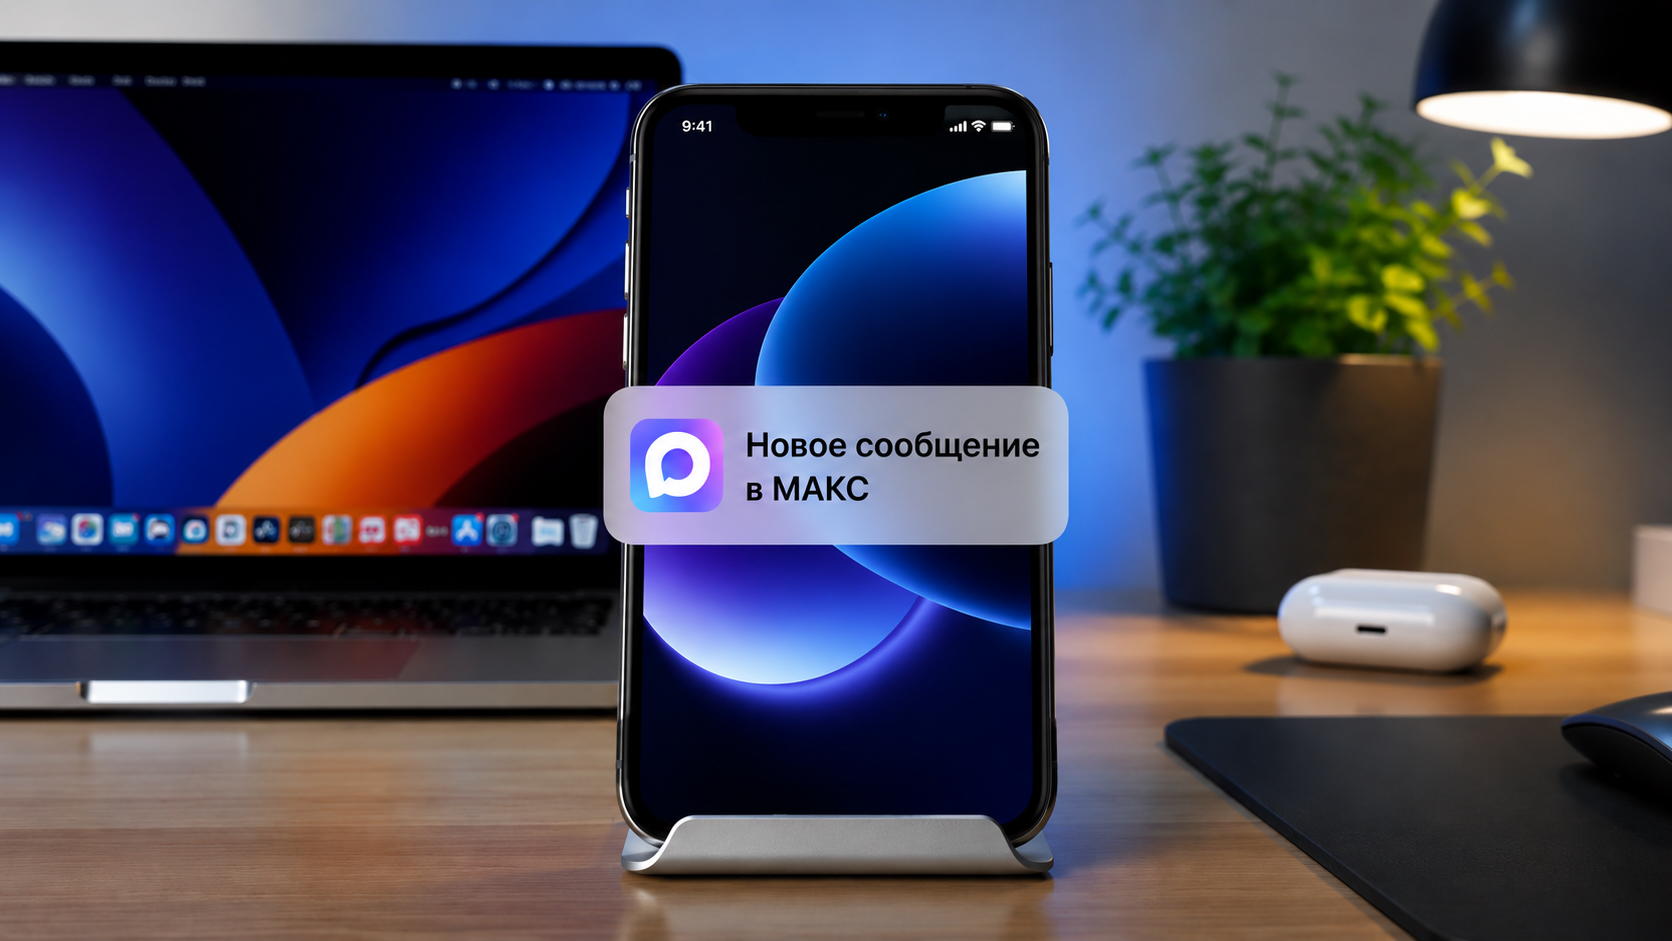
MAKS notifications will start arriving, but in iMessage
MAKS Messages on iPhone via iMessage
The idea is simple yet elegant. Max2iMessage is a small Mac application that lives in the menu bar and monitors MAKS notifications. As soon as a new message arrives, the utility packages it into a regular iMessage and sends it to your phone number or Apple ID email. Then the familiar Apple magic kicks in: the notification arrives simultaneously on iPhone, iPad, and Apple Watch.
Essentially, you’re using Apple’s own infrastructure instead of MAKS’s blocked push notifications. The message text is also visible — it’s not just a badge saying “you got something,” but a full notification with content. This solution is useful for everyone whose MAKS notifications stopped arriving after the block.
The app has several nice details. It can work with multiple MAKS accounts and send them to different iMessage addresses. All processing happens locally on your Mac, and MAKS passwords are not saved anywhere. The first public build weighs only 392 KB and requires macOS 15.6 or newer.
Setting Up MAKS Notifications on iPhone via Mac
Before you begin, make sure that iMessage is set up and working on your Mac — all notifications will go through it. This method also helps those whose MAKS stopped working on iPhone and computer. Then follow these steps.
- Download the Max2iMessage-v1.0-macos.zip archive from the release page on GitHub.
- Unpack it and drag Max2iMessage.app to the Applications folder.
- Launch the app — its icon will appear in the macOS menu bar.
- Open the settings and enter the email or phone number linked to your iMessage.
- At the end of the settings, click the “Log in to MAKS” button.
- Authorize with your account. After logging in, the status will change to Online.
- During the first forwarding, macOS will request Automation permission for the Messages app. Click “Allow.”
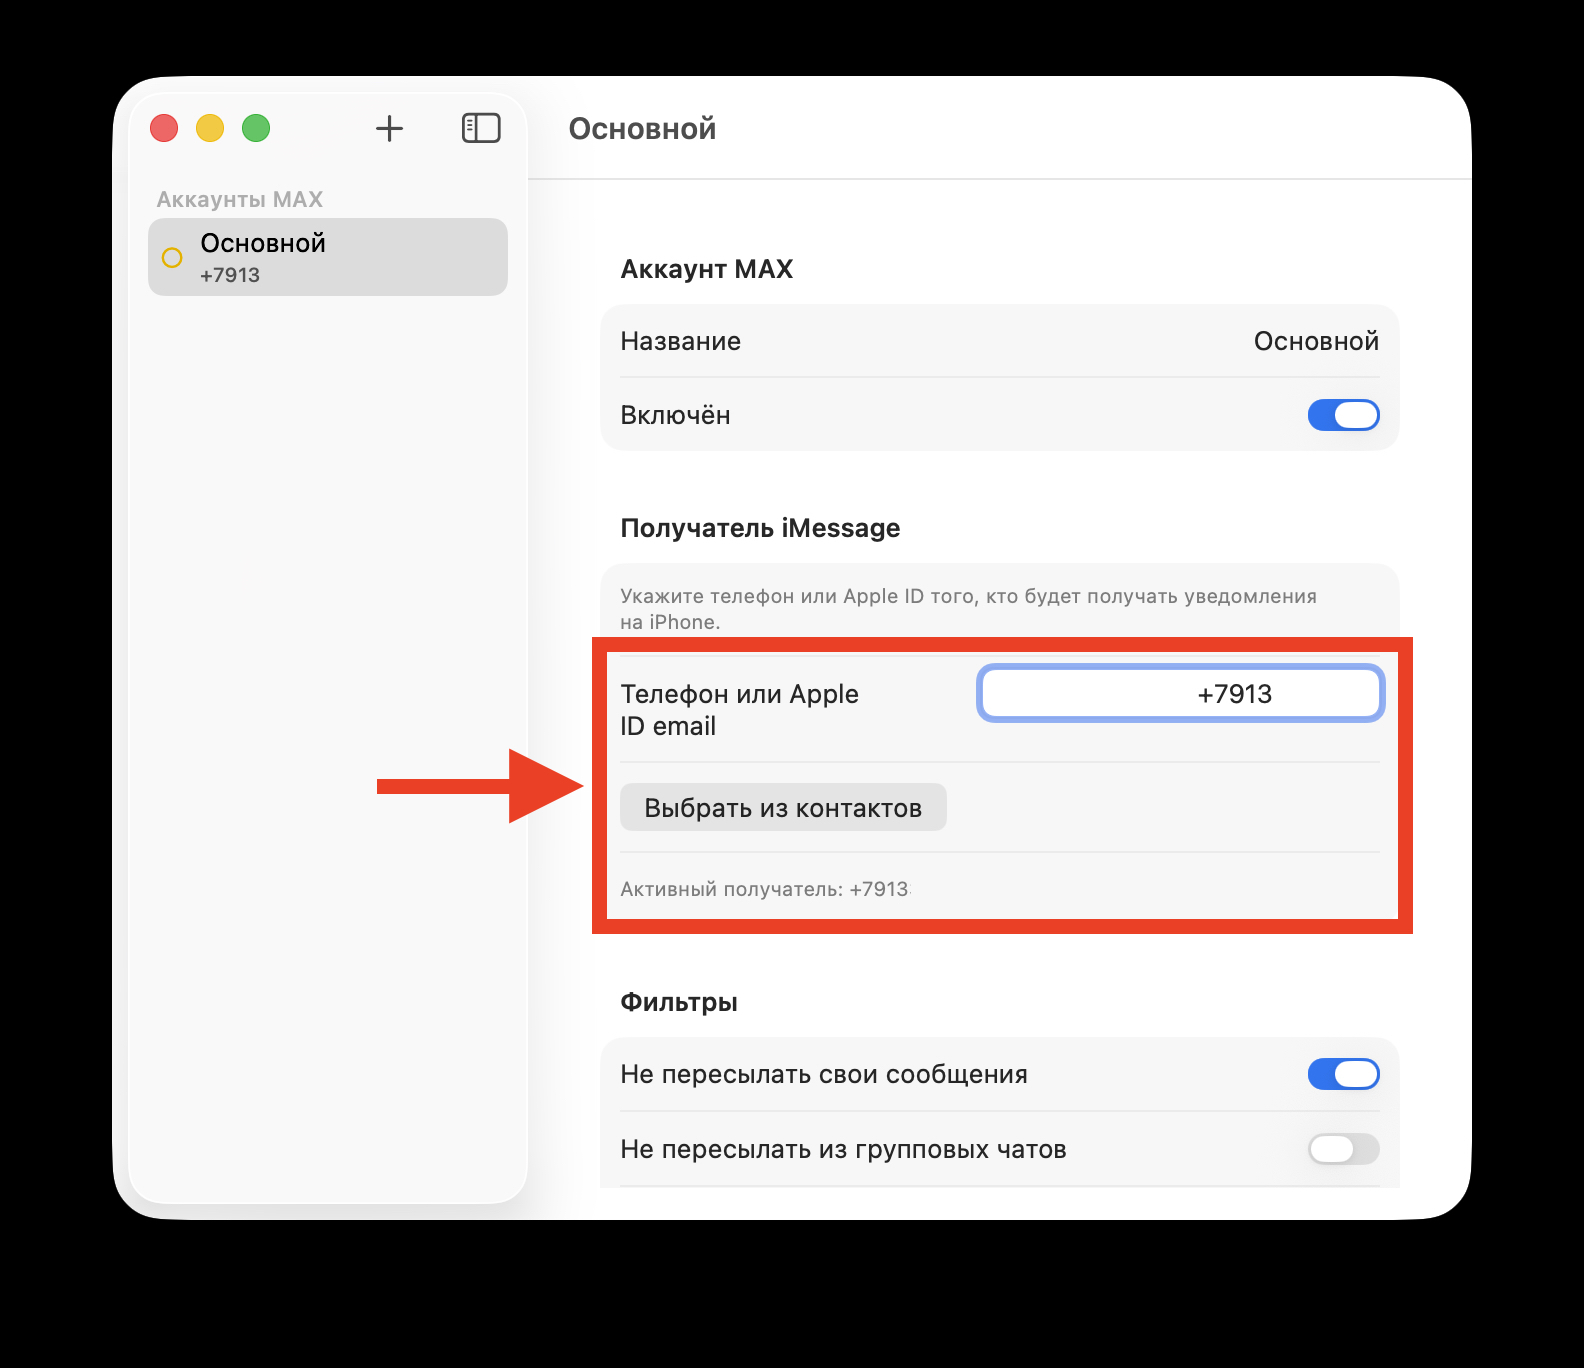
Enter the number or email where messages will be sent
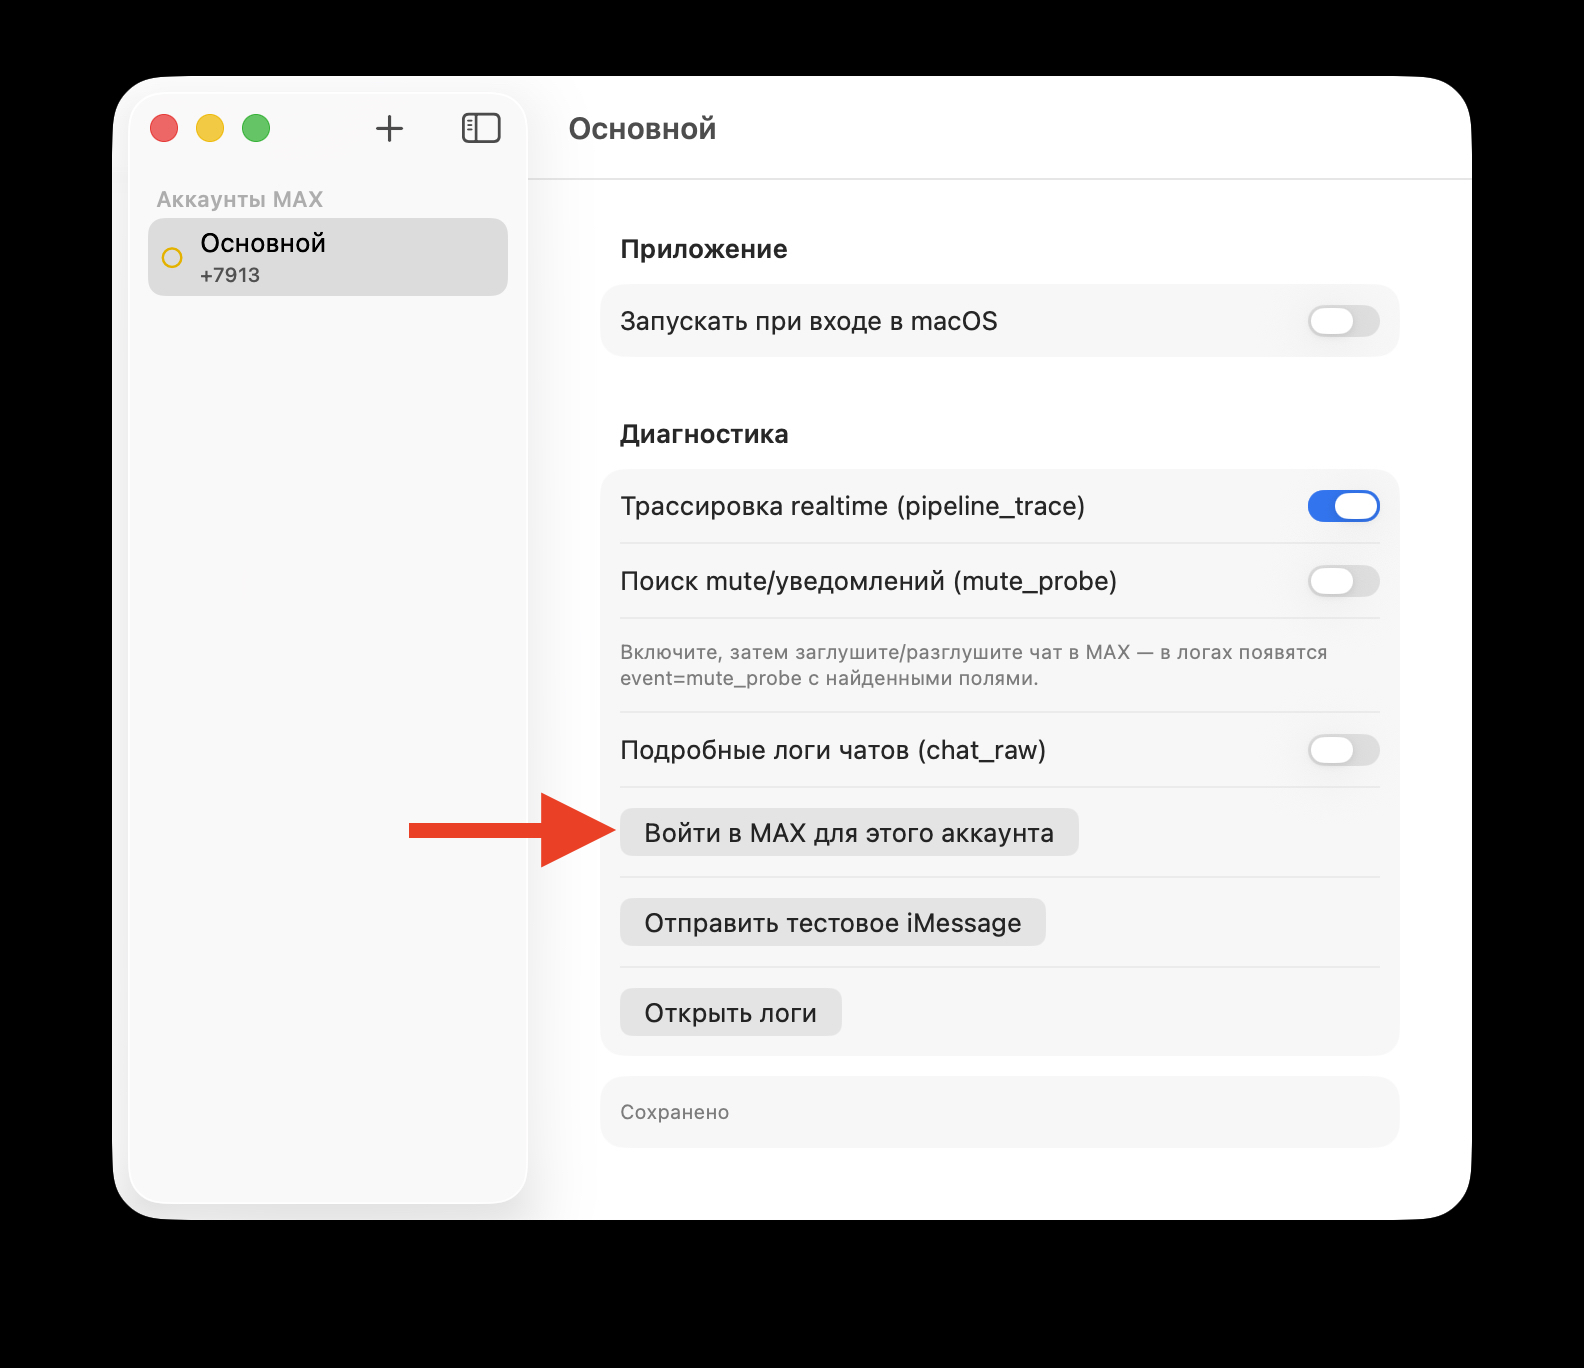
Log in to the web version of MAKS using this button
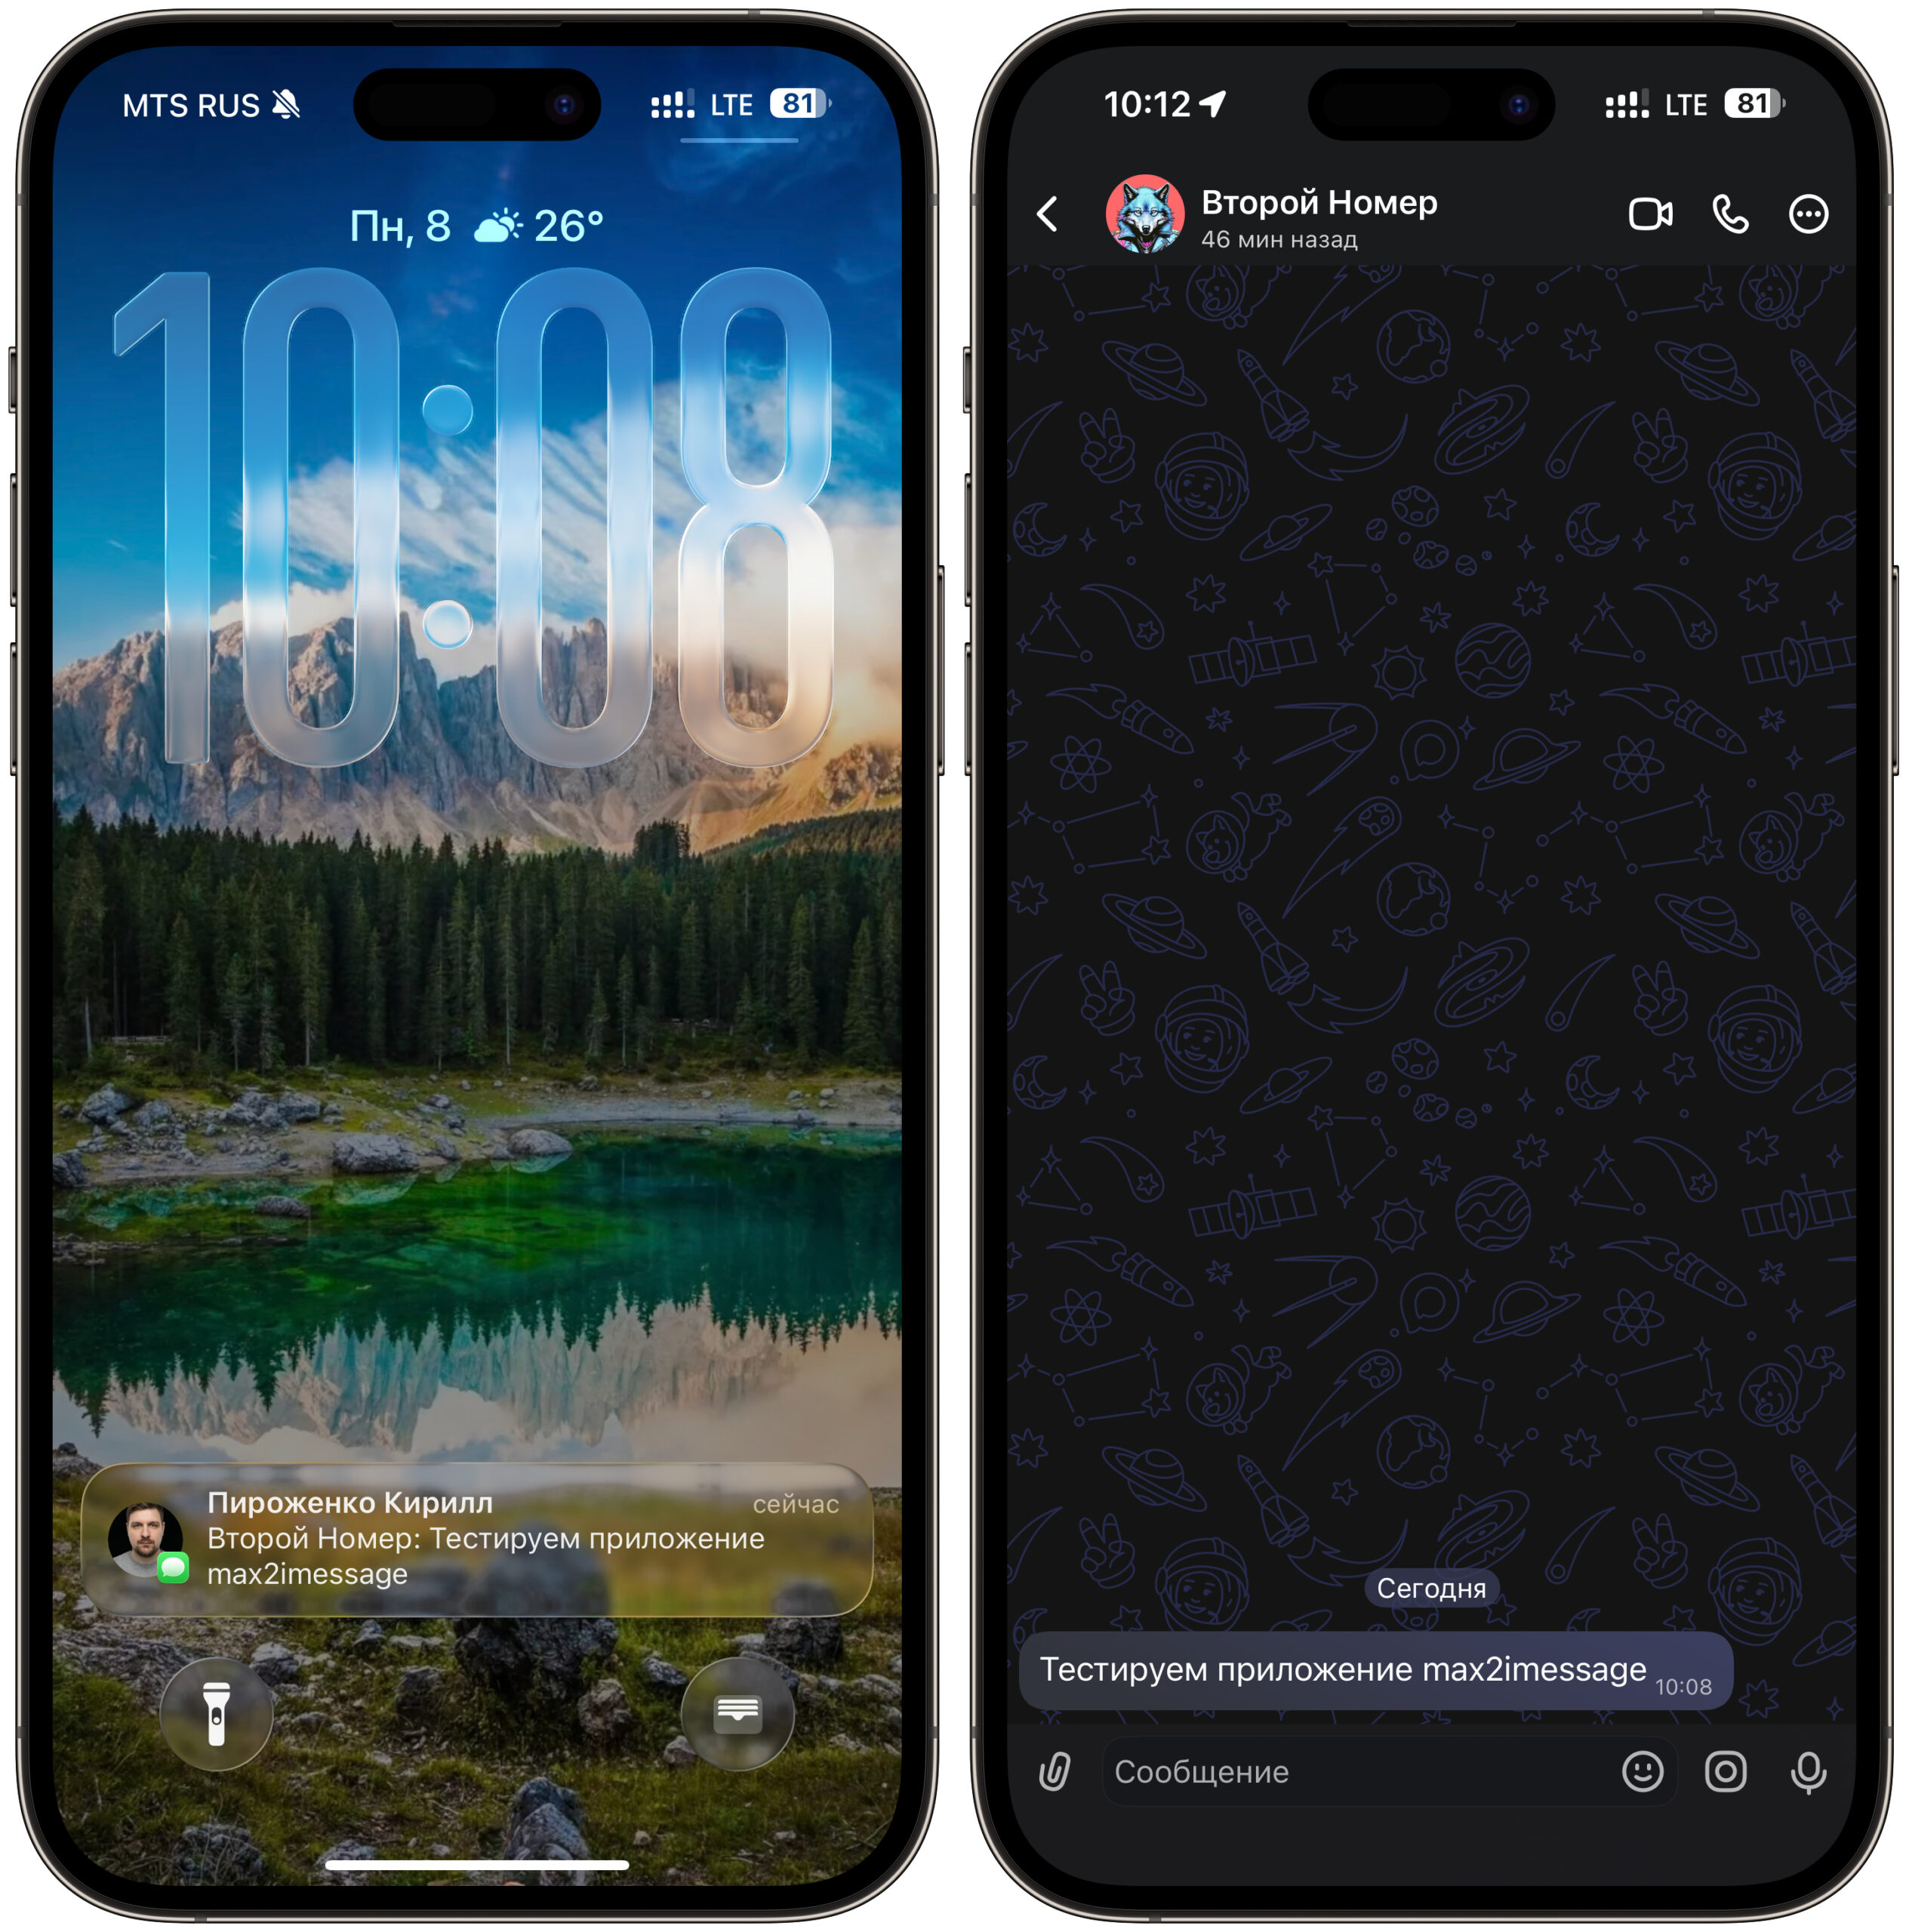
Messages will arrive in this format. First the sender, then the text
After that, test the connection. Ask someone to message you on MAKS or send a message from another account. Within a couple of seconds, the notification should arrive on your iPhone as a regular iMessage. If nothing comes through, check that the Mac hasn’t gone to sleep and that the app shows Online status in settings.
Launching an App from an Unknown Developer on Mac
The build is signed with a development certificate and hasn’t passed Apple notarization. Therefore, on first launch, macOS may block the app and show a warning about an unknown developer. Don’t worry — you can open the utility manually.
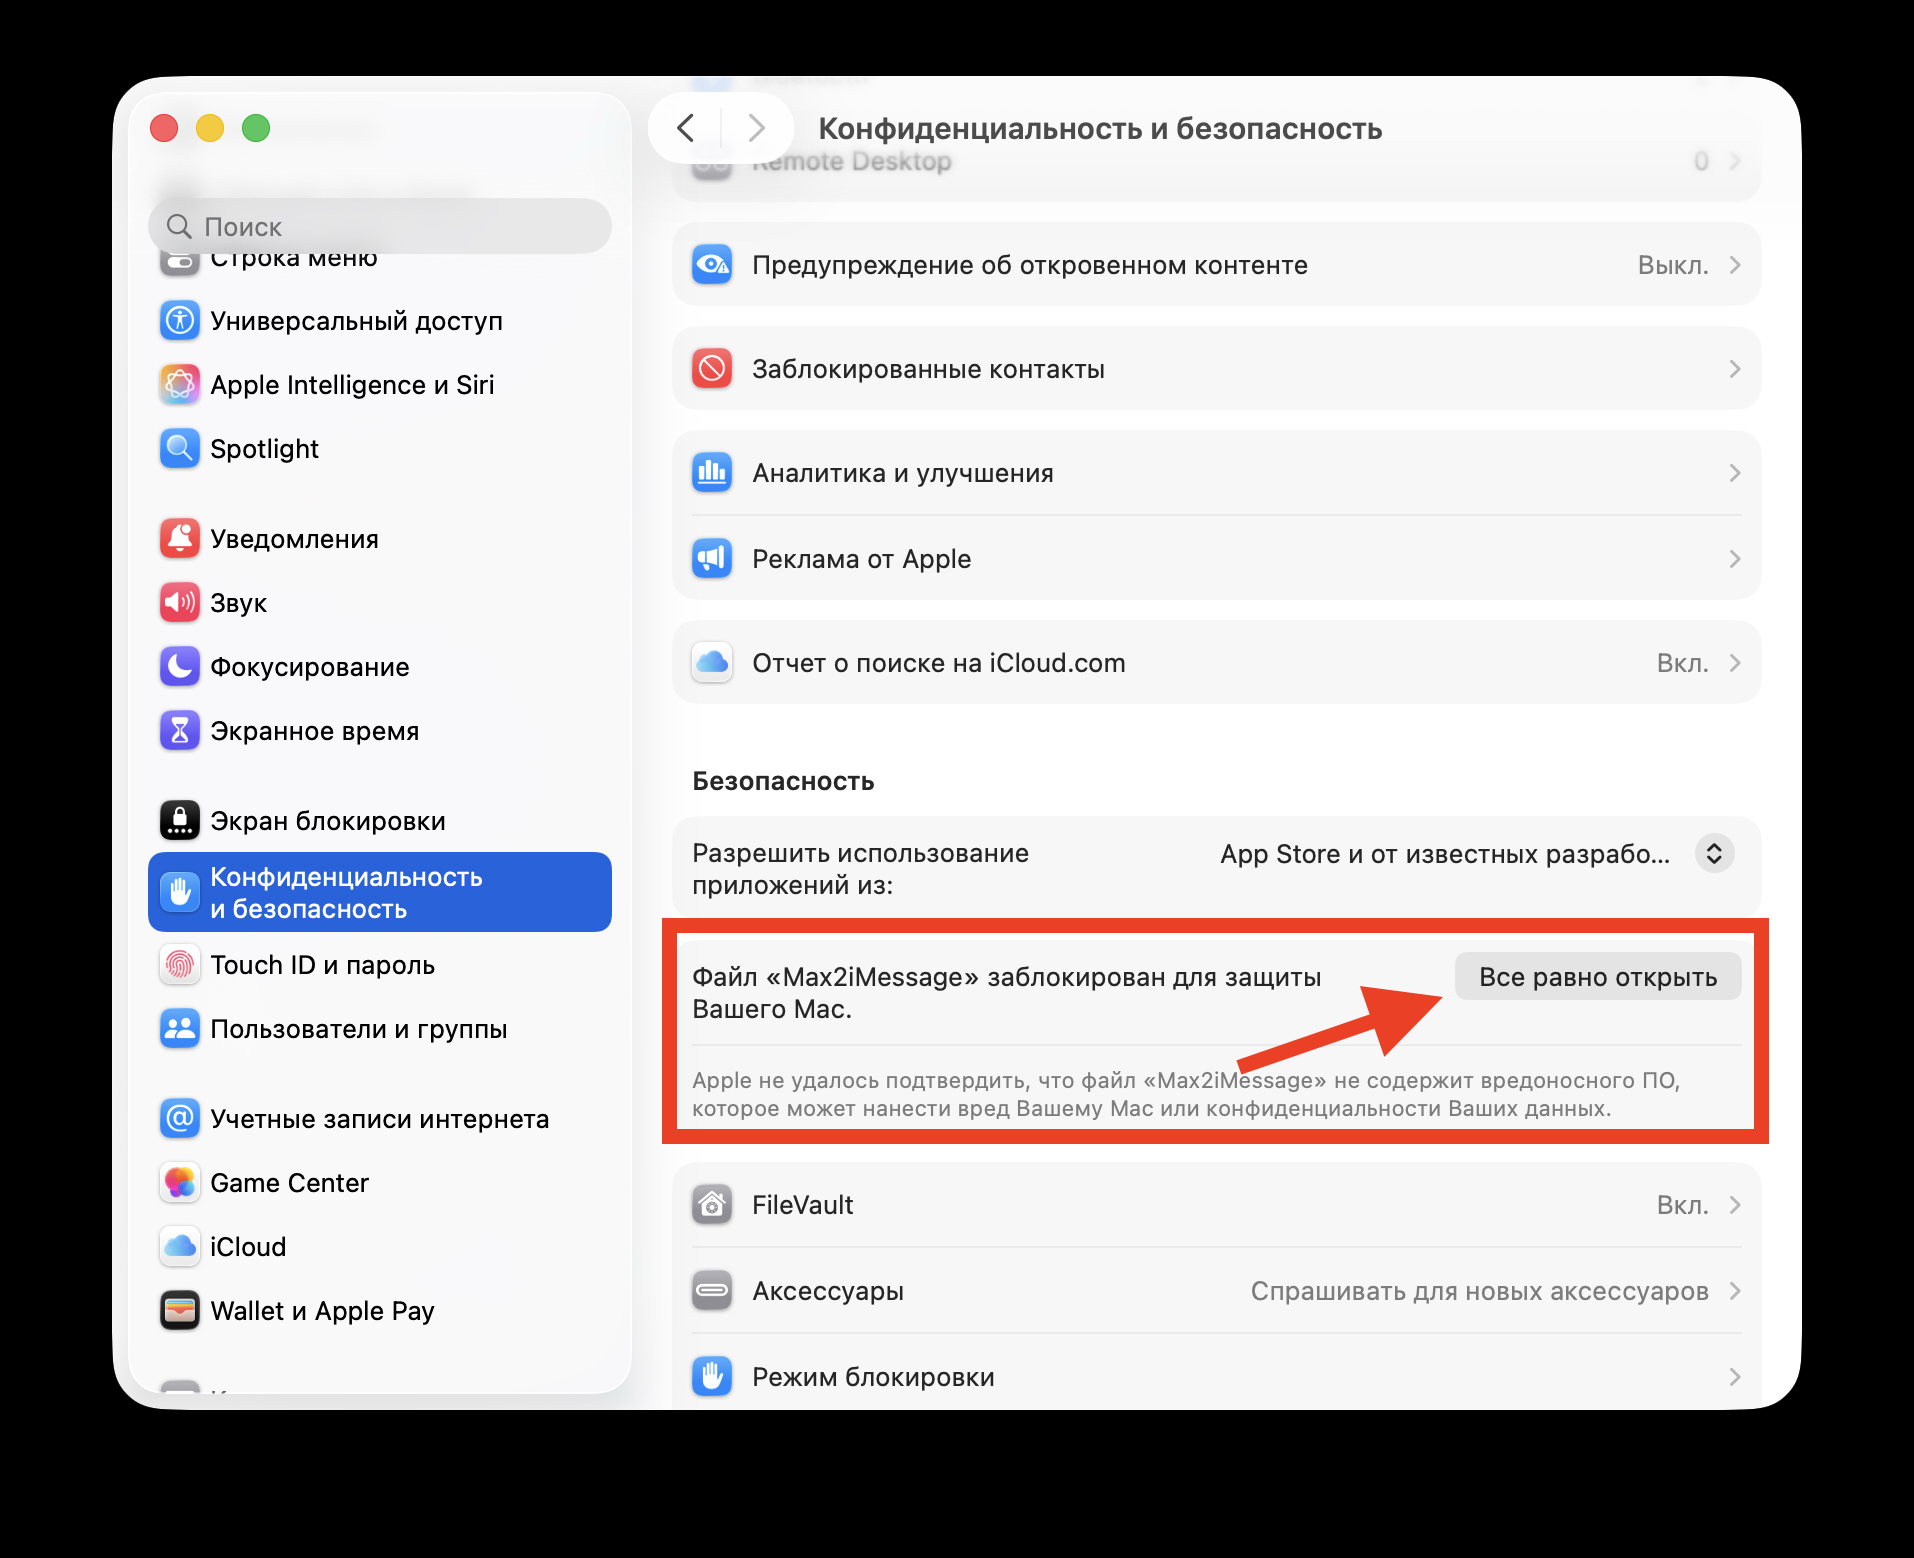
You’ll also need to allow the installation, otherwise Gatekeeper will block the app
- Open “System Settings” — “Privacy & Security.”
- Scroll down to the blocked app message and click “Open Anyway.”
- Or even simpler: right-click on Max2iMessage.app and select “Open.”
What You Need to Know Before Setting Up MAKS Notifications via Mac
There’s exactly one downside to this setup, but it’s significant: the Mac must always be on. Max2iMessage forwards notifications only while the app is running and the computer is awake. Turn off or put the Mac to sleep — and notifications will stop. For those who always have a Mac mini running at home or a MacBook plugged in, this isn’t a problem. But owners of a single laptop will need to keep it active.
The settings offer flexible forwarding parameters. For example, you can disable group chat notifications to avoid a flood from noisy conversations and keep only private messages. This way, notifications remain useful rather than turning into spam.
The solution isn’t perfect and is clearly temporary, but right now it’s a working way to see MAKS messages on iPhone again without opening the app every five minutes. Until official push notifications return, this workaround does the job. And when the situation with MAKS in the App Store changes, you can simply delete the utility.