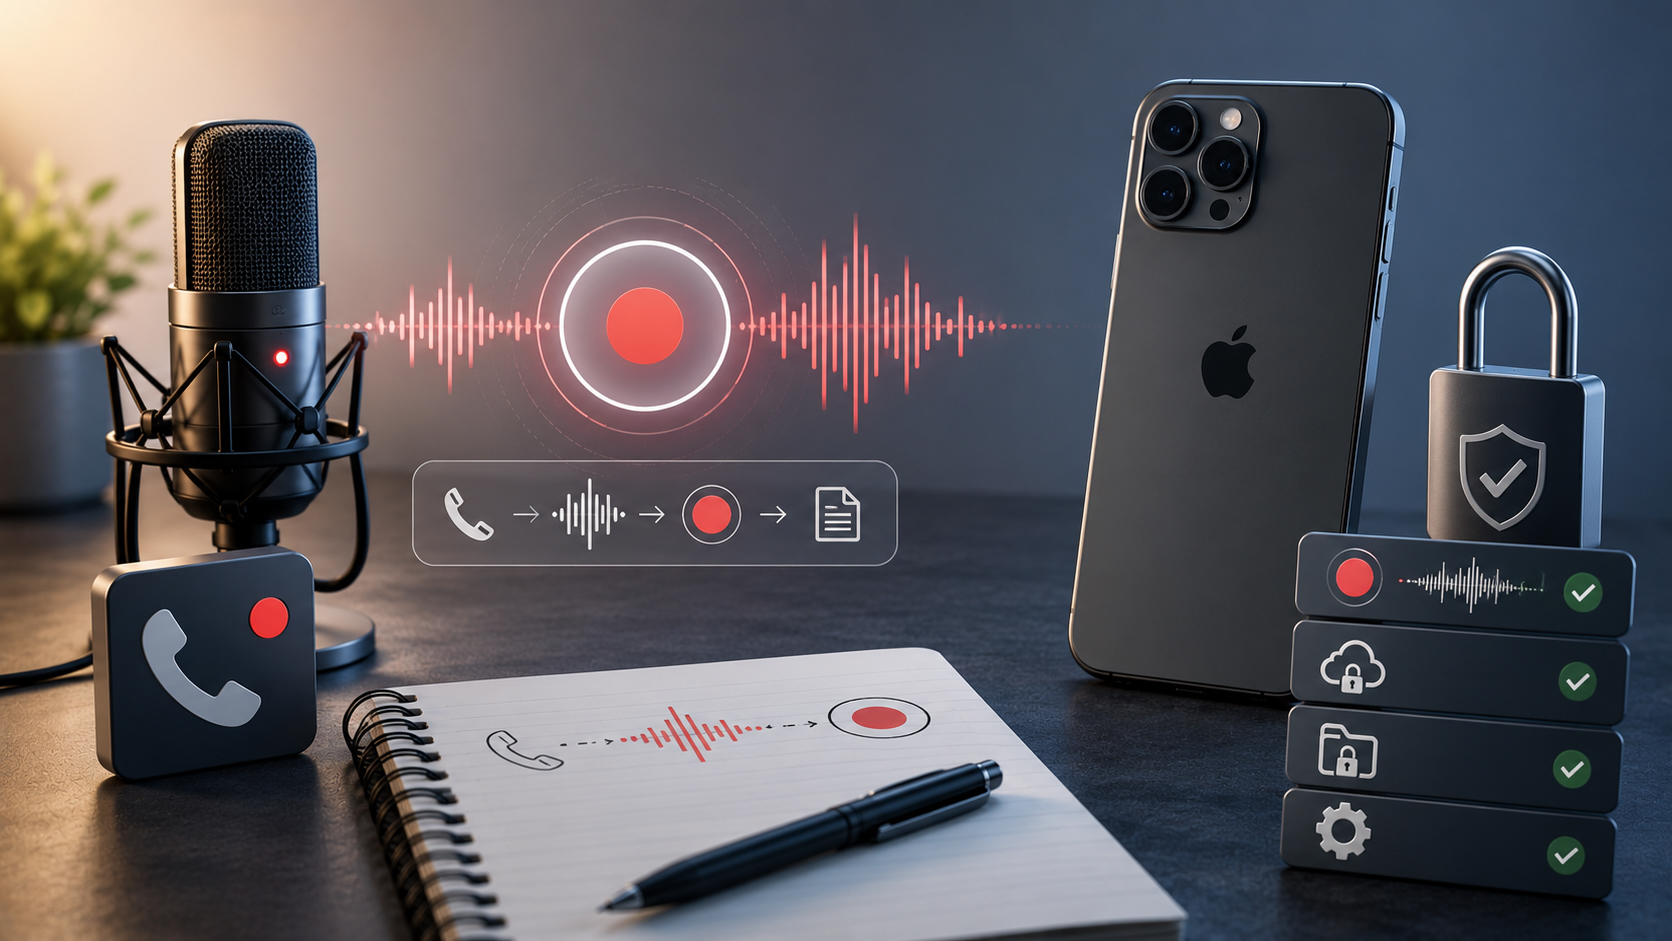
Call recording appeared in the standard Phone app back in iOS 18, but for many users it simply doesn’t start. The reasons vary: from regional restrictions to glitches and lack of storage. The main unpleasant detail — in Russia, the feature is officially unavailable, but this can be bypassed by changing the region. Let’s go through all the ways to solve the problem and also look at how iPhone battery life has changed after the latest update.
Not everyone can enable call recording on iPhone
Countries Where Call Recording Doesn’t Work on iPhone
Apple blocks call recording due to local laws in a number of countries. The list includes:
- Azerbaijan
- Bahrain
- Egypt
- European Union countries
- Iran
- Iraq
- Jordan
- Kuwait
- Morocco
- Nigeria
- Oman
- Pakistan
- Qatar
- Russia
- Saudi Arabia
- South Africa
- Turkey
- UAE
- Yemen
If your iPhone is set to a region from this list, the recording button in the Phone app won’t be there. But don’t rush to get upset — the feature can be enabled by changing the region to one of the supported countries, such as the USA or Canada.
How to Enable Call Recording on iPhone
To activate call recording in Russia, you just need to change the device region to a supported one. This doesn’t affect the interface language and doesn’t require a VPN. Do the following:
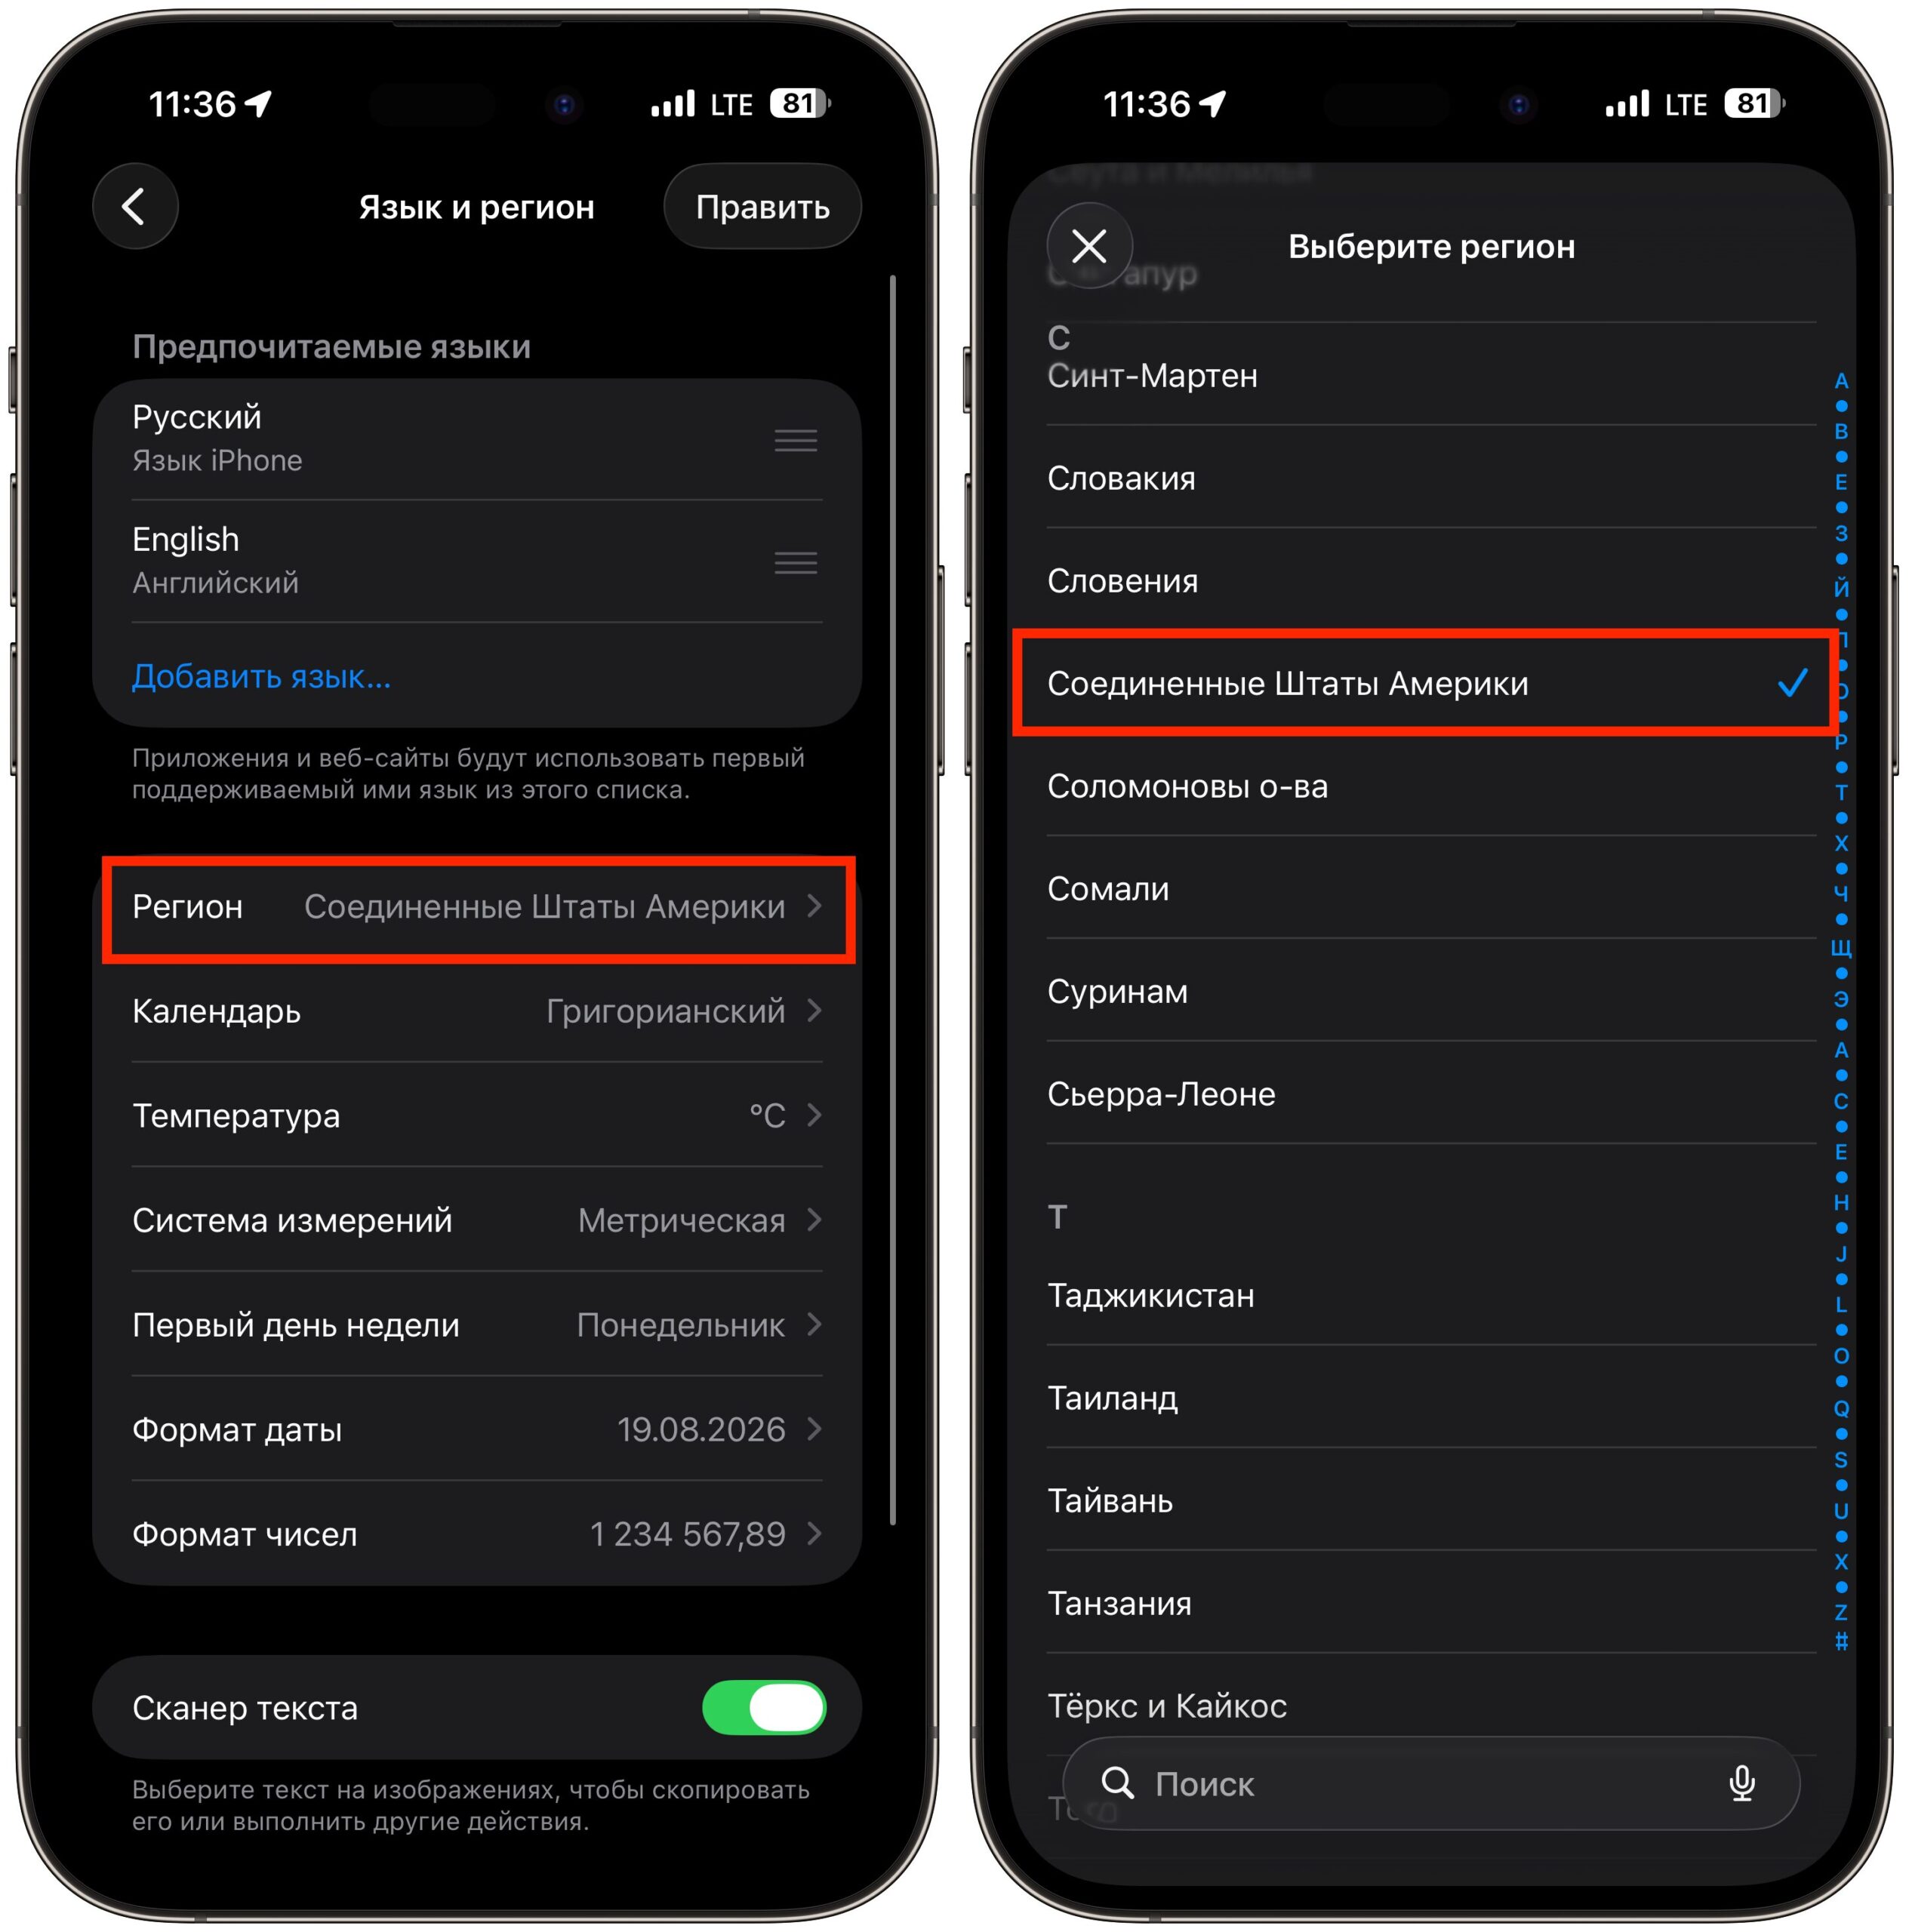
Change the region to one that supports recording
- Open Settings — General — Language & Region.
- Tap on the Region option.
- Select a country where call recording is supported, such as the USA or Canada.
- Confirm the region change.
- Restart your iPhone.
- After restarting, open Settings — Apps — Phone and make sure the Call Audio Recording option has appeared and is active.
After these steps, the recording button will appear on screen during a call. The iPhone interface will remain in Russian. Be aware that the date format and default currency may change. This can be adjusted in the same place where you changed the region.
Generally, the feature is enabled by default, but sometimes the toggle ends up turned off. To check, open Settings, go to the Apps section, select Phone, and find the Call Audio Recording option. Make sure it’s active.
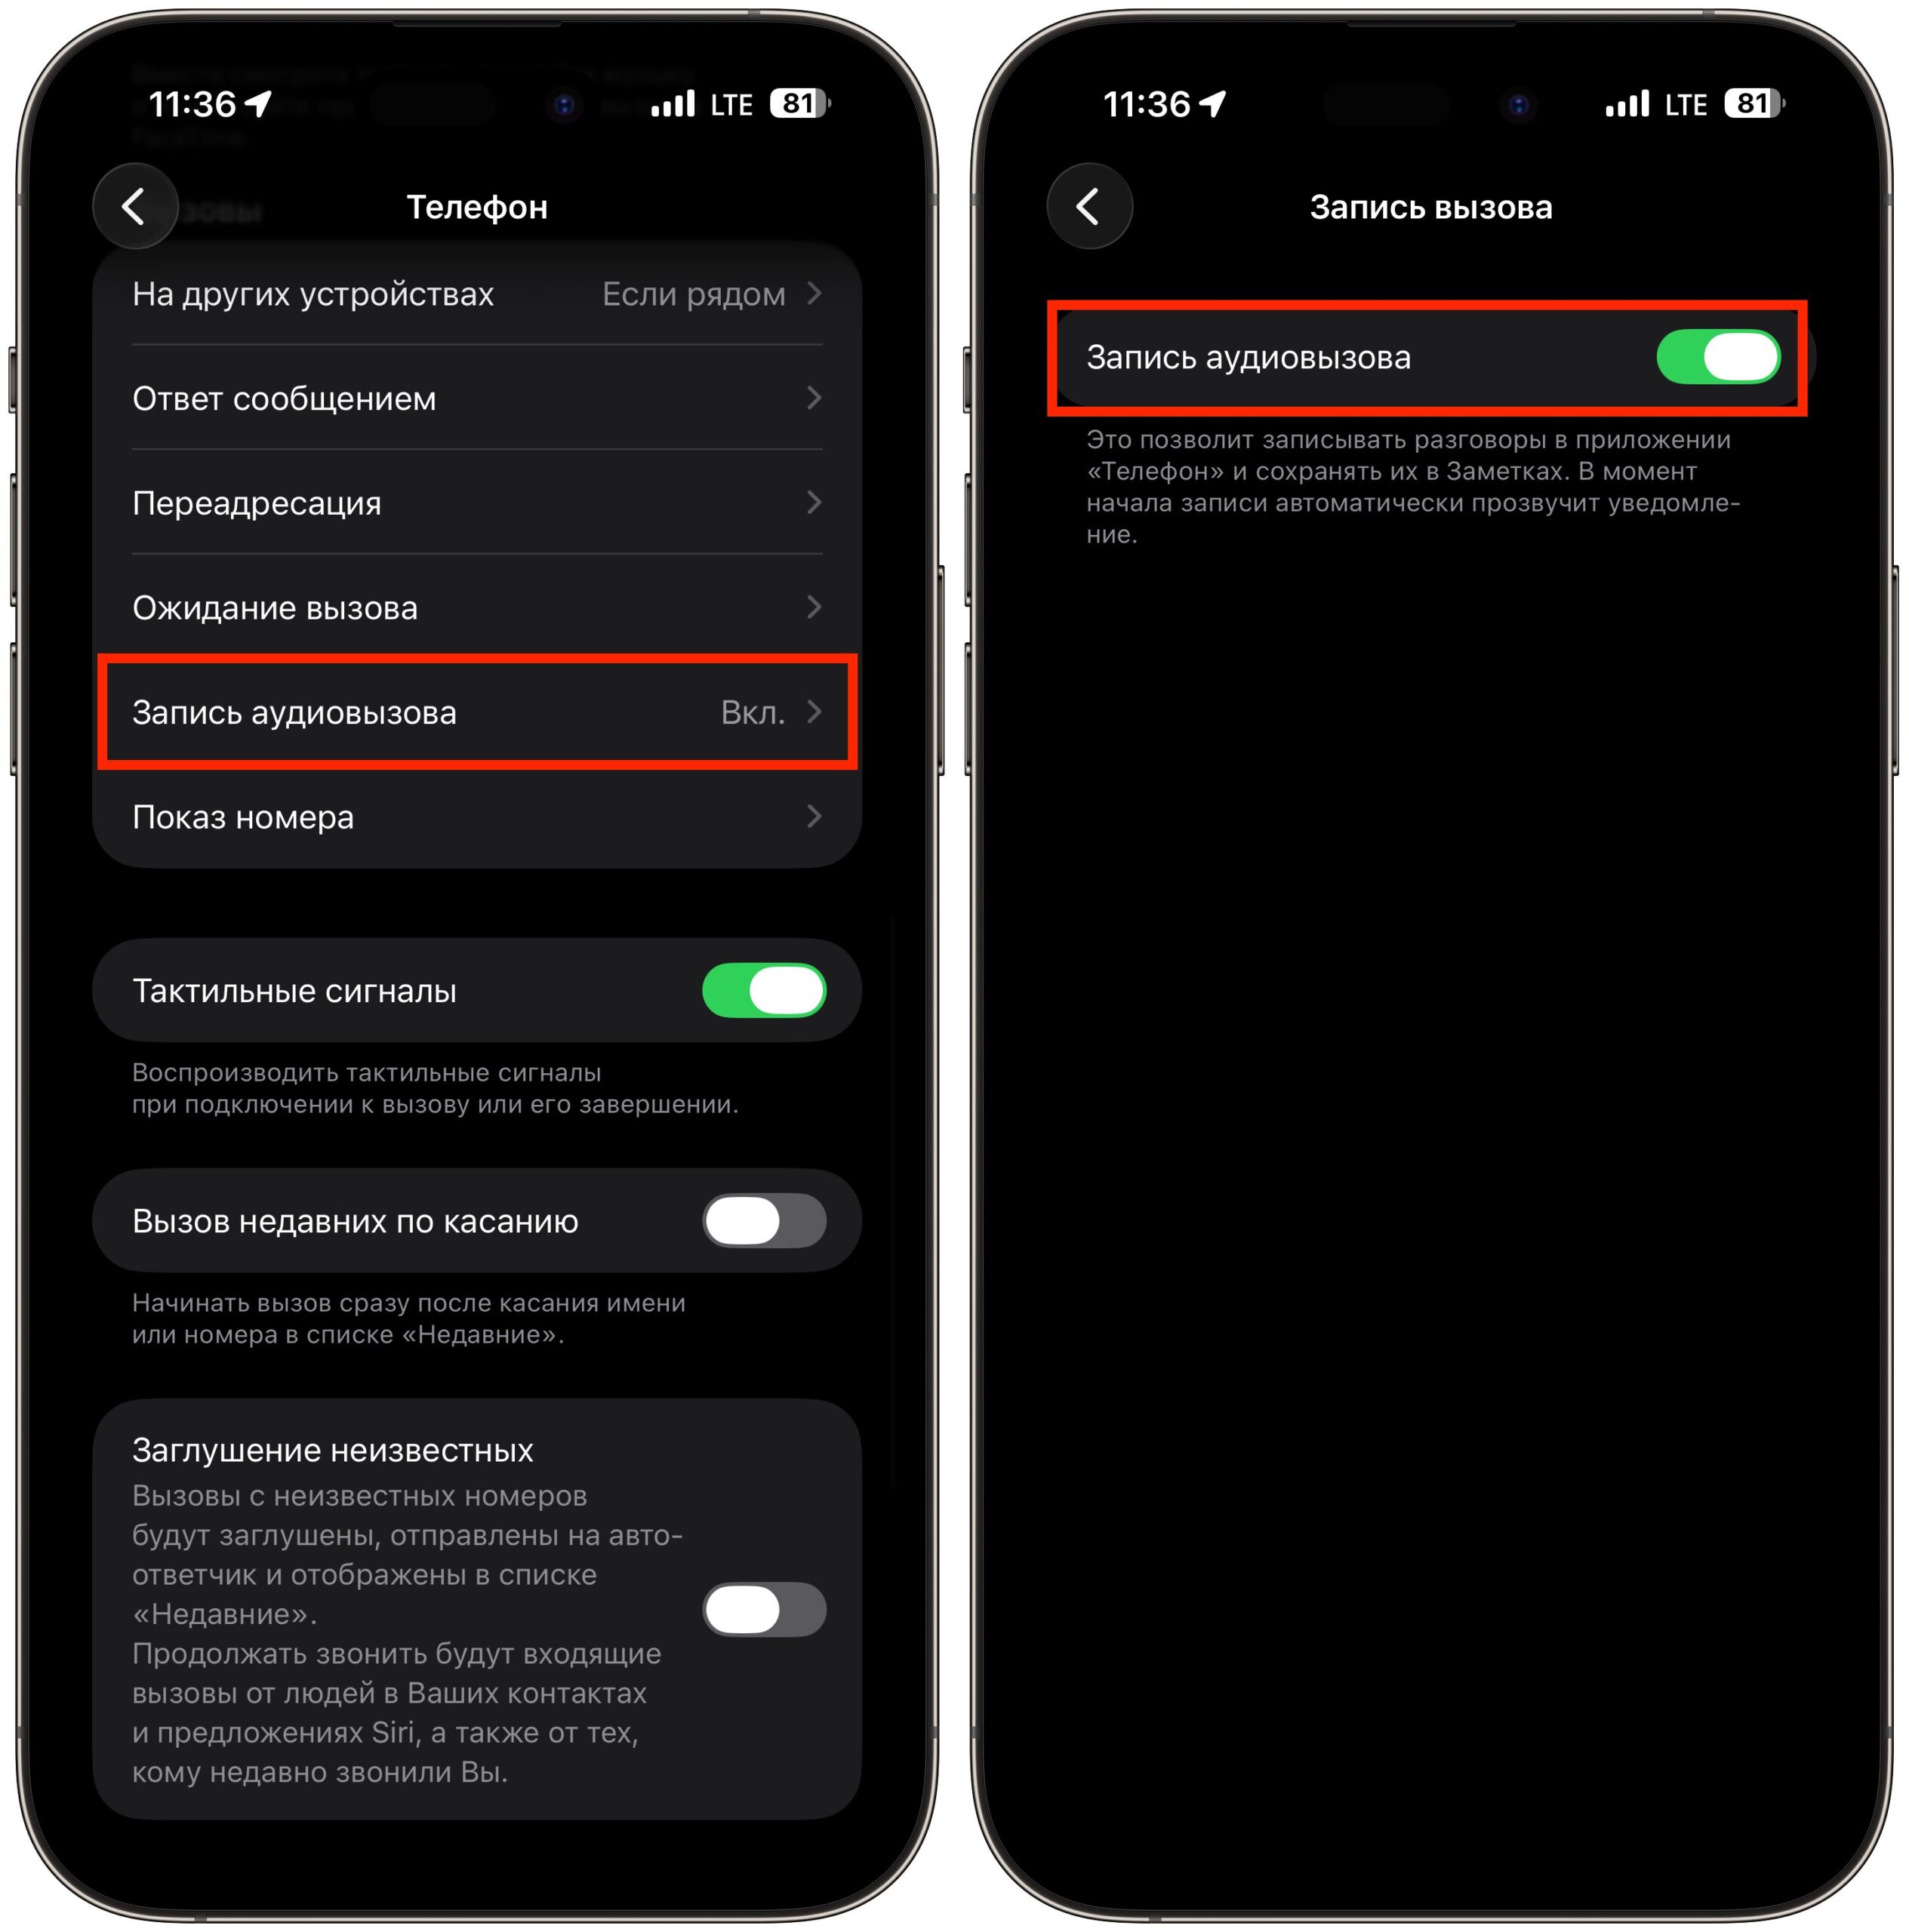
The recording itself is activated in iPhone settings
After this, the recording button should appear on screen during a call. If it’s not there even with the toggle enabled and the correct region — move on to the next steps.
Which iPhones Support Call Recording
Call recording works on iPhone XR, XS, and newer models. The minimum system version is iOS 18, but if the feature doesn’t launch, it makes sense to update to the current iOS 26 — which supports iPhone 11 and newer. On older models that didn’t receive iOS 18, call recording won’t appear at all.
If you haven’t installed updates in a while, start with this step.
Why Call Recording on iPhone Gets Canceled Immediately
When you start recording, a thin banner with the message “This call will be recorded” appears on the call screen. Before the recording begins, there’s a three-second countdown, then the other party hears a voice notification, and only after that does the actual recording start.
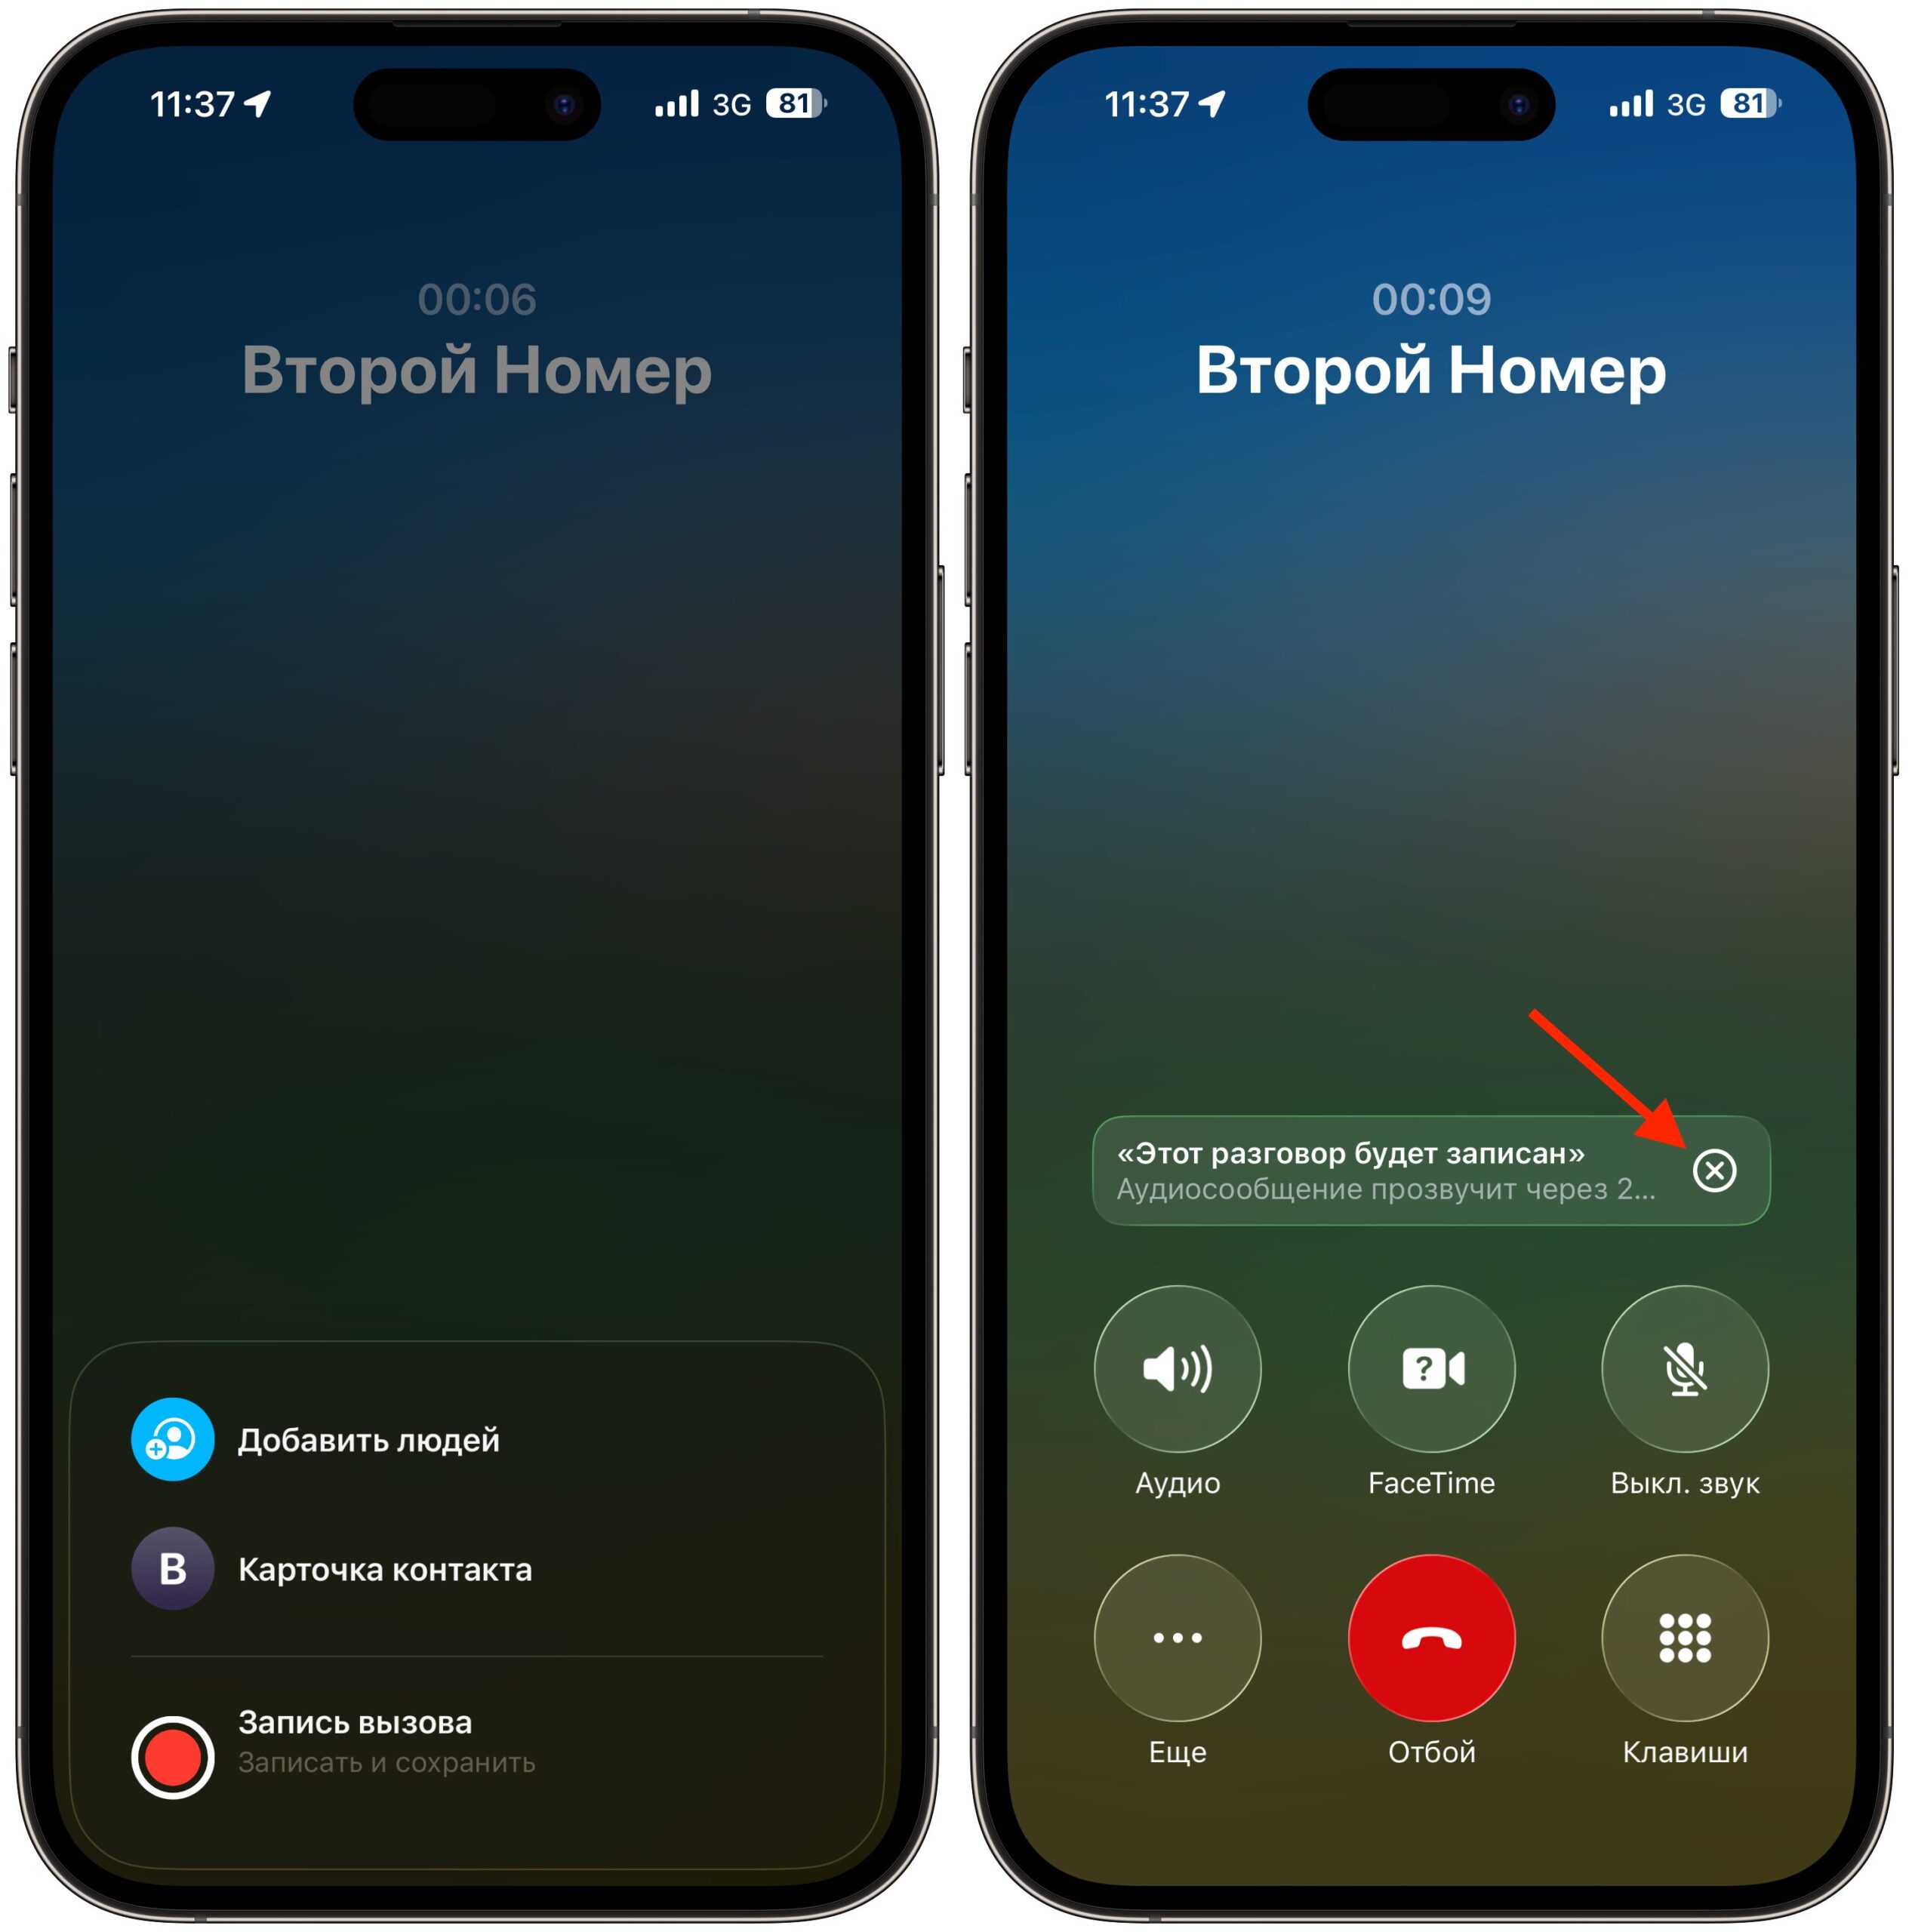
Don’t press this X button, it will cancel the recording
Many people think that the X button on the banner removes this three-second delay and starts recording instantly. In reality, it’s the opposite: pressing the X button cancels the recording. If you want to start over, you’ll need to open the More menu again and enable recording. However, if you need the other party not to hear the voice notification, those three seconds give you just enough time to cancel it.
What to Do If the Call Recording Button Doesn’t Appear
Sometimes the recording button becomes grayed out or doesn’t appear due to a temporary system glitch. In such cases, a simple restart helps: turn off your iPhone and turn it back on, or ask Siri to restart the device.
It also happens that recording doesn’t work on a specific call — for example, when talking to a call center. If recording is critical, there’s a backup option: turn on the voice recorder on an iPad or Mac and record the conversation from there.
Locking the Phone App via Face ID
If recording still won’t start, there’s a trick with locking the app. Follow these steps:
- Press and hold the Phone app icon on the home screen and select Require Face ID, then confirm your choice.
- Restart your iPhone.
- Press and hold the Phone icon again and this time select Don’t Require Face ID, then confirm.
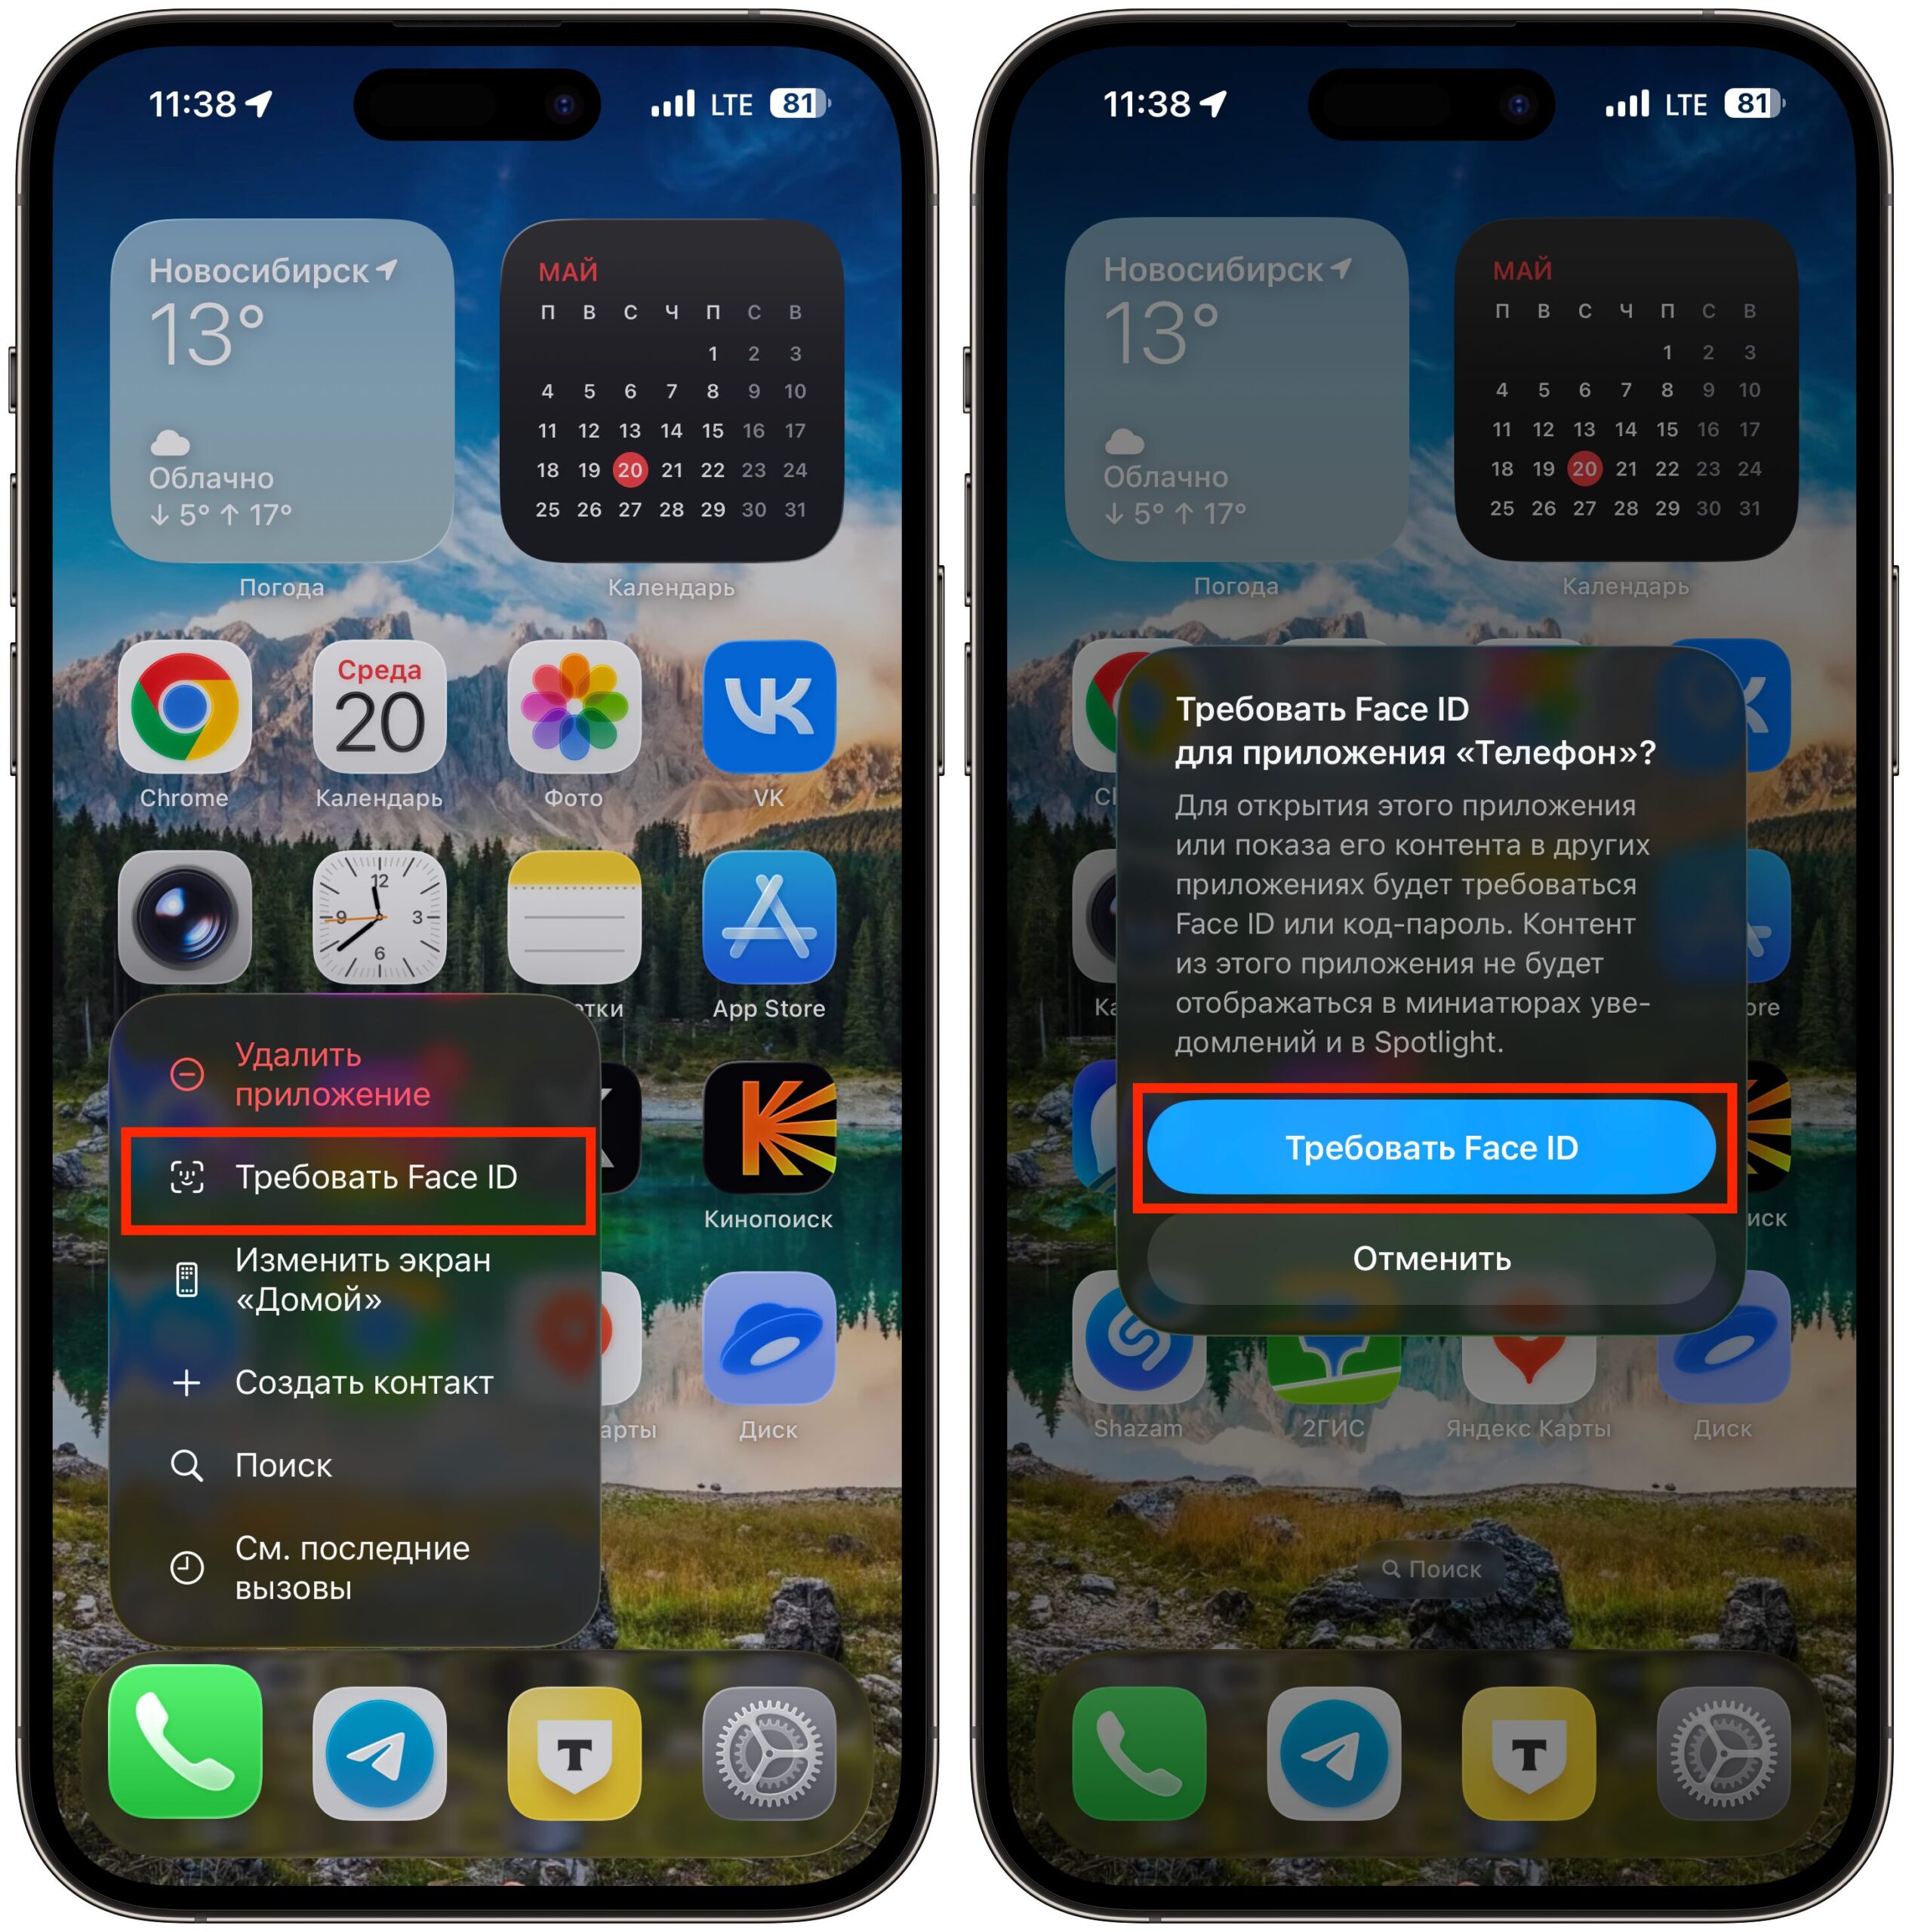
Lock the app
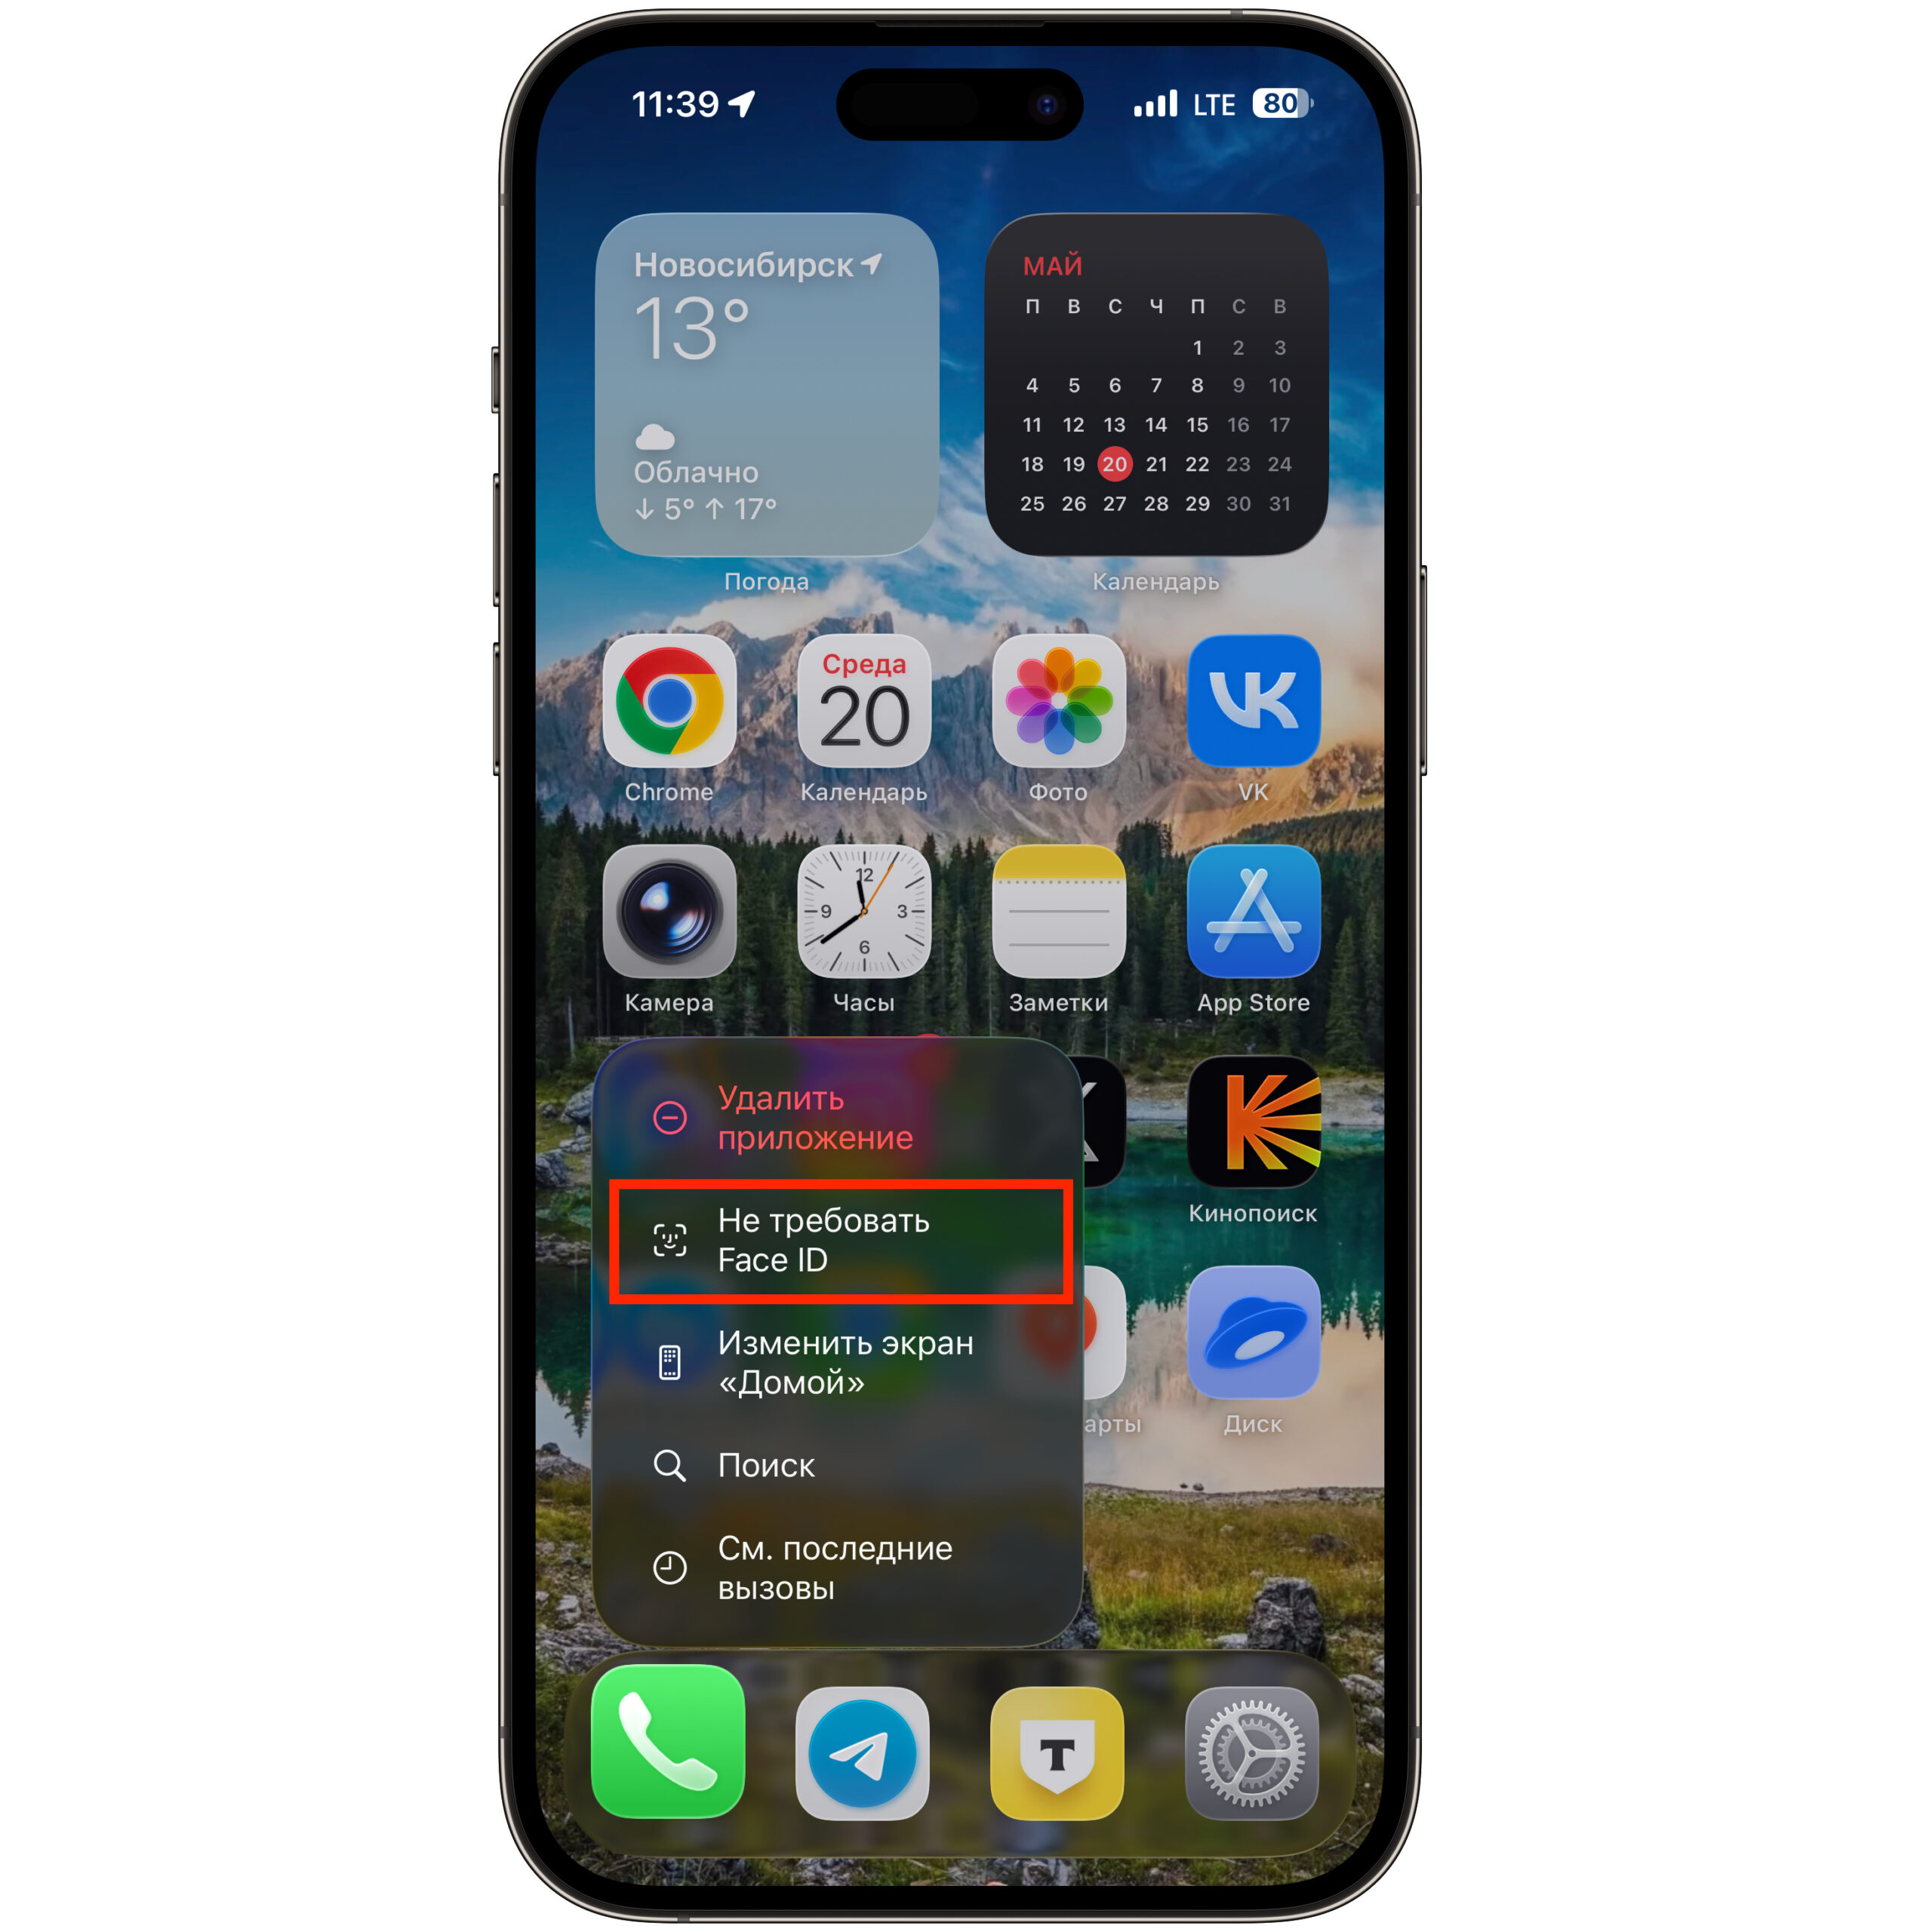
Restart and unlock it back