Bought your first MacBook and don’t know where to start? By default, macOS looks beautiful, but working with it “out of the box” isn’t always convenient. Apple, for some reason, hides some useful features while enabling unnecessary ones. Every time I set up a new Mac, I do the same five things, and after that, the system starts working the way I need it to. Especially if you’ve just bought the cheapest MacBook and want to get the most out of it. Here’s what you should change first.
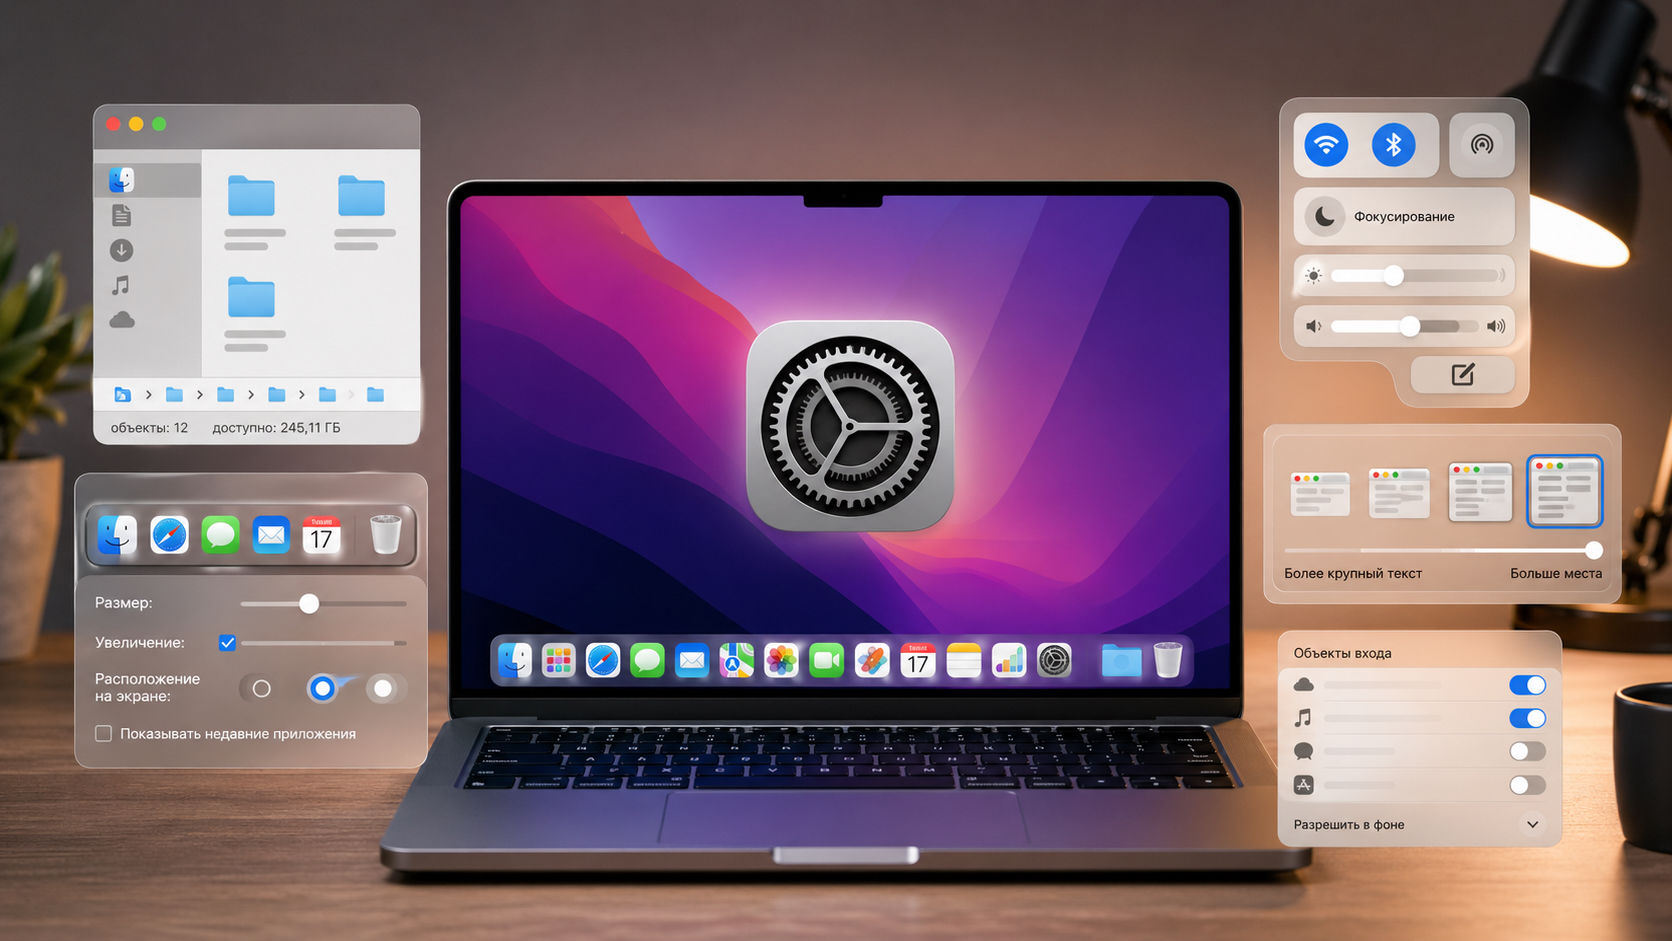
Several important settings that will make your Mac more convenient
How to Make Finder on Mac More Convenient
Finder is the macOS file manager that you’ll use every day. But by default, it hides two very useful things: the path bar and the status bar. Without them, you can’t see exactly which folder you’re currently in, and you don’t know how much free space is left on your drive.
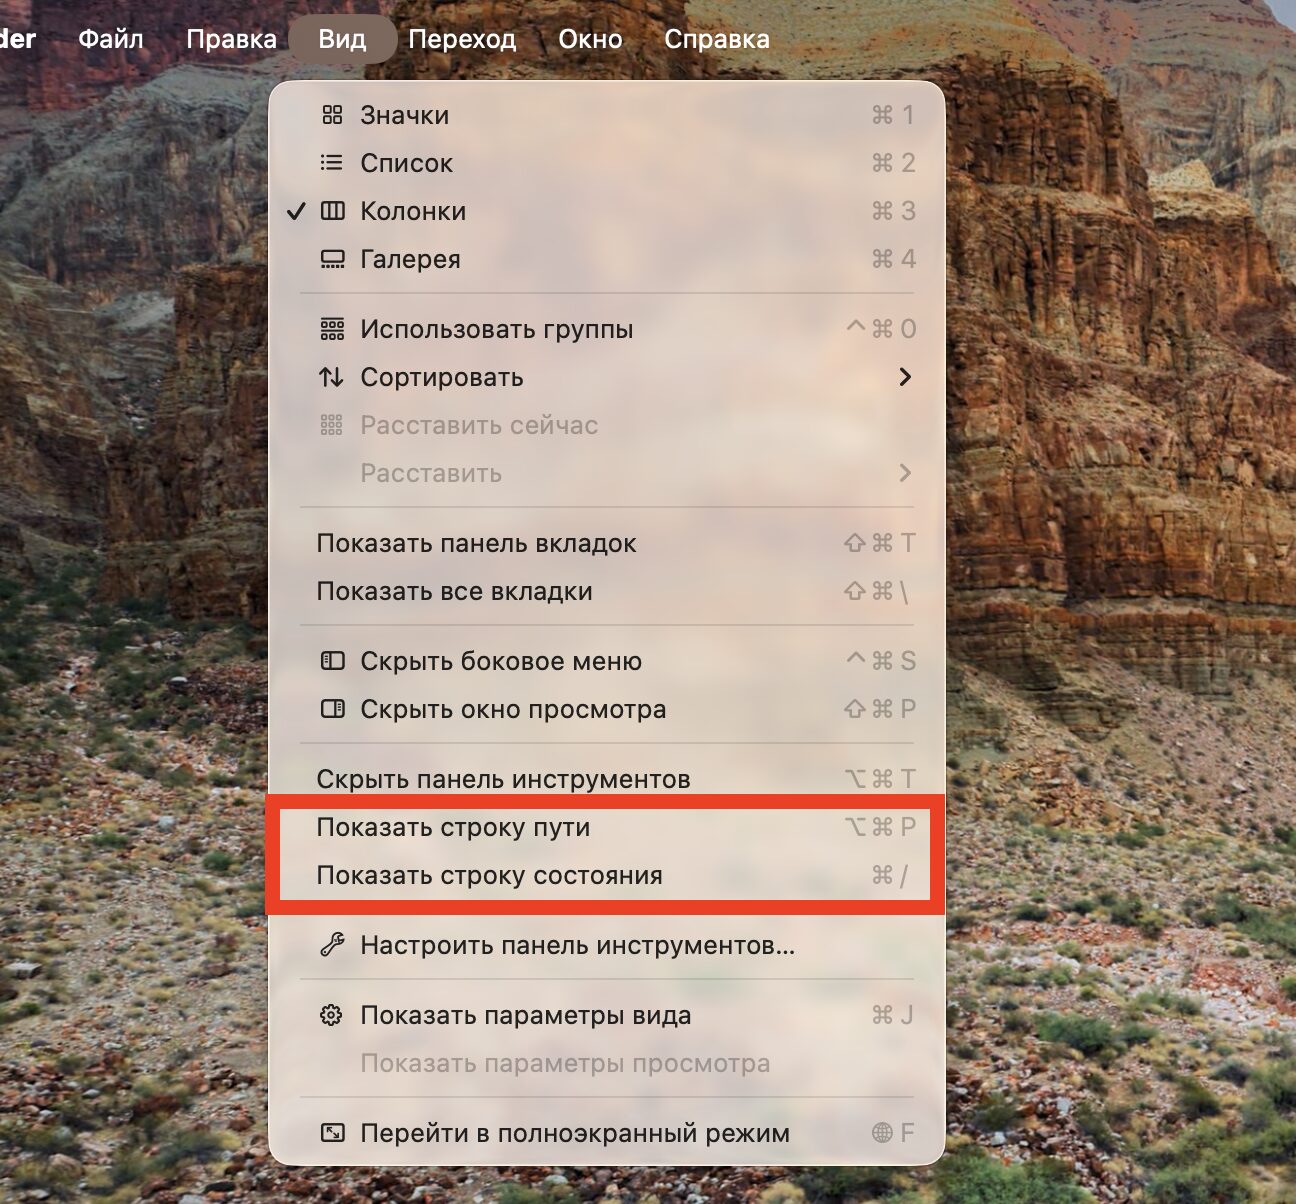
Enable both of these options and you’ll see that Finder becomes more convenient
The path bar appears at the bottom of the Finder window and shows the full path to the current folder. What’s convenient is that you can click on it to jump directly to any parent directory. The status bar, in turn, shows the number of items in the folder and the amount of free storage.
To enable both features, open Finder and go to the “View” menu. Here, select “Show Path Bar” and then “Show Status Bar.” You can do this even faster using keyboard shortcuts: Option + Command + P for the path bar and Command + / for the status bar. After this, navigating through folders will become much more intuitive.
Customize the Dock on Mac and Remove Unnecessary Apps
The Dock on a new Mac is packed with apps, half of which you’re unlikely to use. Maps, Podcasts, Keynote, TV — all of this takes up space on the panel and is distracting. The first thing you should do is remove the unnecessary ones. To do this, right-click on the unwanted icon, select “Options,” and click “Remove from Dock.”
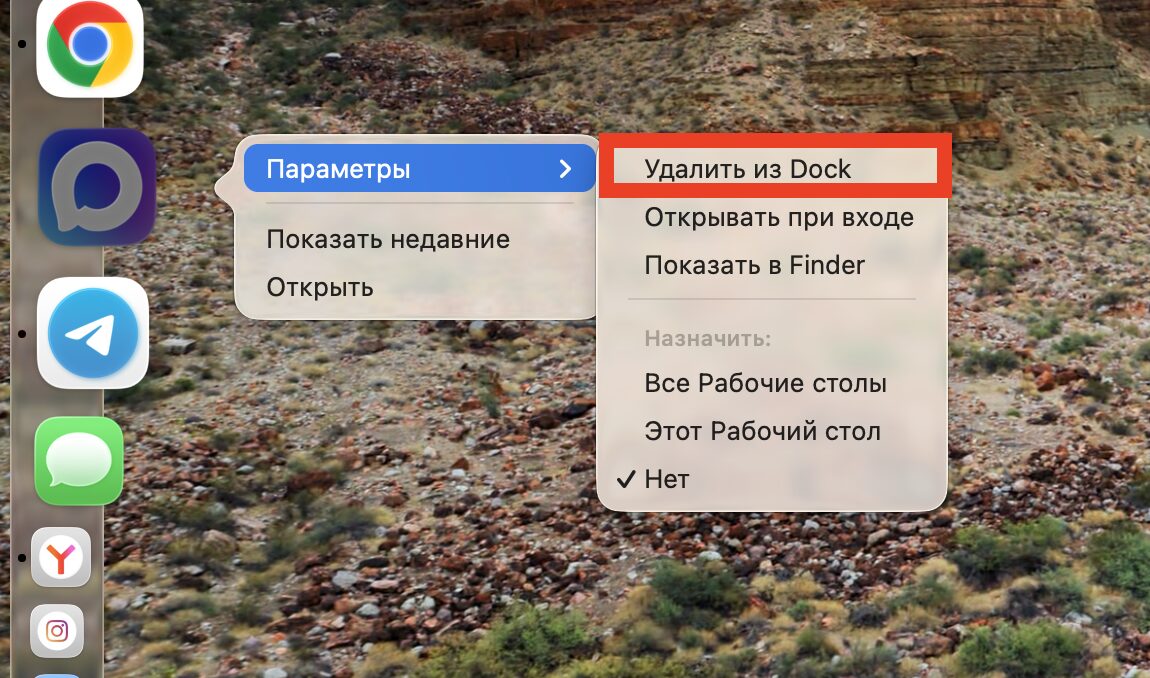
Remove everything unnecessary. Mostly these will be standard Apple apps
Next — fine-tuning. Right-click on the divider in the Dock (the thin line between apps and folders) and select “Dock Preferences.” Here you can configure:
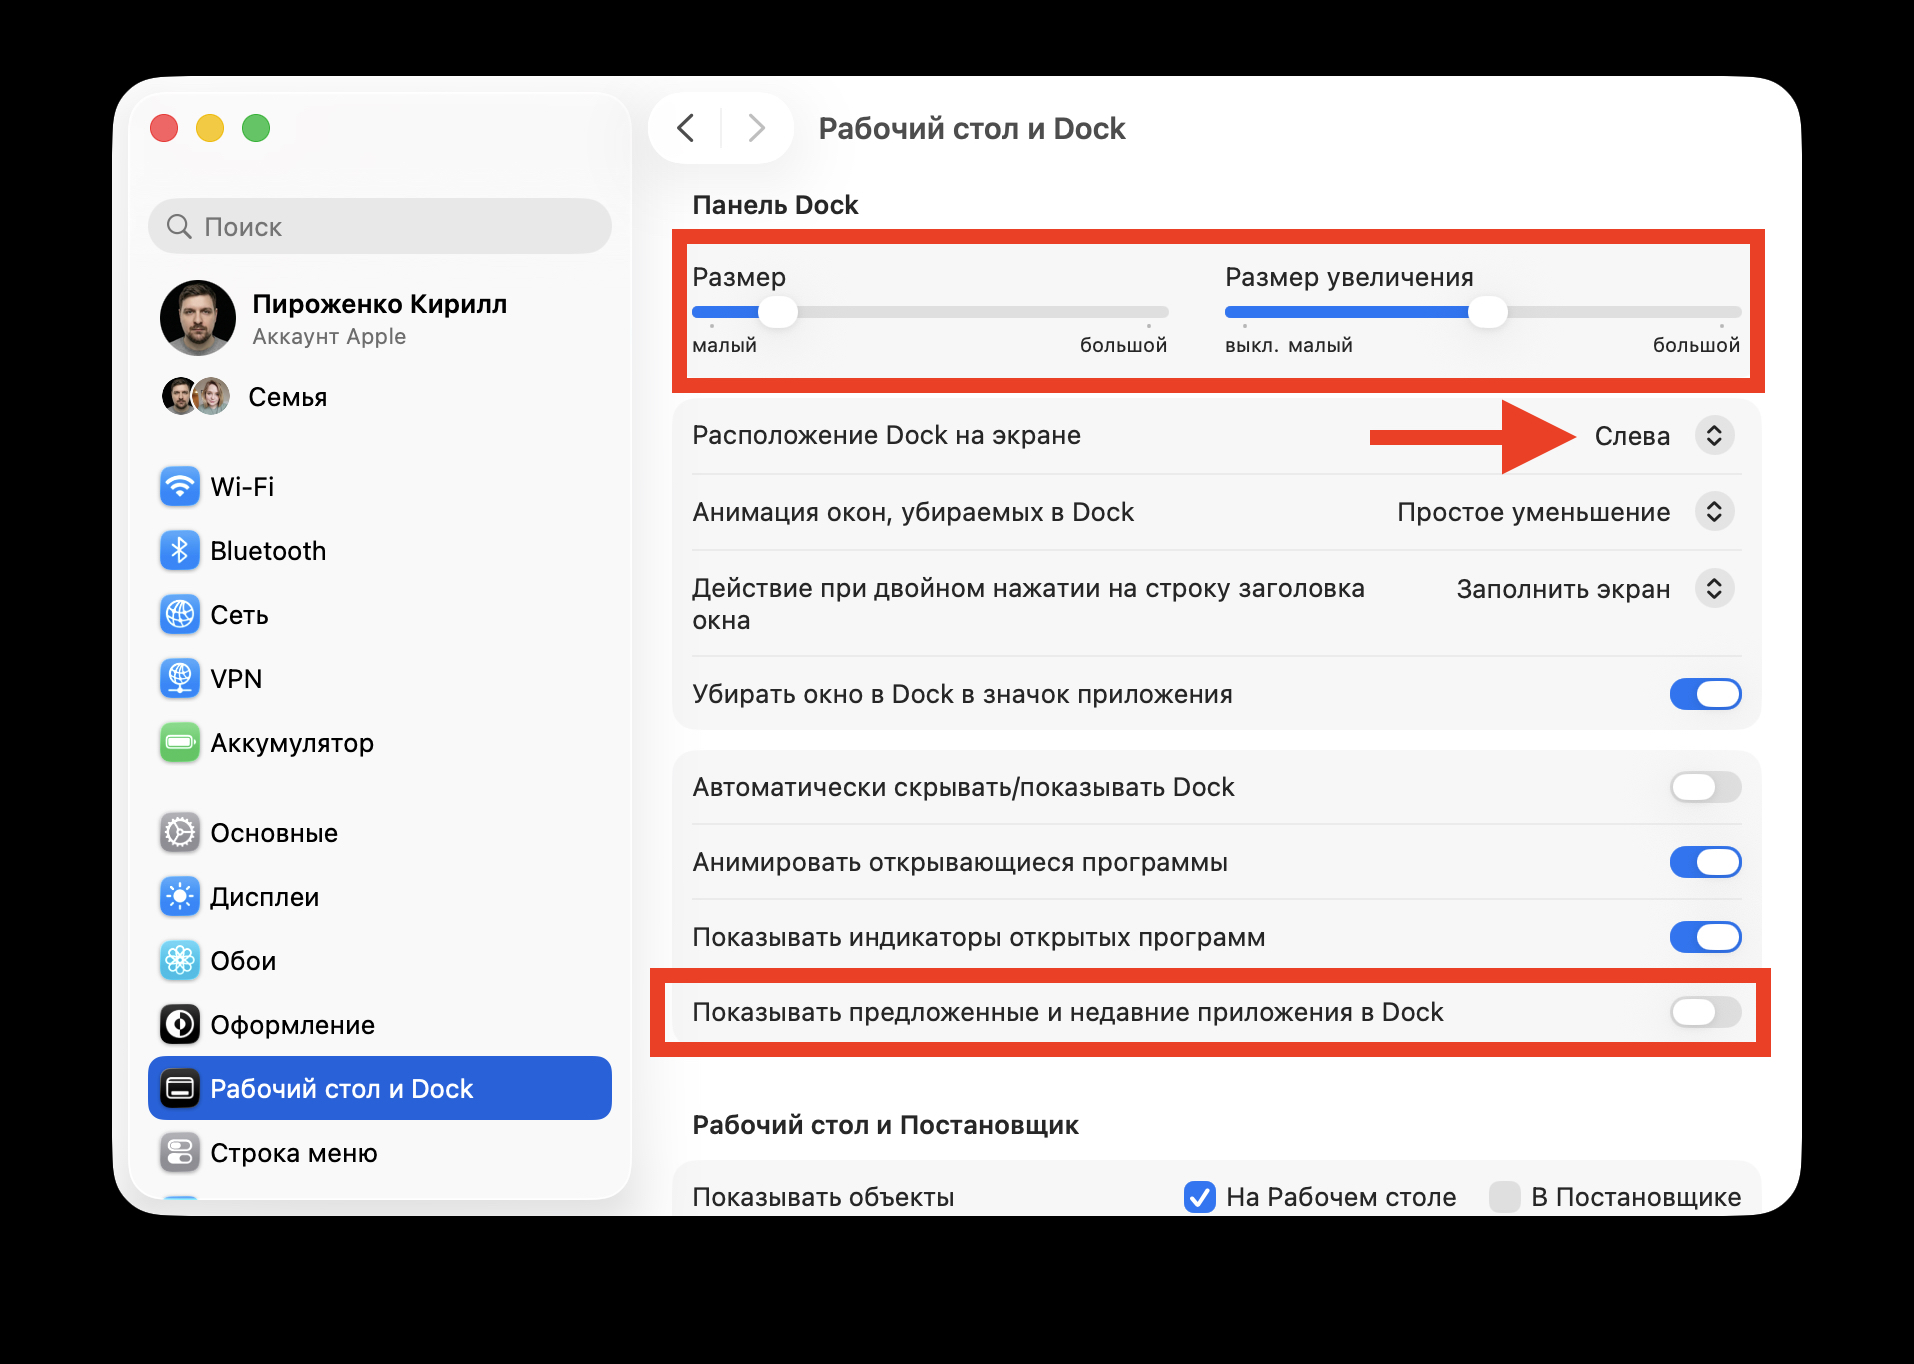
Here, adjust the icon size in the Dock and enable magnification
- Icon size — on a MacBook Air or 13-inch Pro, it makes sense to make them smaller so they don’t take up half the screen
- Magnification on hover — icons will enlarge when you move your cursor over them. Convenient if you’ve made the Dock small
- Position on screen — by default, the Dock is at the bottom, but you can move it to the left or right. Many MacBook users keep the panel on the left to avoid losing vertical space
I also recommend disabling the “Show suggested and recent apps” option in the Dock — without it, the panel will look cleaner.
How to Add the Right Buttons to Control Center on Mac
Control Center on Mac works on the same principle as on iPhone. You click the icon in the upper right corner — and get quick access to Wi-Fi, Bluetooth, brightness, and volume. But not everyone knows that it can be customized.
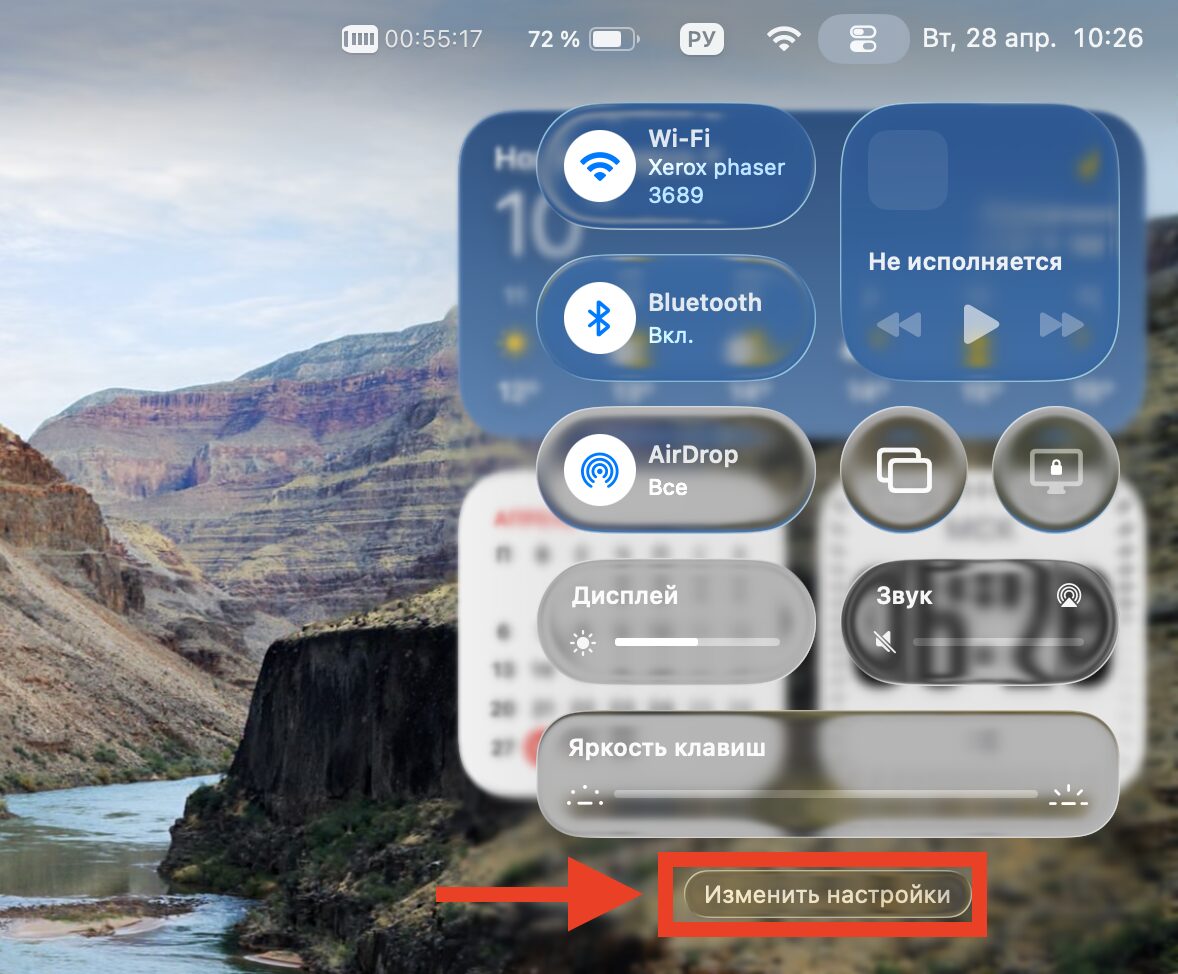
Click this button and you’ll enter the Control Center editor
Open Control Center and click the “Edit Settings” button at the bottom of the panel. A special menu will open, allowing you to customize this section however you like. Add and remove the toggles you need, adjust their size, and arrange them however is most convenient for you.
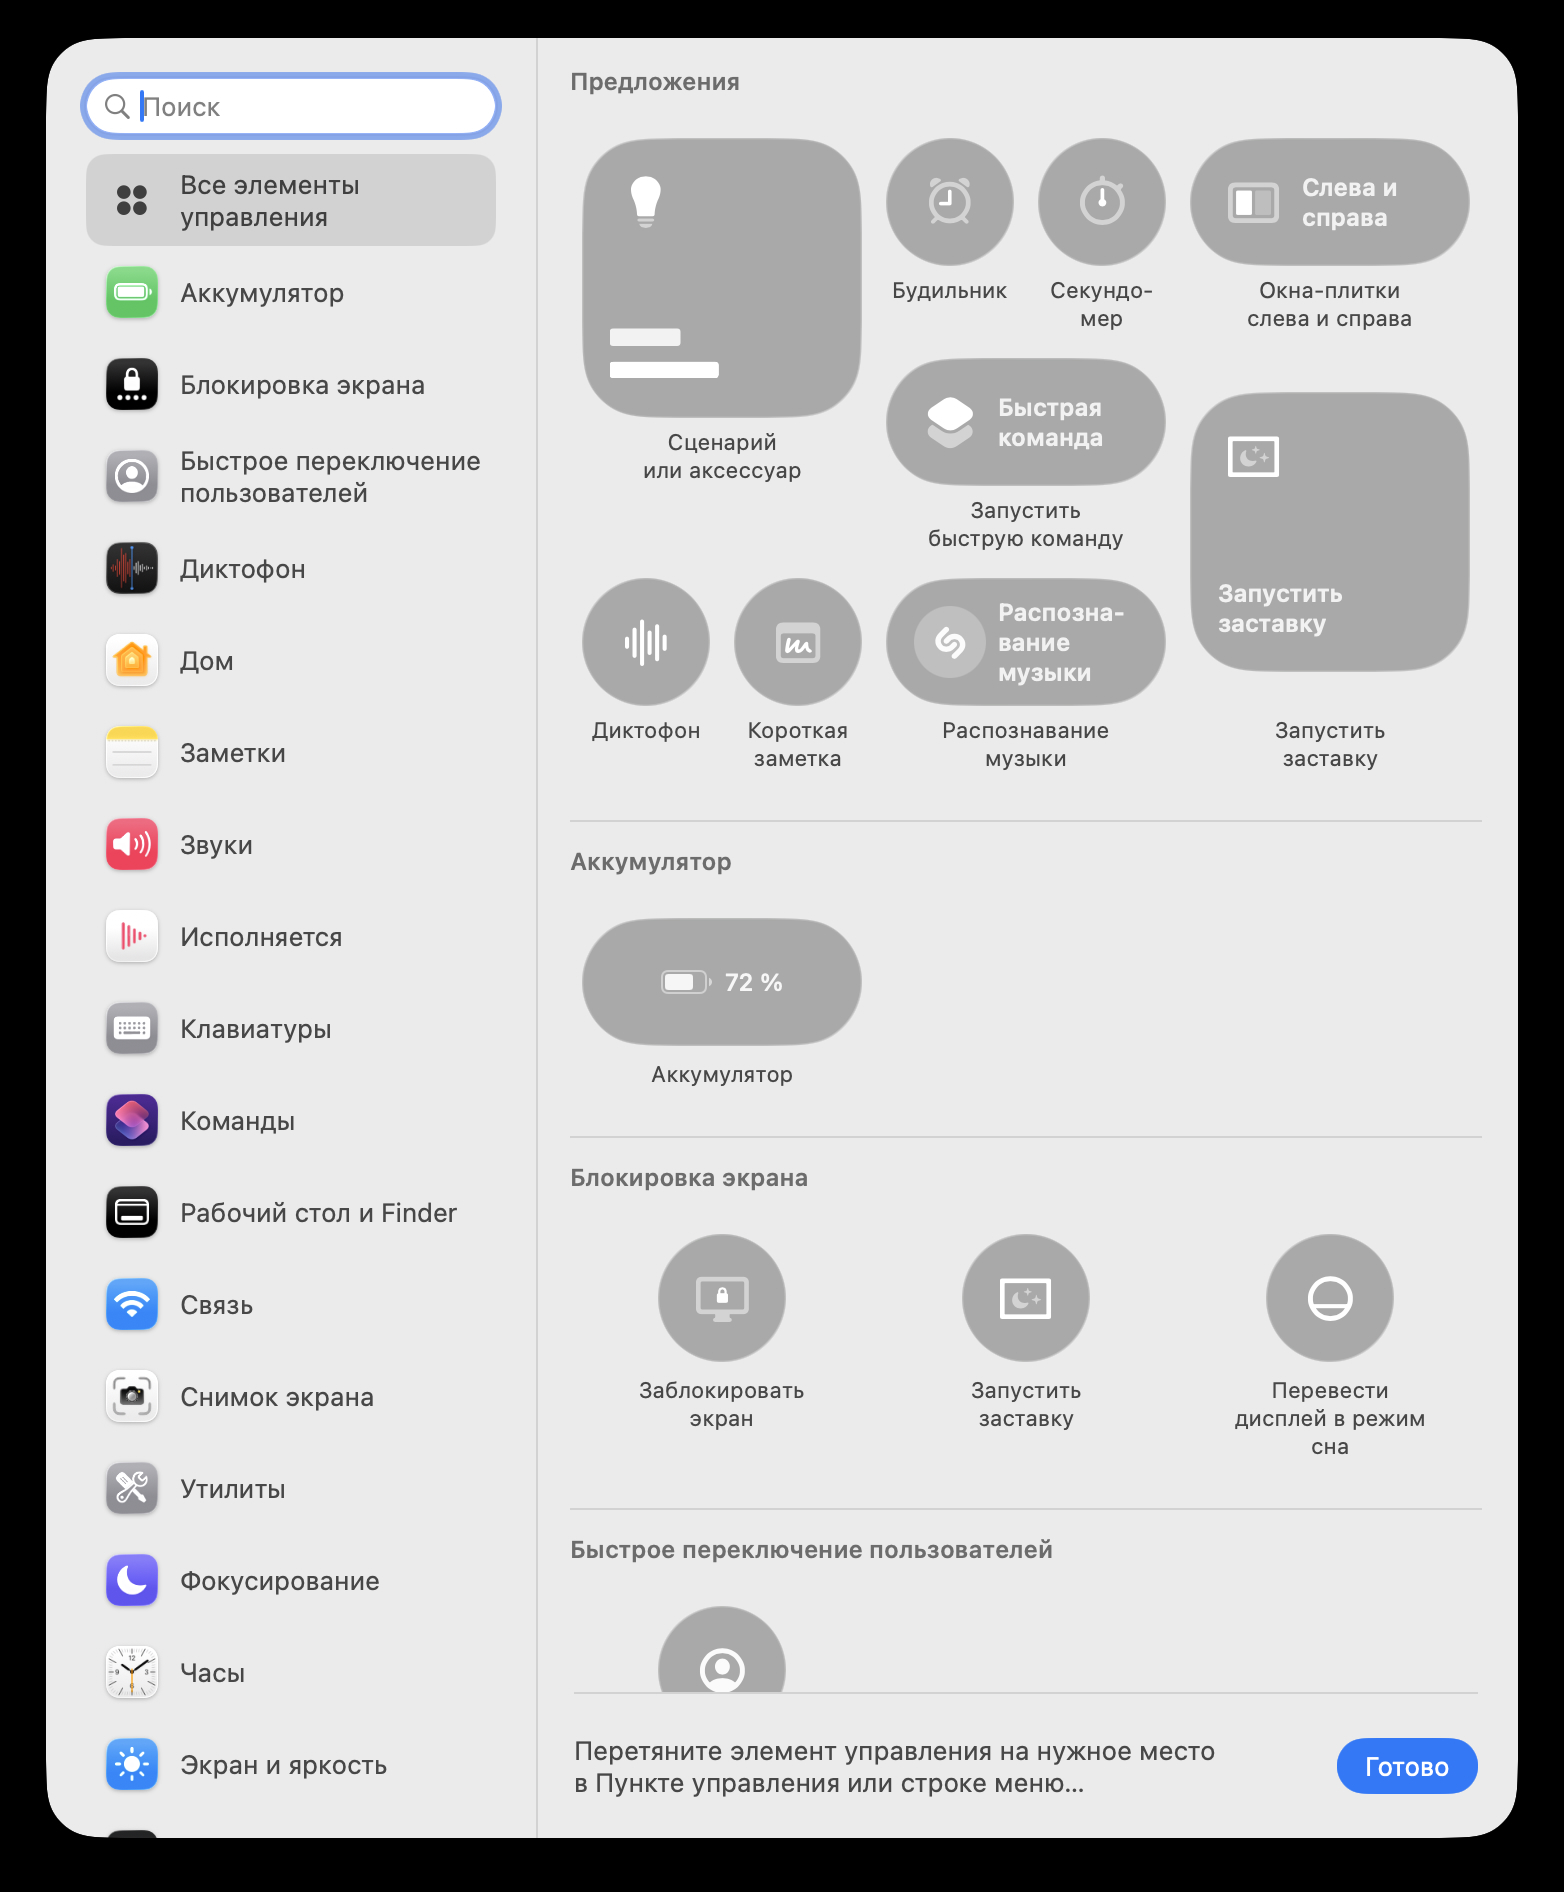
There will be tons of buttons and toggles to choose from. I added fine keyboard brightness control, very convenient
For example, you can add a “Quick Note” toggle to Control Center or remove Stage Manager if you don’t use that feature. You can also drag individual elements directly to the menu bar — just hold the icon and drag it over.
How to Increase Workspace on a MacBook Screen
Modern MacBook screens have very high resolution, but Apple doesn’t use the maximum by default, instead opting for a so-called “recommended” scaling. It makes interface elements larger and easier on the eyes, but you lose some workspace in the process.
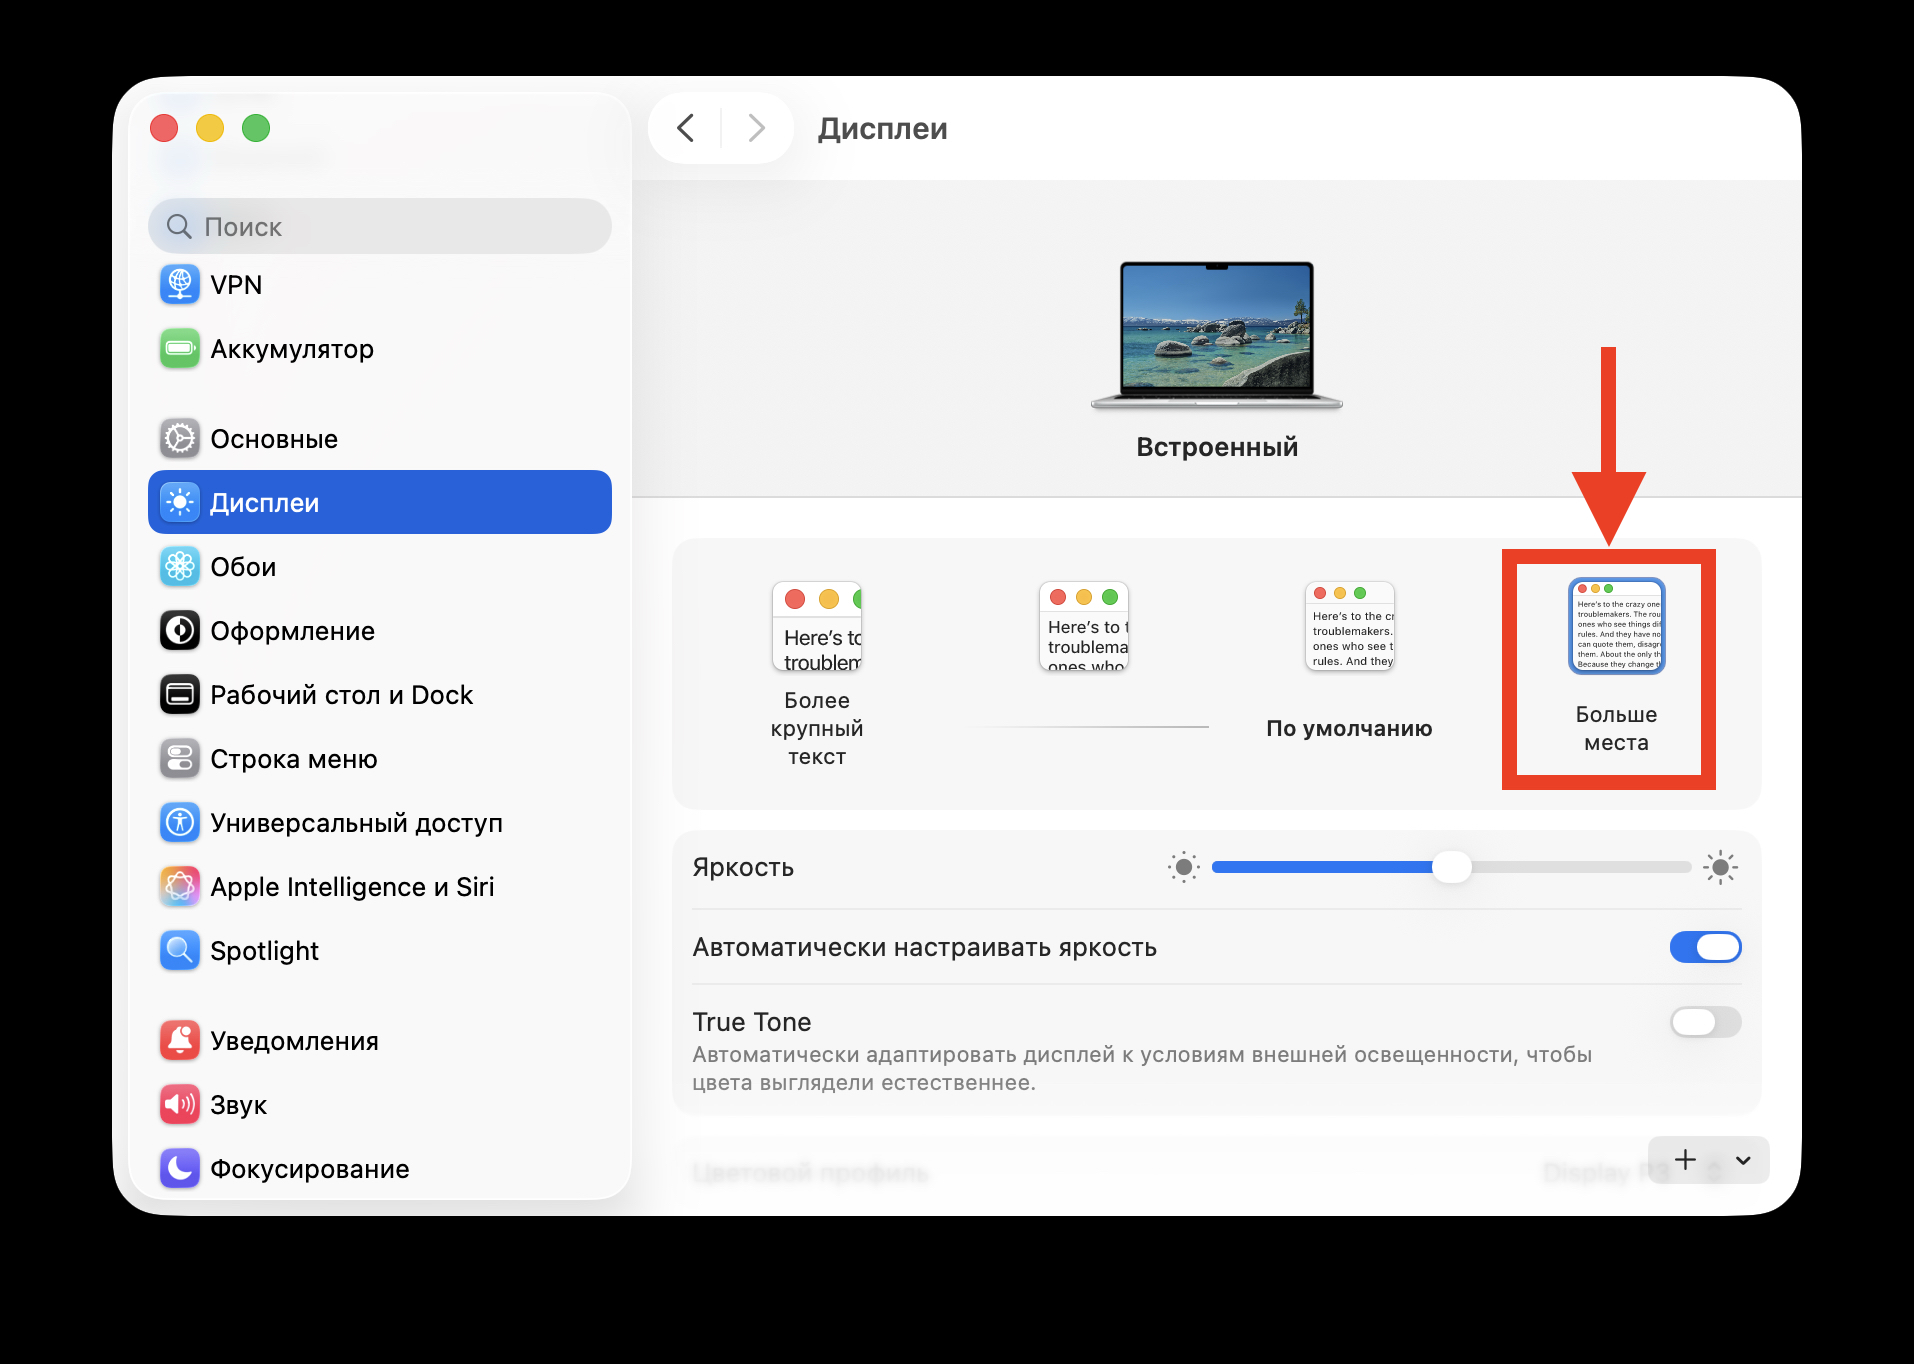
With this setting, more elements will fit on the screen
To change the scaling, open “System Settings” — “Displays.” You’ll see several options — from “Larger Text” to “More Space.” Choose the last option, and significantly more information will fit on your screen. This is especially useful if you work with multiple windows.