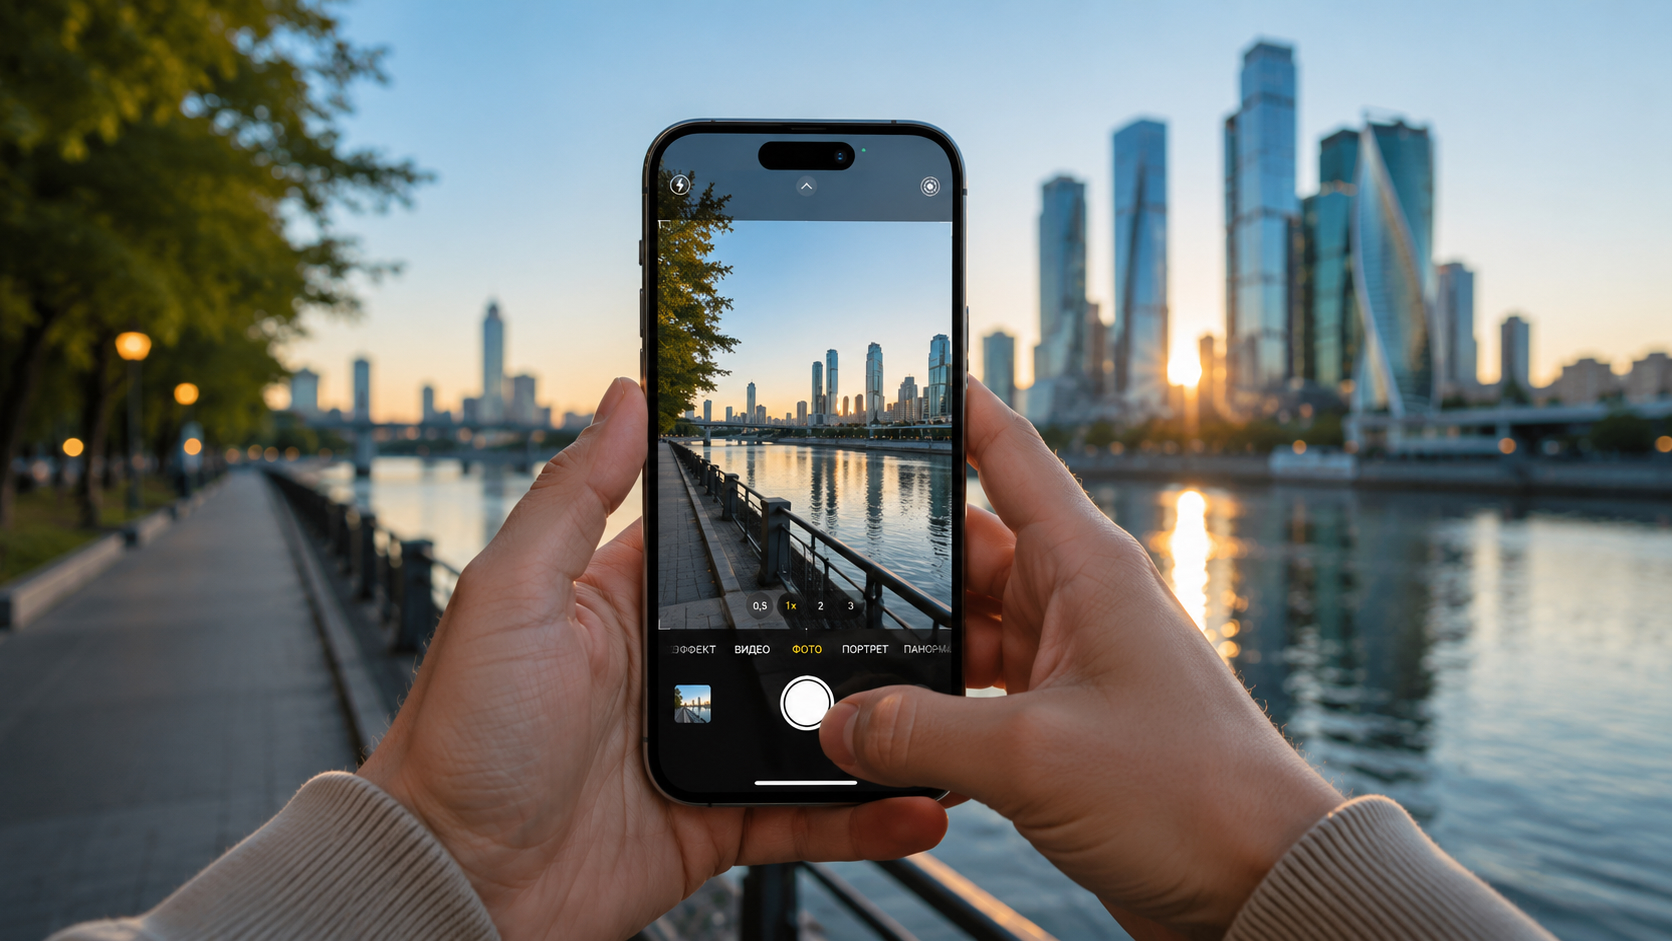
If it seems like iPhone photos look too bright and over-polished, it’s not you — it’s the processing. The iPhone camera performs billions of operations on every shot, and the result is often far from what you actually saw with your eyes. Here are five settings and one third-party app that will help you get a natural, slightly “film-like” result without buying a separate camera.
Removing excessive processing from iPhone photos
Why iPhone Photos Look Too Bright
Apple once proudly stated that the iPhone performs around 4 trillion operations on every photo. This both saves shots in difficult lighting and simultaneously kills the natural texture of the image: skin becomes plastic-looking, the sky becomes unnaturally vivid, and shadows get washed out.
Meanwhile, Gen Z is increasingly picking up simple digital point-and-shoot cameras for the unprocessed photo effect. The good news: you don’t need a separate camera for a similar result — just change a few iPhone settings.
How to Make iPhone Photos Darker and More Saturated
The iPhone tends to overexpose shots so that no scene ends up too dark. As a result, colors lose their depth. The solution is simple: slightly lower the exposure manually.
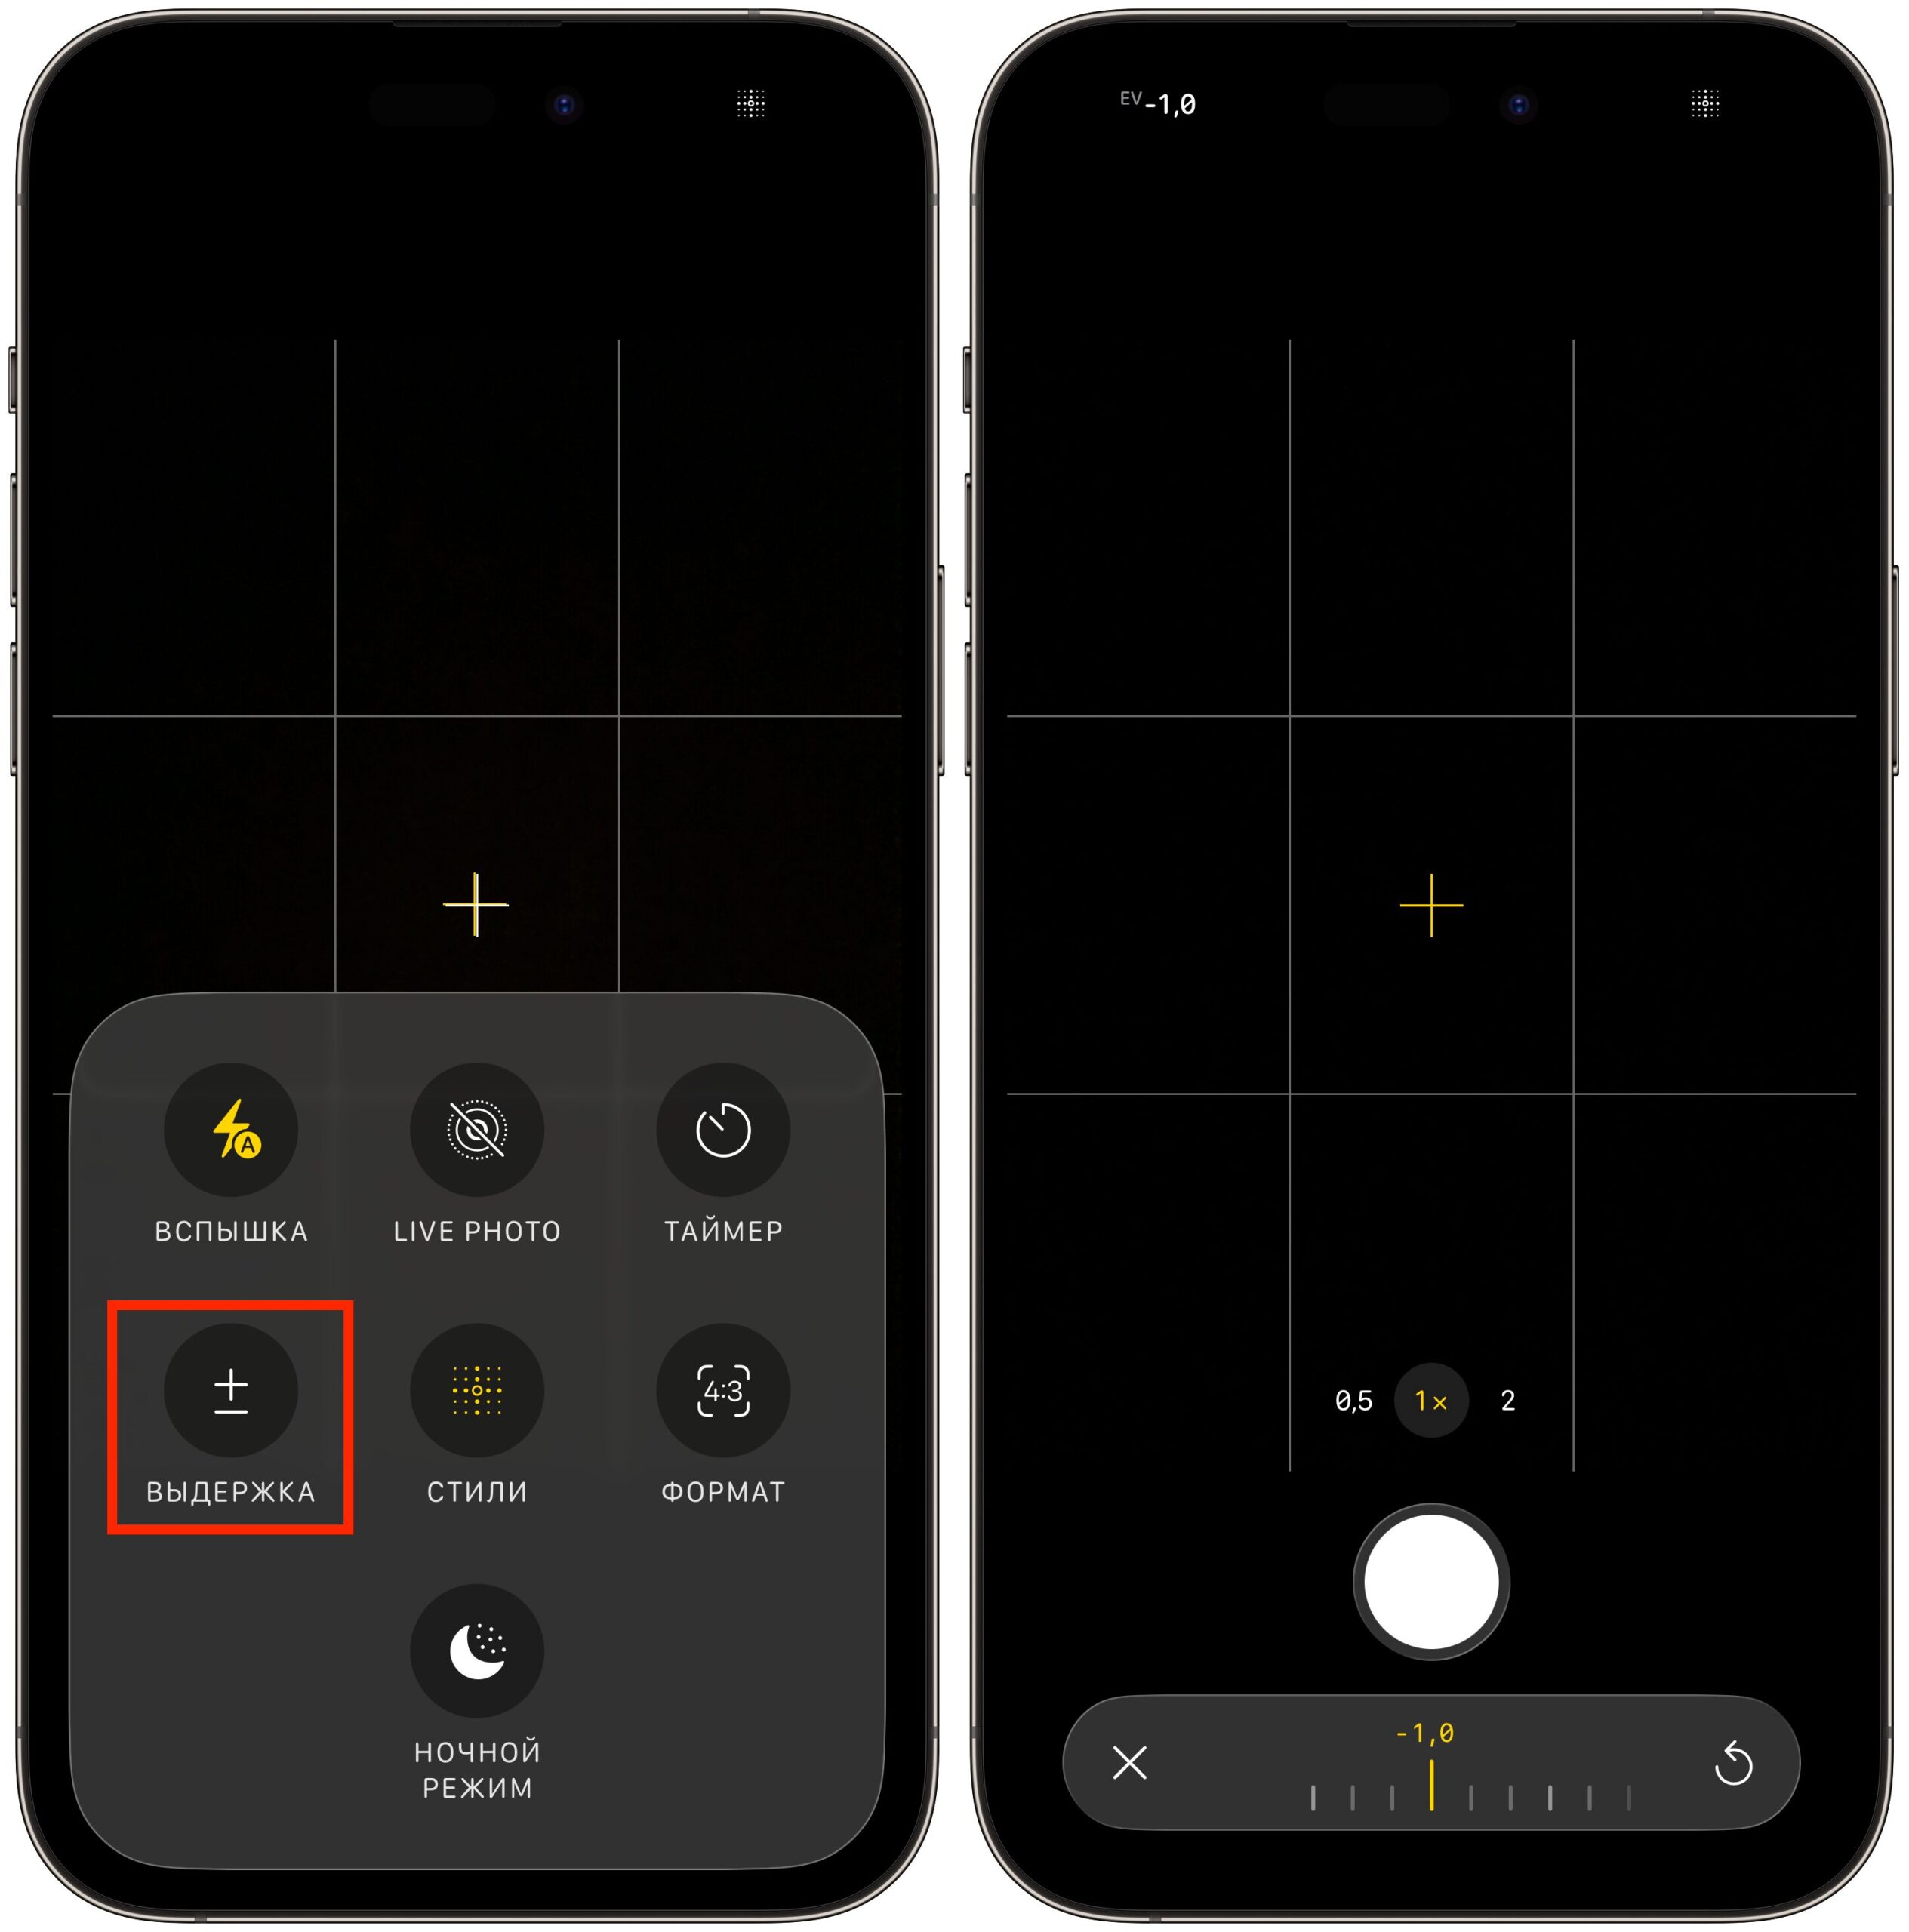
Adjust the exposure slider to your preference
In the Camera app, tap the “Photo” button at the bottom of the screen to open the menu, select “Exposure” and slide the slider to approximately –0.7 or –1.0. After that, you’ll see deeper and more saturated colors in your photos.
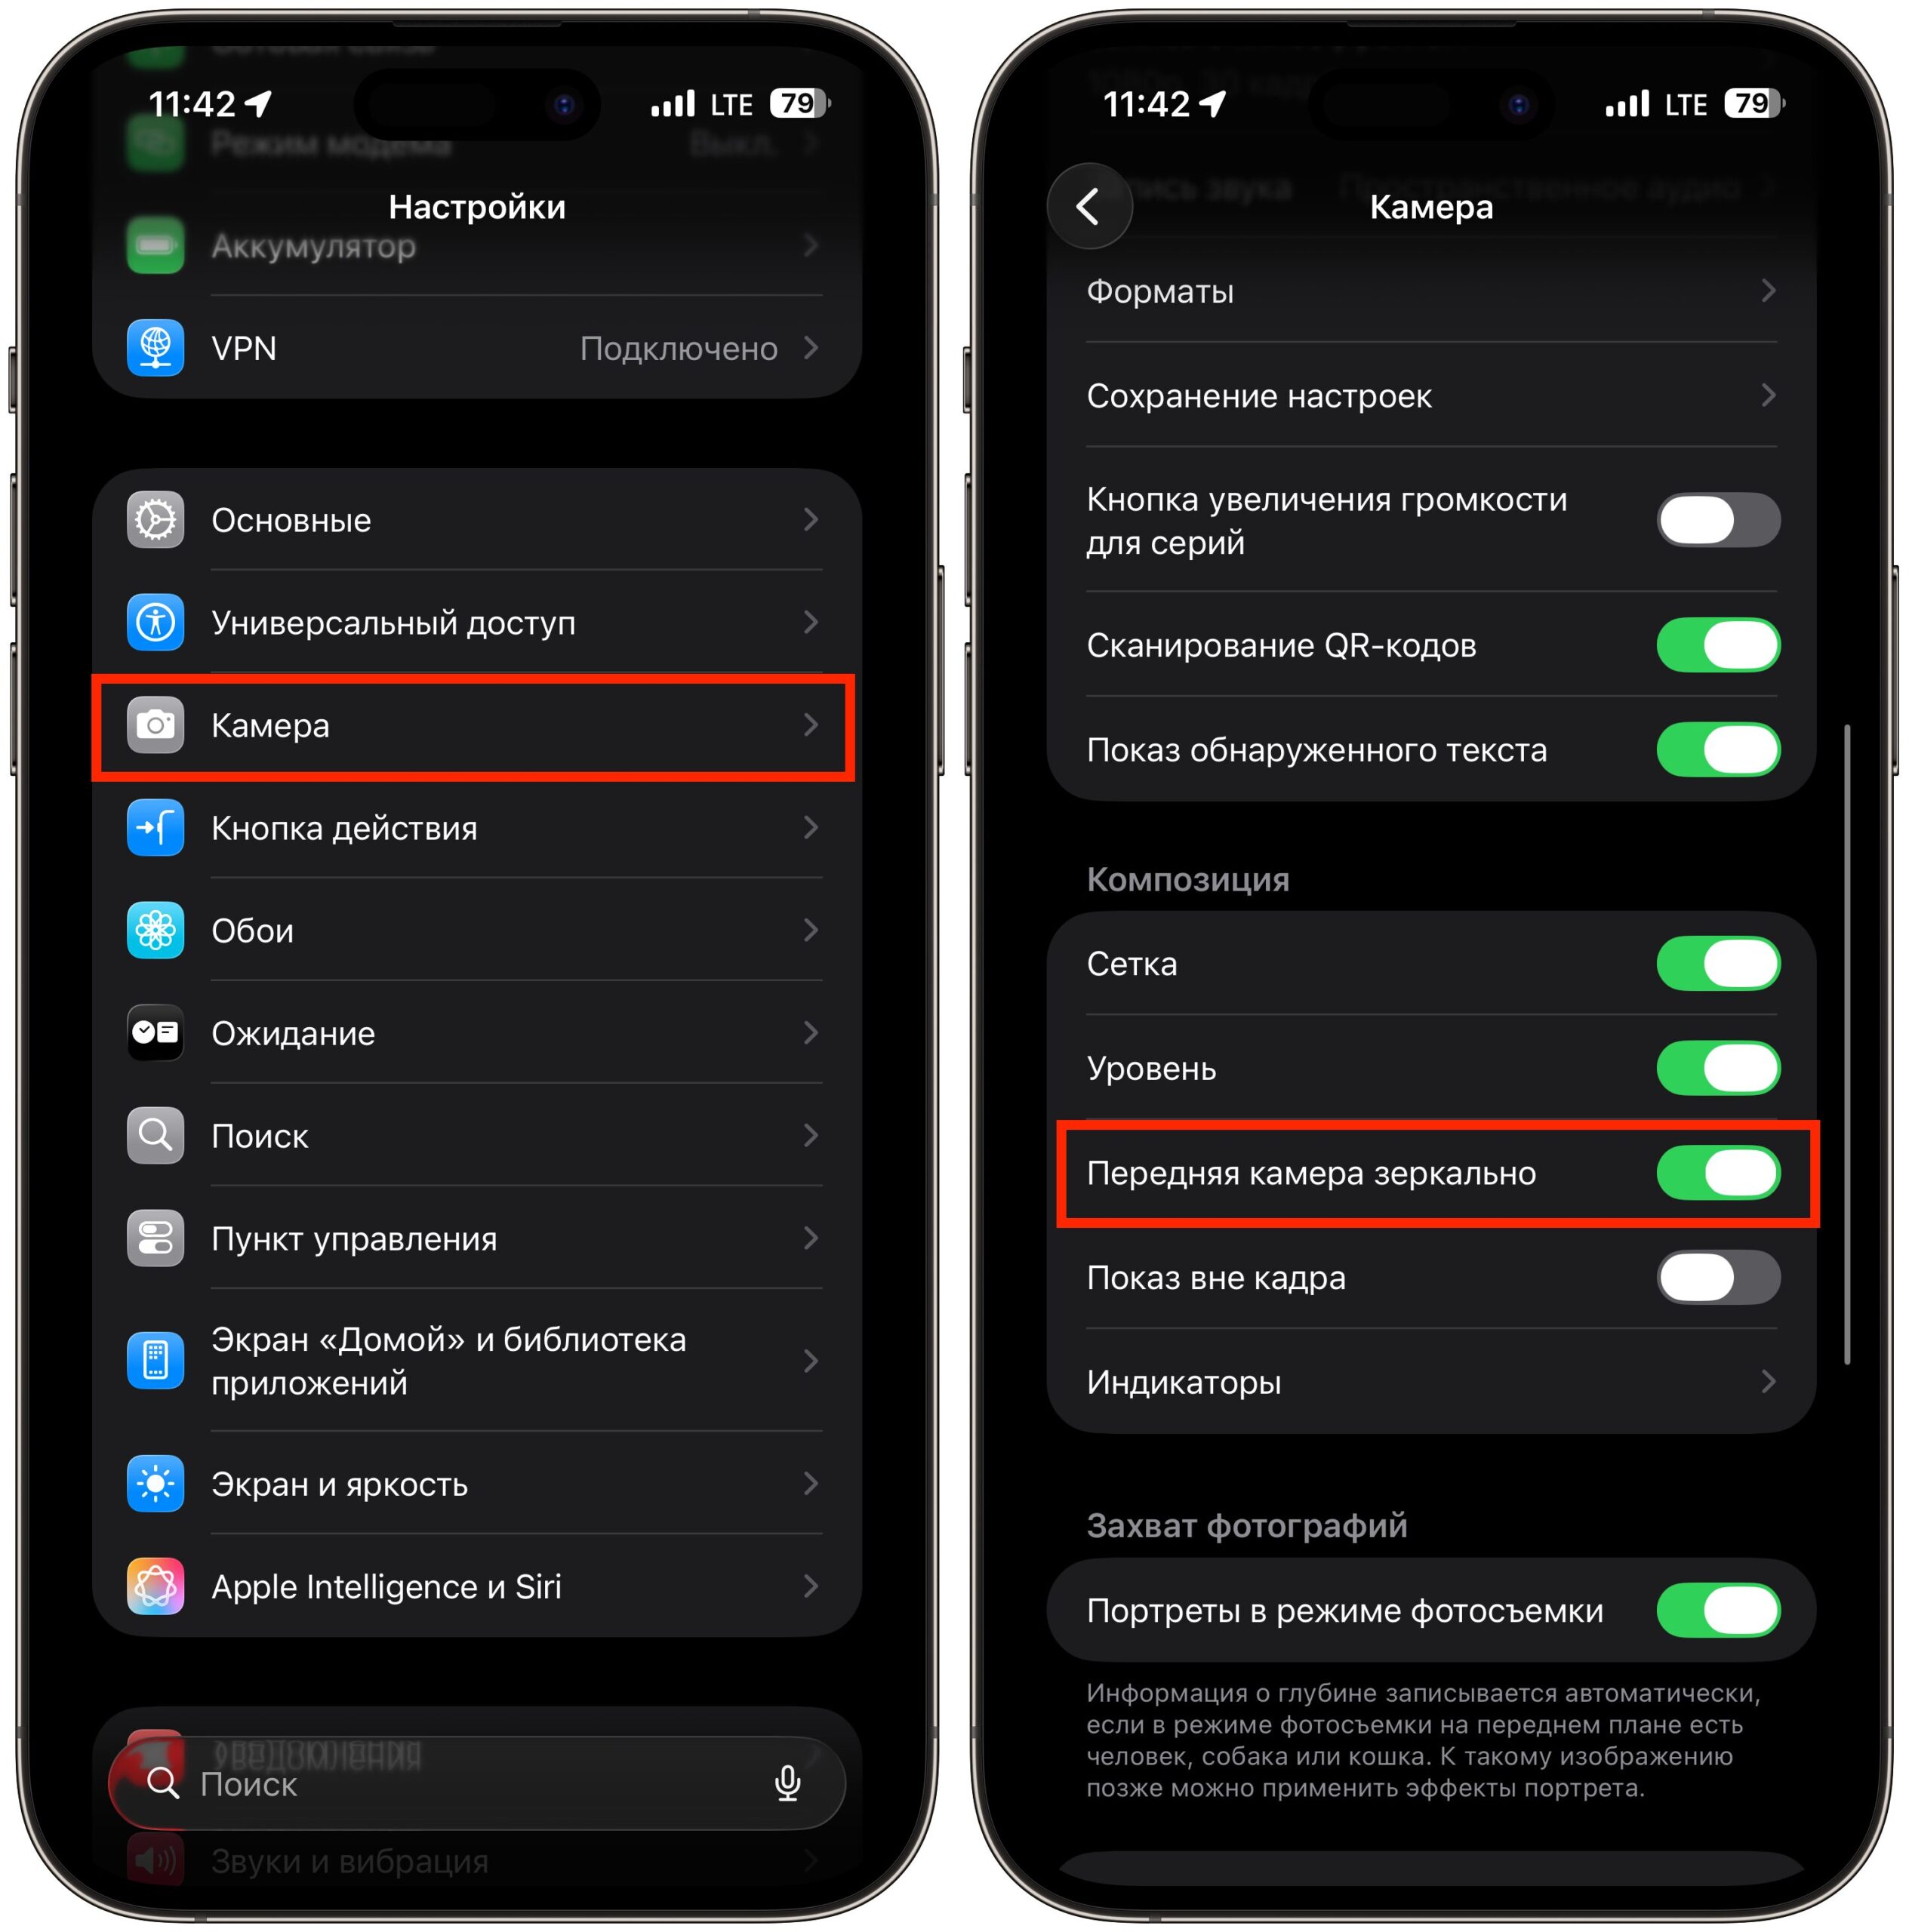
To prevent the setting from resetting after closing the app, go to Settings — Camera — Preserve Settings and enable “Exposure Adjustment.”
Lens Correction on iPhone: What It Is and How to Disable It
The selfie camera and ultra-wide lens have a wide field of view, and by nature they produce a “fisheye” effect. But by default, the iPhone straightens the image so the perspective at the edges looks more linear. The result is a “correct” photo, but it loses the characteristic wide-angle geometry.
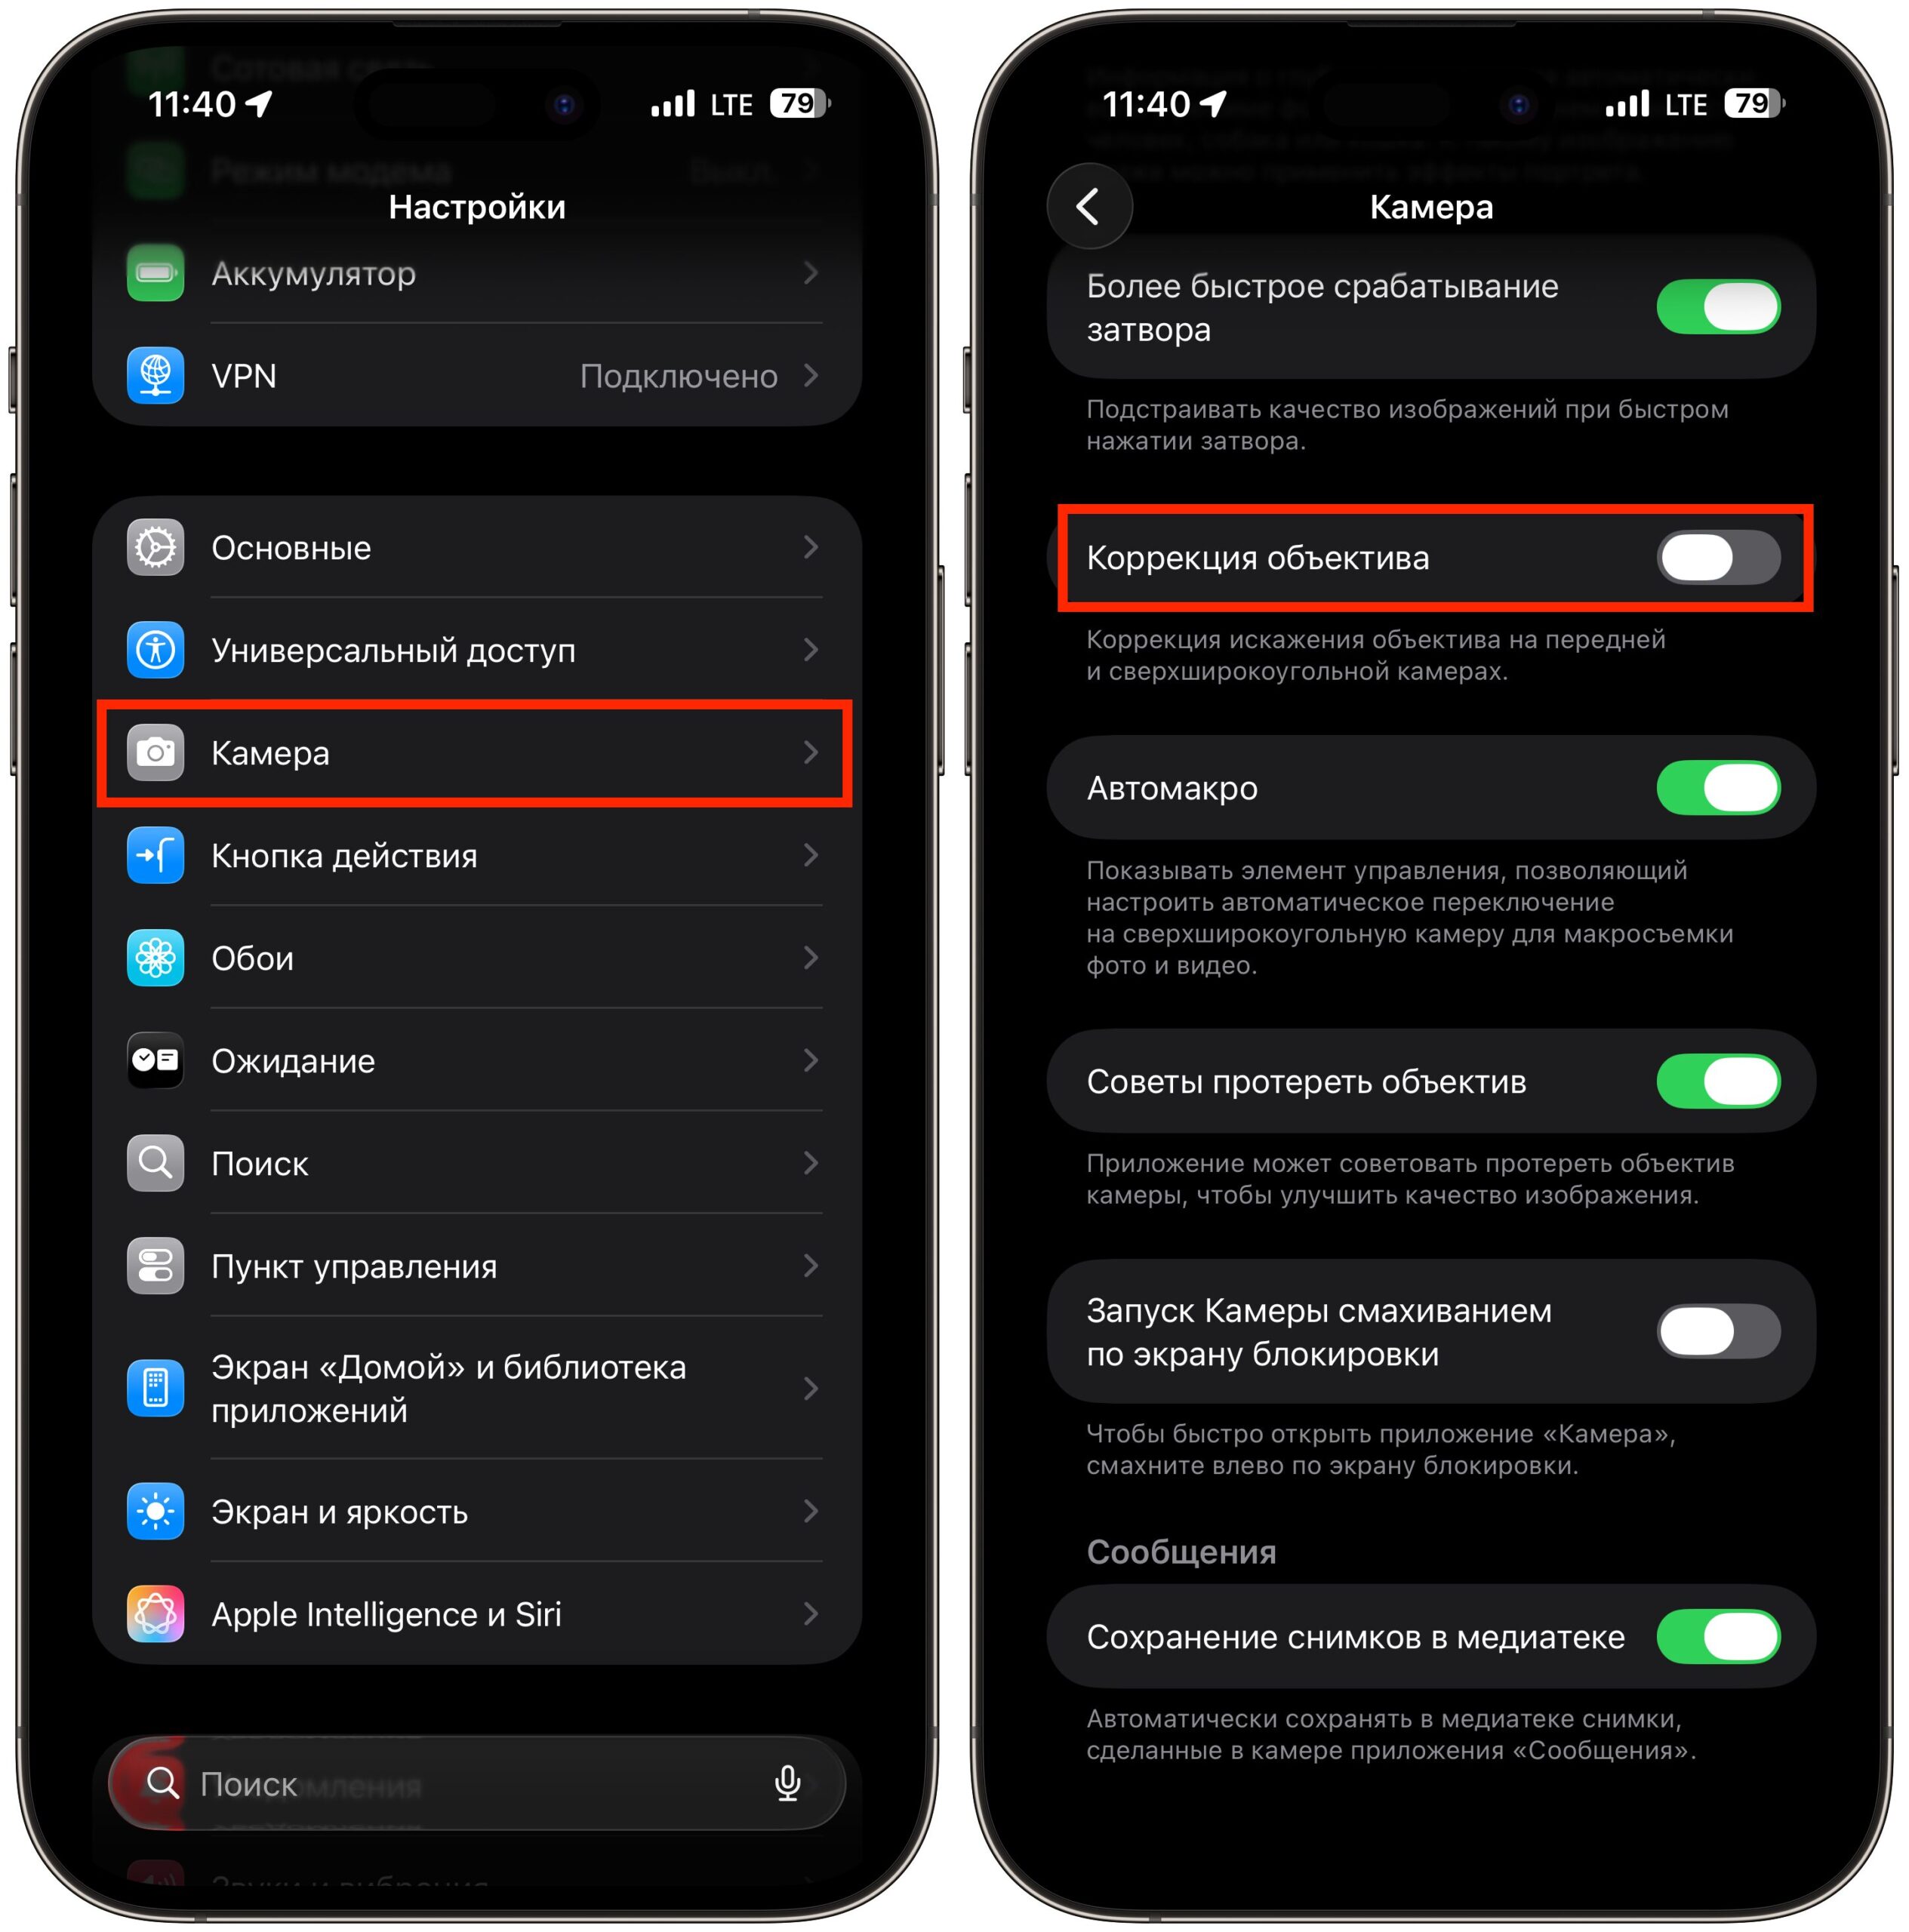
Lens correction can get in the way
If you want an honest wide angle with slight edge distortion, open Settings — Camera and turn off “Lens Correction.”
Photographic Styles in iPhone Camera: Which to Use
This tip works only on iPhone 16 and 17. The iPhone saves additional sensor data alongside each photo, and you can later change how colors are processed — this isn’t a regular filter on top of a finished image, but a reconfiguration of the processing.
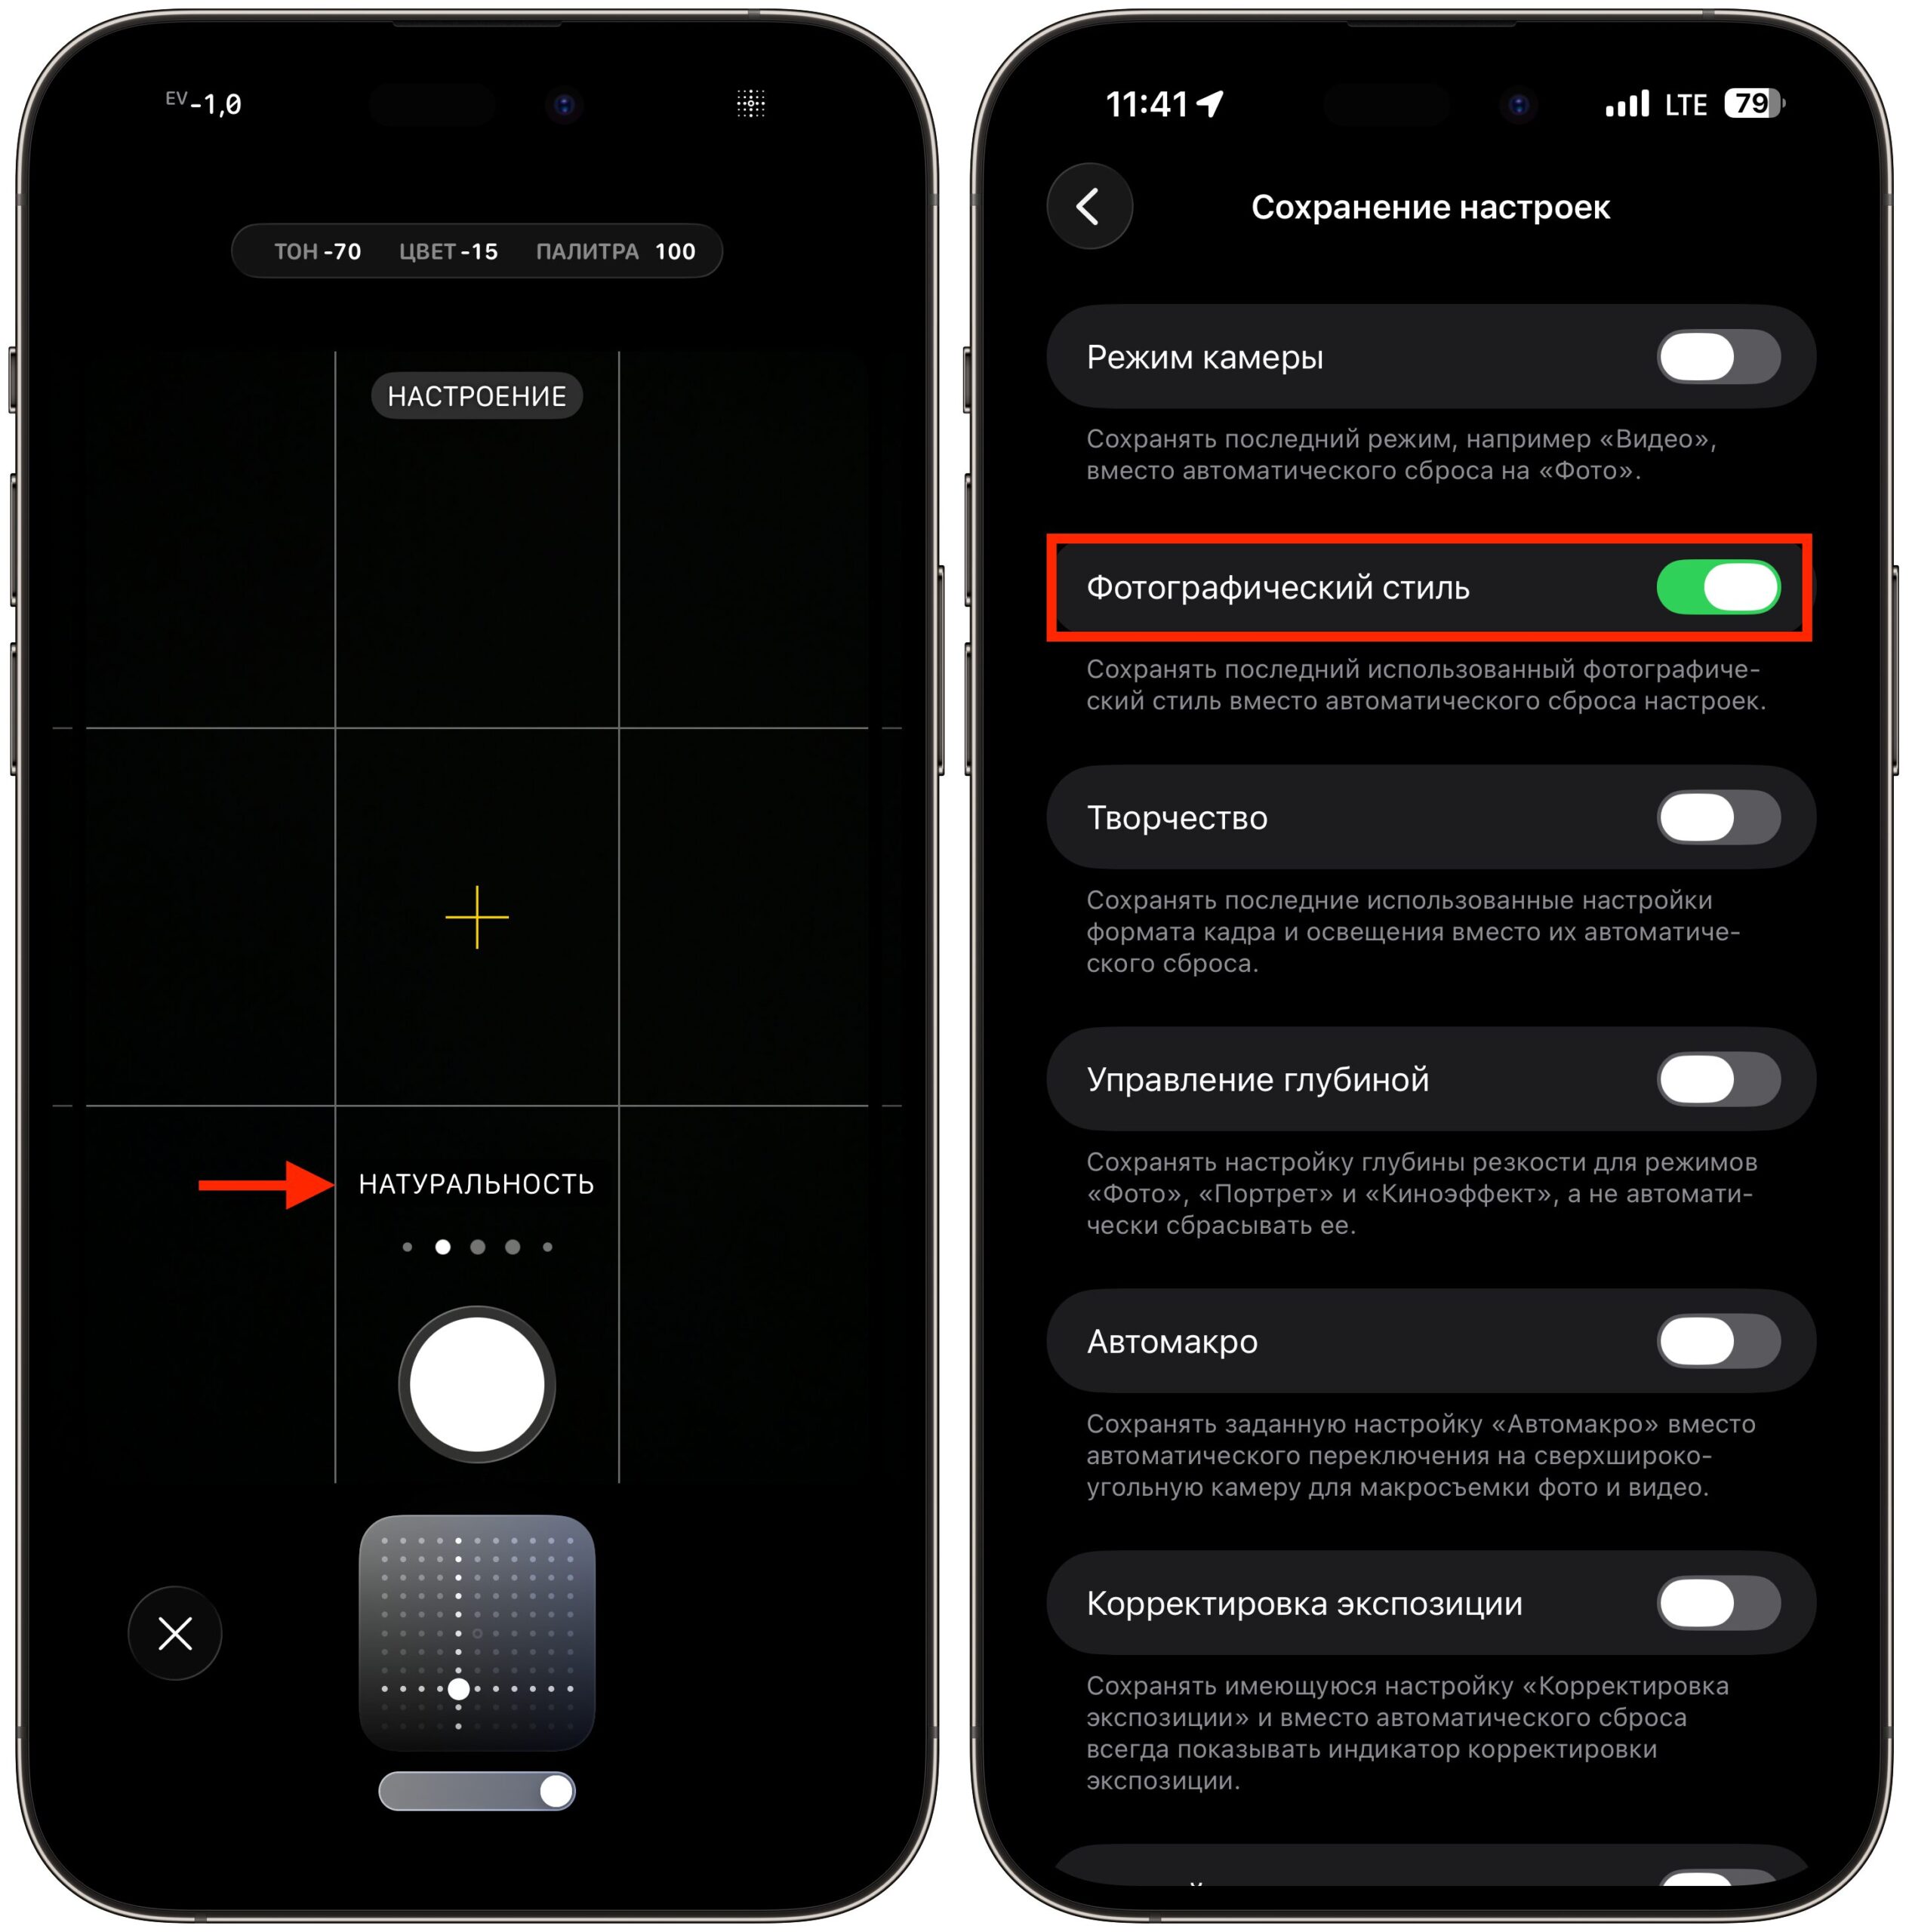
Set a photographic style and lock it in settings
Among the photo styles there’s “Natural” — it renders the scene as close to how it looks in reality as possible. In the Camera app, tap “Photo,” then “Styles,” and swipe from “Standard” through “Vibrant” to “Natural.” To prevent the style from resetting, go to Settings — Camera — Preserve Settings and enable “Photographic Style.”
Why iPhone Selfies Flip After Shooting
If your selfies look strange to you, it’s not your appearance. Even on a symmetrical face, the slightest differences make a mirror-flipped image feel unfamiliar. By default, the iPhone “flips” the image, and you see yourself differently from how you’re used to seeing yourself in the mirror. To save selfies mirrored — the way you see yourself every morning — open Settings — Camera and enable “Mirror Front Camera.”
Now selfies will be mirrored
You can also fix old selfies. Open Photos, go to the “Albums” tab, find the “Media Types” section and go to “Selfies.” Then it’s a two-step process:
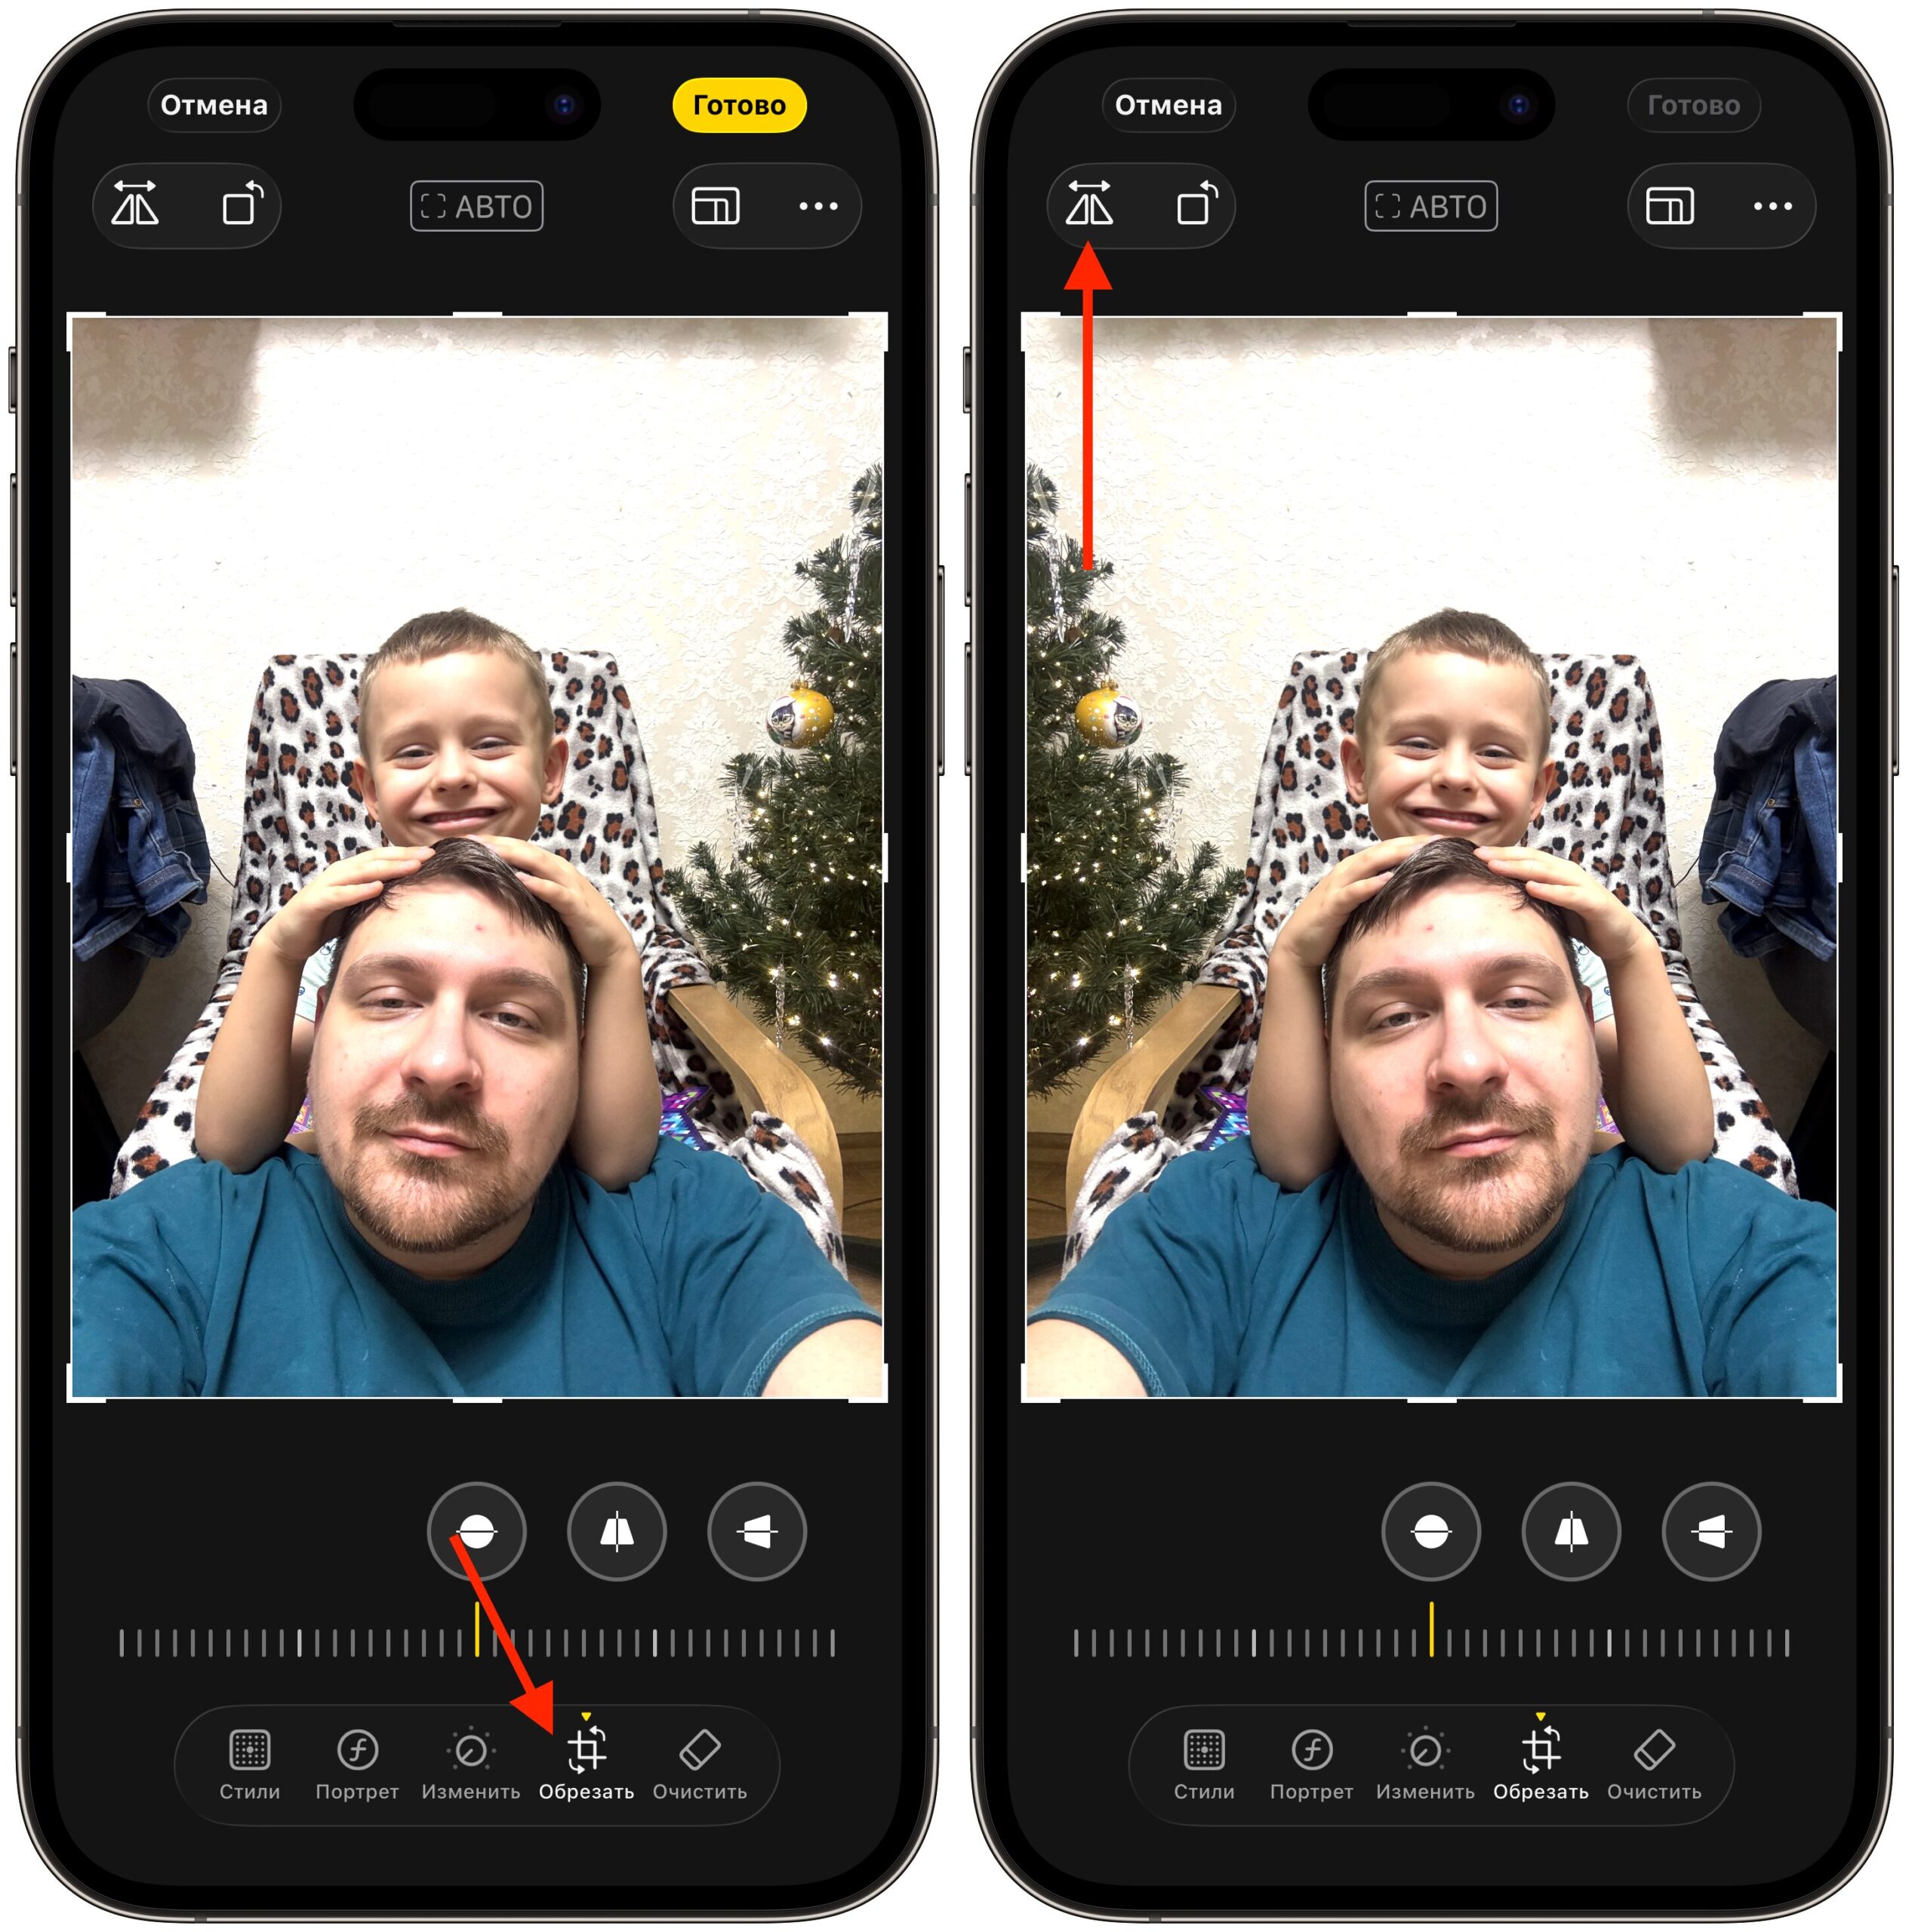
You can also fix existing photos
- Open a photo, tap “Edit,” select “Crop” and the “Flip” button in the upper left corner. Confirm the change.
- Tap “More” in the upper right corner, select “Copy Edits,” keep only “Rotation.” Go back to the selfie grid, tap “Select,” swipe across the desired photos, then “More” — “Paste Edits.”
This way you can mirror-flip dozens of old selfies in one pass.
An App for iPhone Photos Without Excessive Processing
The stock Camera app has its limits: even with correction disabled and the Natural style on iPhone, it still runs the image through its processing pipeline. If you want shots straight from the sensor, you need a third-party app.
One of the best solutions for this is (Not Boring) Camera. In the free version, you can take unprocessed photos straight from the camera sensor: no HDR, with bright highlights and noticeable noise in the shadows — that very point-and-shoot effect, but on your phone.