The MAX messenger is growing its audience, and more and more creators are building channels on it. But creating a channel in MAX is only half the battle, even though it’s not the easiest part. You also need to figure out how to invite subscribers to a channel in MAX, what methods are available for public and private channels, and how they differ. This guide provides step-by-step instructions for every scenario, tips for managing join requests, and practical recommendations for growing your audience.
Learning how to invite subscribers in MAX. Image: vk.company
Ways to Invite Subscribers in MAX
MAX offers several mechanisms for attracting subscribers to channels. The set of tools depends on the channel type — public or private.
For public channels, two options are available:
- Adding from contacts — you manually select users from your MAX address book and invite them to the channel.
- Invite link with nickname — a unique URL like max.ru/channel_name that can be sent to anyone or published on external platforms.
For private channels, the set is wider — three scenarios:
- Adding from contacts (same as for public channels).
- Closed invite link without requests — a person follows the link and immediately joins the channel.
- Closed link with join requests — the user sends a request, and the administrator decides whether to approve or reject it.
The choice of method depends on your goals. If you need maximum reach — open links are the way to go. If audience control is important — use join requests. Let’s break down each method in detail.
How to Invite Subscribers to a Public Channel in MAX
A public channel in MAX is visible in the messenger’s search, and any user can subscribe to it on their own. But at the start, when the channel isn’t yet indexed in search and has no audience, you need to invite subscribers manually. Here are the two main methods.
Adding Subscribers from Contacts
This is the fastest way to get your first subscribers — especially if your friends and colleagues already use MAX.
You can add subscribers from contacts
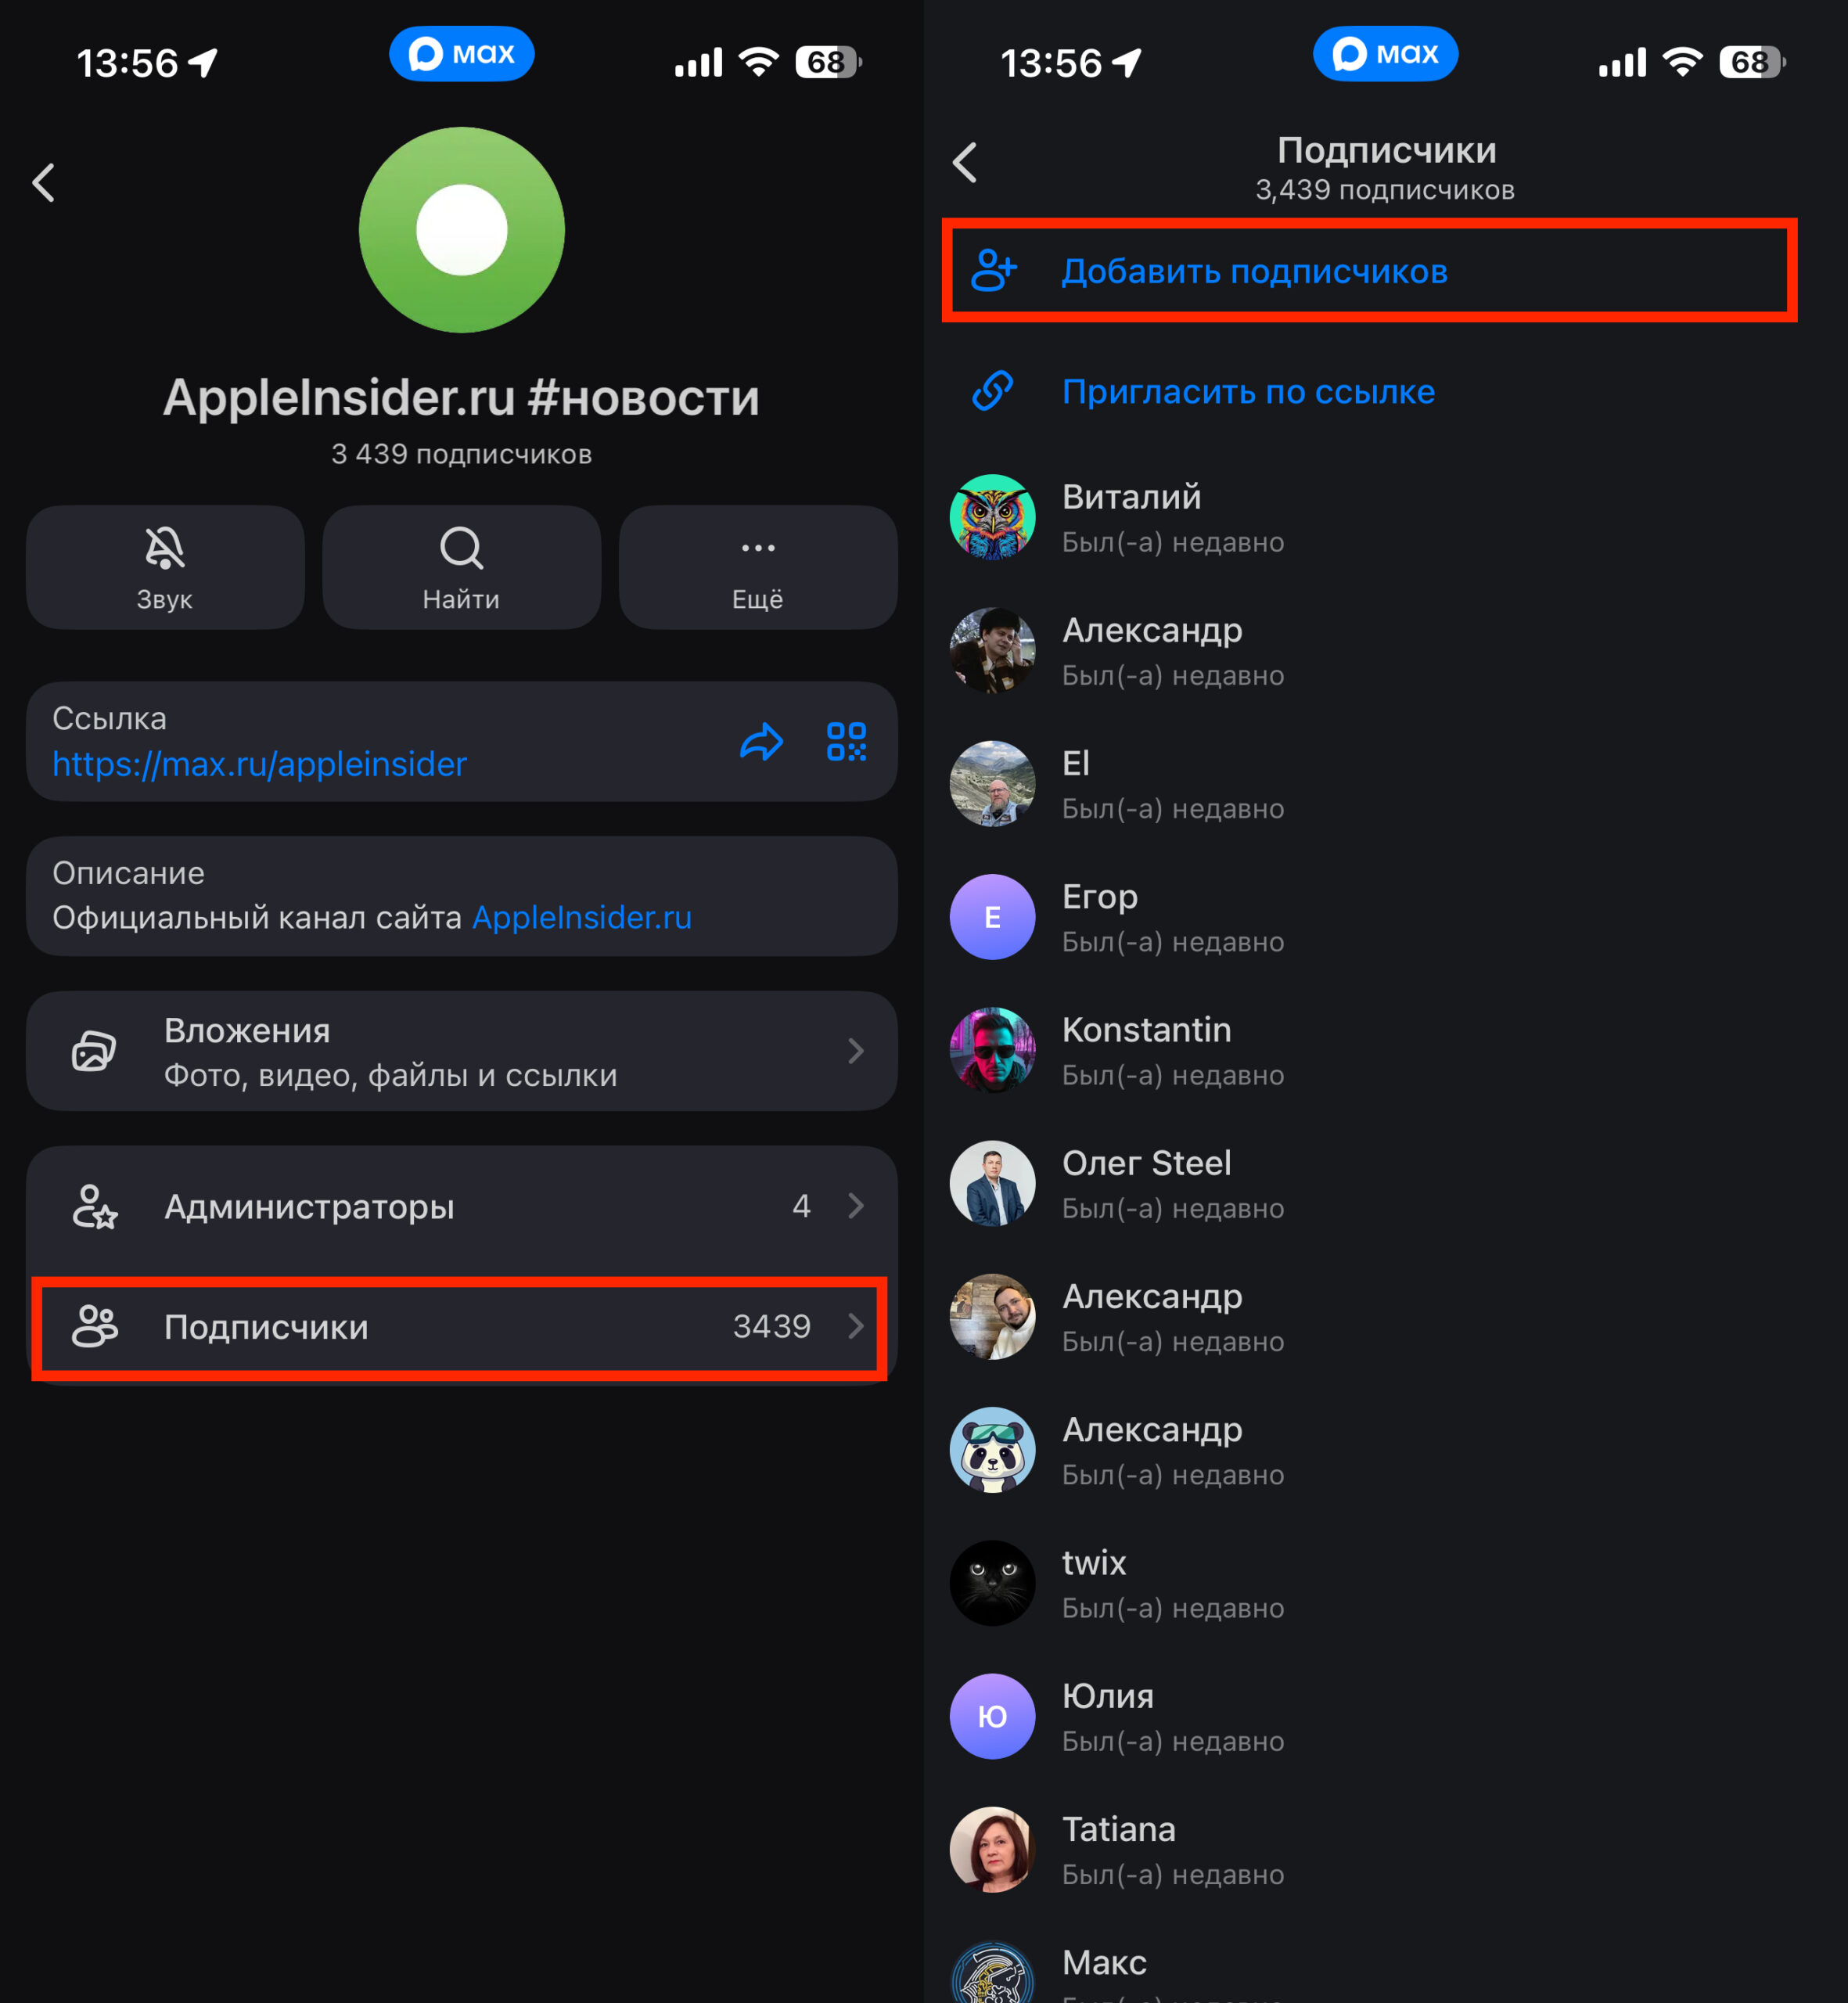
- Open your channel in MAX.
- Go to the channel page and find the “Subscribers” section.
- Tap “Add Subscribers.”
- In the list that appears, select the desired users from your MAX contacts.
- Confirm the invitation.
Selected users will receive a notification and will be automatically added to the channel. They don’t need to confirm joining — they’ll immediately appear in the subscriber list.
Invite Link with Channel Nickname
If you want to attract an audience from outside MAX — from social networks, websites, email newsletters — use the invite link.
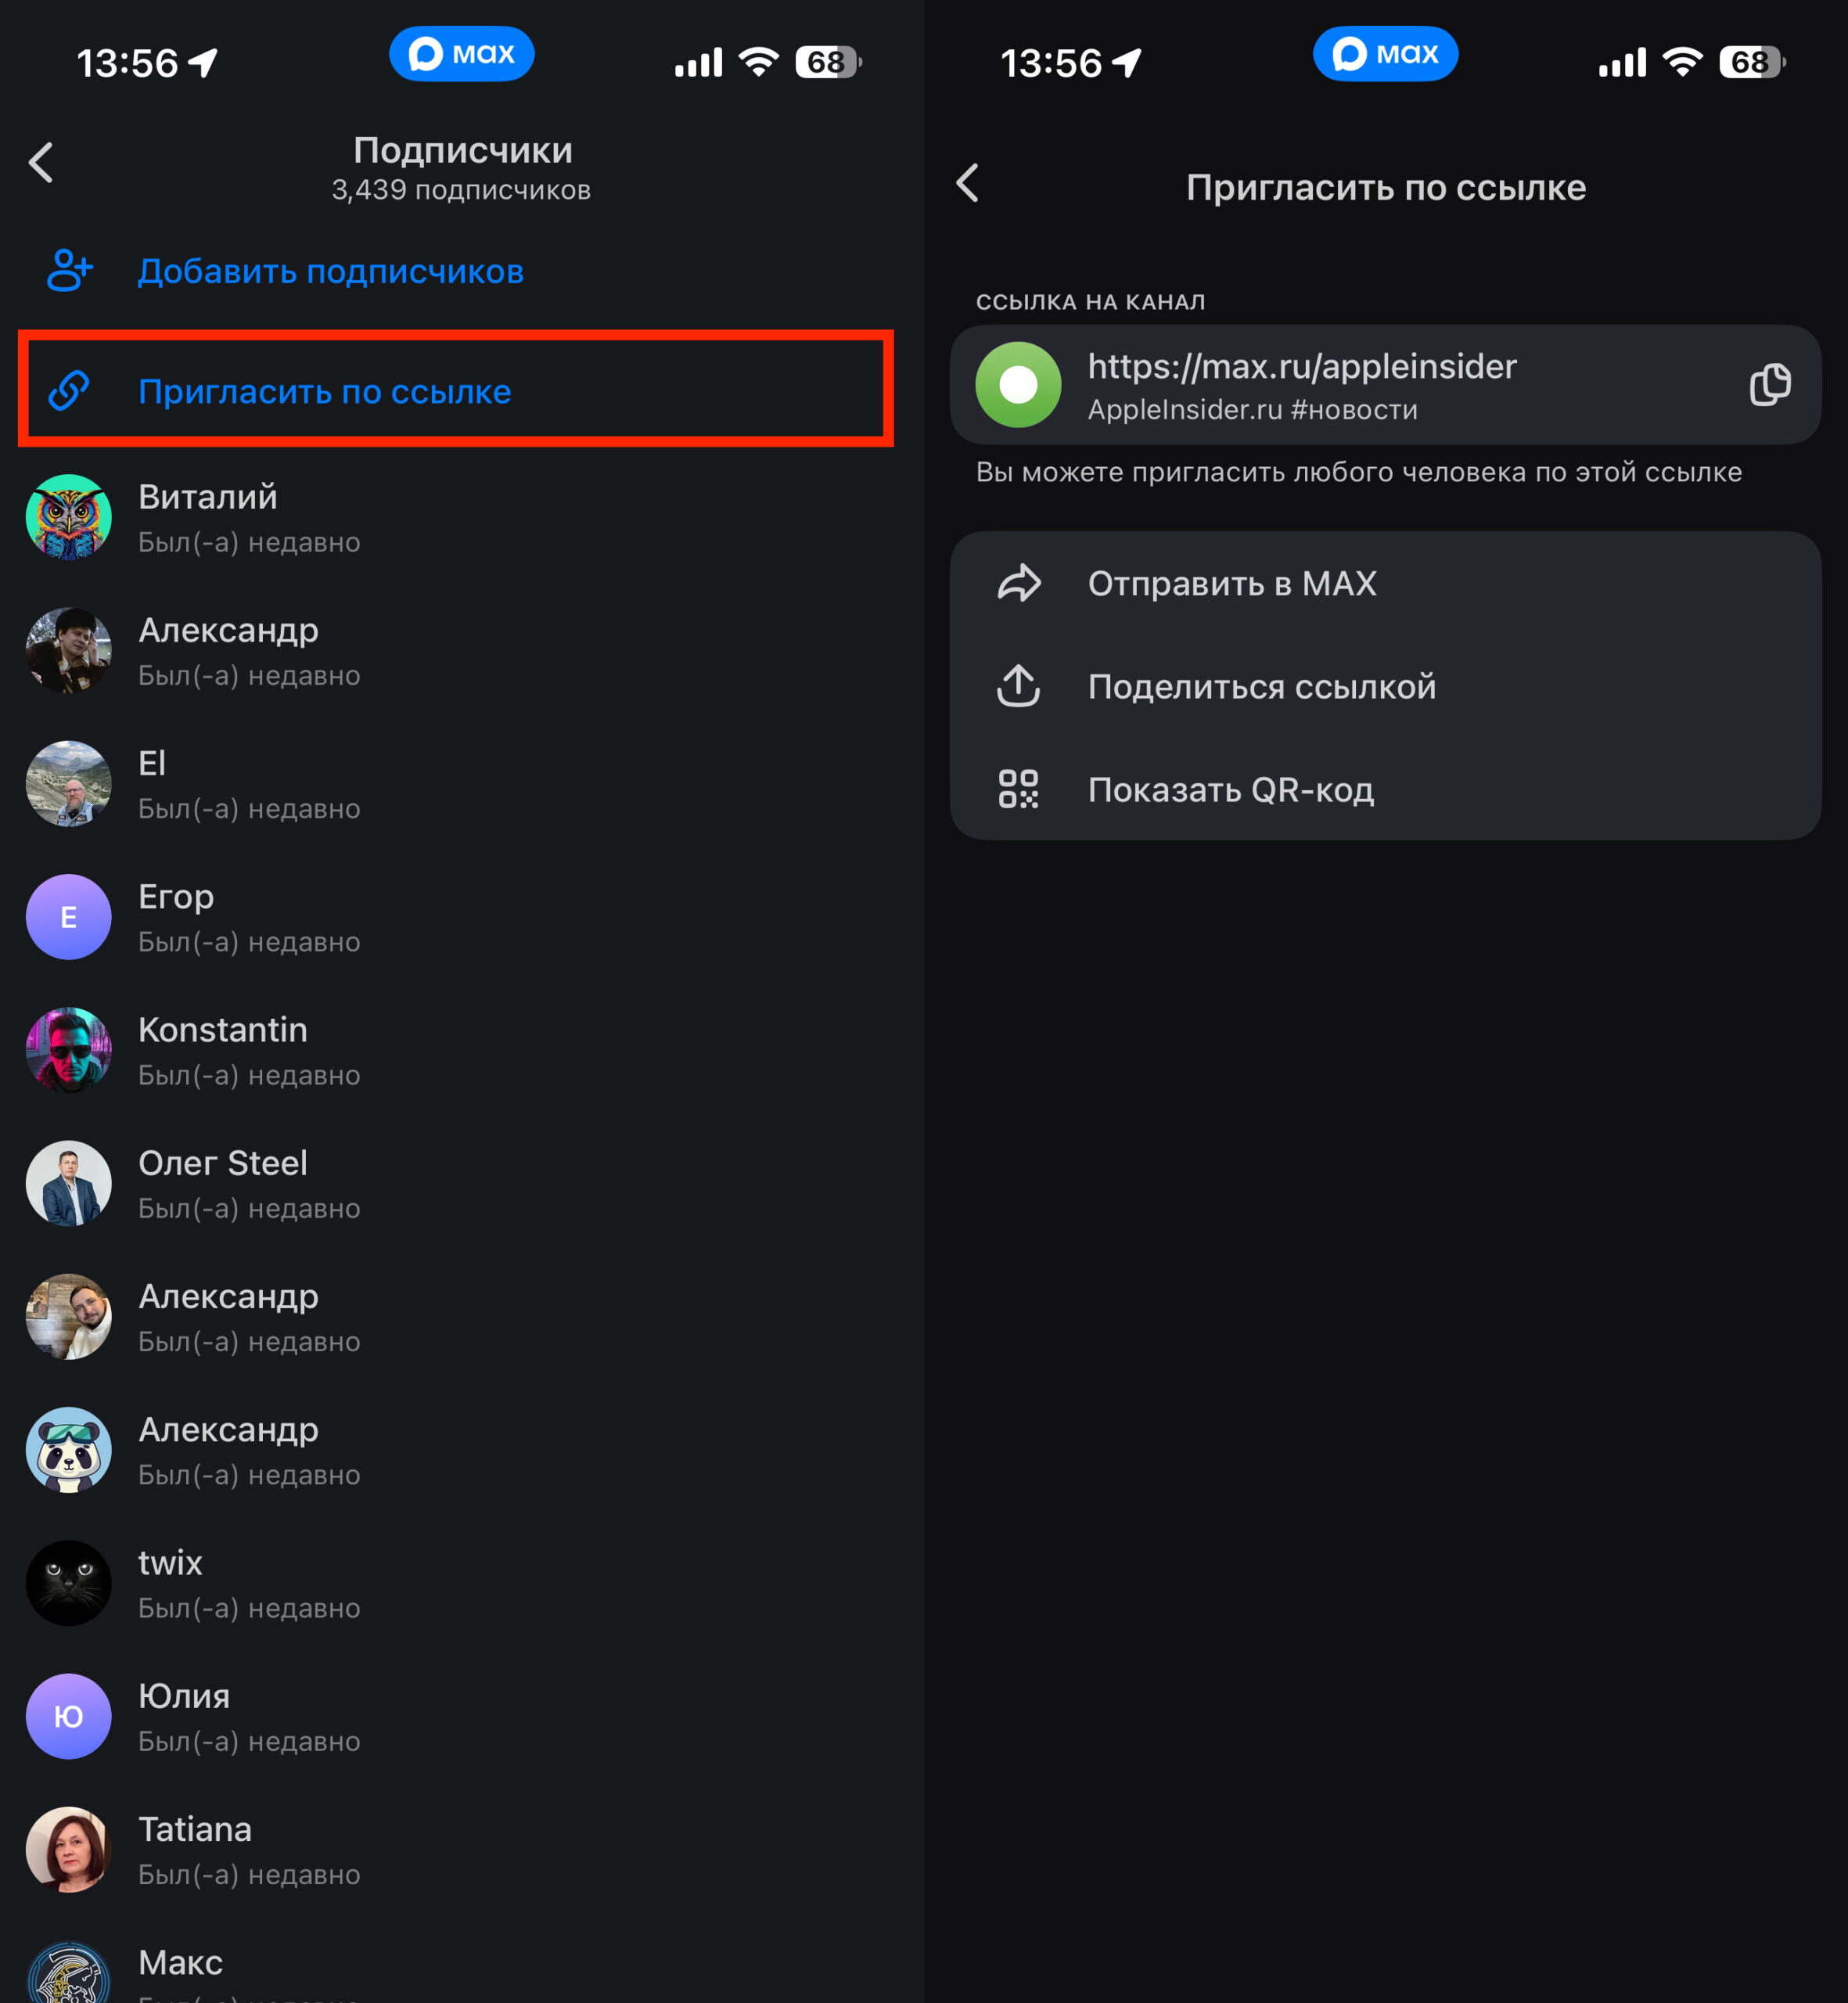
Or send the link to anyone interested
- Go to your channel page in MAX.
- Copy the channel link (it’s generated automatically based on the nickname) or open the QR code.
- Send the link via MAX, other messengers, social networks, or place it on a website.
QR codes are especially convenient for offline events: you can display them on screen during a presentation, print them on a business card, or hang them in the office. Anyone who scans the code with their smartphone camera will go directly to the channel page.
Inviting Subscribers to a Private Channel in MAX
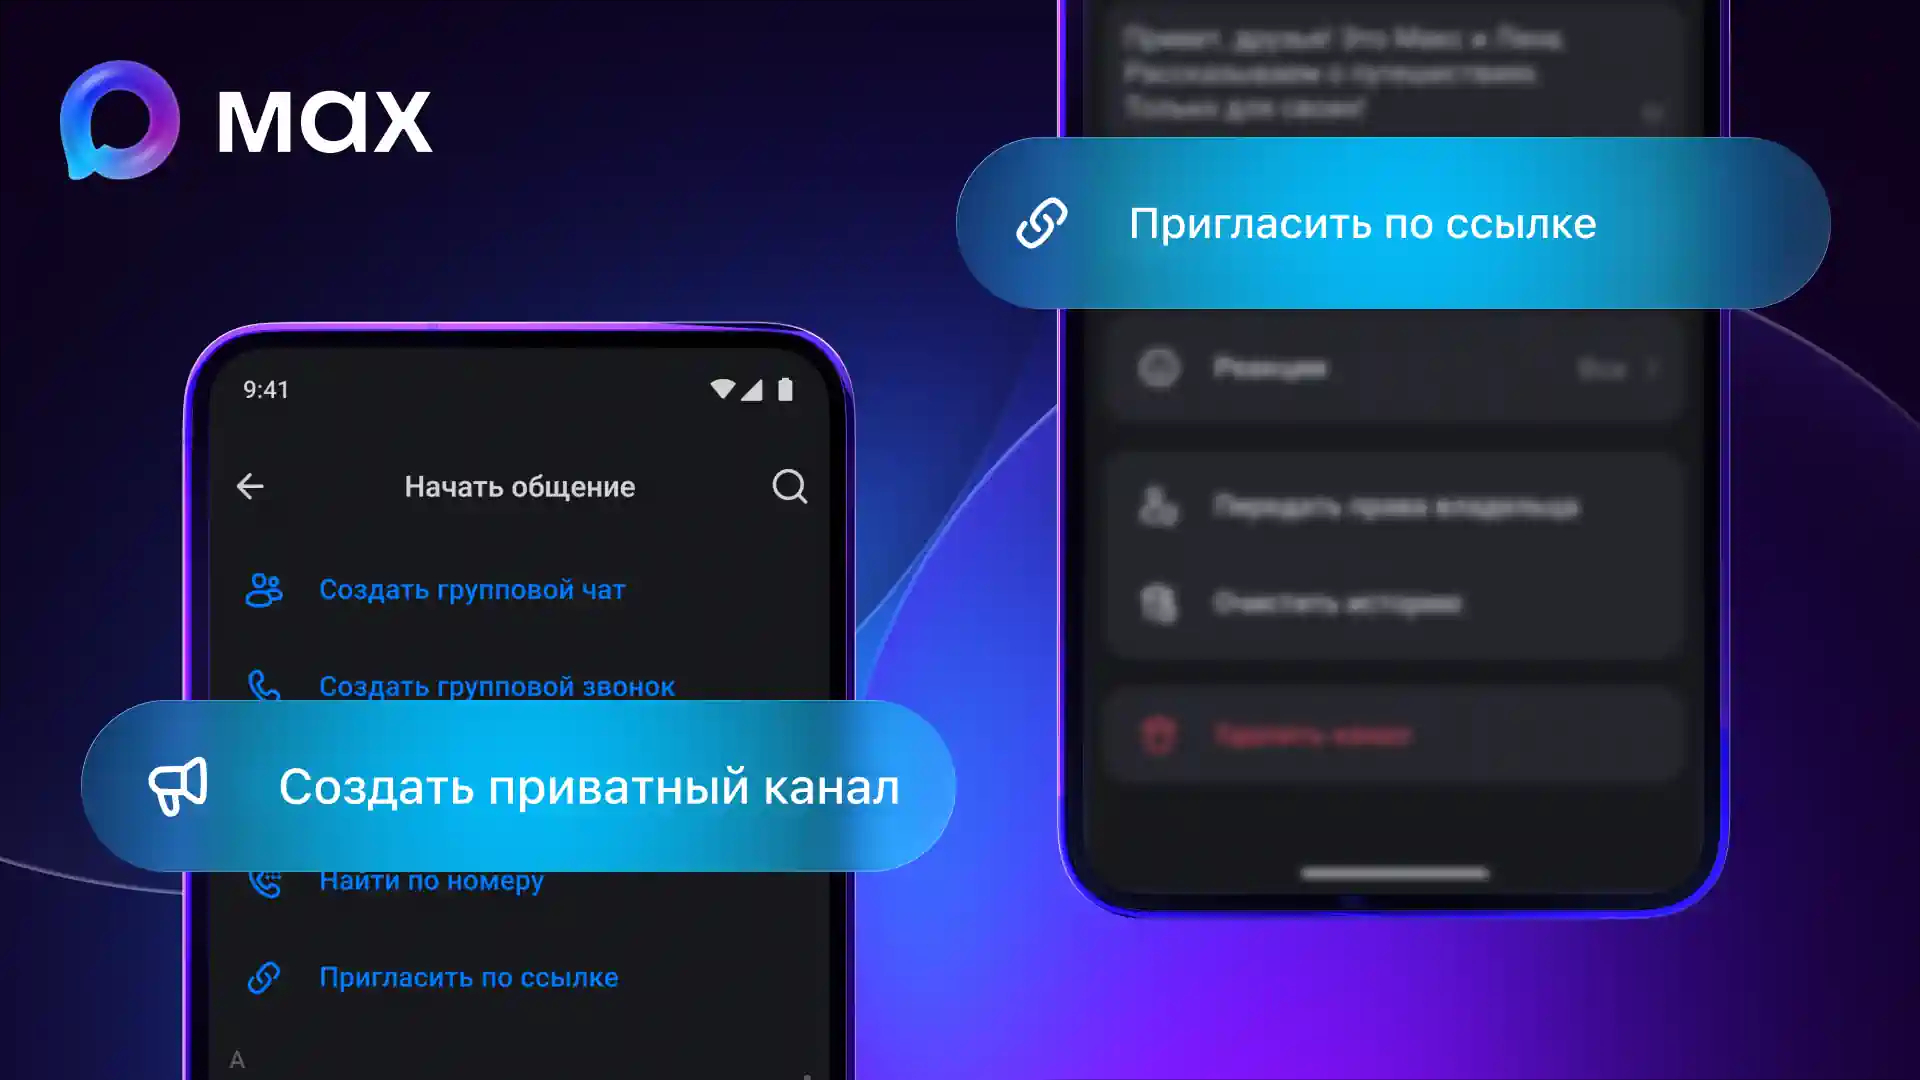
Private channels have an additional setting. Image: habr.com
A private channel doesn’t appear in MAX search, and you can only subscribe to it by invitation. This is suitable for closed communities, corporate channels, or author blogs with restricted access. MAX provides three invitation scenarios for private channels.
Adding from Contacts
Works exactly the same as with public channels: you go to the “Subscribers” section, tap “Add Subscribers,” and select people from your contacts list. They immediately join the channel without any confirmations.
Closed Link Without Requests
This option is suitable if you want to quickly build an audience for a private channel and don’t want to spend time manually approving each subscriber. Anyone who receives the link will automatically become a member.

Simply send the generated link
- Open your channel settings in MAX.
- Find the “Invite by Link” section.
- Make sure the “Join Request” option is disabled.
- Copy the generated link or QR code.
- Send the link to future subscribers using any convenient method.
Keep in mind that such a link can be forwarded. If it ends up with the wrong people, random users will join the channel. So only share it in trusted circles or be prepared to periodically regenerate the link — this can be done in the same settings.
Closed Link with Join Requests
Maximum control over subscriber composition. The user follows the link but doesn’t join the channel immediately — they send a request that the administrator must approve or reject.
- Go to the channel settings.
- Open the “Invite by Link” section.
- Enable the “Join Request” option.
- Copy the link and share it with the right people.
This format is most commonly used by corporate channels, closed professional communities, and creators who want to filter their audience. For example, you can create a channel for company clients and only accept those who actually are clients.
Managing Join Requests for a MAX Channel
If you’ve chosen the request mode, it’s important to understand how to work with them. All new join requests are displayed right inside the channel — the administrator receives a push notification for each new request.
The request management process looks like this:
- Open the channel in MAX — you’ll see a notification about new requests.
- Go to the requests list.
- Review the profile of each user who sent a request.
- Tap “Accept” or “Reject” next to each request.
If the channel has multiple administrators, any of them can process a request.