Losing all your photos, messages, and iPhone settings can happen in a second — all it takes is a failed update, theft, or device failure. And with iCloud payments being disabled in Russia, you won’t even need to do anything for that to happen. A backup on Mac is the most reliable way to protect yourself, because it’s stored locally and doesn’t depend on the internet or a paid iCloud subscription. Here’s how to create one, where to find it, and what’s important not to forget.
Learning how to create local backups of iPhone and iPad on Mac. Image: 9to5mac.com
iPhone Backup on Mac — Why You Need It
iCloud is convenient, but the free 5 GB is barely enough for contacts and notes. A full iPhone backup with photos, apps, and health data simply won’t fit without a paid subscription. Plus, an iCloud backup depends on internet speed and can get stuck halfway through.
A local backup on Mac doesn’t have these problems. It’s created via cable, works fast, and includes almost all device content. If something goes wrong, a new iPhone can be restored from it in 15–20 minutes without downloading dozens of gigabytes from the cloud.
It’s especially important to make a backup before updating iOS, before sending your device for repair, and before switching to a new iPhone. It takes just a few minutes but can save you days of stress.
How to Back Up iPhone via Finder on macOS
Starting with macOS Catalina (2019), iTunes is no longer available on Mac. All iPhone and iPad management features have moved to Finder. Here’s what you need to do:
Everything is done with a couple of clicks in Finder
- Connect your iPhone or iPad to your Mac using a Lightning or USB-C cable.
- Open Finder. In the left sidebar, under the “Locations” section, your device name will appear — click on it.
- If you’re connecting the device to this Mac for the first time, click “Trust” on both the Mac and iPhone (you’ll need to enter the passcode on iPhone).
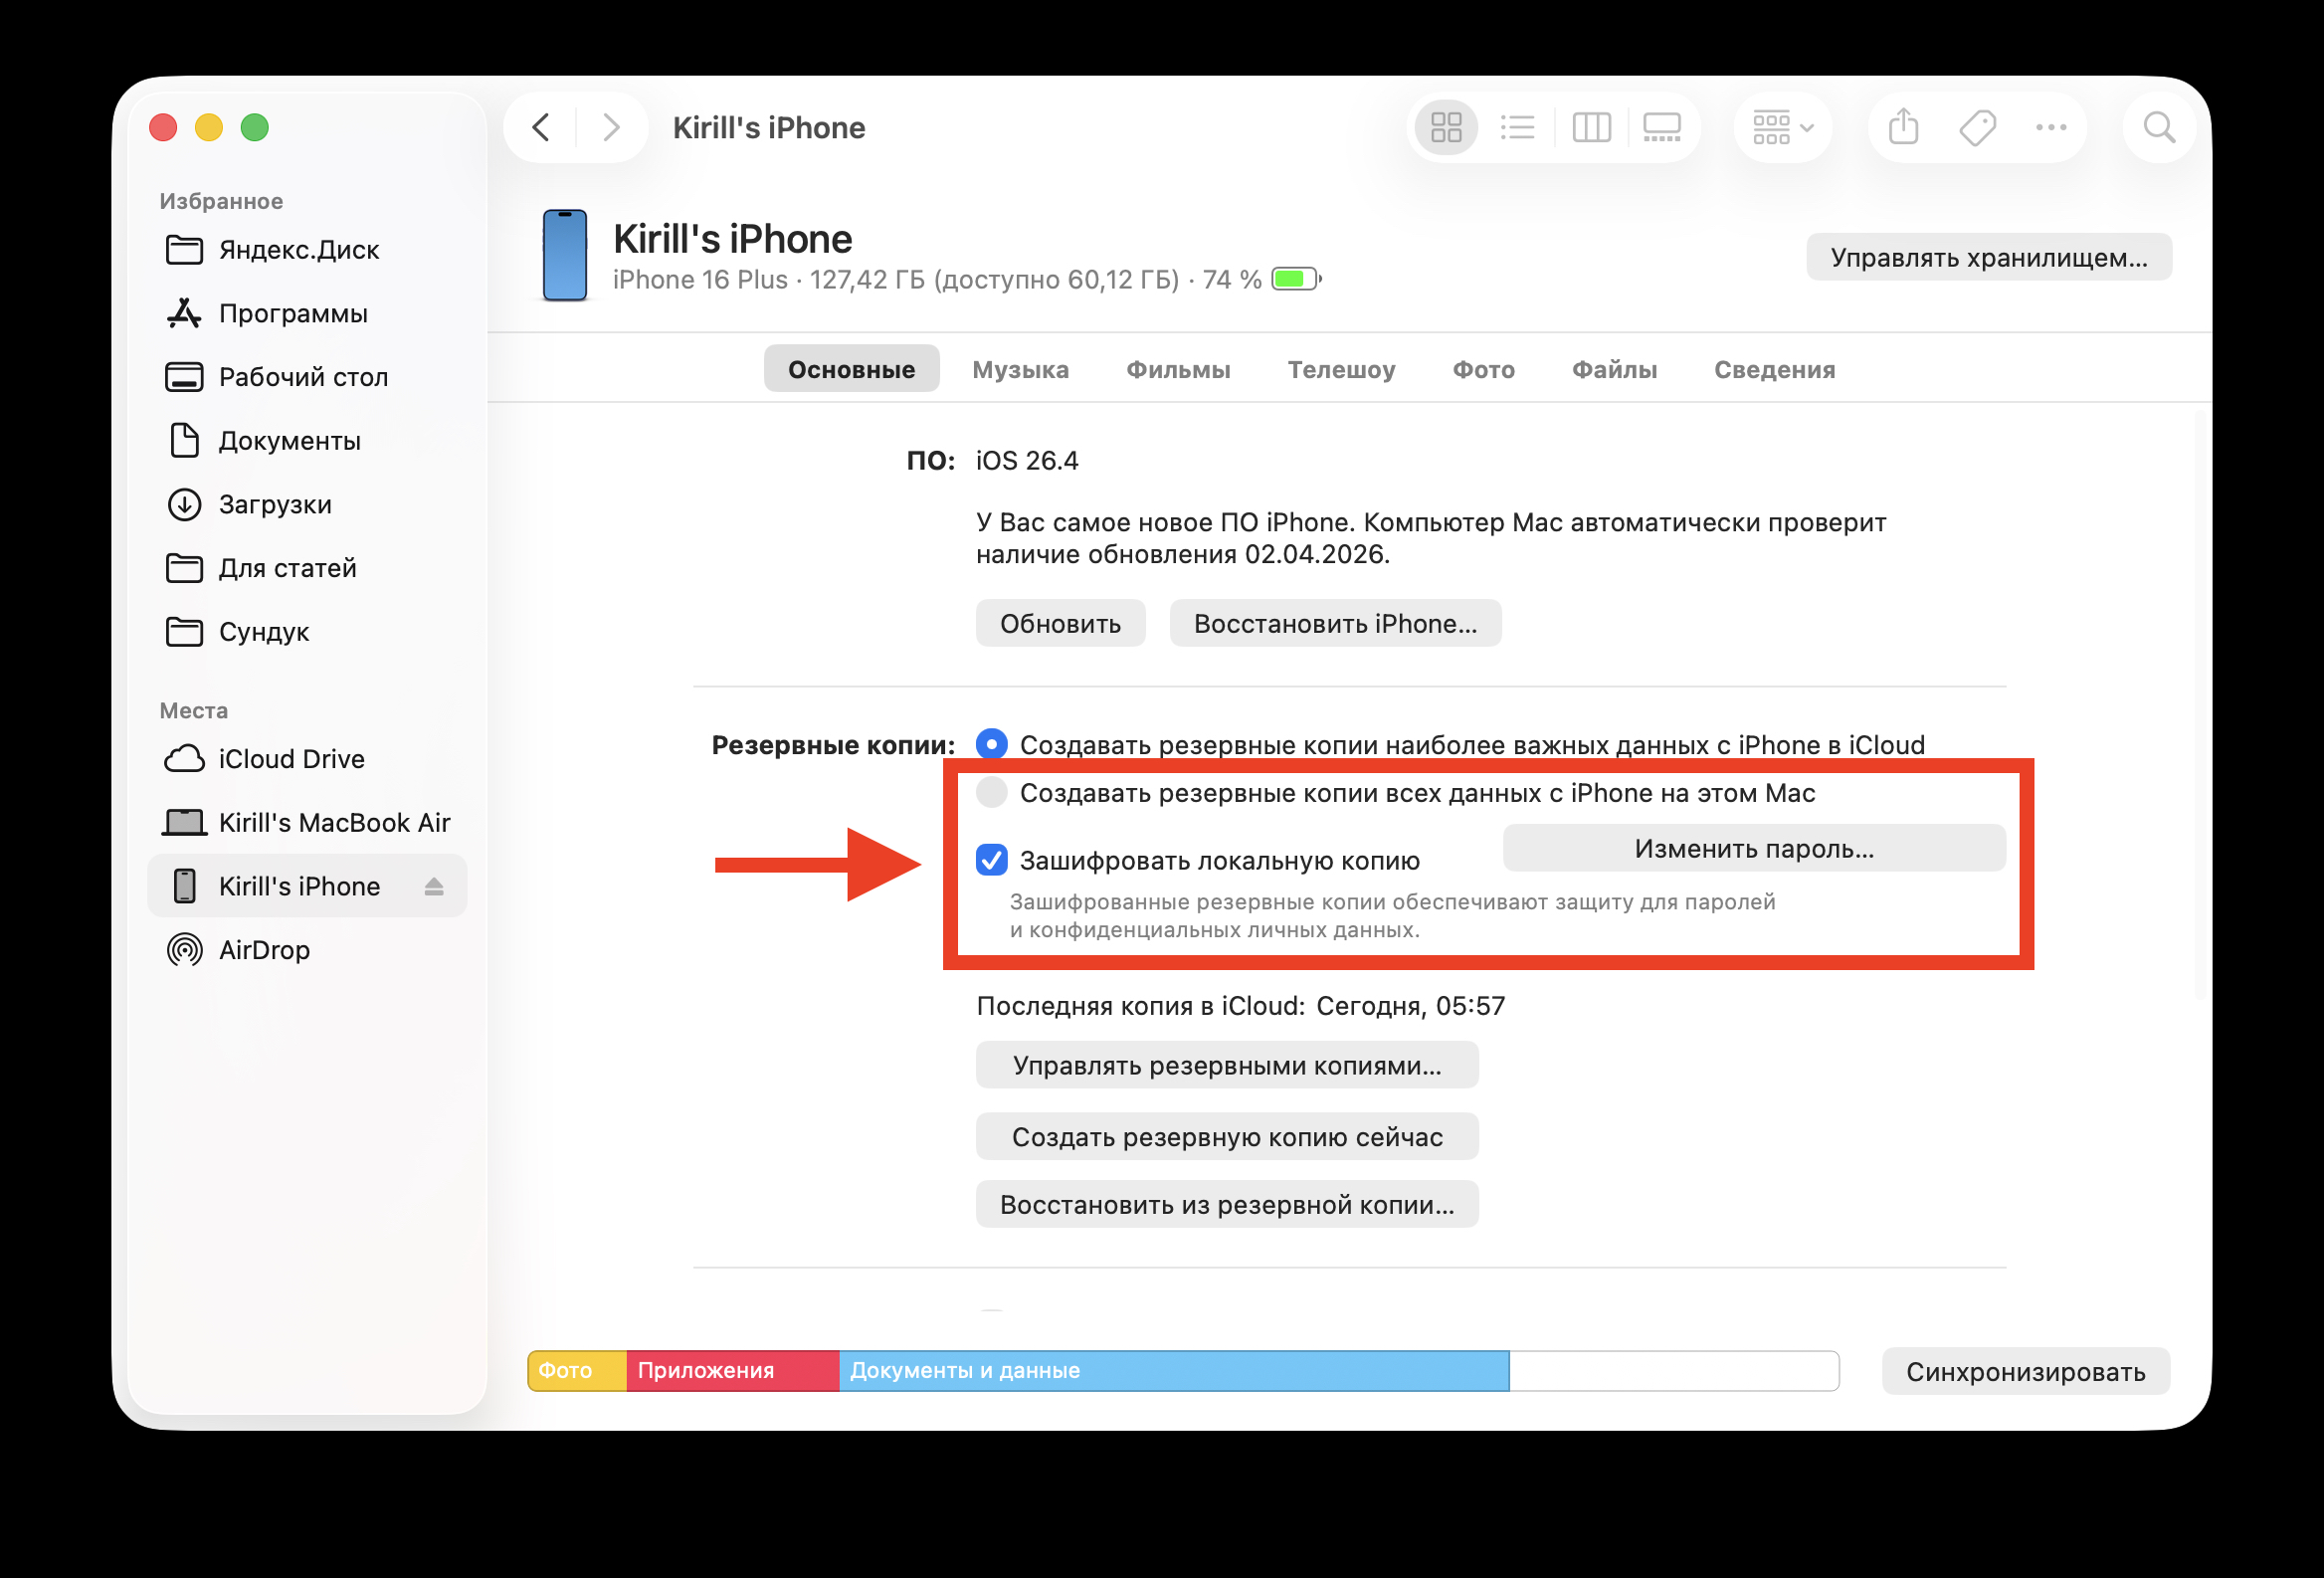
- In the main Finder window, select the “General” tab.
- In the “Backups” section, select “Back up all of the data on your iPhone to this Mac.”
- Check the box “Encrypt local backup” — more on this below.
- Click “Back Up Now.”
The process can take from a few minutes to half an hour — depending on the amount of data on the device. Don’t disconnect the cable until it’s finished.
Why You Should Encrypt Your iPhone Backup on Mac
When you check the “Encrypt local backup” box, the system asks you to create a password. This isn’t just a formality — without encryption, saved passwords, Health app data, call history, and Wi-Fi settings are not included in the backup.
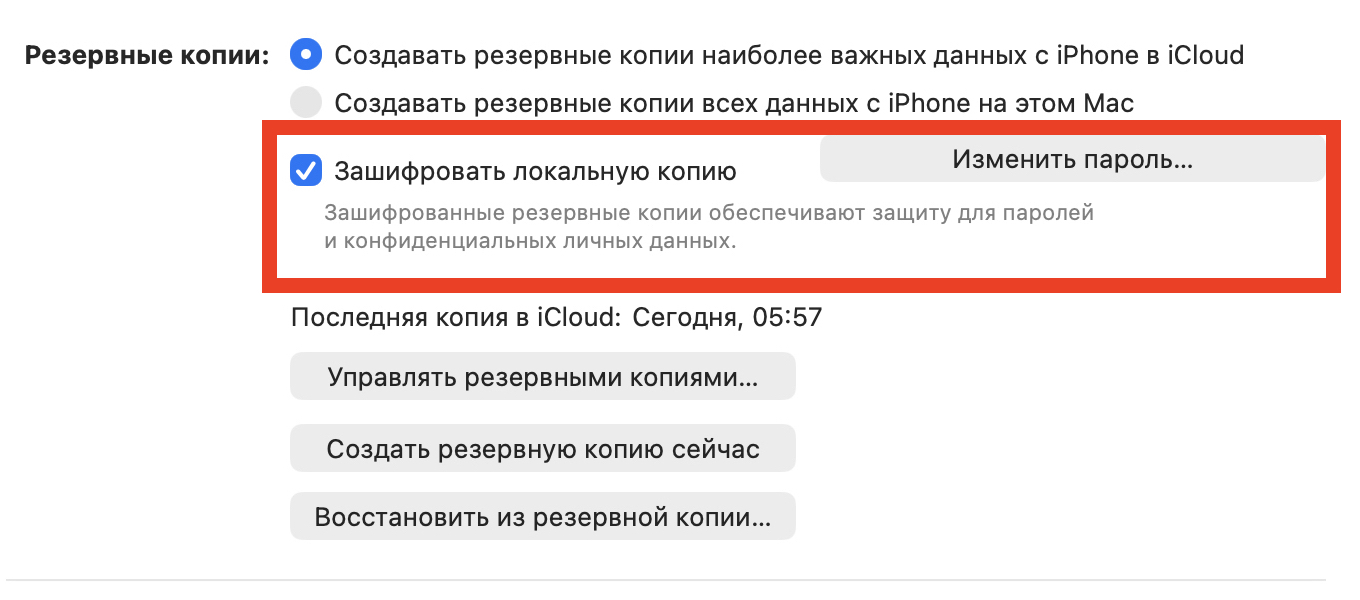
Always encrypt your backup
In other words, an unencrypted backup is incomplete. If you restore your iPhone from such a backup, you’ll have to re-enter passwords for all Wi-Fi networks, log into all apps again, and lose your health and activity data.
Important: you need to remember the encryption password or save it in a password manager. If you forget it, recovering data from this backup will be impossible — Apple won’t be able to help.
Where Is the iPhone Backup Stored on Mac
This is one of the most common questions, and the answer isn’t obvious. Backups are stored in a hidden folder that isn’t easily accessible through Finder. The path looks like this:
~/Library/Application Support/MobileSync/Backup/
To get there:
- Open Finder.
- In the top menu, click “Go” — “Go to Folder…”
- Paste the path: ~/Library/Application Support/MobileSync/Backup/
- Press Enter.
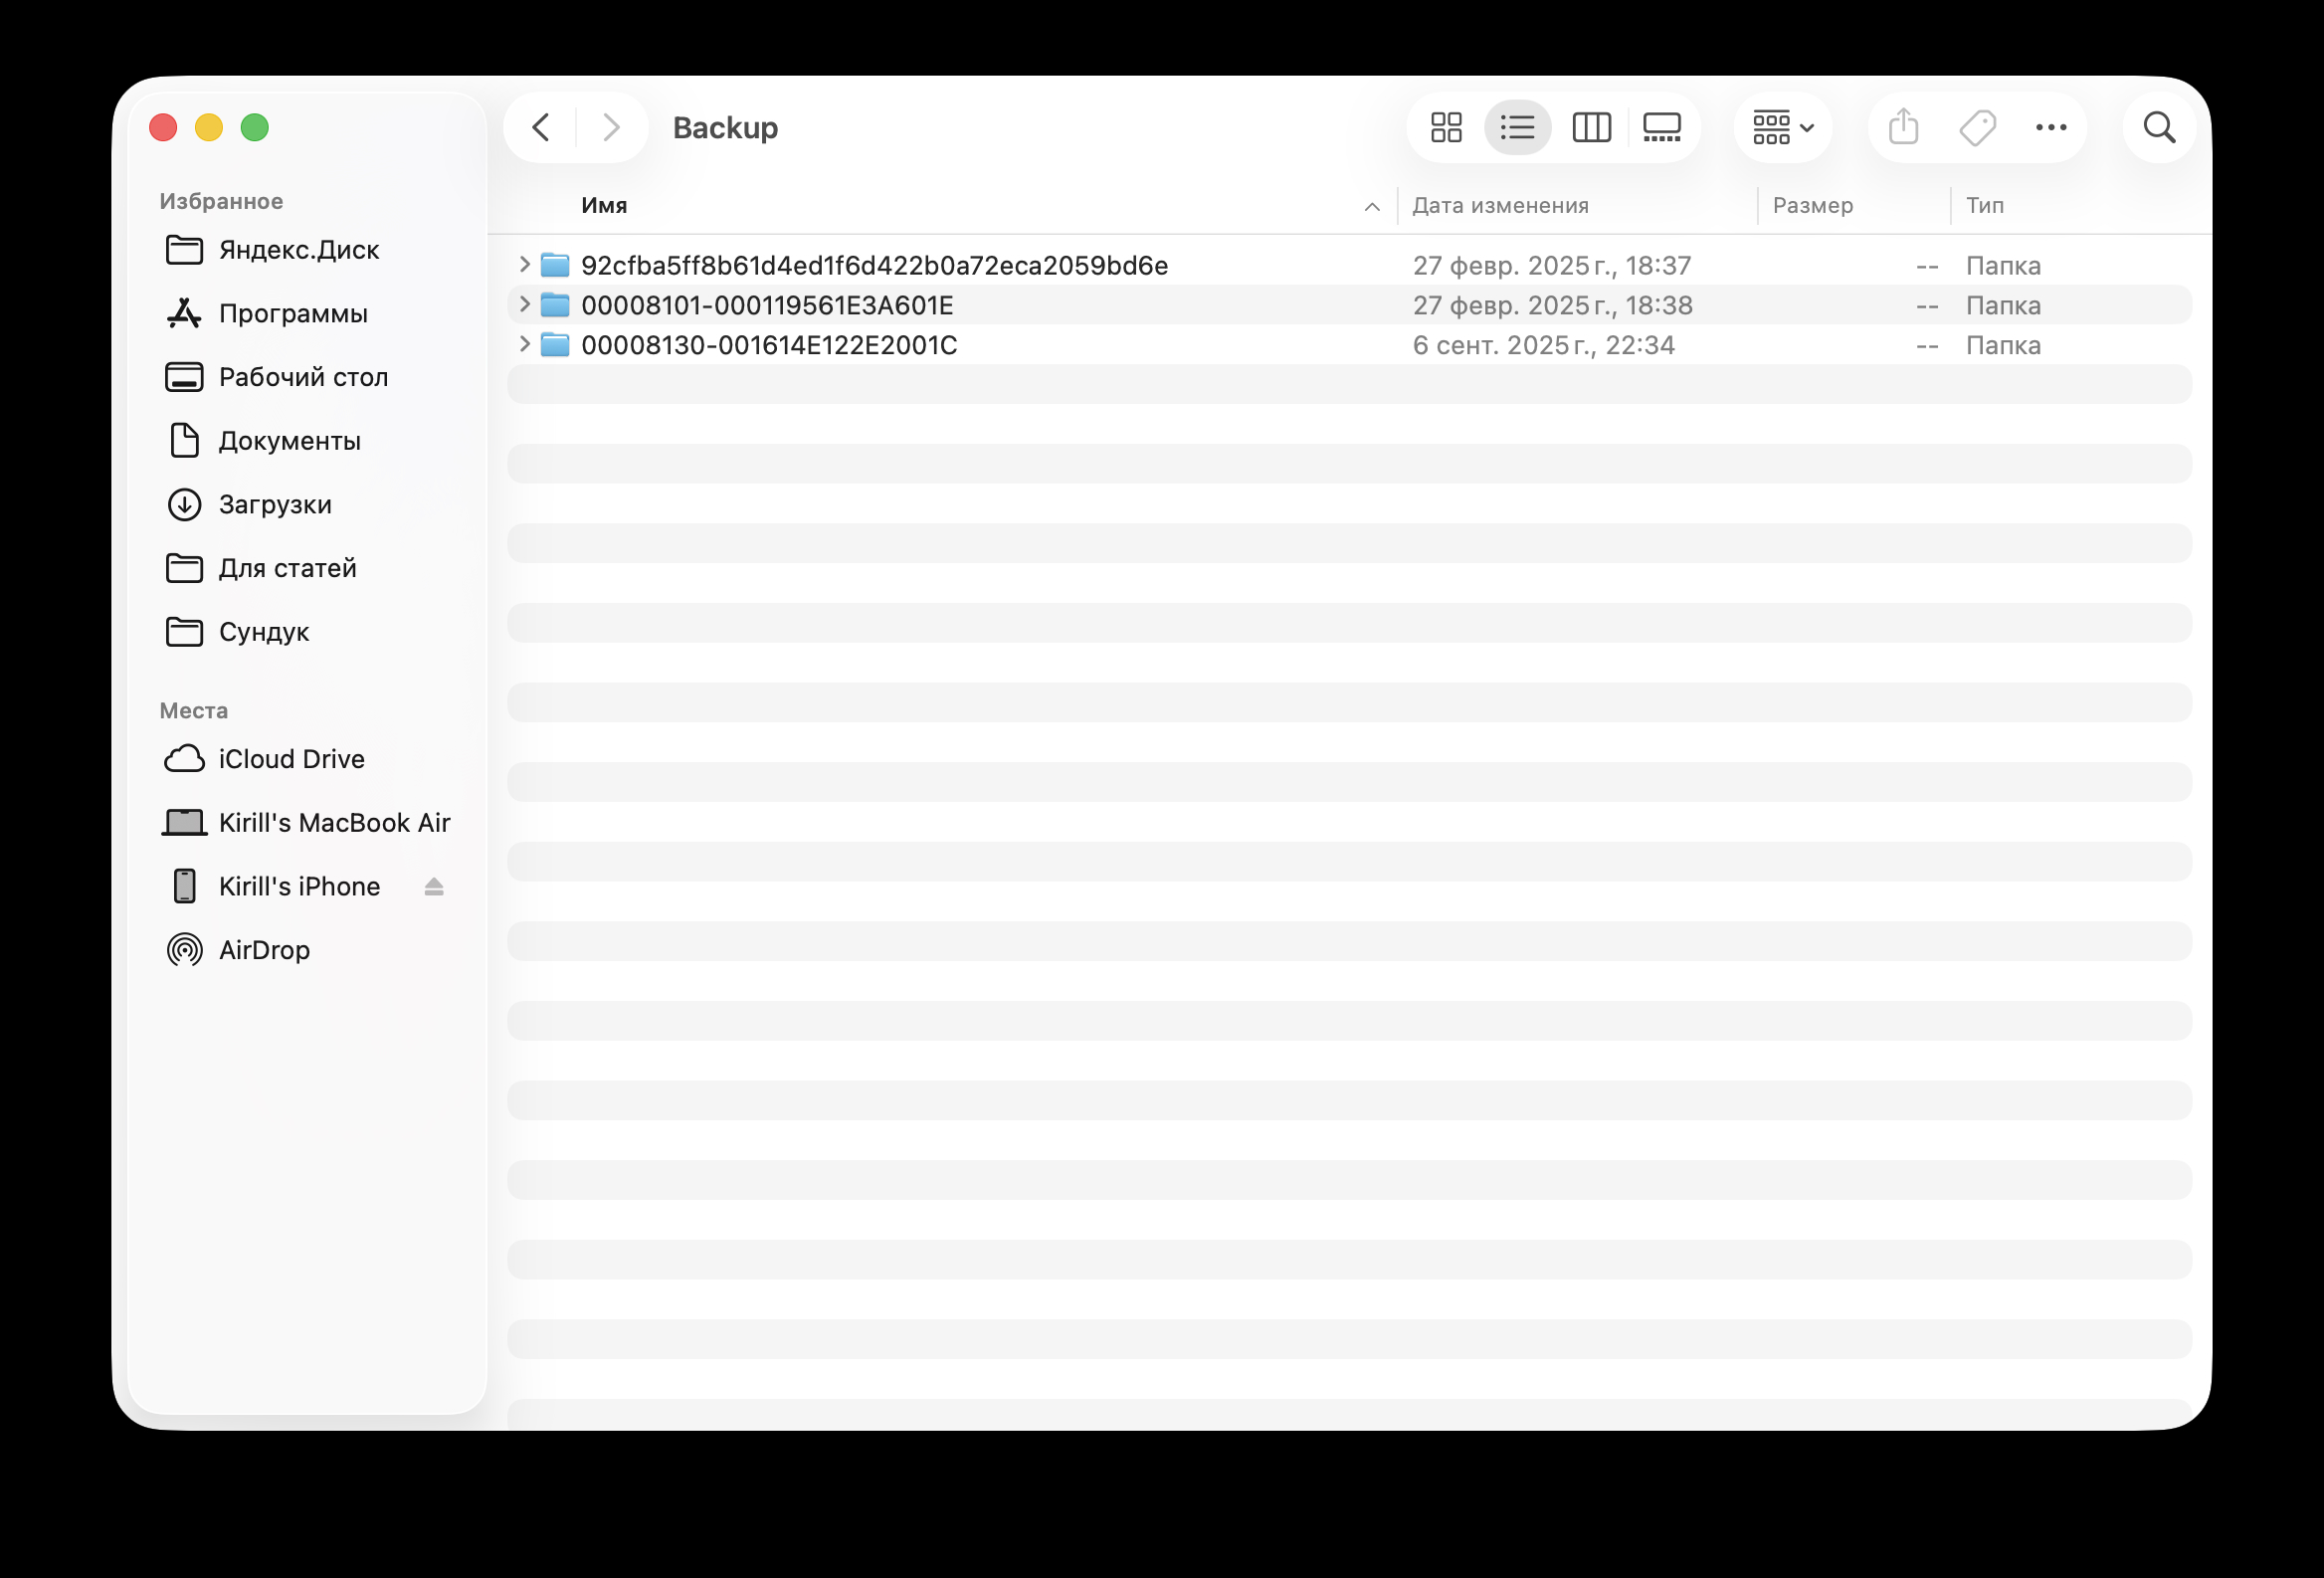
This is what the backup folder looks like on your Mac
Inside, you’ll see folders with long alphanumeric names — each corresponds to a backup of a specific device. Don’t rename or manually edit these folders, otherwise the backup may become unreadable.
You can also find backups more easily: connect your iPhone to Mac, open it in Finder, click “Manage Backups” — a list of all backups with dates will appear. Right-click on any of them — “Show in Finder” will open the needed folder.
How to Move iPhone Backup to an External Hard Drive on macOS
An iPhone backup can weigh 30, 50, or even over 100 gigabytes. On a Mac with a small SSD, this is a serious problem. The solution is to move backups to an external drive. The method works but requires careful execution. The idea is to move the Backup folder to an external drive and create a symbolic link (symlink) — a kind of “shortcut” that makes macOS think the folder is still in its original location.
- Make sure no backup is currently running.
- Copy the folder ~/Library/Application Support/MobileSync/Backup/ to the external drive.
- Rename the original Backup folder to Backup_old (in case something goes wrong).
- Open Terminal and enter the command:
ln -s /Volumes/DriveName/Backup/ ~/Library/Application Support/MobileSync/Backup - Verify: connect your iPhone, start a new backup. If everything works — you can delete the old Backup_old folder.
Keep in mind: the external drive must be formatted in APFS or Mac OS Extended (HFS+). exFAT or NTFS formats won’t work — symbolic links don’t function correctly with them. And, of course, the drive must be connected to the Mac every time you create a backup.
How Often Should You Back Up Your iPhone
There’s no universal answer — it depends on how actively you use your device. But here are some guidelines:
- Before every iOS update — mandatory.
- Before sending your iPhone for repair — mandatory.
- Before switching to a new iPhone — mandatory.
- Once every 1–2 weeks — a good habit if you frequently take photos and videos.
- Once a month — the minimum reasonable interval for everyone else.
In Finder, you can see the date of the last backup right on the device page. If you see that more than a month has passed — it’s time to press the button.
Creating a backup on Mac is one of those things people remember when it’s already too late. Set up the process once, remember your encryption password — and after that, it will only take a couple of minutes. Given the inability to pay for iCloud in Russia, I recommend everyone learn to use this method. It will definitely save you a lot of stress.