You can make a PDF from photos on iPhone without installing additional apps — iOS already has everything you need. But if you need flexible settings, batch processing, or scanning paper documents, third-party solutions can come in handy. In this article, we’ll cover all the working ways to create a PDF file on iPhone from one or several images — with step-by-step instructions and practical tips.
You can comfortably work with PDF documents on iPhone
Why Convert Photos to PDF on iPhone
The PDF format preserves the original image quality, looks the same on any device, and is protected from accidental editing. Here are typical situations when you need to create a PDF file on iPhone from photos:
- Sending documents — scans of passports, contracts, and certificates are more convenient to send as a single PDF rather than a bunch of images.
- Study and work — notes, diagrams, and presentations in PDF open without distortions on any computer or phone.
- Archiving — multiple photos in a single file take up less space and are easier to store in the cloud.
- Printing — PDF guarantees correct sizes and orientation when outputting to a printer.
Below are all the methods, from the quickest built-in ones to advanced options using third-party apps.
Create PDF from Photos Using the Print Menu in iOS
The fastest way to create a PDF on iPhone is to use the hidden function in the print menu. You don’t need to download anything: this trick works on any iPhone with iOS 15 and later.
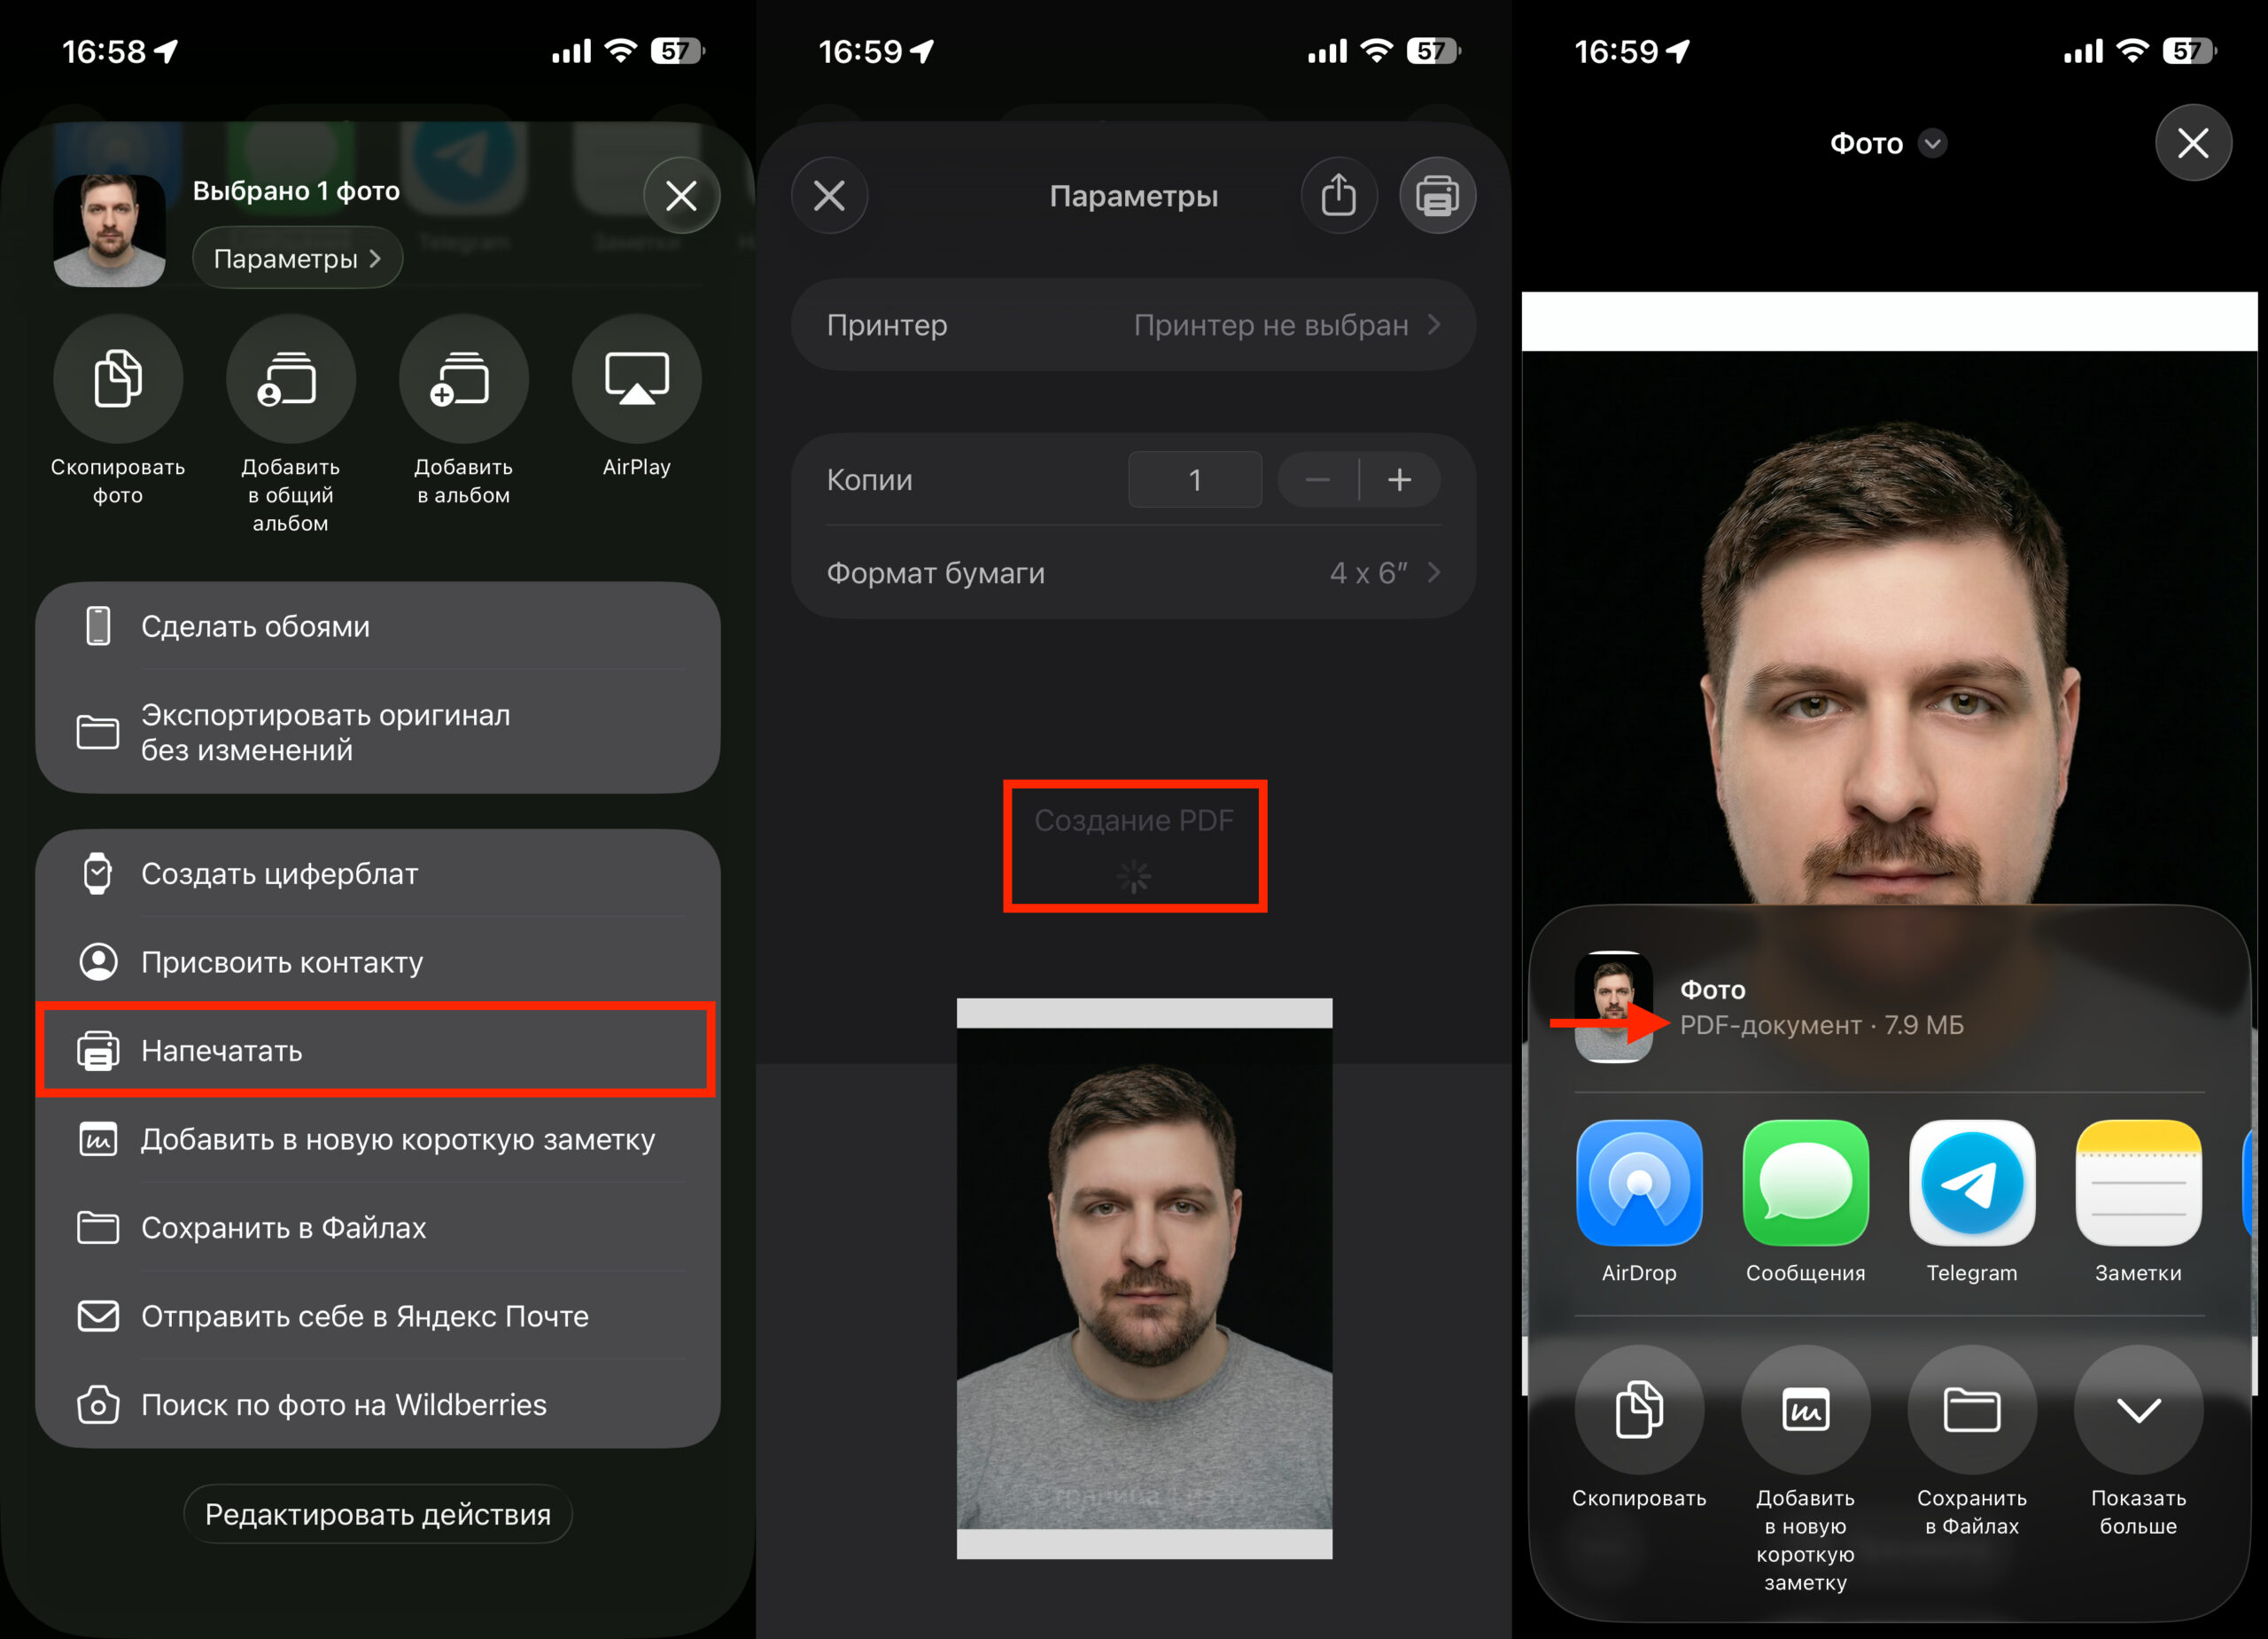
A cool life hack for creating PDFs
- Open the Photos app and select one or more images. To select multiple photos, tap “Select” in the upper right corner and mark the desired shots.
- Tap the Share icon (square with an upward arrow).
- Scroll down the list of actions and select “Print”.
- On the print preview screen, spread two fingers apart on the image thumbnail — perform a pinch-to-zoom gesture. The photo will automatically turn into a PDF document.
- In the opened PDF preview, tap the Share icon again. Now you can save the file to the Files app, send it by email, via messenger, or through AirDrop.
If you selected multiple photos, they will all end up in one multi-page PDF. The page order corresponds to the order in which you selected the shots in the gallery.
Important: this method does not allow you to change the page order, add annotations, or compress the file. For basic tasks — sending a document scan or a couple of photos — it’s more than enough.
Create a PDF File on iPhone Using the Files App
The Files app is a full-featured file manager in iOS, and it has a built-in PDF creation function. This method is especially convenient when you need to combine several photos into one document and immediately save it to the desired folder.
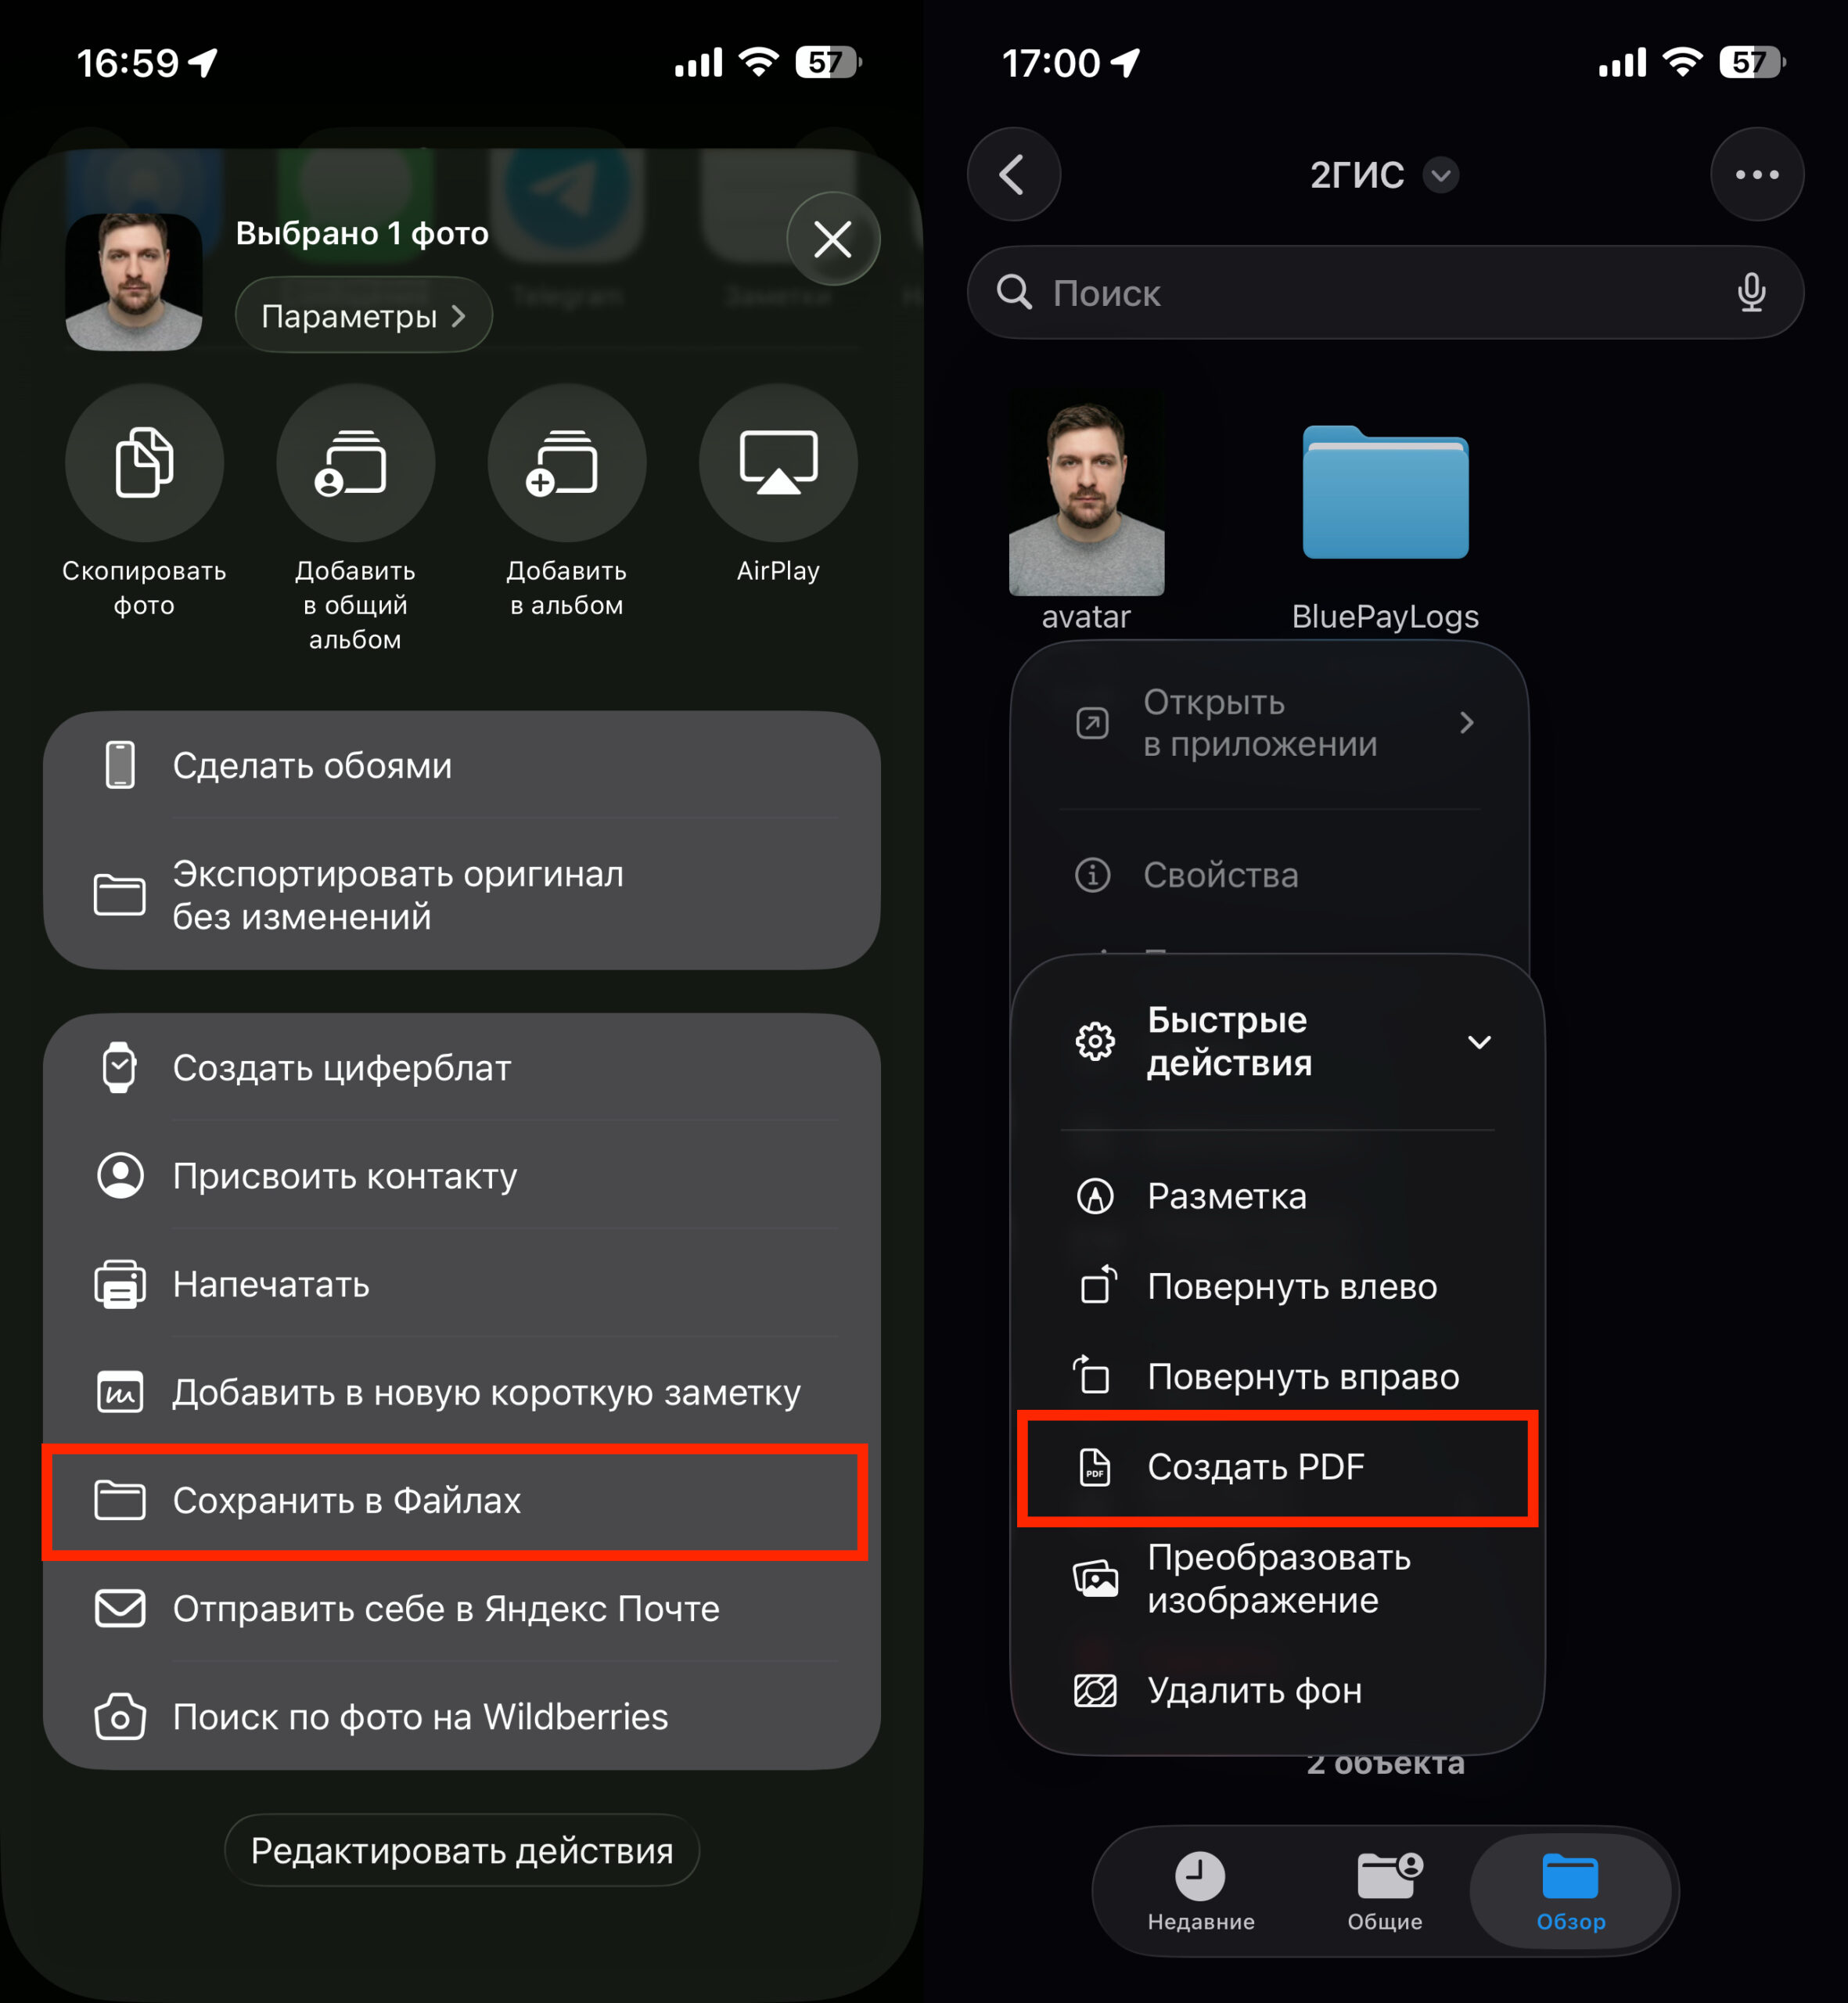
You can create a PDF right from the Files app
- Open the Photos app, select the desired shots, and tap “Share.”
- Select “Save to Files” and specify a folder (for example, “On My iPhone” or a folder in iCloud Drive).
- Go to the Files app and open the folder with the saved images.
- Long-press on the previously saved photo.
- In the menu that appears, tap “Quick Actions” and “Create PDF”.
The system will create a PDF file in the same folder. If you selected multiple images, they will be arranged in alphabetical order by file name. To set the desired page sequence, rename the files before converting — for example, “01.jpg,” “02.jpg,” etc. The resulting PDF can be immediately opened in the Preview app — to add a signature, text, or drawing — and sent from the same app.
Create a PDF Document on iPhone Using the Books App
Apple Books is not just a reader but also a convenient PDF storage. If you frequently work with documents and want to keep them handy, this method is for you.
Books automatically converts photos to PDF
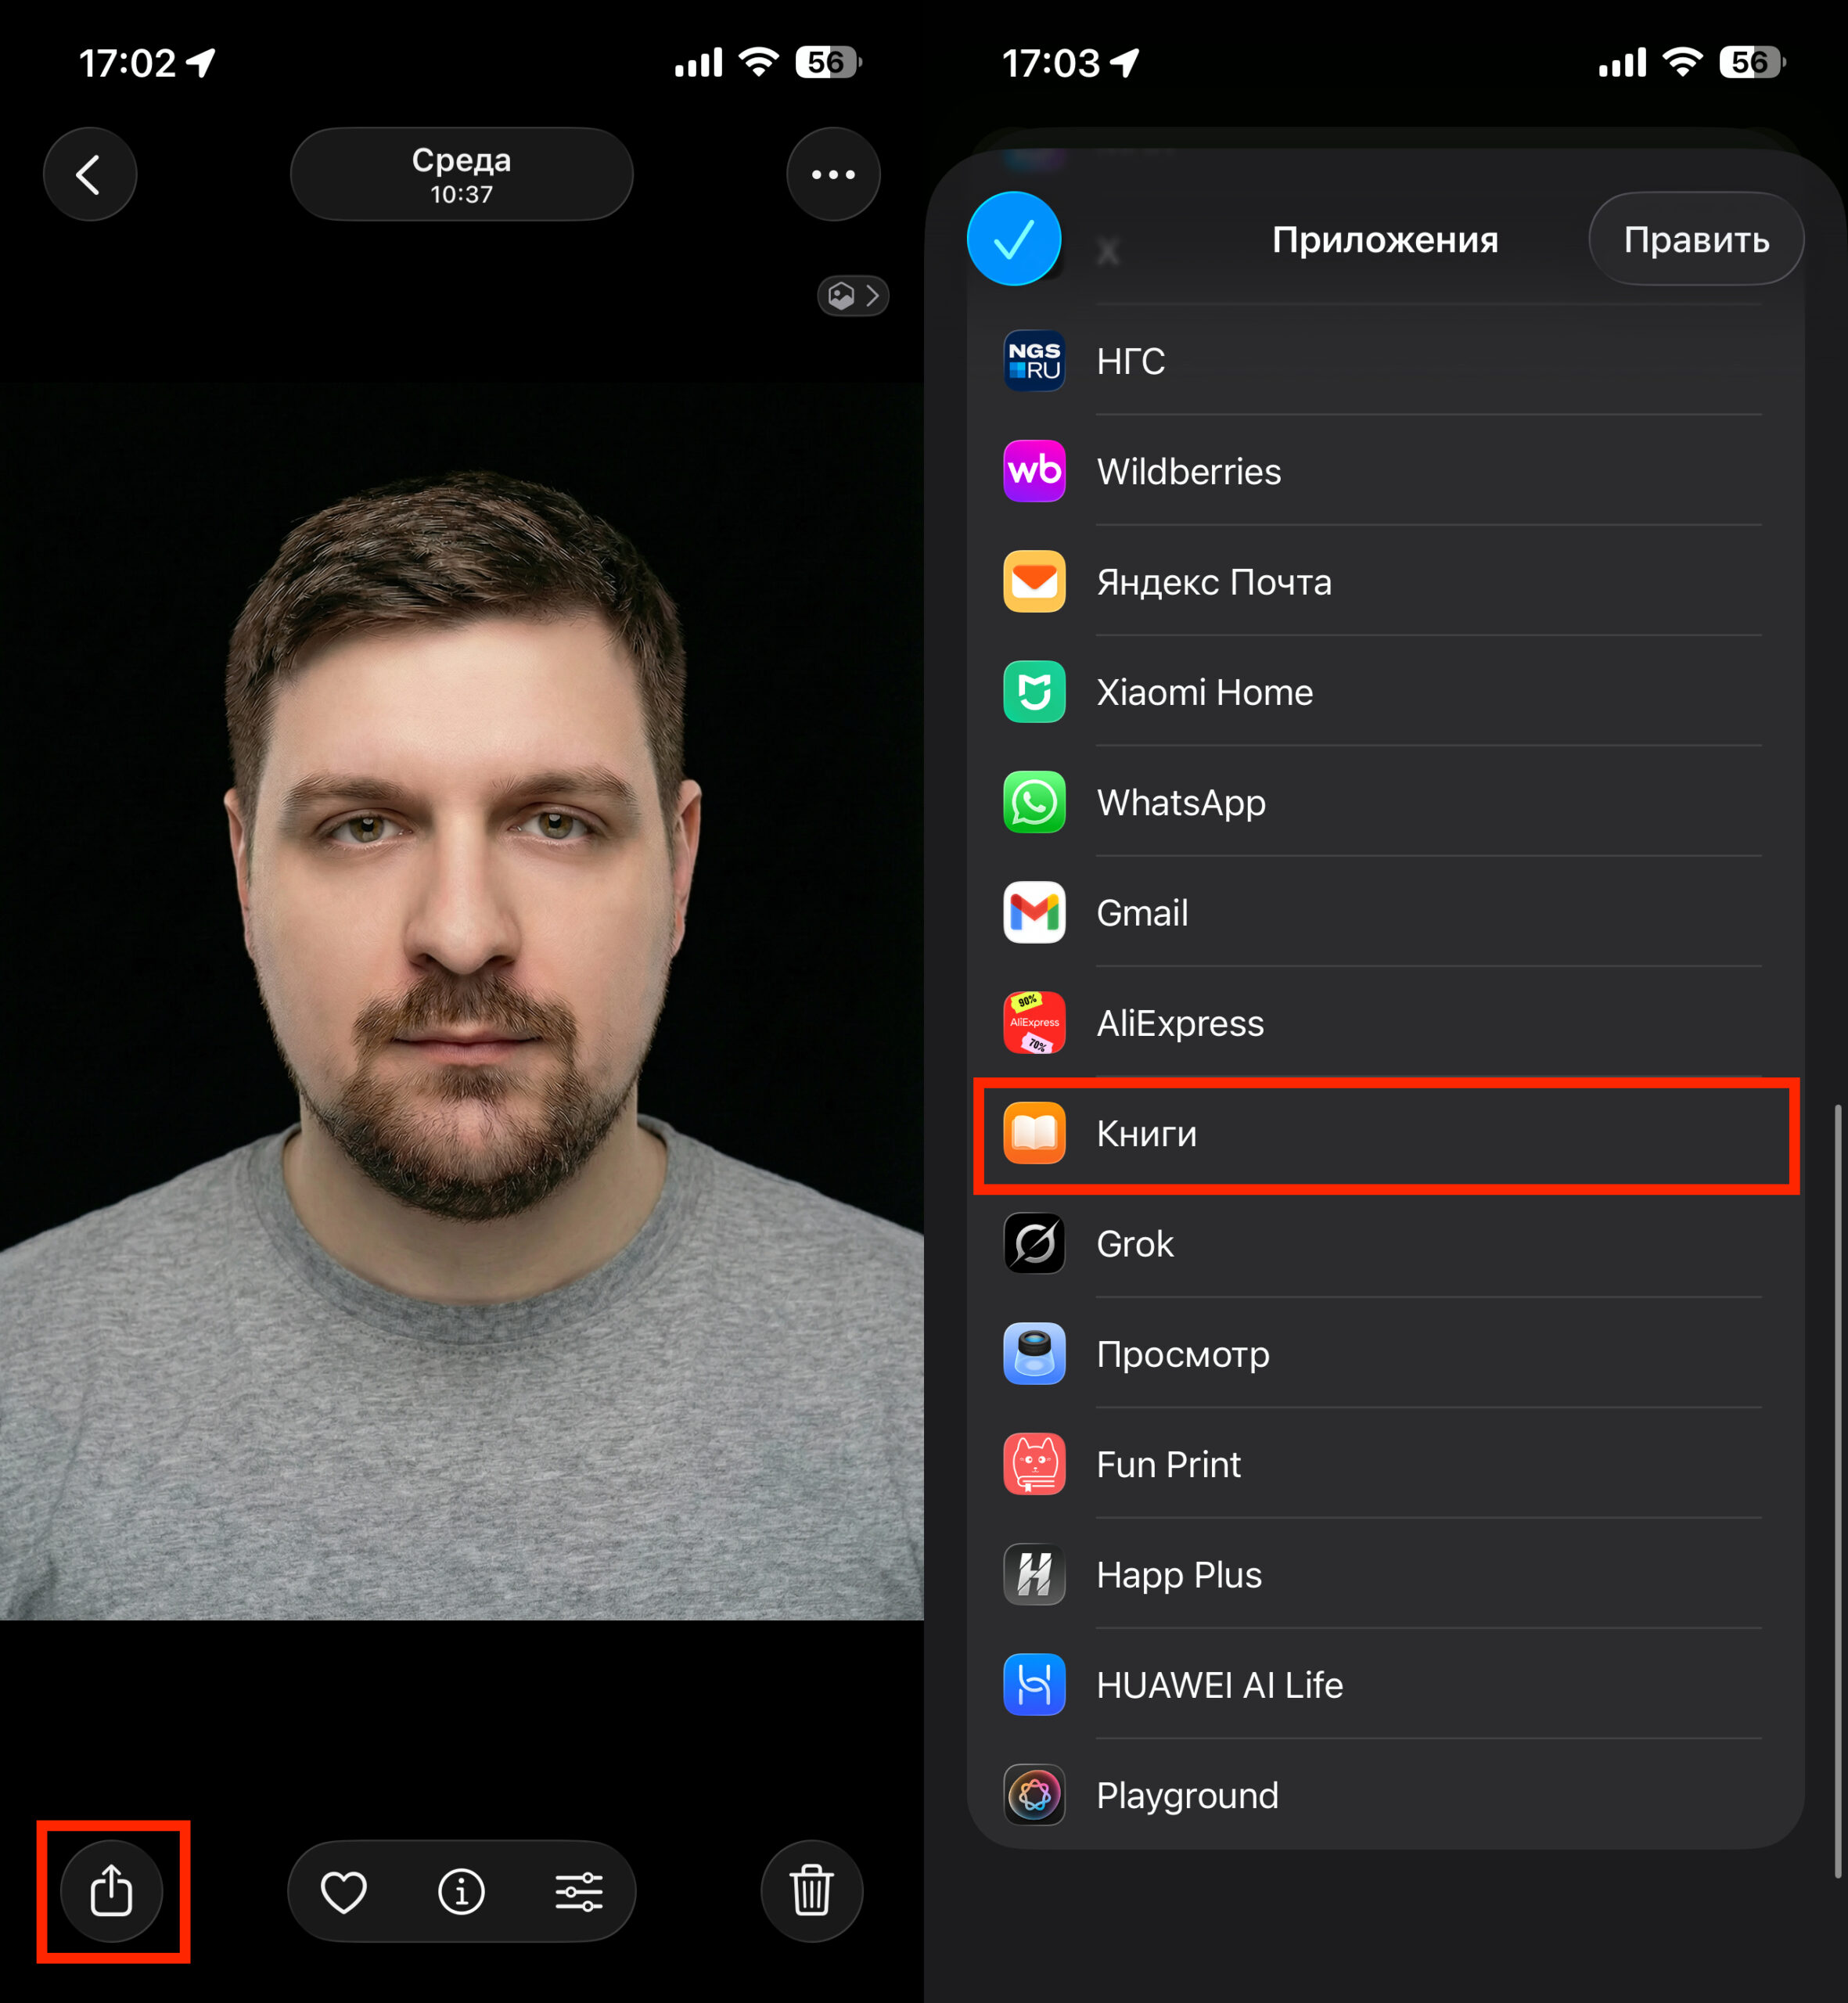
- In the Photos app, select one or more images.
- Tap “Share” and find the “Books” icon in the list of apps. If it’s not visible, scroll the row of icons to the right and tap “More.”
- iPhone will automatically convert the photos to PDF and open it in Books.
The document will be saved in the app’s library and will sync via iCloud across all your Apple devices — iPad, Mac, another iPhone. From Books, you can send the PDF by email, via AirDrop, or messenger — just open the file, tap the menu, and select “Share.”
The downside of this method: you cannot customize the page order or image quality. But for quick conversion and storage, it’s one of the most convenient options.
Scan to PDF on iPhone Using Notes and Files
If you need not just to convert an existing photo but to scan a paper document and immediately save it as a PDF — iOS has a built-in scanner. It’s available in two apps.
Scanning via Notes:
You can scan via Notes
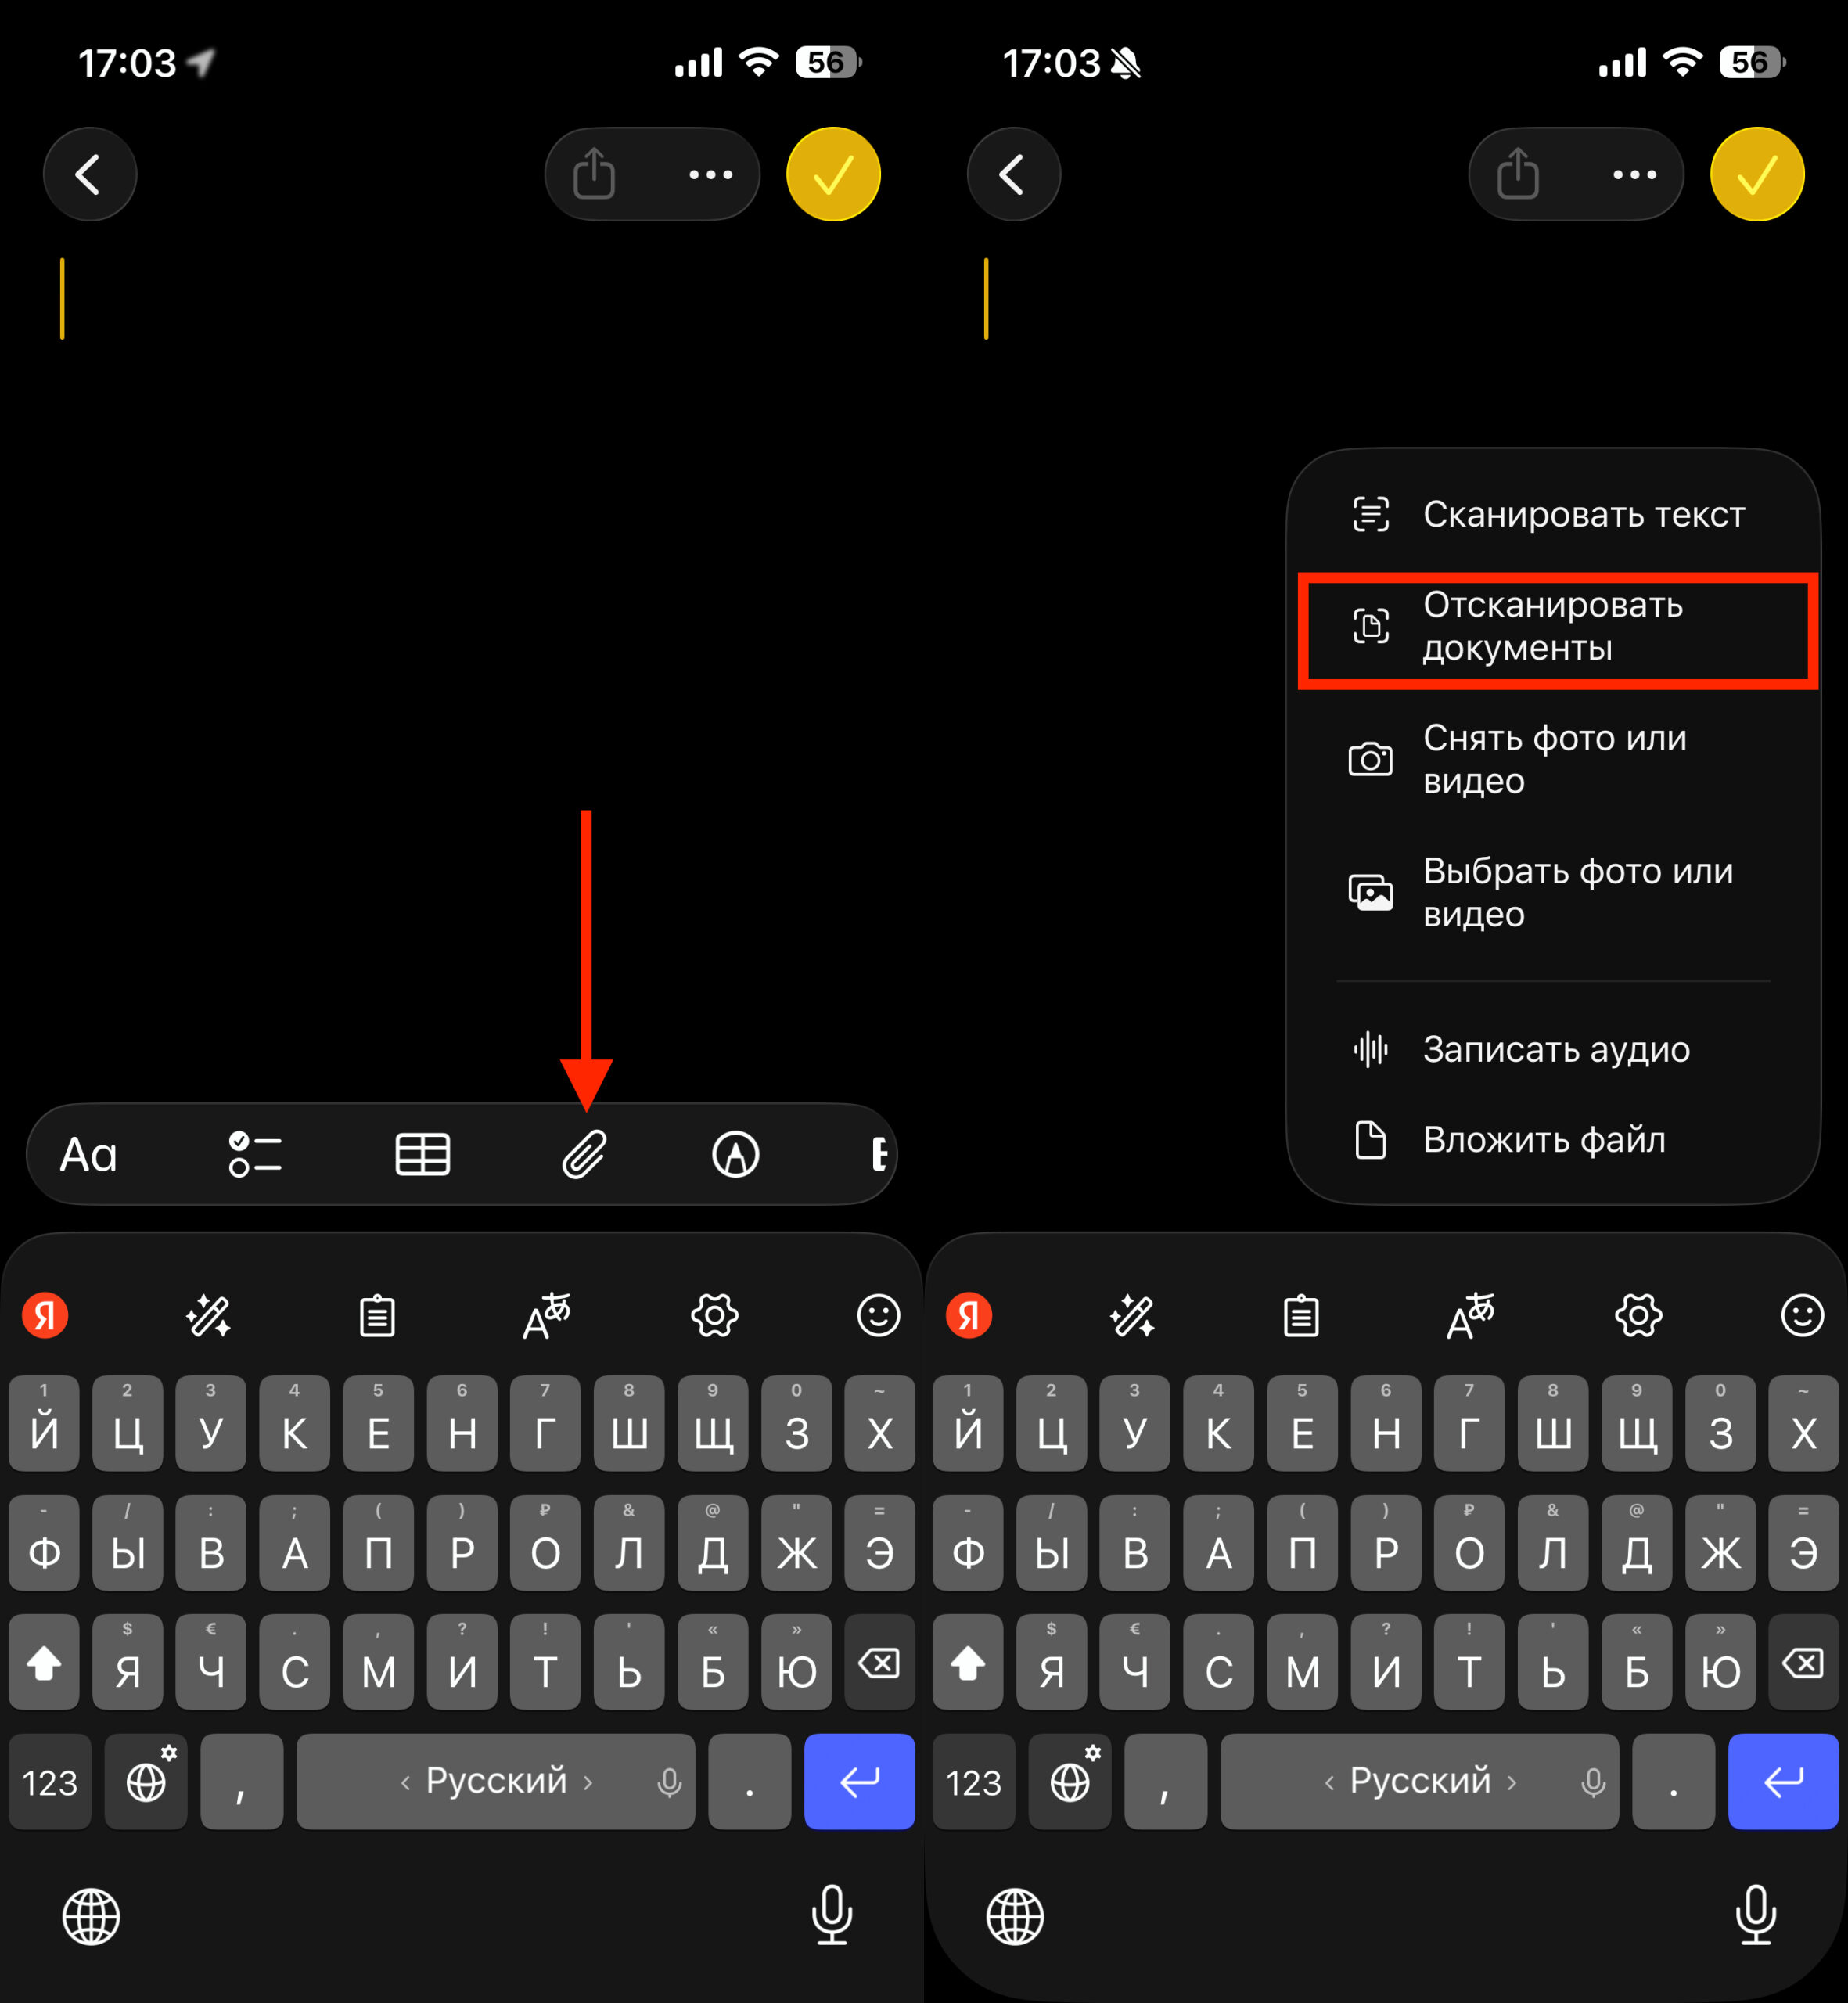
- Open the Notes app and create a new note (or open an existing one).
- Tap the camera icon above the keyboard and select “Scan Documents.”
- Point the camera at the document — iPhone will automatically detect the edges and take a shot. You can also tap the shutter button manually.
- If needed, scan several pages in a row, then tap “Save.”
- The scan will be saved as an attachment in the note. Tap on it, then tap the Share icon — the menu will have a ready PDF that you can save to Files or send.
Scanning via Files:
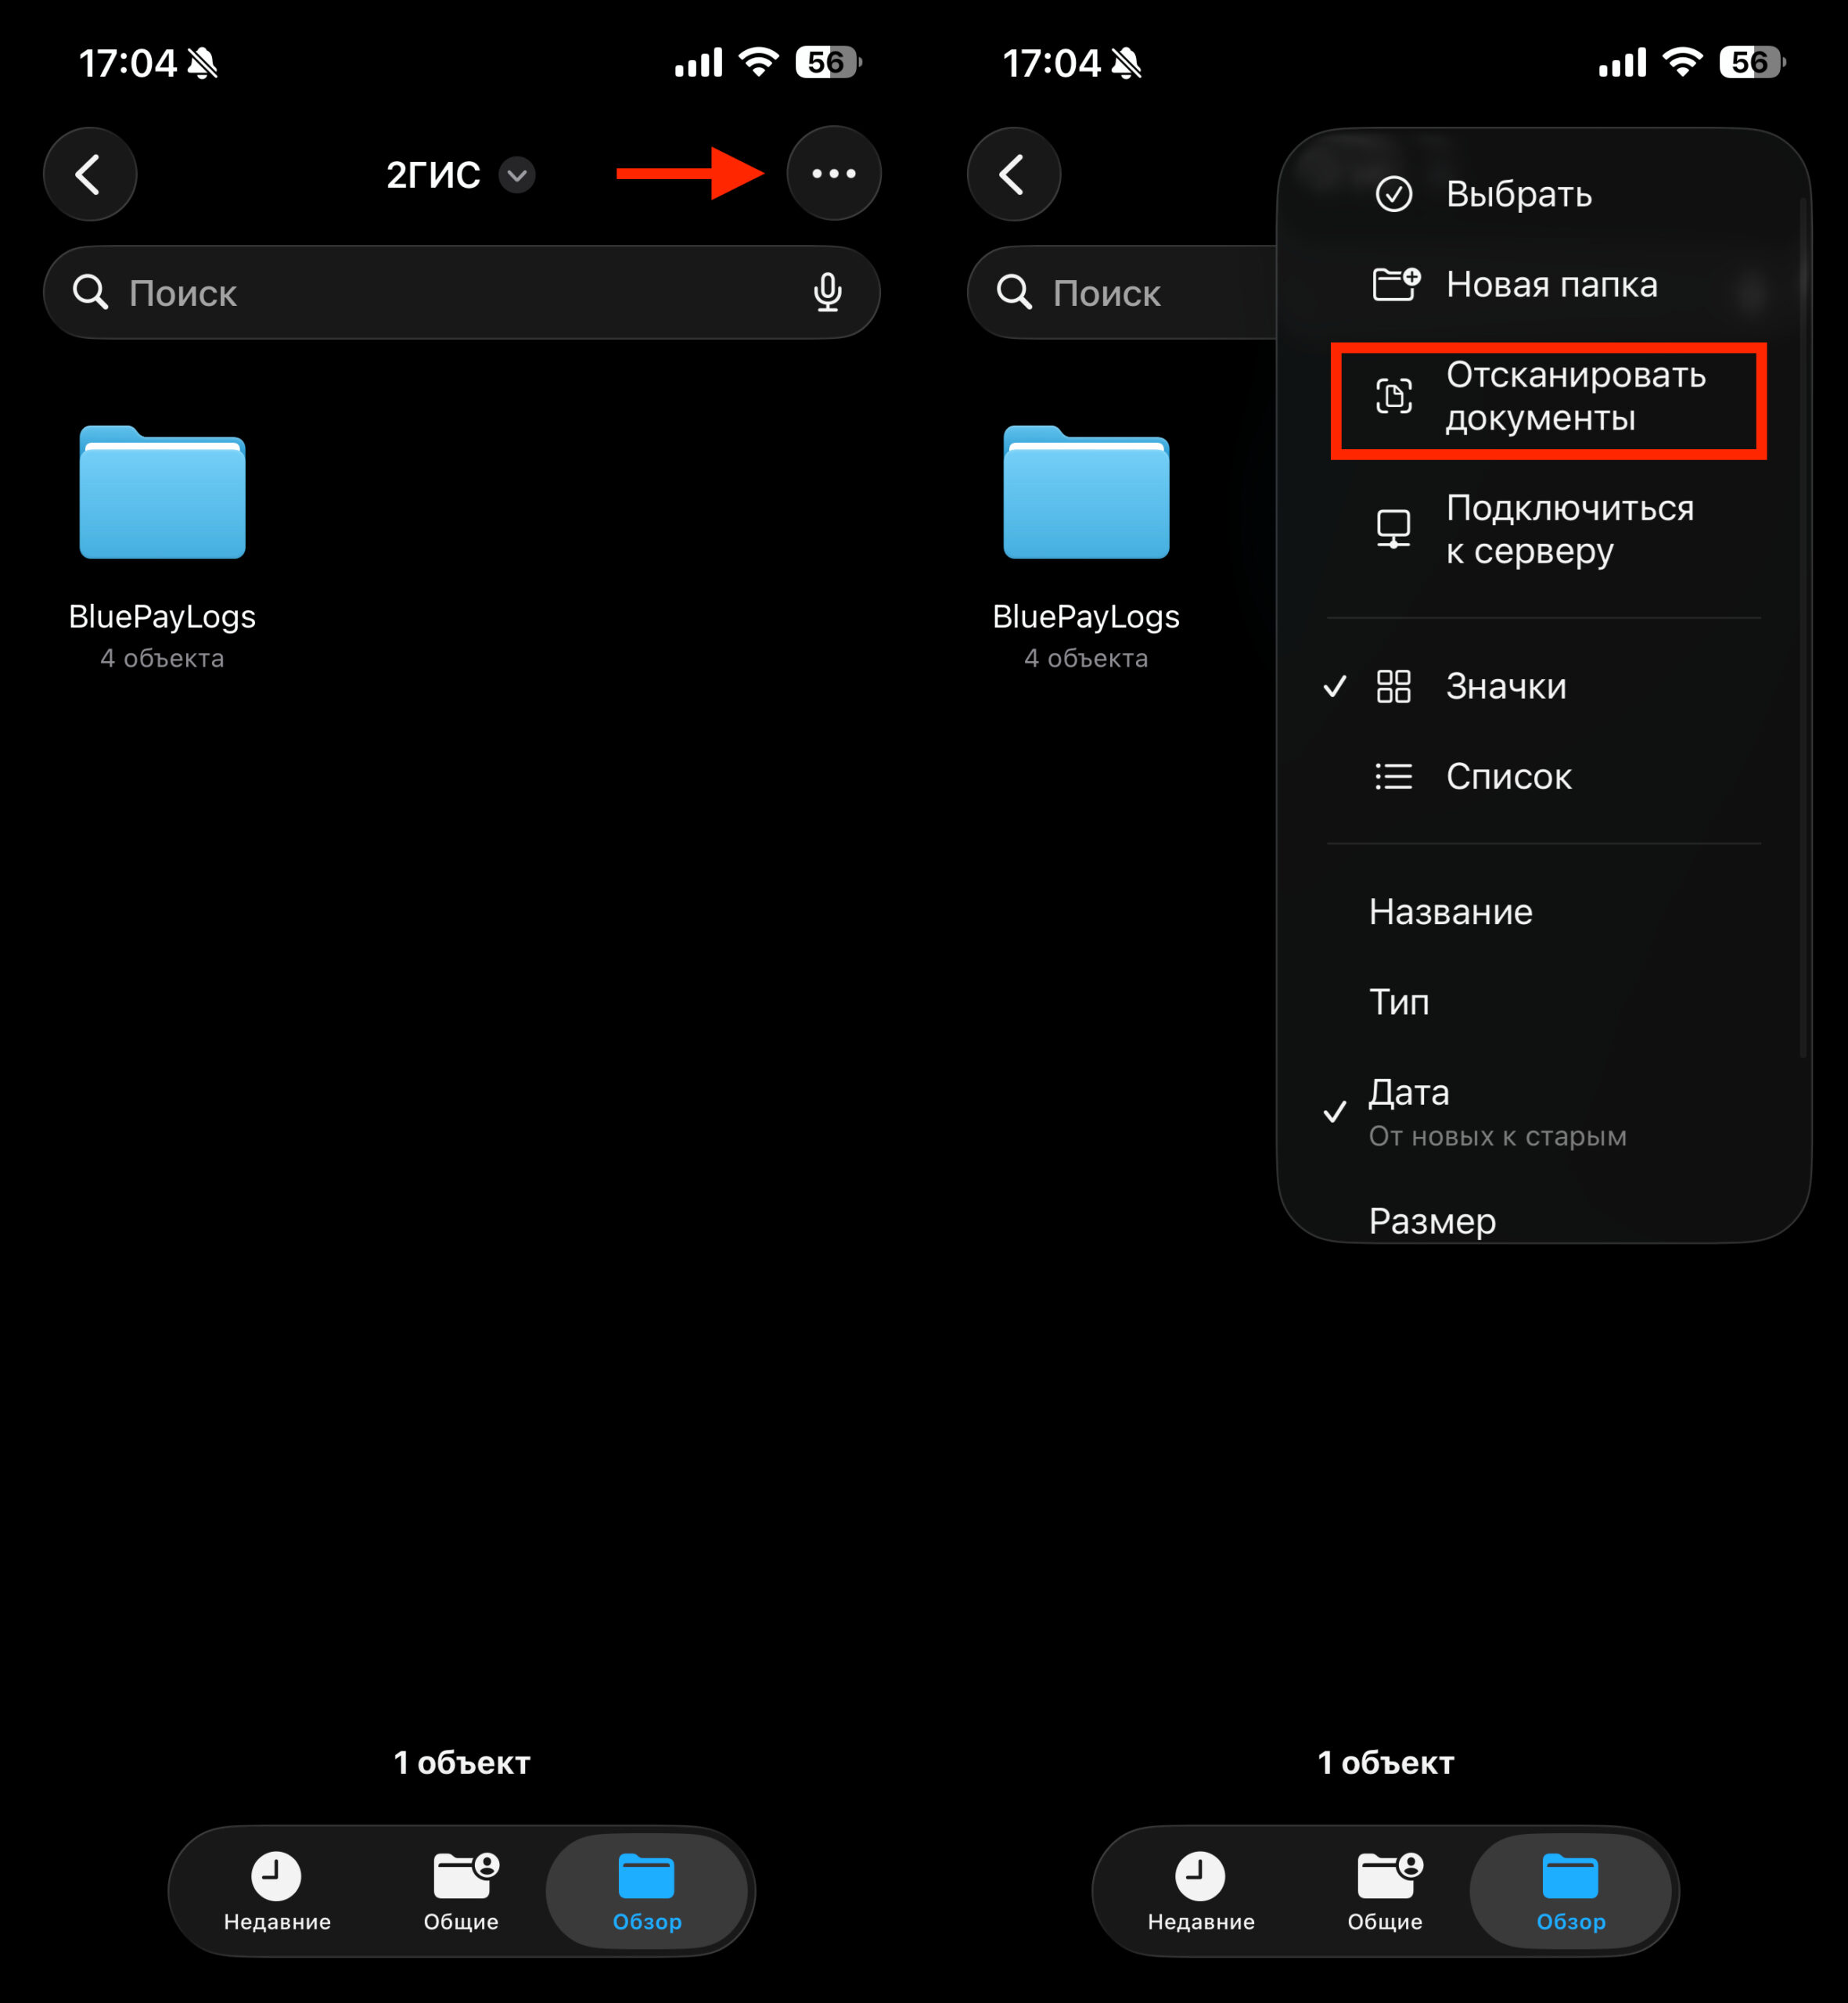
Or directly through Files